Since we do fabric or felt flowers around here a lot I thought it would be fun to have a page with all the directions – in one handy dandy place!

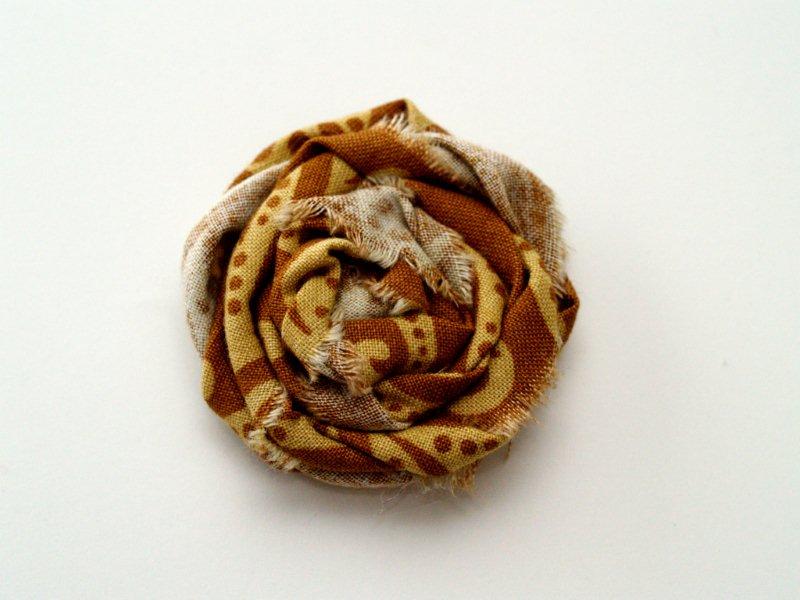
Rolled Fabric Flowers
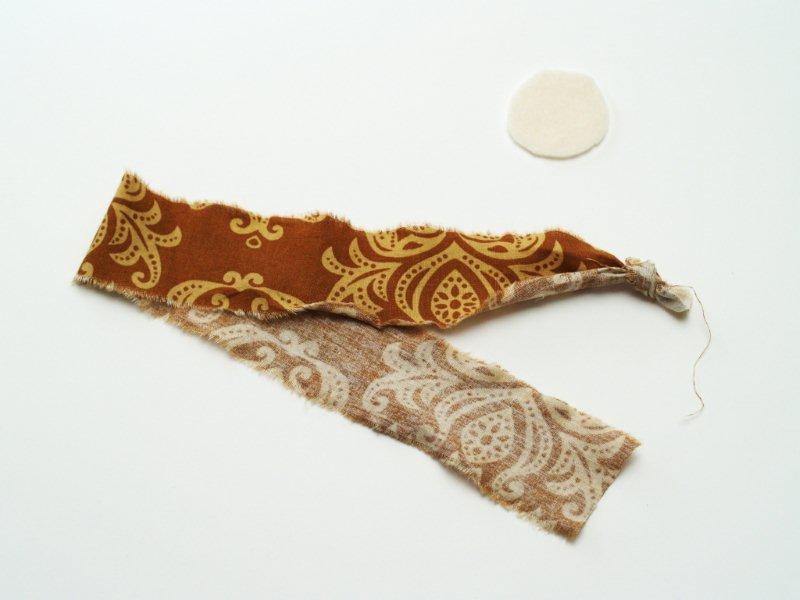
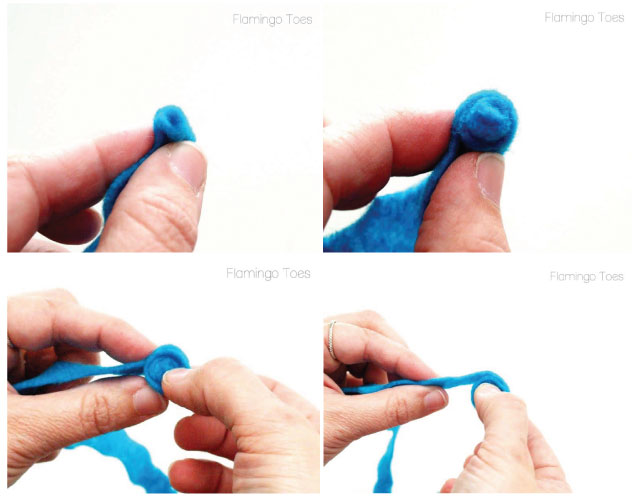
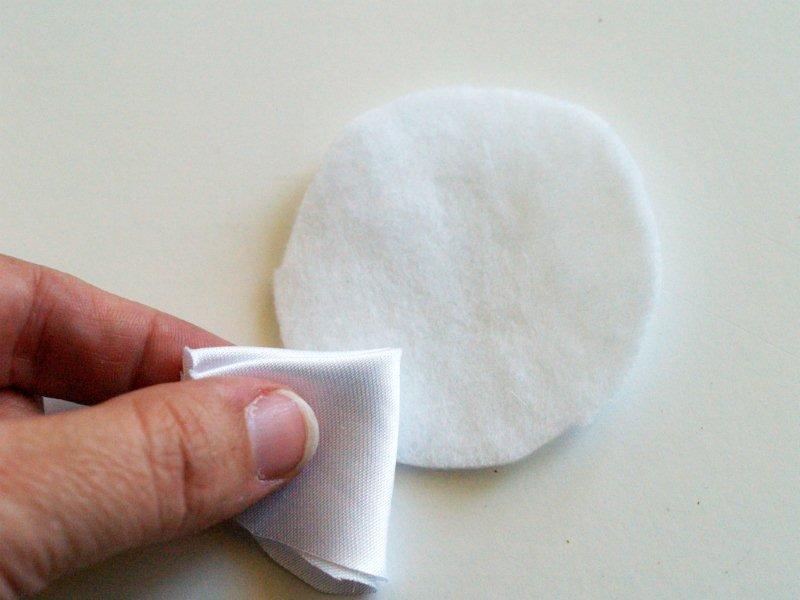
For each rosette you’ll need one strip and one felt circle. The longer and/or wider your strip, the larger your flower will be. I like to tear a long strip about 1″ wide for most rosettes – then I can cut the length off if I don’t need it. Tie a knot close to one end of the fabric strip.
Hold the knot in your left hand and begin twisting the strip loosely with your right hand. Start to wrap the twisted strip around the knot.
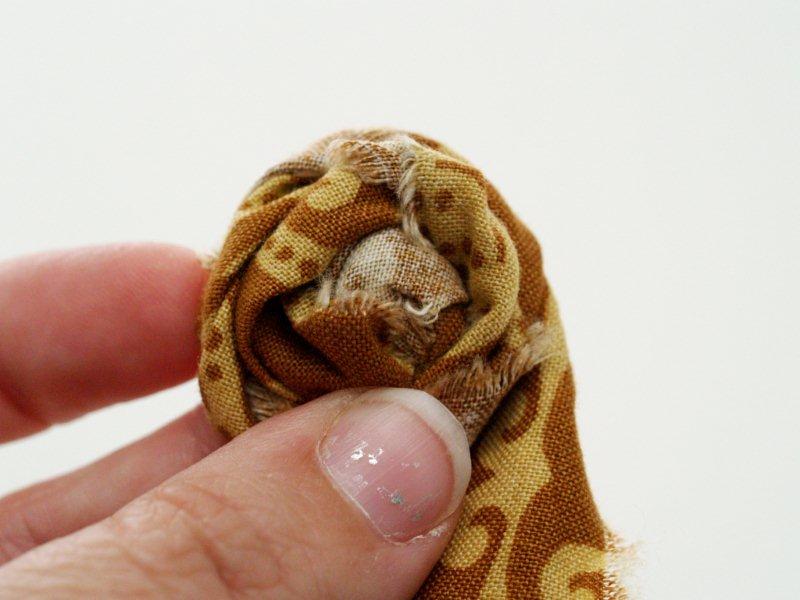 (Ignore my scritchy sad little painted fingernail please. :)
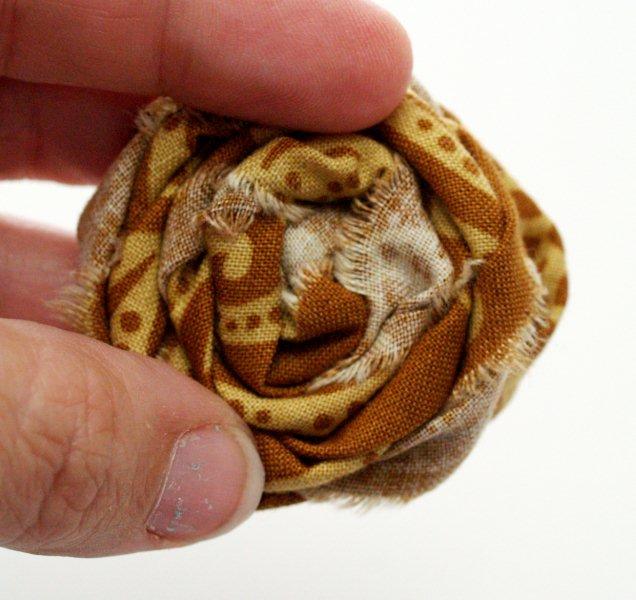
Keep wrapping until your rosette is a little bigger than your felt circle.
Tuck the end under the rosette and hot glue it to the felt circle. (You can also sew these together if you don’t want to use hot glue.)
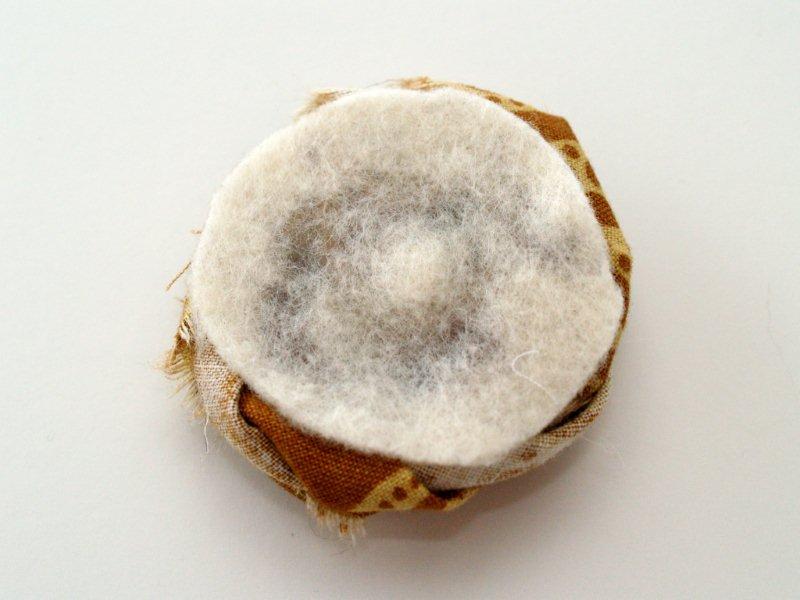
Now you have a cute little fabric rosette!
Rolled Felt Flowers
To make these rolled felt flowers you’re going to cut out a spiral circle. To give them the little ”petal” look – you want to cut out a wavy spiral like the one below. If you want, you can draw out a spiral as a guide, or you can free hand it. It doesn’t have to be a perfect circle (obviously :). You just don’t want the spiral sections to be too wide – otherwise you’ll have really tall flowers. You might want to have some “practice felt”. My first flowers were a little sad and chunky looking.

Once your spiral is cut, start rolling up the flower at the outside end. Roll it tightly into a spiral.
You want the center pretty tight – then you can start rolling it a little more loosely so the outer sections look more like open petals.
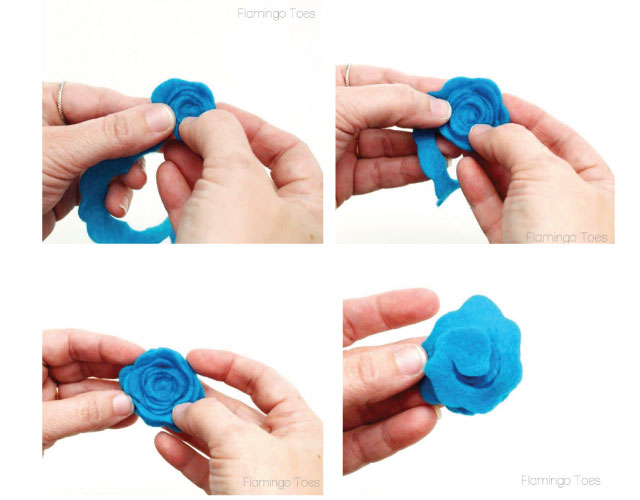
When you’ve rolled the whole flower, you’ll have the little center section left. Glue this down to the center of the flower, then cut a small felt circle to glue to the base. This will hold the flower in place.
Combining a Rolled Felt Flower with a Fabric Petals Flower
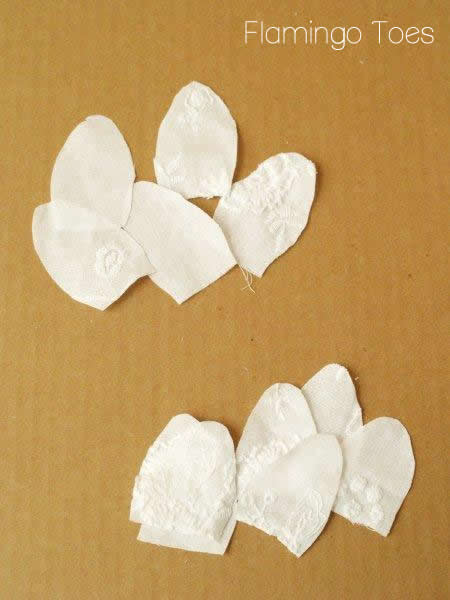
Cut two petal shapes out of paper, one longer than the other by about a 1/2″. Cut 5 of the larger petals out of fabric and 7 of the smaller petals out of fabric.
Sew a gathering stitch along the bottom of the large petals, about 1/4″ from the straight end.
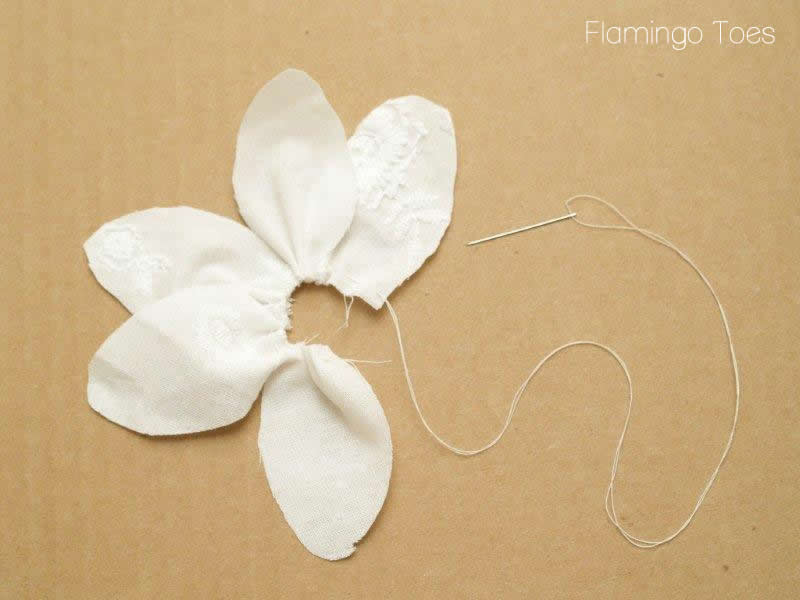
Sew the last petal to the first and pull up the gathering stitch. Knot the thread.
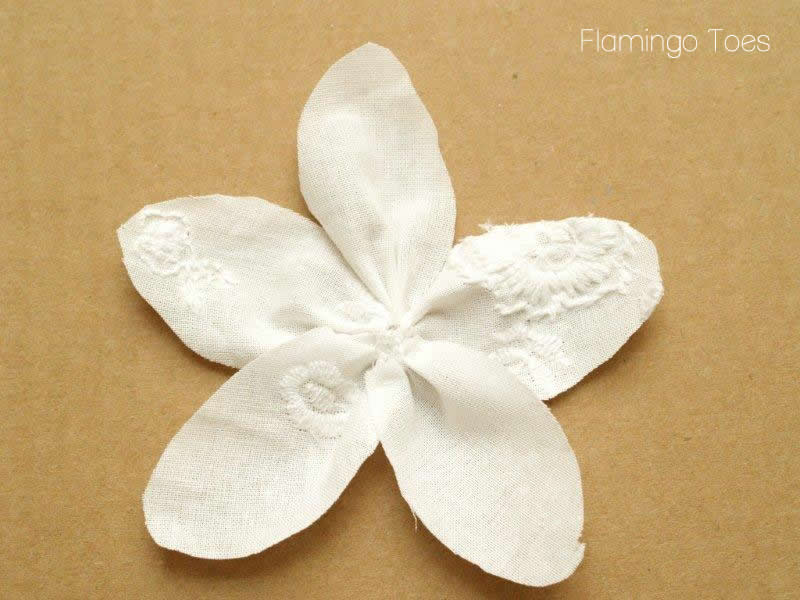
Repeat with the seven smaller petals.
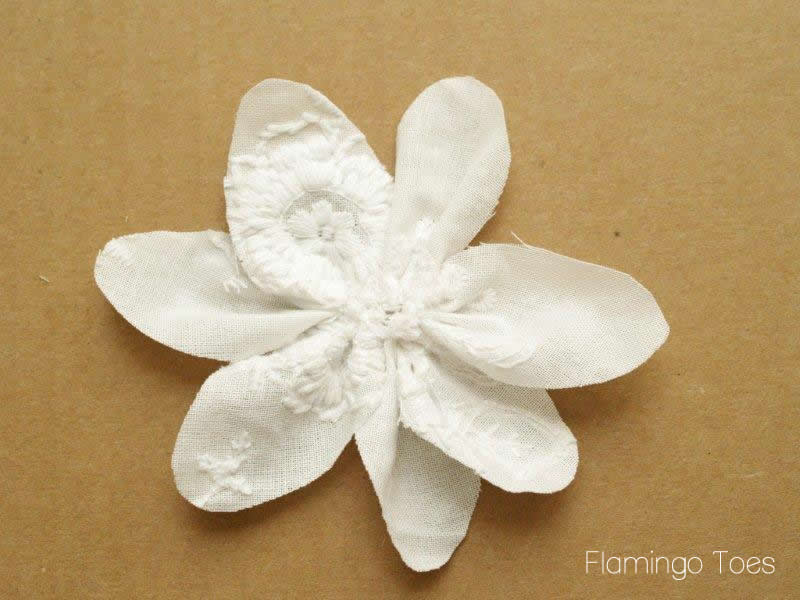
Layer the smaller flower on top of the larger and glue together.

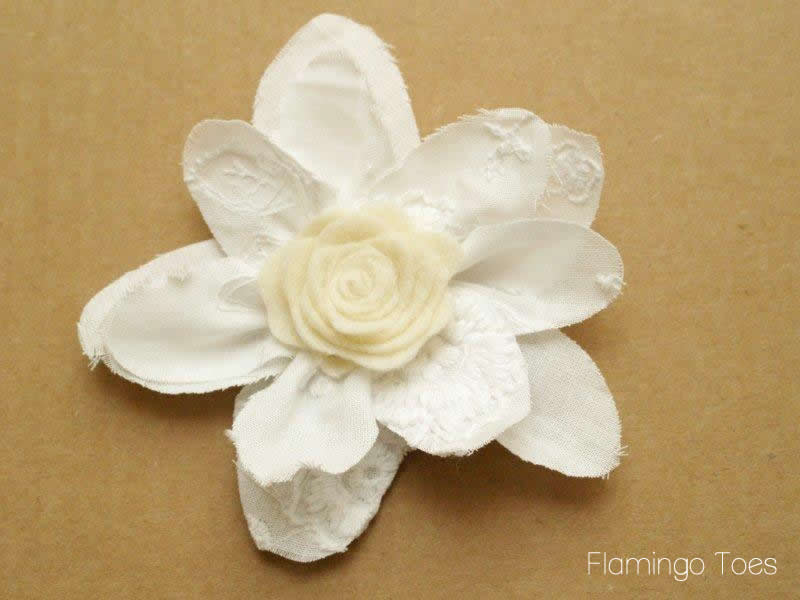
Glue a small felt circle to the back of the fabric flower and glue one of your small cream rolled flowers in the center. You can also rough up the edges of the flower a bit to give it more of a frayed look.
Folded Fabric Ruffle Flower
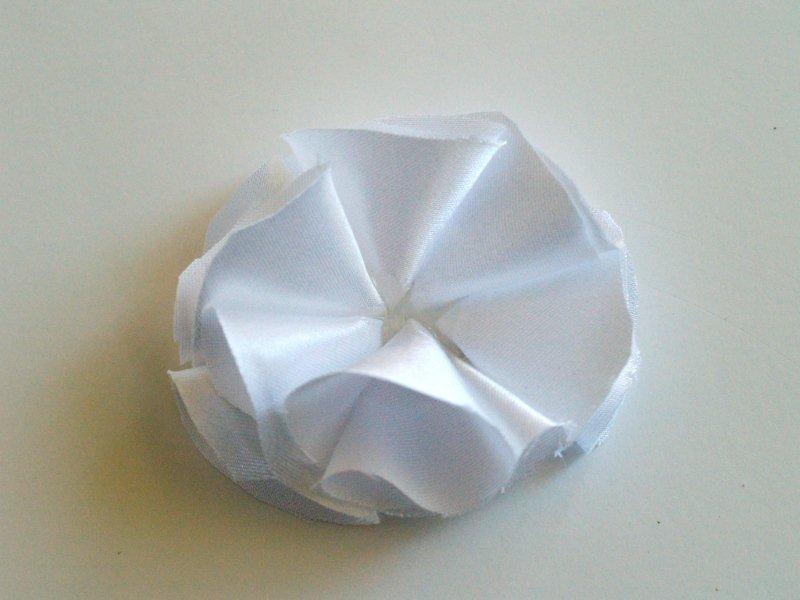
To make a ruffle flower, cut 12 circles out of white satin. The bigger the circles, the bigger your flower will be.
Fold the circles in half, then in half again. Glue the point to a felt circle.
Cover the rest of the circle with one row of folded circles, then add another two or three rows, depending on how full you want your flower.
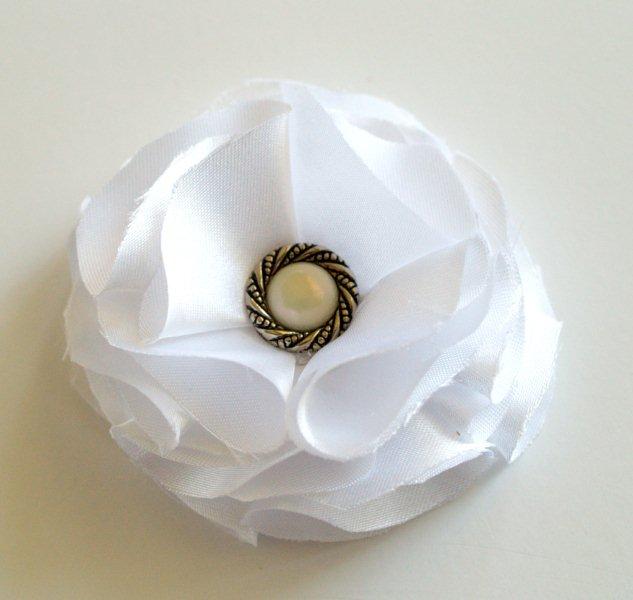
Add a button to the center and fluff up the circles.
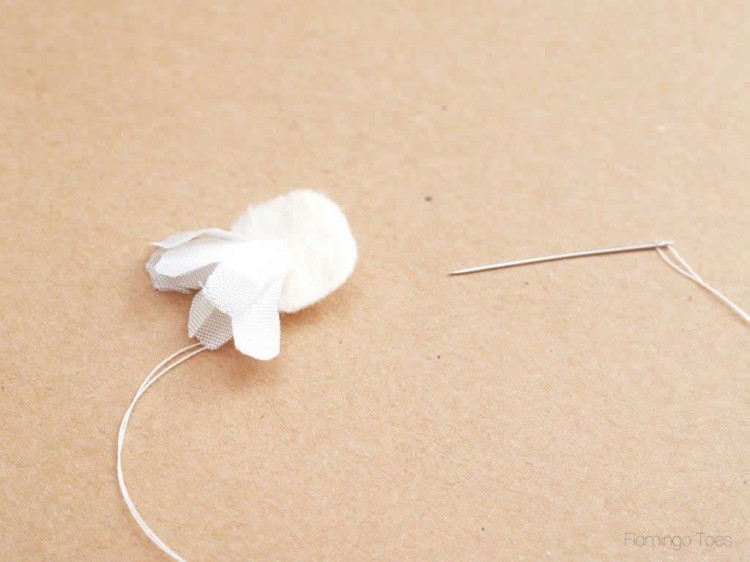
Tiny Puffed Fabric Flowers
Cut 5 small circles out of fabric. To make tiny flowers – use the top of a large spool of thread. If you want to make larger ones, just increase the size of your circle.
Sew around the edge with little gathering stitches. (kind of like if you were making a yo-yo)
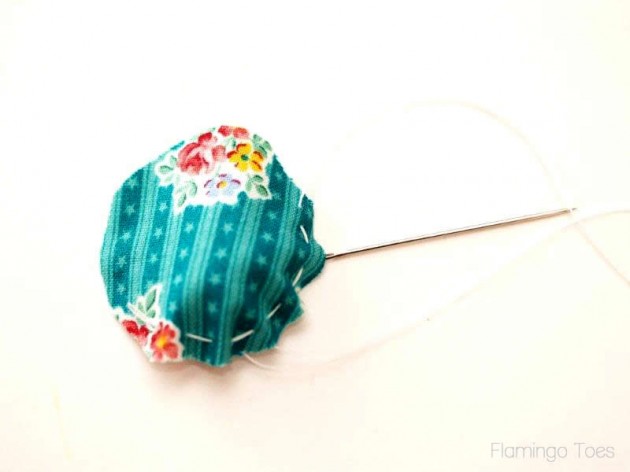
Pull up the stitches just a bit to start to form a ball. Add a wee tiny bit of stuffing inside.
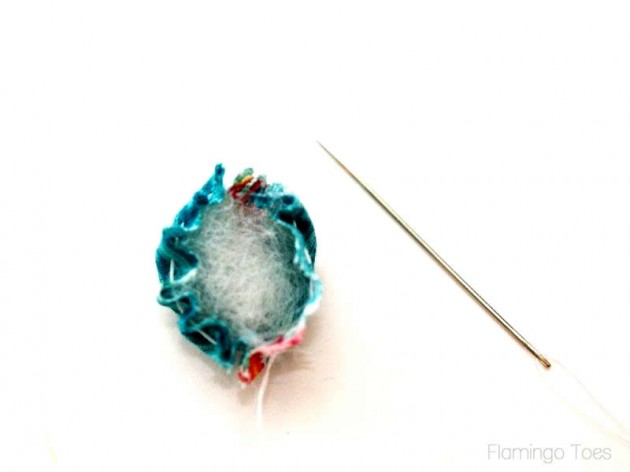
Pull the stitches tight and then sew along the bottom edge to hold everything in place.
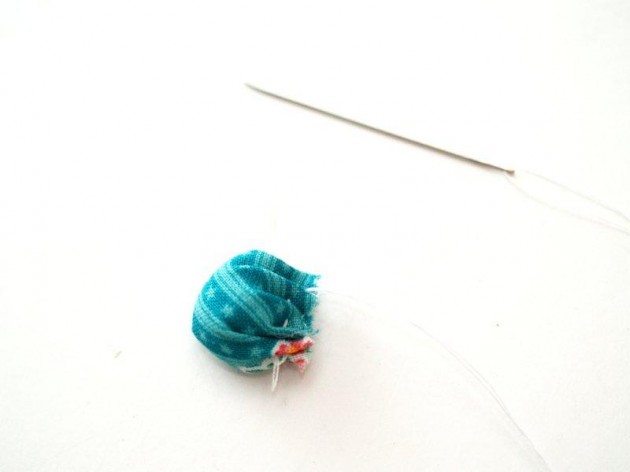
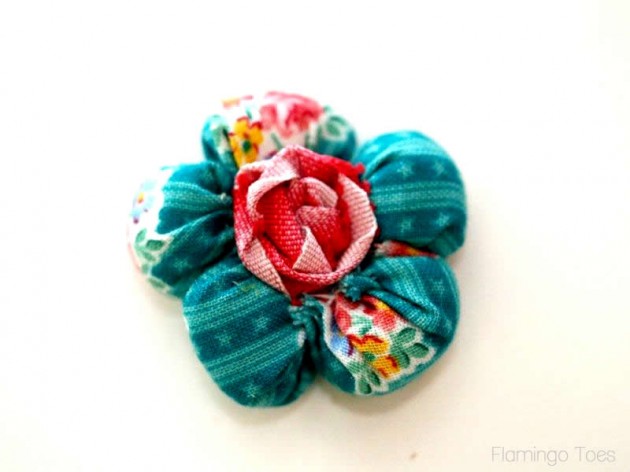
Repeat for the other four circles, then sew them together in a flower shape.

With some ribbon, create a little rolled flower center and glue that in the center of your puffy flower.
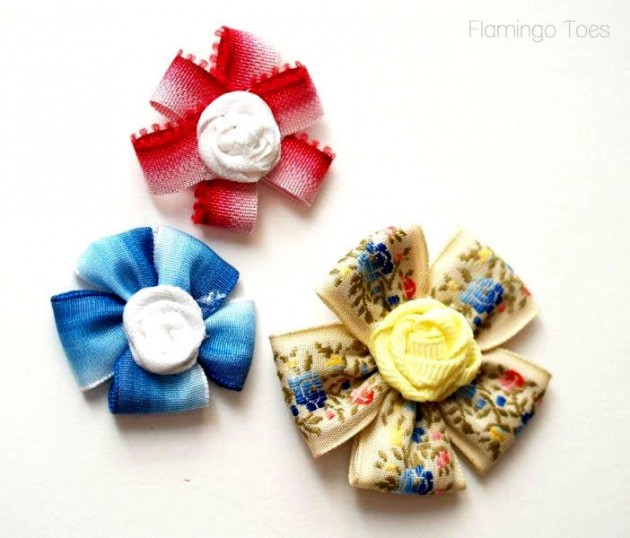
Folded Ribbon Flowers
You can also create little flowers with ribbons. These will work best for small flowers.
ut small strips of ribbon and fold them in half. Sew gathering stitches along the ends.
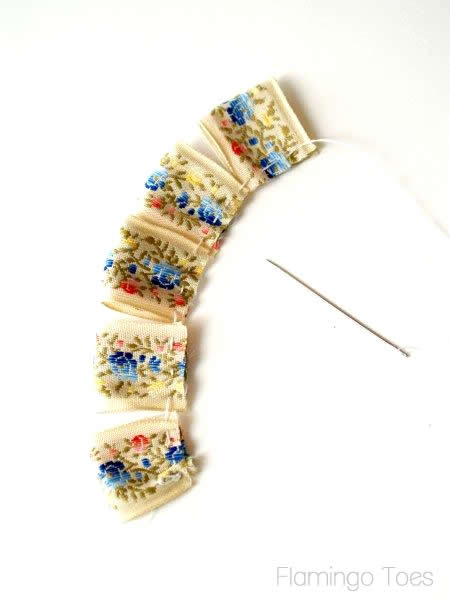
Pull up your threads until the ribbon is all gathered, then sew the last ribbon to the first one.
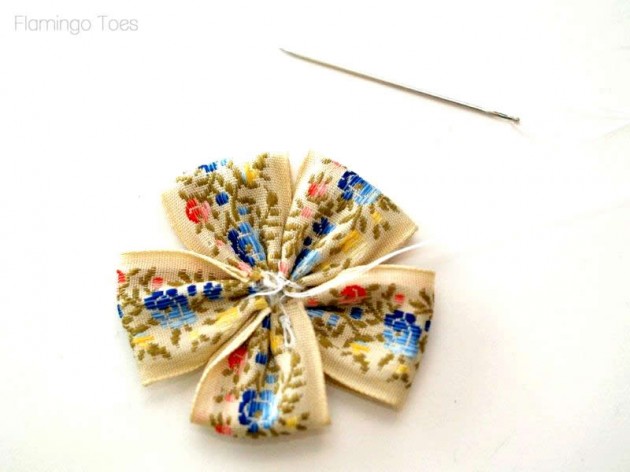
Add rolled ribbon flowers to the centers to finish them off. You could add buttons or little beads too!
Rhinestone & Chiffon Flowers
These sweet chiffon flowers are easy to make in any size! You can decorate them with rhinestones or other beads in the center.
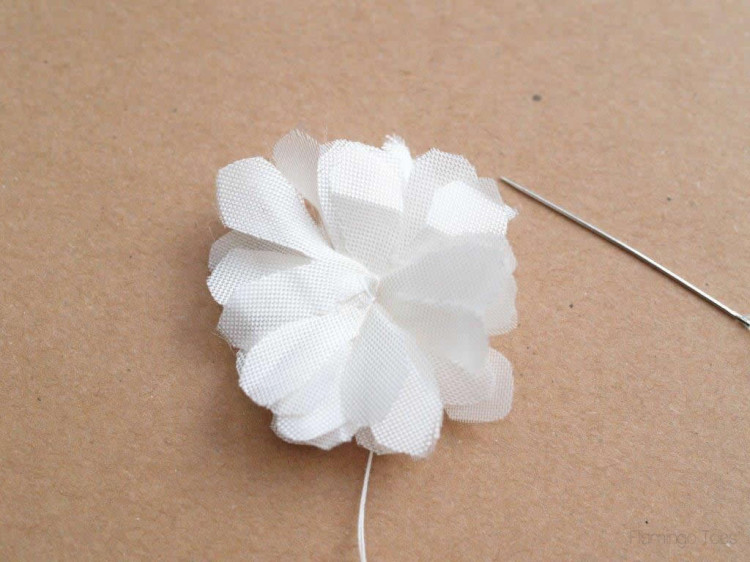
Start by tracing a small flower pattern. This one is 1 1/4″ in diameter. Cut 8 flowers out of chiffon.
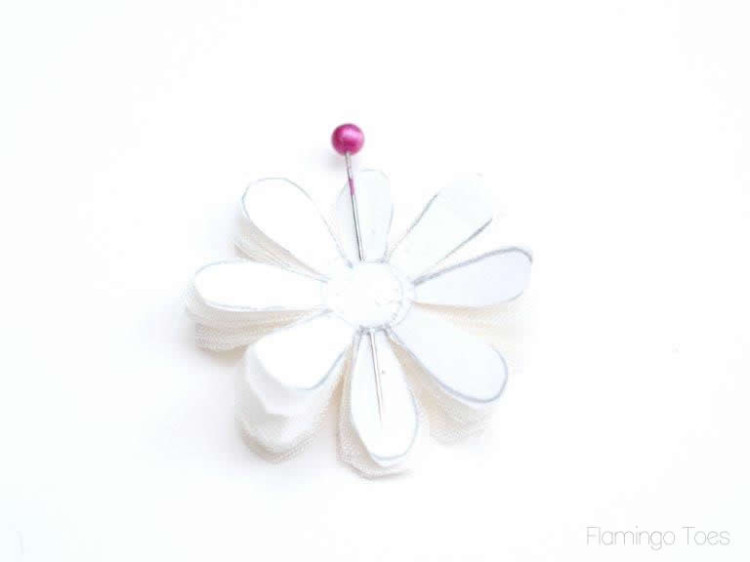
Cut a small circle of felt, about 1/2″. Take your first chiffon flower and fold it into fourths. Sew the top folded center of the flower to the center of the felt circle.
Repeat with three more flower pieces, placing them so the centers are in the middle of the felt and the flowers only overlap a little bit.
 \
\
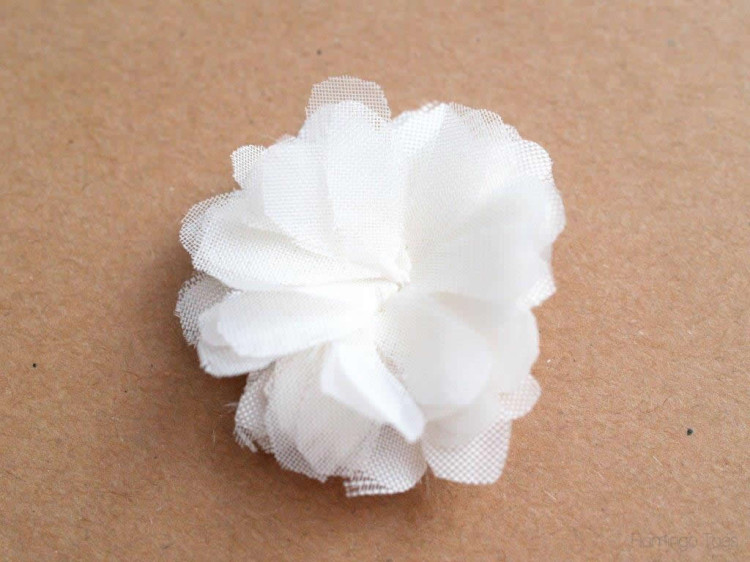
Repeat with 4 more flower pieces, sewing these to the center as well. You should now have eight flowers sewn on and your flower should be nice and fluffy.
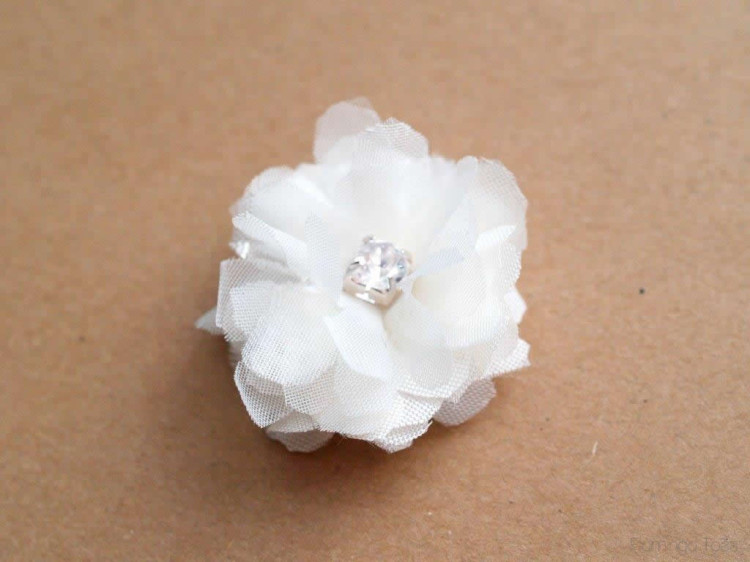
Glue a rhinestone piece in the center of the flower to cover up the stitching and to add a little bling.
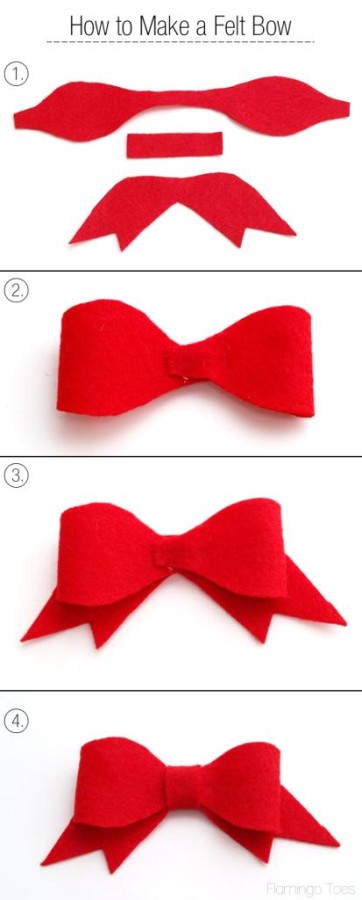
Felt Bow Instructions and Pattern
Click here for Pattern pieces for Felt Bow
Instrustions: 1. Cut out one of each pattern piece from felt or heavy fabric.
2. Fold ends of long curved piece in towards the center and overlap. Glue in place.
3. Glue curved bow piece over back piece.
4. Wrap bow center around the middle and overlap in the back. Glue in place.
Now you have a super cute bow to use for decorations or hair bows!


Very cute ideas. Thanks for the tutorial. :)
that was really fun and inspiring! love your colors
This is a great addition to your site! Any chance you could add some kanzashi flower tutes?
I love this tutorial, you are so talented. Thank you for sharing. I’m sorry I don’t blog or have a web sight, but I love to follow blogs and you are my favorite.
This is a wonderful tutorial. I really like how you included so many different types of flowers. I am pinning it to my flower-making pinboard. I love your blog.
Greetings, I don’t know which flower to chose. They’re all lovely. Great tutorial. Thanks for sharing.
Thank you for the tutorials! I’m going to try the ribbon flower.
This is a lovely set of tutorials. Thanks you so much for sharing and also to Pinterest, without whom I wouldn’t have stumbled across you. :-)
Another great tutorial ….. since discovering Flamingo Toes,I’m back to sewing again and it sure keeps me off games. Love it, keep it up..
Annie.
I LOVE this! I’ve always wanted to know how to make various fabric flowers and know I have all the info! Thank you so much for doing this tutorial post! I found it while admiring how to make your Valentine wreath on 540 Main’s blog. I am going to be up to my eyeballs in fabric flowers now – weeeeeeeee! Hugs, Leena
Thank you for the tutorial it inspries me to try making some. Luv your blog.
Great tutorial – everything in one place. Awesome!
its beautiful,my embriodrey calss will love todo it.thanku.
Very nice tutorial I love the white flower and the the others how to put them together .Beautiful!
I have been looking for this for a long time. Thank you for posting this and I am going to make soon . It looks like it would lot of fun and so pretty too !!
Thanks so much for this information. I use fabric flowers a lot in my crafts, including making wedding bouquets, corsages and boutonnieres of fabric flowers. regina-atthelake.blogspot.com
To Bev.
Love all the flowers. Thank you for making it look so easy. Carolynn.
Bev
I love your blog. Thanks for all the flower tutorials. I make a lot of fabric flowers also and am always looking for new methods for making them to add a little variety.
I can hardly wait to use these floral techniques to decorate my cuff bracelets. Instructions are great and easy to follow!
Thank you ,it was very interesting and easy to follow steps……i loved your flowers…it would be very nice of you if you could include some
flowers (rose)made out of thin nylon ribbon..
thanking you
sheetal
Wow! What a tutorial..I have been searching for fabric flowers to make and finding them all at one place has made it so much easier! Thank you for this post!!
I absolutely love all the different ways to make flowers…I can just see my granddaughters and I spending a day planting flowers.
Thank you!
Wow now I can make great flowers. Thanks so much for the great walk through on this.
Thank you so much for posting.
This is awesome. I love it.
The instructions are very easy to follow .
I would like to make the Flamingo quilt. But since it was last summer, I was thinking that I might have a hard time finding the fabric….
Do you have it in your shop? Do you have it as a kit? If you do, cost of it?
Thank you. Love your site, wish I found it earlier!!
Linda
Hi Linda,
I’m so glad you like the quilt! You can find links to all the fabrics I used in this post: https://flamingotoes.com/2017/07/fun-flamingo-quilt-free-pattern/. I don’t sell a kit for it, sorry. I’ve seen lots of versions made up in different fabrics and they all look cute!