Ok. Most ridiculous title ever – but I couldn’t resist.
I’m working on adding some fun touches to our family room. You can check out our Entertainment center and the Pallet clock if you’ve missed those.
Since we can’t paint the walls (renters) I’m trying to add in some fun pops of color to brighten up the walls!
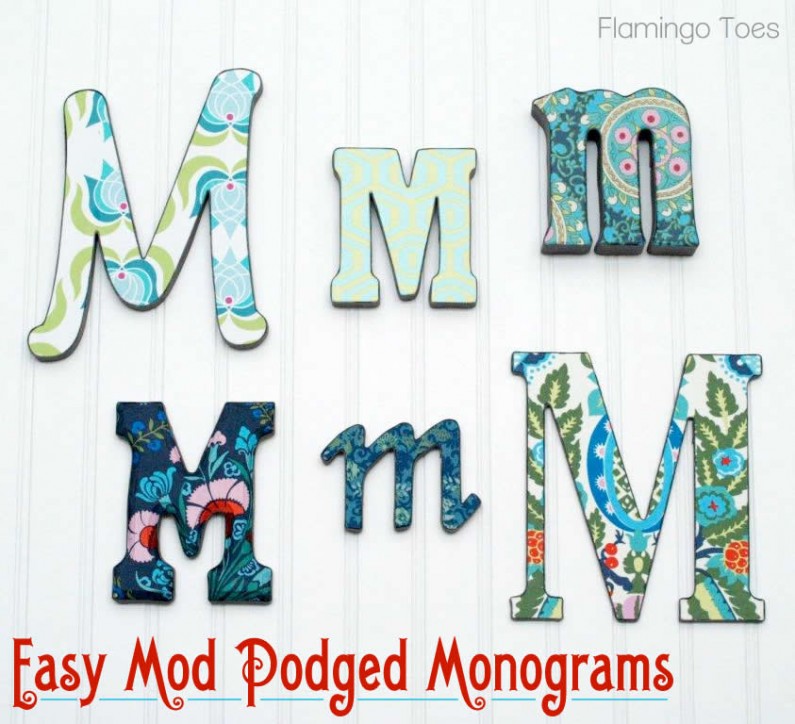
I’ve been wanting to do a little wall grouping of Monograms for a while – and I finally found all the fabrics I wanted to use!

Aren’t they cute?
Now, I realize that you don’t really need a tutorial for these – goodness, they are everywhere. But I wanted to show you how I finished off the sides.
I’m sure I’m not the first person to have done this either – but I’ll show you anyway. ;)
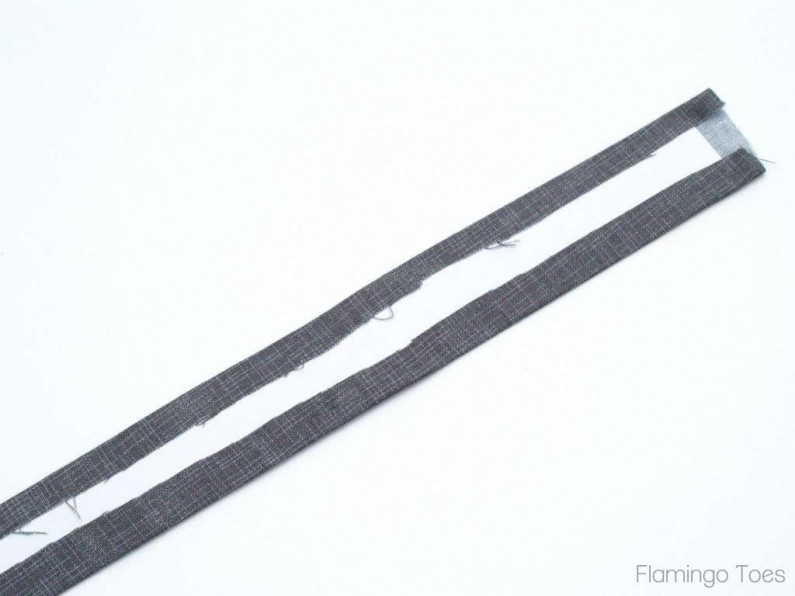
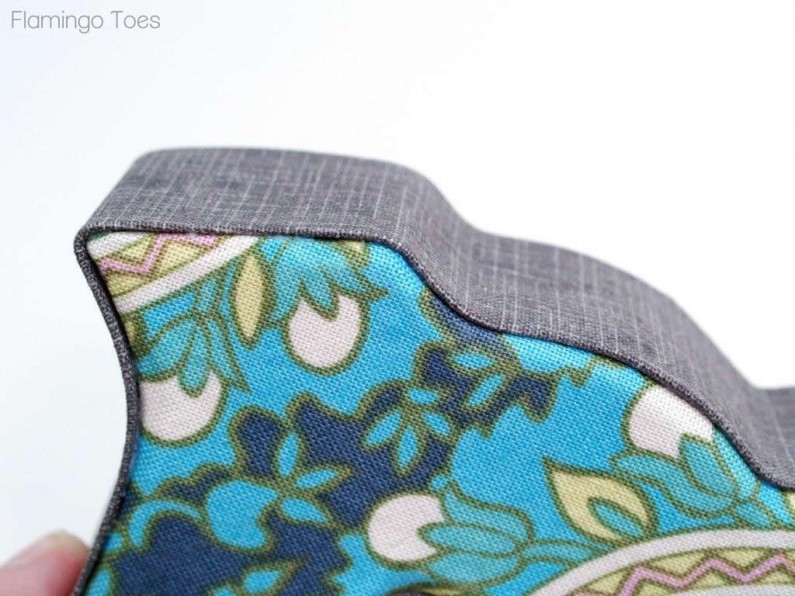
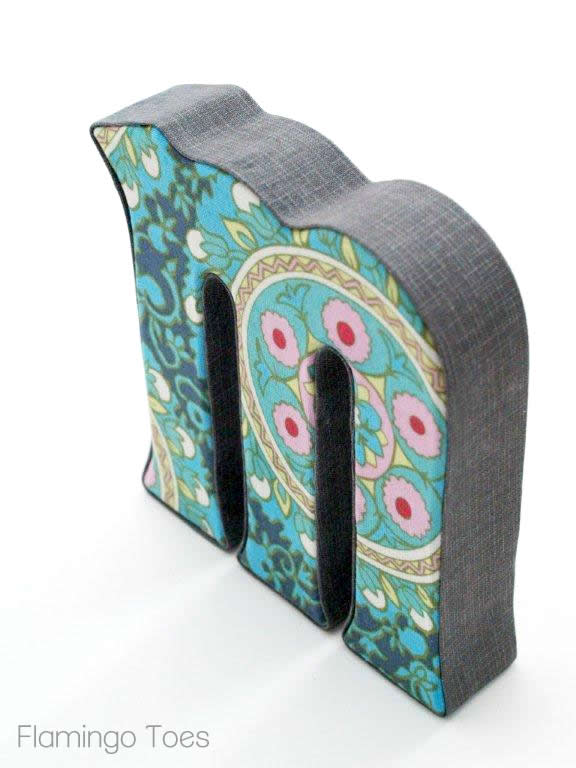
I made a kind of fabric-covered posterboard bias tape for the sides – so they look all nice and tidy!
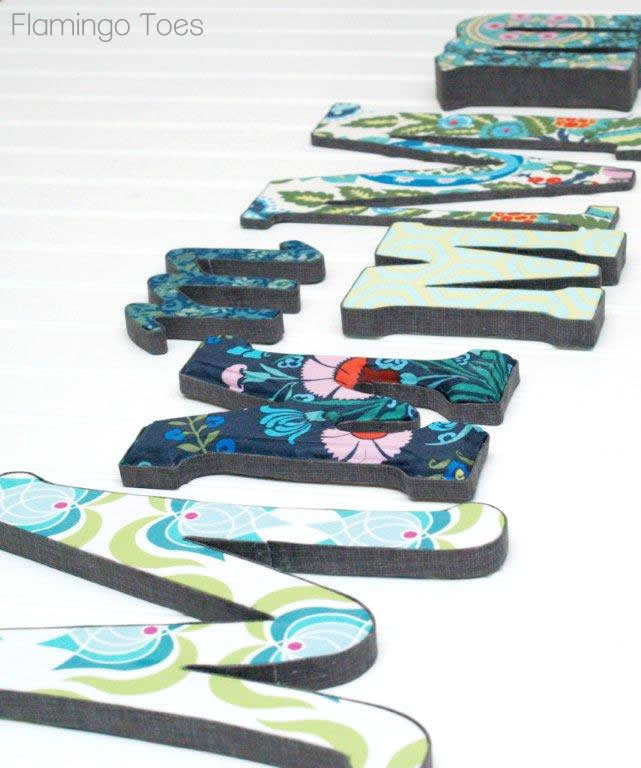
I like that the sides are all the same fabric too – kind of ties them all together don’t you think?
So here’s the quick and easy semi-tutorial on how to do these. :)
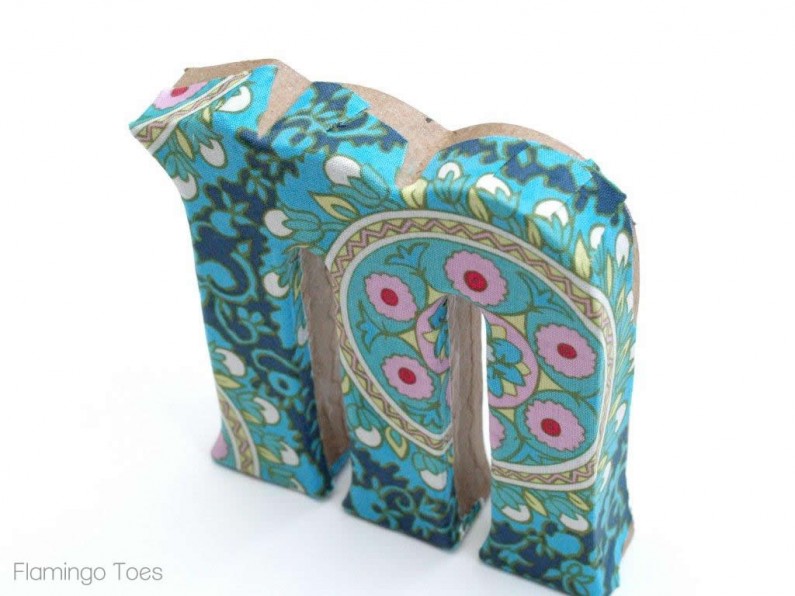
Cover the front of your letter with Mod Podge. Place the fabric over the letter and fold the fabric around the sides. Clip the fabric where necessary to allow the fabric to lay flat around the curves and corners.
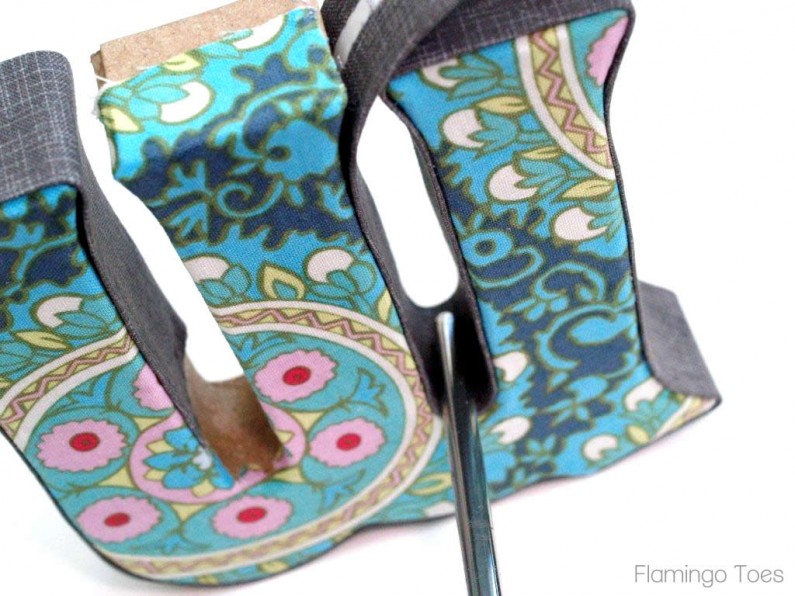
Measure the width of your letter. Take another measurement all along the edge of the letter (wraping your measuring tape all long the curves, insides, etc.)
Cut a piece of posterboard the width of your letter (1″ for this one) and the length of all the sides. I think this one was about 30″.
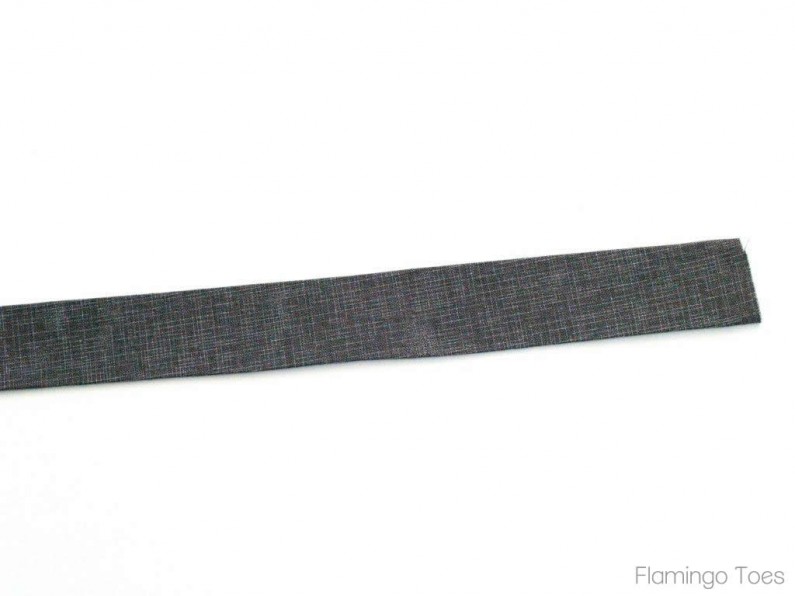
Cut a strip of fabric that is the same length, but twice the width. So in this case 30″ x 2″.
You can piece the fabric and posterboard together if you need to.
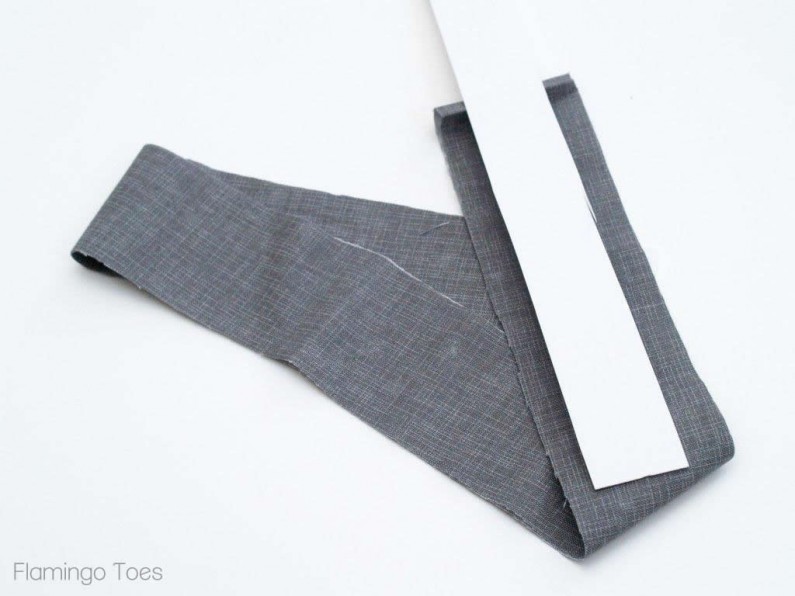
Lay the posterboard strip down the center of the wrong side of the fabric strip. Cover the fabric with Mod Podge and fold the sides of the fabric in around the posterboard.
If you need to piece your fabric or posterboard, just glue the ends together as you’re covering the posterboard.
This will give you a nice fabric covered strip.
Begin glueing the strip along the letter, starting in a not-so-noticable place. Use Mod Podge to glue it on.
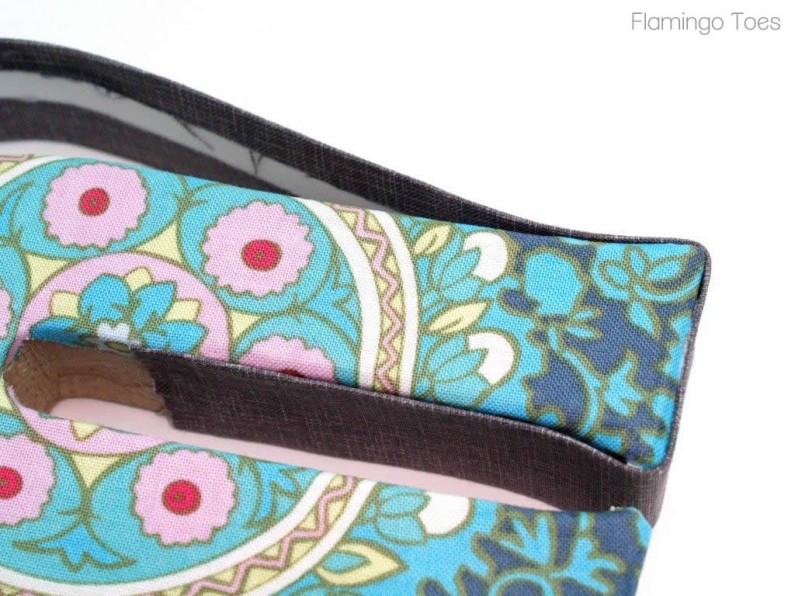
Press the strip around the curves and corners of the letter. You’ll have to glue a little, hold it in place, then glue a little more.
Try and keep your fingers as clean as possible or you’ll have sticky spots on the outside of the strip.
If you have small little inside curves, use something to pull the posterboard strip into the curve. On this one I used my handy-dandy stainless steel chopstick – but on one of the other letters the curve was so tiny I had to use a yarn needle to get the strip in place.
Overlap the ends just a bit and trim the strip. Add a little extra Mod Podge to make sure it stays nice and flat.
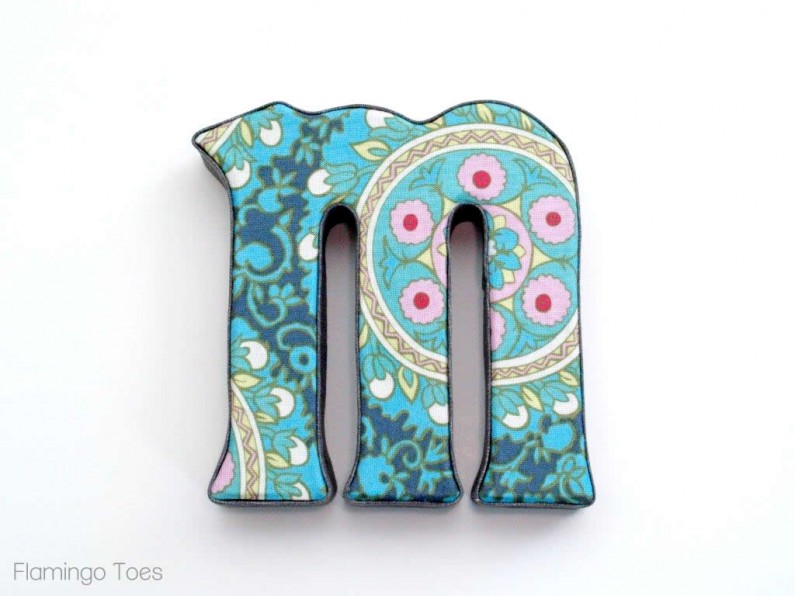
I love how nice it makes the sides look!
That’s all there is to it! Crazy easy right? And kind of therapeutic. It makes for a fun evening of sitting and glueing. And maybe watching French Kiss.

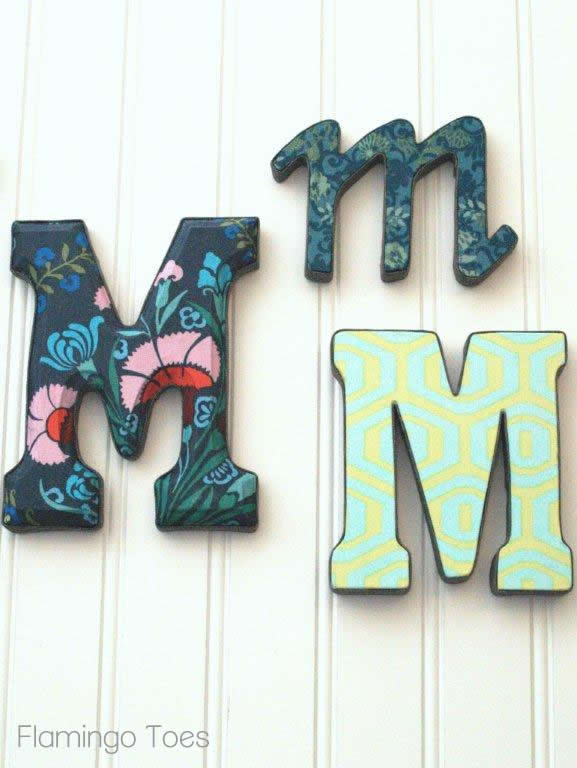
You can kind of go crazy with your fabrics – it’s fun to mix and match them.
I’m still playing with layout, so I’ll show you a photo of the room with them hung up soon!

They are so cheerful! I love how they turned out!
Linking up at Sunday Scoop, Today’s Creative Blog, Met Monday, Tutorials & Tips Tuesday, Shabby Creek Cottage, My Repurposed Life, 504 Main, and the other fabulous parties on the party page – make sure you check them out!


Love that fabric!
Where oh where did you find all those great letters?? I always only see the regular wood ones or plastic ones and they are always capital letters only. Do you have a secret source that you’d like to make not-so-secret?L
Thanks! Love the sides!
I can’t wait to try this. Looks really great! I may even make a few as gifts for my daughters!
They’re fabulous Bev!
Bev! These are the CUTEST monograms! You are so very clever to to wrap the fabric around the cardboard. I love the look it gave the letters!
You know its projects like these that make me happy we have the same monogram. If I ever come visit I could slip one into my bag… ;)
Love this!! Wrapping the edges is brilliant, I painted the one and only that I did. This is exactly what I’ve been attempting to do, but where oh where did you find all of the different fonts???? Would you share?? Thanks~deb~
These are so cute and spring-y! I love them! I would love for you to come by and link this or another project/recipe at my brand new link party!! Hope to see you! http://domesticsuperhero.com/2013/03/07/domestic-superhero-sharing-thursday-1
LOVE these! And I love how you finished the sides! Wishing I had some letters that I could make, lol. Pinned them while I was here too :)
Thanks for sharing this idea!
Shauna
http://thebestblogrecipes.blogspot.com/
super cute. i LOVE how they turned out and how you lined the sides!! genius!
Love, love, love them!! Where did you find all the different letters? It looks beautiful and fun!!!
OMG, those are fantastic!!! I love your choice of fabrics and your edging just finishes them perfectly!!!
Oh Bev, these are absolutely brilliant! Looking really pretty from every angle :) My favourite is the blue lower case with serif font (bottom middle), looks like it’s dancing :D
looks really nice and very well made :)
Great idea adding fabric – and I love the way they are trimed out on the sides, too!
I found you today thru the Linky Party at The Shabby Nest, where I’m #231. I hope you get a chance to stop by my blog and leave a comment, too!
~ Megin of VMG206
http://www.vmg206.blogspot.com
Ahhh, you are American. Love that movie!
These are wicked stinking cute as heck Bev – They look perfect too.
Where did you find the letter? I am trying to do something for my neices wedding and would Like Capital and Lowercase letters with the capital being about 8 inches and I need the :”&”
Your many mod podged monograms make me merry! (I couldn’t resist….) -Jen
I LOVE this idea! Just saw it at “I Heart Naptime.” Thanks for sharing.
These looks amazing! I love the edges, they look tailored and perfect. The different M’s put it over the top!
Great job!
-Kim
I realize it has been asked, but where did you find so many cute letters?? I am truly inspired and would love to copy!:)
These are so gorgeous. I’ve been planning on Making some of them. In fact, I’ve already bought letters for my daughter’s room. Thx glad I seen yours before I done them