My kids are teenagers now – so I don’t get to do full up costumes for them.
But I wanted to create something that was fun and Halloween-y, without getting too crazy. I came up with the idea to do a cute, fun headband that can be worn to Halloween parties or work – when you want to show off just a little bit of Halloween Spirit!
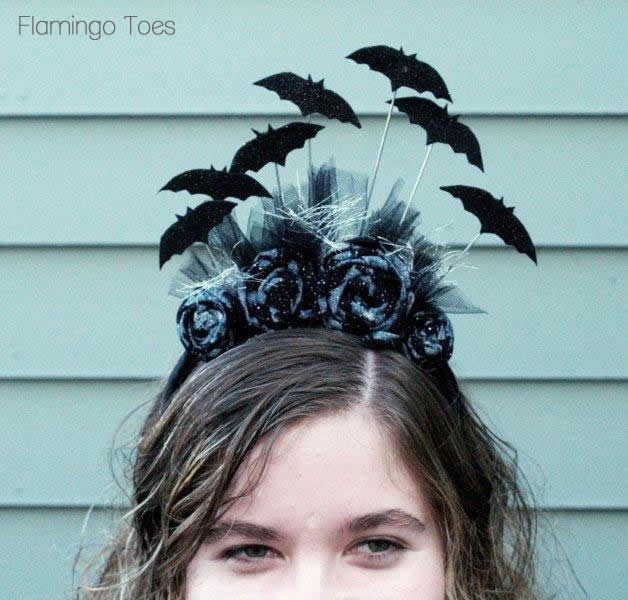
I love how it came out!
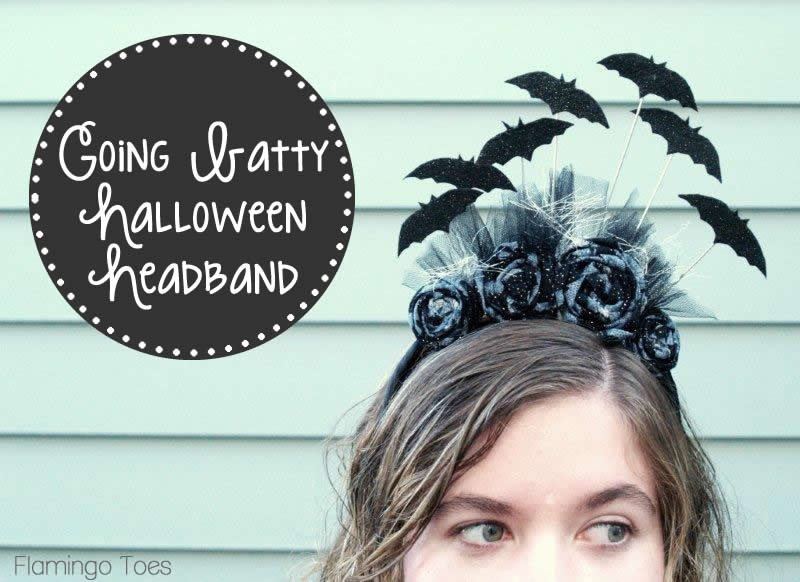
My daughter trying to look all spooky. :)
So here’s what you’ll need to make your own Batty Headband!
- thin headband
- 18 gauge wire
- black glitter felt (the stiff kind)
- regular black felt
- black/silver fabric
- glue gun/glue
- Black Satin Ribbon
- Black Tulle and Silver Fringe ribbon
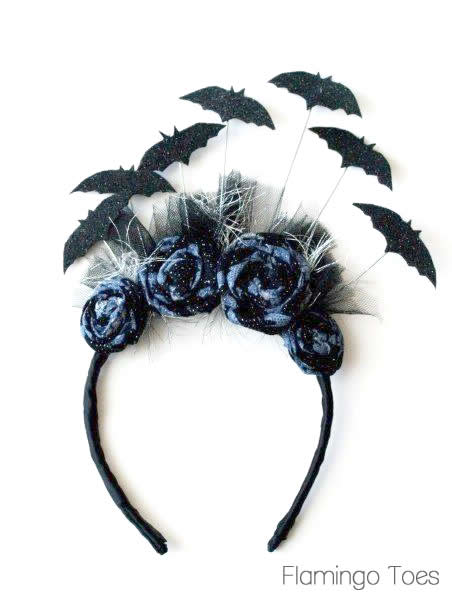
Begin by cutting small Bat shapes out of the stabilized Glitter Felt. You’ll want 7 shapes – these are about 2″ long.

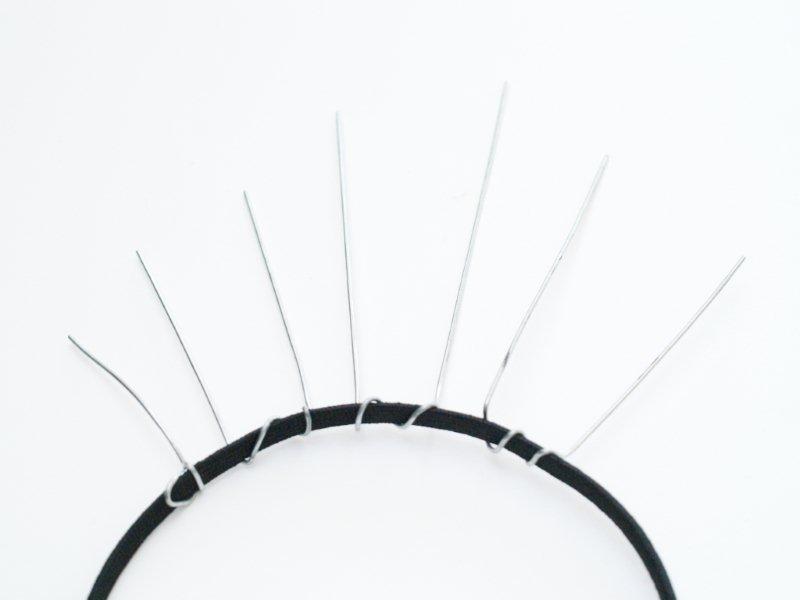
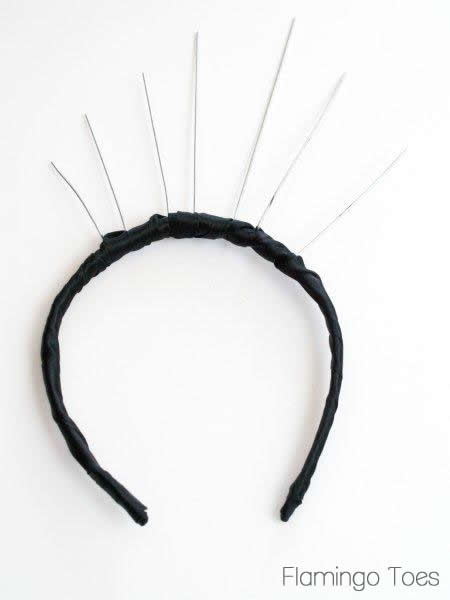
Wrap strands of the 18 gauge wire around the headband, to one side. You’ll want the longest pieces in the center.
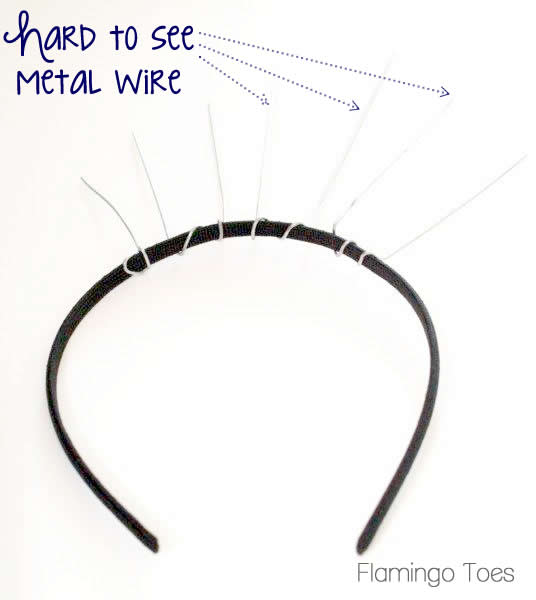
Try and flatten the wire to the headband as much as possible – you can use pliers to help with this if you need to.
Once the wire is as flat as you can make it, cut a small strip of black felt and glue this along the underside of the headband. This will make sure you don’t feel the wire when you’re wearing it.
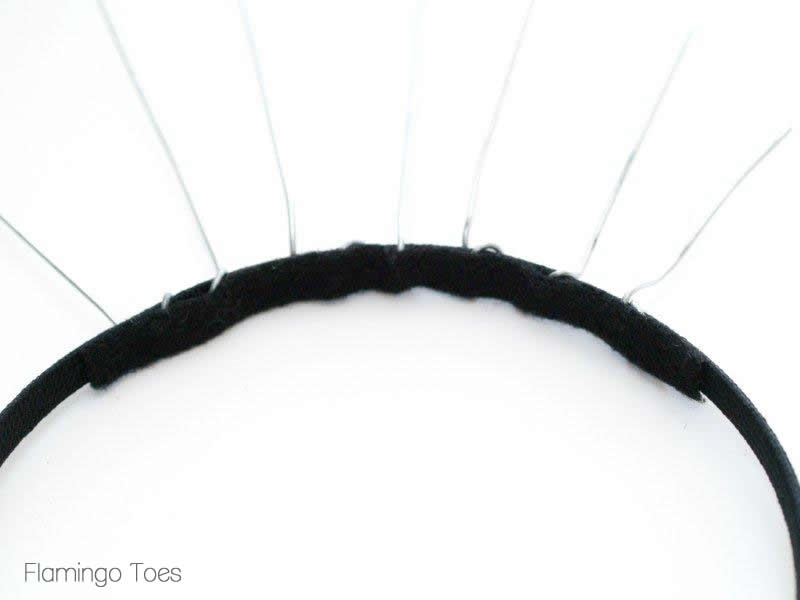
Starting at one side, glue the end of your black satin ribbon down and begin wrapping it around the headband. Keep wrapping between the wires until they are all covered and you reach the other side.
Glue the other end down.
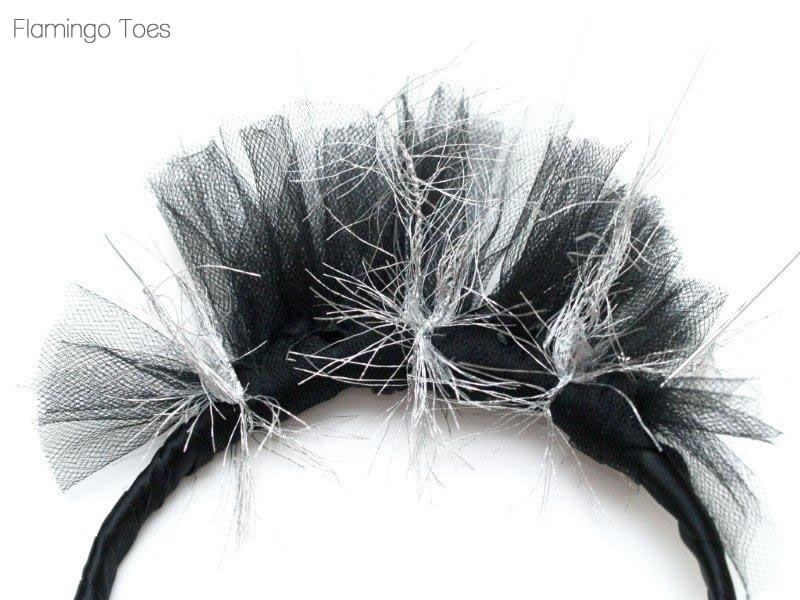
Now we’re going to get to the fun stuff. Add a little bit of tulle to the headband by cutting pieces and knotting them on between each wire. I didn’t measure how long, just make sure the center pieces are a little taller.

Add in a little lighter trim for some contrast. I had some wired silver fringe, but you could use anything – silver ribbon, rick rack, beaded trim – whatever you have on hand!
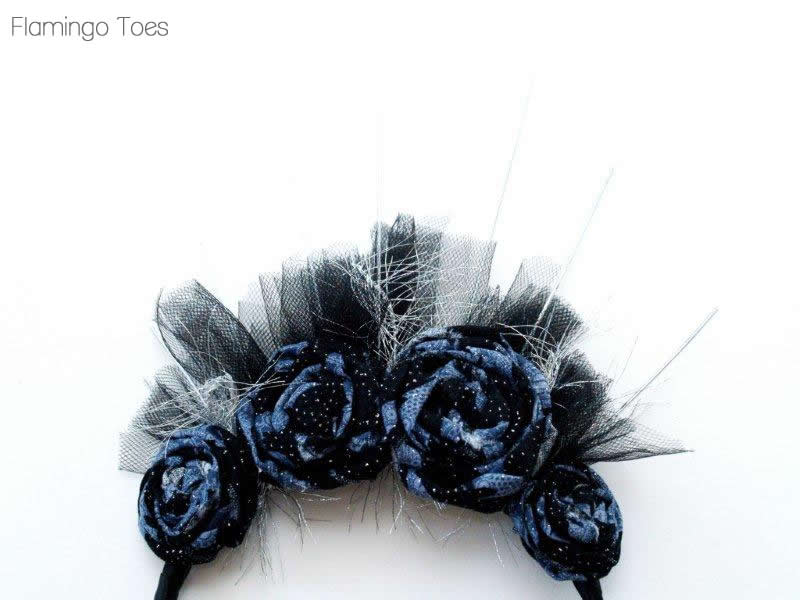
Make four rolled fabric flowers – two large and two medium-sized. If you need a tutorial, you can check out my How To Make Flowers page. I have several different flower tutorials there for you to reference.
Glue the fabric flowers along the front of the headband, but not too low so it will still sit on your head.
(I promise the wires are still there – they’re just hard to see in the photo.)
Last up – glue your bats onto the wires with a little hot glue. Cut small strips of regular felt to glue over the top of the wire on the back side. This will help hold them on, and keep it looking nice from the back too!
Isn’t it fun? I love that it’s super eye catching but still cute!

And you can’t go wrong with bats and glitter. It’s like a spooky little Halloween tiara. :)
I hope you like it!
So do you dress up for Halloween? I’d love to know if you have your costume planned yet!
Linking up at Sunday Scoop, Today’s Creative Blog, Met Monday, Tutorials & Tips Tuesday, Quilt Story, Shabby Creek Cottage, My Repurposed Life and the other fabulous parties on the party page – make sure you check them out!


What a fun and clever idea – a Halloween tiara! And it’s totally cute and even pretty – may have to make one for me:)
Its so cute and spooky, Bev! That has to be a hard combination to achieve. :)
And I love that photo at the top of your daughter. So fun!
AWESOME BEV!! Love it.
Very cute! THANKS.
Ha!I am always going batty – this would be the perfect Halloween headband for me.
This is so perfect! What a great idea- love it Beverly!
Oh my God I love it, need to make one for my daughter.
super cute
So, so, so fun!! My girls would all just love that. I love all the different textures you’ve got going there.
I want one! so cute
Very cute! And one could wear it past Halloween on those days when it’s an apt description of a hectic day ;)
<3 Christina at I Gotta Create!
Wildly Original linky party is open
Love this idea! So, so cute!
OK I love this so so so so so so much. So , I featured it as part of my link party wrap up. I could wear this all year long!
I LOVE this! I’ve made Halloween headbands for myself for the last two years and I definitely want to remember this one for next year! Great idea:)
http://mommysordinarymagic.blogspot.com
These are so adorable. What a great idea and tutorial.
I just came over from “The Answer is Chocolate”. (I always like to know how people find me)
Love this! Too cute!!
Kim
Love your Halloween Tiara, such a awesome idea. Thanks for sharing. ;o)
JUST wanted to say how cute and cleaver ! My youngest will love it!!!!!!!!!
So cute! Thanks for sharing. Pinning for later!
Really cute bat headband craft! Thanks for sharing!
I love love love this. I’m going to make this for me. See, next month I’m going to Europe on a cruise and on Halloween night, I’ll wear it to the dining room with my formal black fancy outfit. How fun this will this be. Thanks for taking the time to write this up and post. It’s such a sweet design.
Awesome! Love the glitter bats idea. Thanks for sharing!
Wow I love that, very cool, just a hint of Halloween atop ones head – perfect!
I love this and want to make one! Did you free hand cut the bat shapes or did you use a pattern? Thanks so much in advance!
Hi Kristin, I’m so glad you like the headband! I drew out the bat shapes ahead of time but you could use any little clip art image that was a good size – whatever is easiest for you!
Really fantastic looking and a great technique to use for so many costumes! great to see you on craft schooling sunday, hope you’ll be back again soon!
LOVE this. Halloween accessories are so much fun! The glittery bats are the best!
My girl is a teen. What a fun (non) costume for that age group! Thanks for the creative idea!
I completely agree! This is way too much fun. I would love wearing it to hand out candy. Pinned!
What a great looking Halloween decoration, very clever & very stylish.
This is so fun. It’s a great way to be festive, without spending a fortune.
How fun! Love it!
This is awesome! I think I’m going to make one for myself this year and wear it when I take the kids out trick or treating. Great substitute for a costume!
What a fun headband!
Thanks for sharing with us at #Throwback Thursday link party. Hope you join us again tonight..
Adorable. Perfect for passing out candy too. Pinned & shared. Thanks for joining the Inspiration Spotlight party! Hope to see you again soon.
Just adorable! It looks great! :) Lisa
Stopping by from Sunday’s Best Linkup. I wish I had found your post weeks ago. My granddaughter is going as a bat this year. This headband would have been perfect. Thanks for sharing.
What a lovely idea. Mine are too big for me to dress up now too. However University students do seem to do an inordinate amount of fancy dress so they do still call on me for ideas & help sometimes!
This is so fun, Bev! It would be perfect to wear to school Halloween parties. Pinned and sharing! Thanks for sharing on Family Joy Blog Link-Up Party this week. Hope you will join us again on Sunday at 12 EST.
I love this! This year I’ll be wearing my youngest in a baby carrier while we take out 2.5 year old trick or treating so I’ve been looking for ways to look festive and still be able to wear the carrier- this is perfect! Thanks for sharing at Share the Wealth Sunday, we hope you stop by again!
Just too cute! I’ve featured it at 2usesTuesday.
What a fun idea for Halloween. I pinned it for next year. Thanks for linking up at the #HomeMattersParty. Hope to see you at this week’s party, the door is open Friday at midnight EST.