I’ve decided to be a complete trendsetter and go for the pink this year for Halloween.
I’m either going to start a whole new thing . . . or everyone is going to think I’m a goofball.
But hey, I’m ok with that.
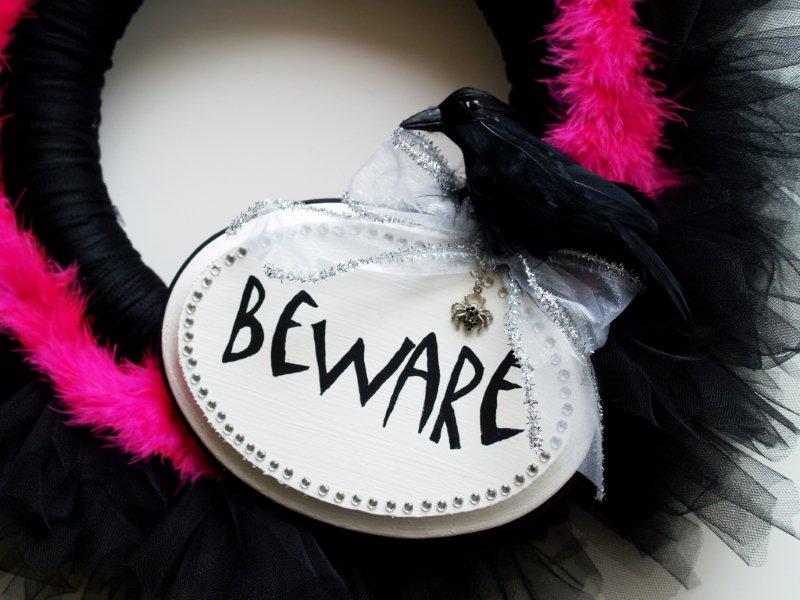
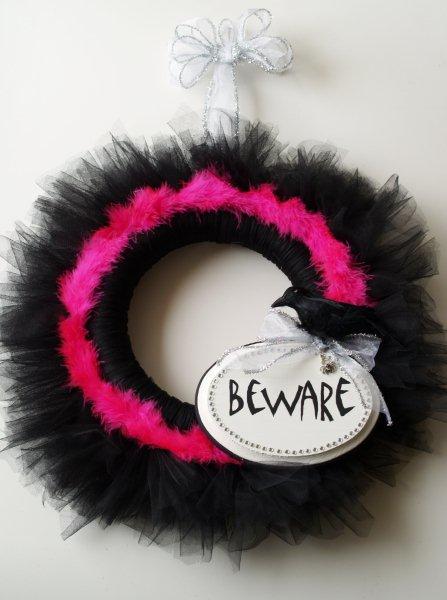
So I’ve put together this super cute Semi-Scary Halloween Wreath to share with you.
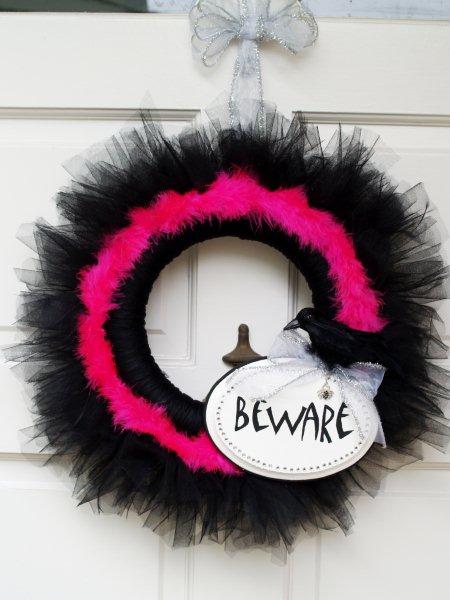
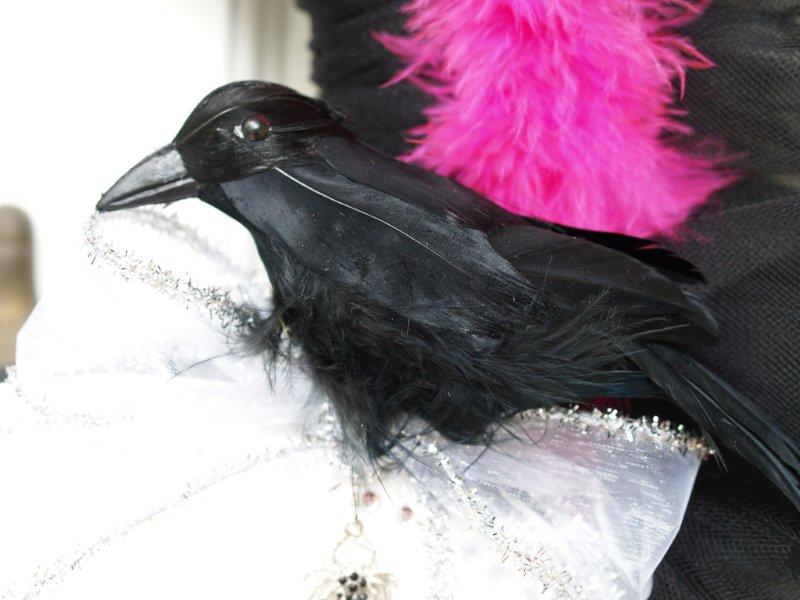
Mr. F.T. says nothing is too scary if it’s made with a pink boa and netting. But I pointed out the crow.
Because um. . . Crows Are Super Scary.
So we compromised and called it the Semi-Scary Halloween Wreath.
Would you like to make your own? Well, I’m going to tell you how anyway. :)
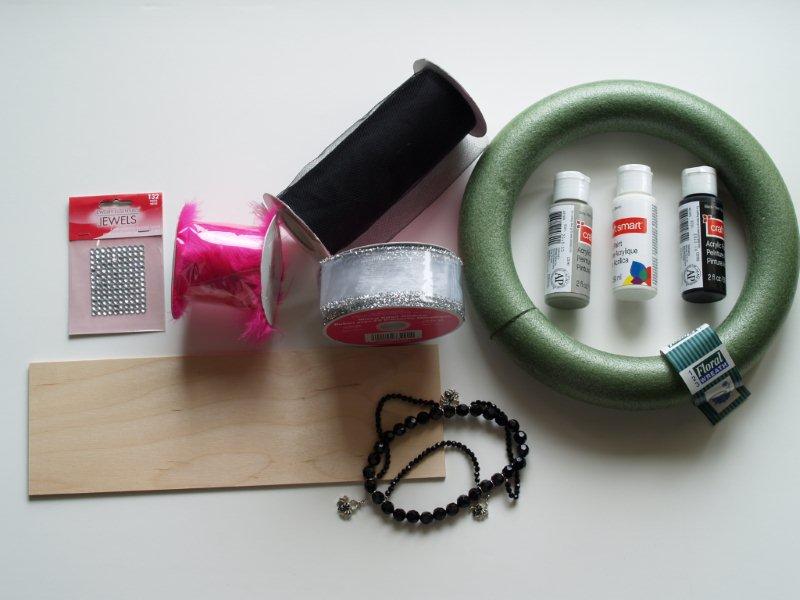
Here’s what you’ll need:
-
A foam wreath base (Dollar Store – woohoo!)
-
Netting/tulle Rolls – I used 1 1/2 rolls
-
Boa or Boa ribbon (I bought the pink boa on a spool at Joann’s)
-
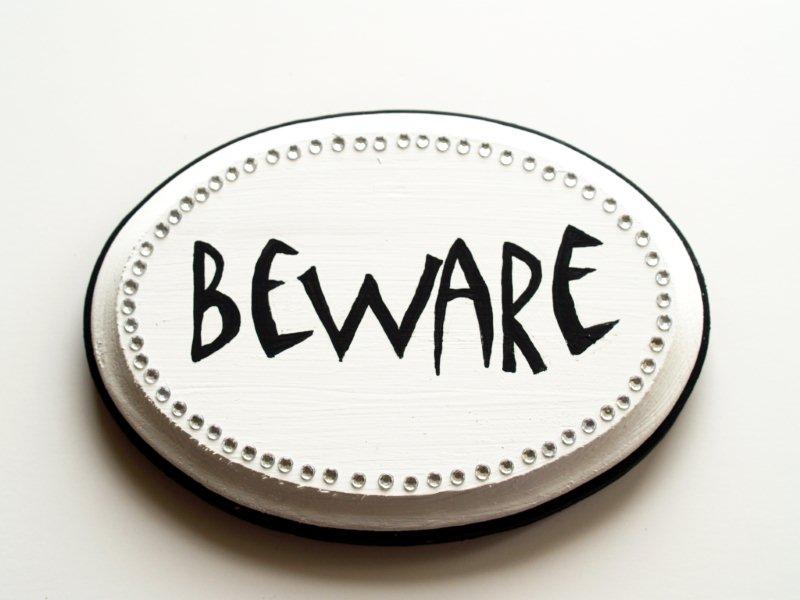
Wooden plaque
(ignore the one in the picture. It was waaay too big. I used a small oval instead) -
paint
-
sticky rhinestones
-
Scary Crow (came from Michael’s)
-
Ribbon
-
Spider Bead
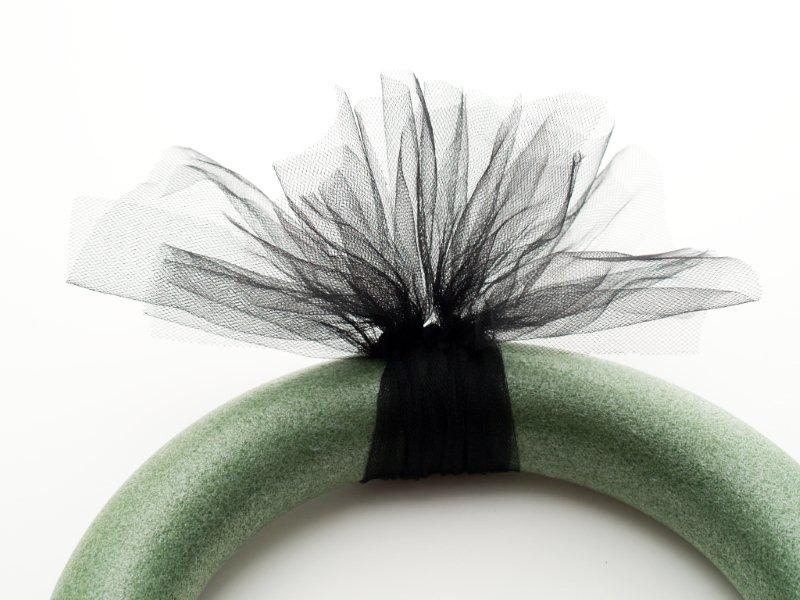
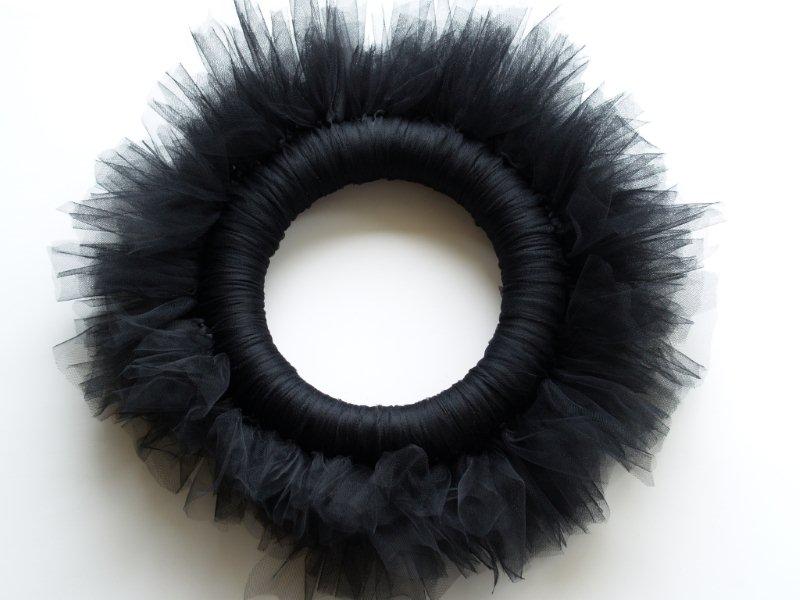
Start by cutting your netting into 13″ pieces. Yes. 13″. That’s semi-scary isn’t it?
Tie a netting piece into a knot around the foam wreath.

Continue tying the netting around the wreath, pushing it together to cover the foam.
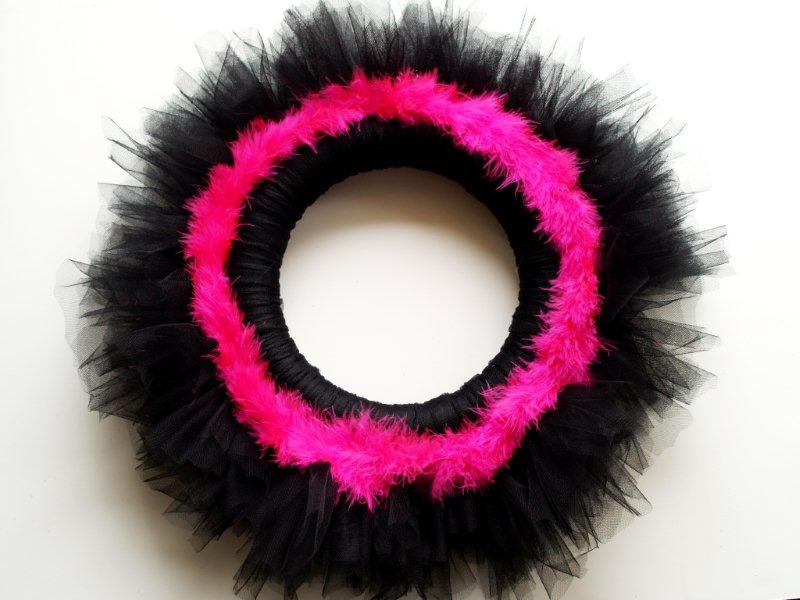
Hot glue your boa around the edge of the wreath where the netting knots are.
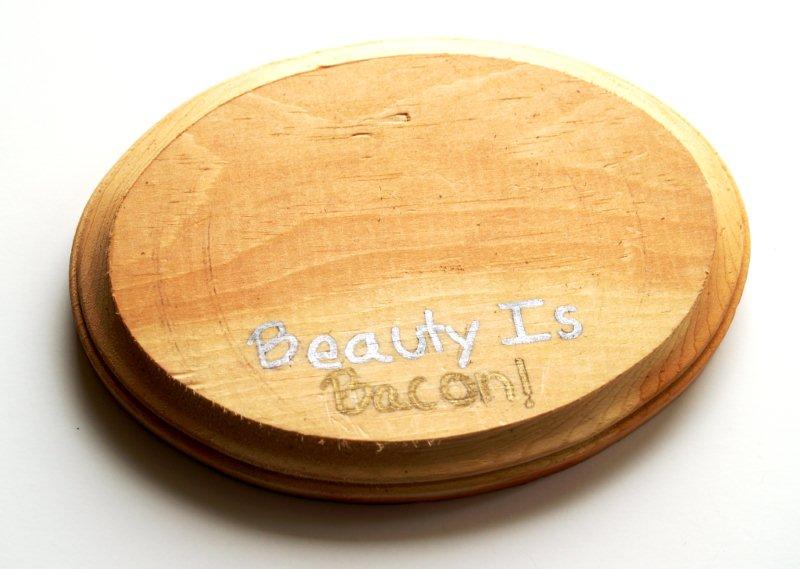
Put your wreath aside for now. Get out your wooden plaque. Mine is from a school project of my son’s.
Yes. That says “Beauty Is Bacon!” It used to have a clay piece of bacon stuck to it.
I have a deep and abiding love for ric rac. He has one for bacon.
We have a wide variety of interests here.
Cover your plaque with white paint. Bye bye bacon.
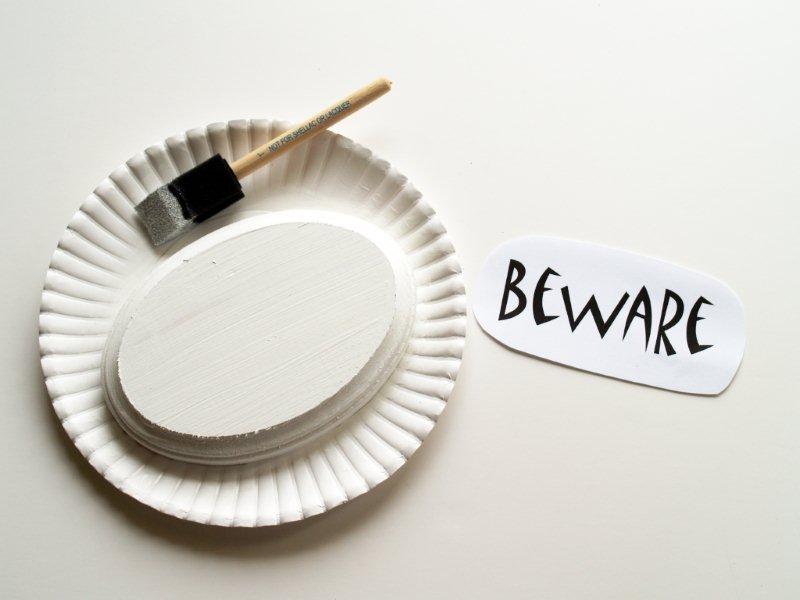
Print out a piece of paper with your word on it – make it a little smaller than your plaque.
(If you have a handy dandy machine that does vinyl, you could use that to make your word. I don’t have one of those so we’re doing this old school.)
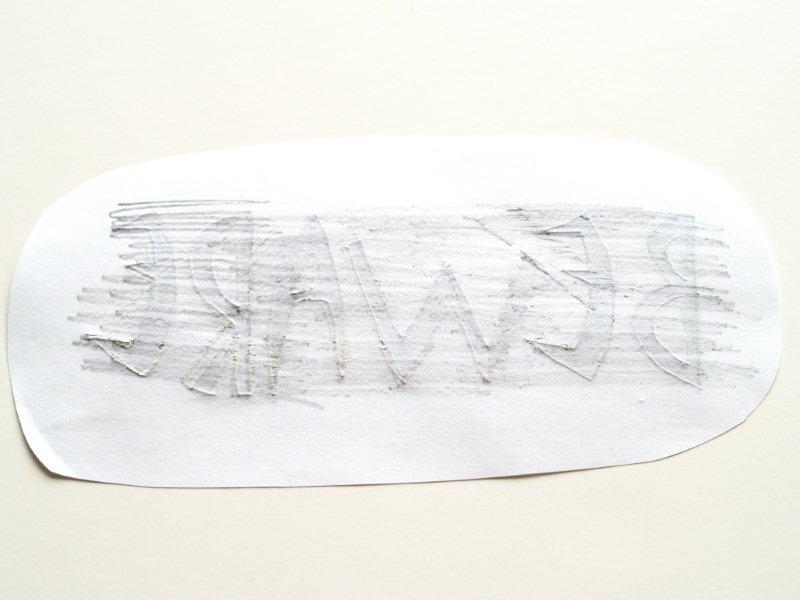
Flip your paper over and cover the lettering with pencil shading.
Flip the paper back over and center it on your plaque. Trace your letters with a pencil.
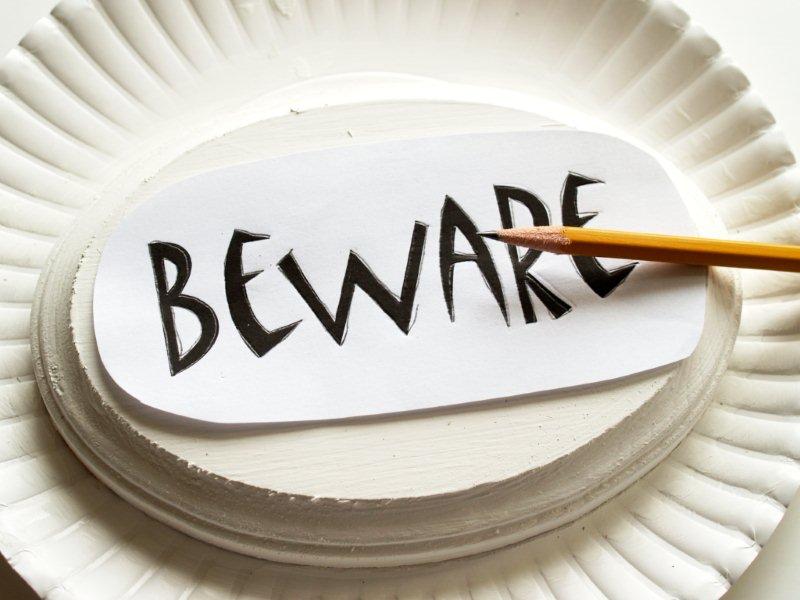
This will transfer a light outline of your letters to the plaque.
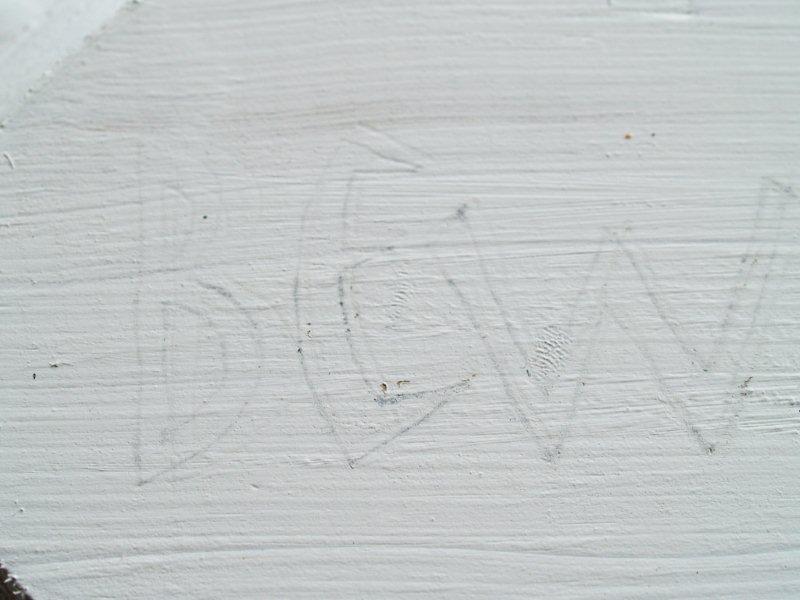
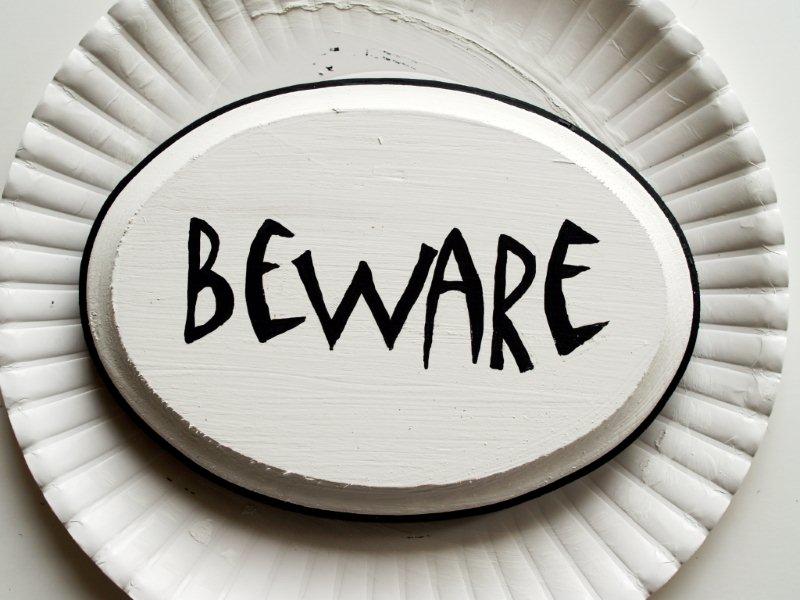
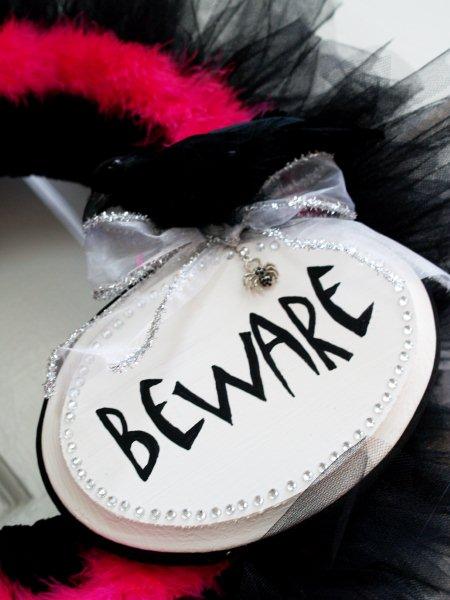
Fill in the letters with black paint. I also painted around the side of the plaque.
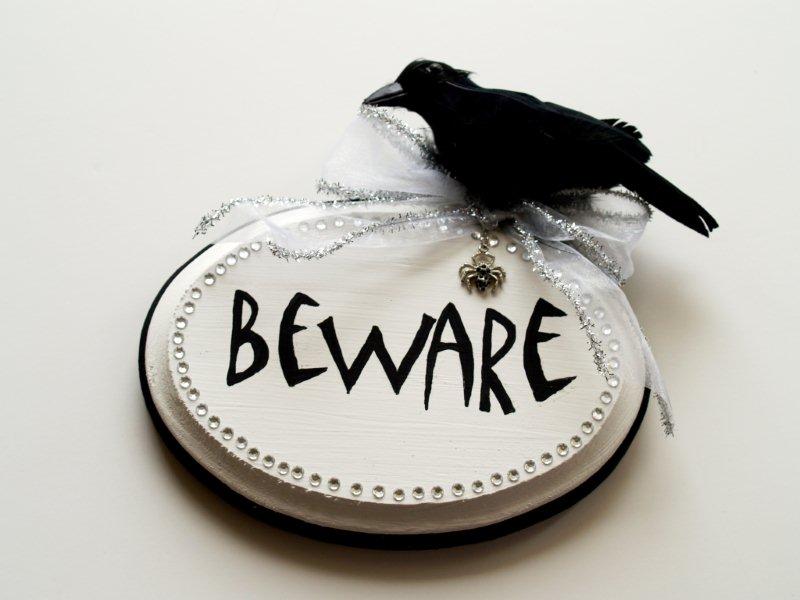
Now to bling things up a bit.
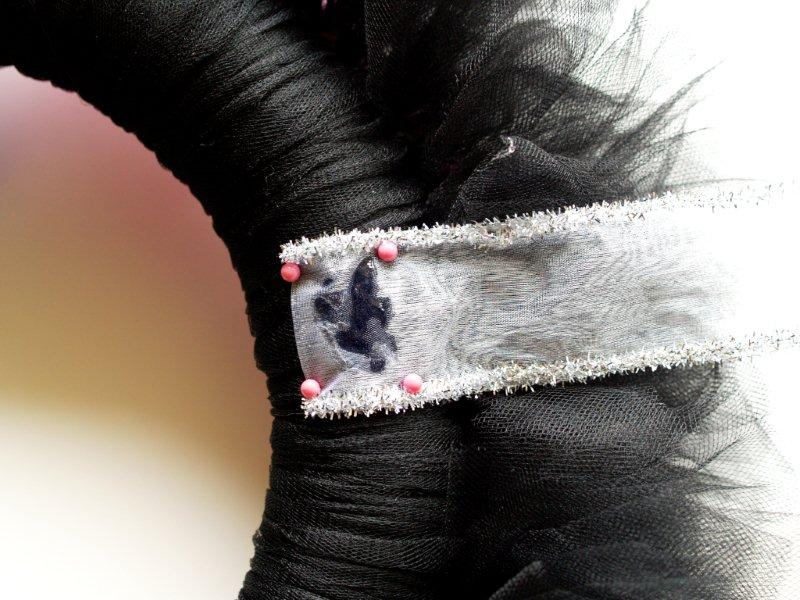
Add a border of rhinestones around the edge. These are sticky rhinestones so they’re super easy to put on.
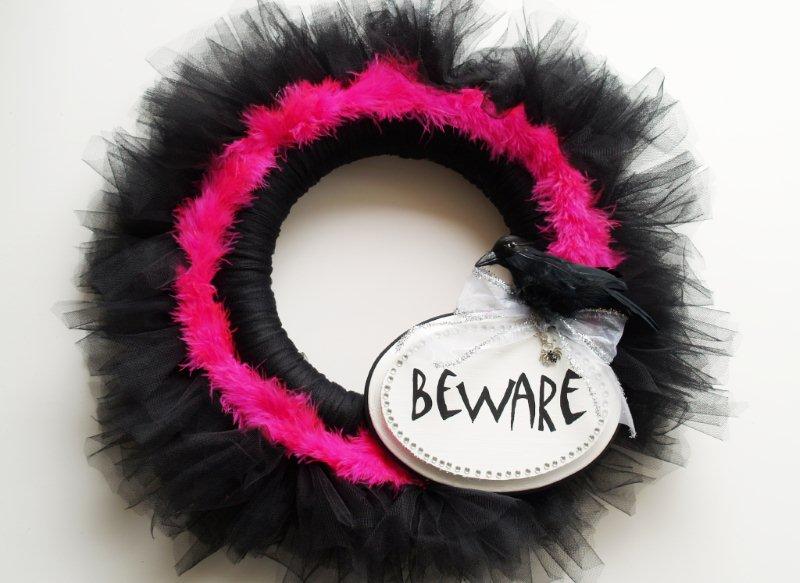
Add a bow and your crow. This crow has an alligator clip on the bottom so it just clipped to the ribbon.
Glue the bow to the plaque – a little off center.
I also added a little spider bead on a chain that dangles from the bow.
Glue the plaque to the lower right side of the wreath.
Make a bow to hang the wreath from if you need to. Cut long strips of ribbon and loop them, then pinch the centers together. Wrap them together with another strip of wired ribbon and glue that down. Make a small loop and glue that to the back to hang everything from.
Cut a strip of ribbon double the length you’d like the wreath to hang from and glue that to the back of the bow as well.
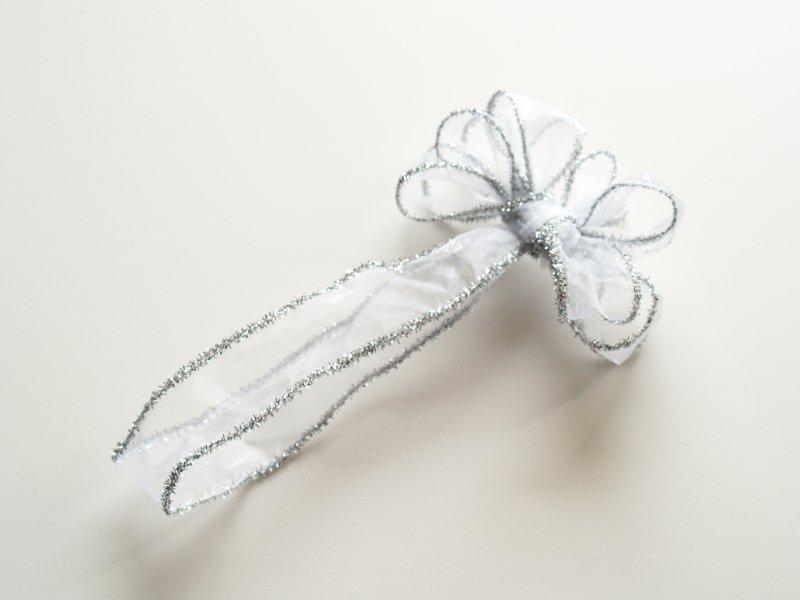
Glue the bottom of the hanger to the back of the wreath. I also added in some stick pins to make sure it will hold.
All done!

I love that is says Beware. It’s so generic a warning.
“Beware – there is a Scary Crow guarding the door”
“Beware – there are ric rac and bacon lovers that live here”
“Beware – these people think pink is a good idea for Halloween decorations.”
It covers so many bases.
Mr. F.T. also thinks it looks a little like a Halloween decoration at a bordello.
I kind of like that idea.
What do you think?
I’m entering this in the Halloween CSI Project Contest!
![]()


LOVE IT!!! Really, it’s awesome and so unique! I transfer my words the same way. Wish I had one of those fancy cutters, though.
~ The Speckled Dog
LOL – I love it! I love that you used the pink – you trendsetter, you!!
I think it’s great! It says.. I’m scary, but I have a sensitive side!! :)
Does it count as scary if it makes me giggle because it’s so cute? ;)
I love this!!
Your so creative! i really like it! I love your blog!!
This is adorable. I really like it. I’m doing a whole crow thing so I am going to do this! Thanks.
You have a great blog too!
Blessings,
Debbie
Bev, it is so fabulous! I love the crow, and I have a sudden urge to tie netting around a wreath!!
Another great post, Bev! What a fun wreath! I love the little spider charm that you added to the plaque. It adds just the right level of scariness! :)
Hands down, this is the CUTEST “scary” wreath I’ve ever seen!! Love the pink!
Wow that is so pretty -you make it look so easy and your description of how to make is entertaining too :-) Thank you for sharing
Being a fellow flamingo fan…I’m totally down with the pink. Frankly, why not pink? LOVE.IT.! :D
Are you trying to make me not want to walk throught the front door by putting a spider on it?
Wow says you can’t have pink and black?! I am totally lovin’ it! You pulled it off!
I LOVE this! And I love how you used pink instead of orange… and it still totally screams halloween to me! You are amazing :]
LOOOOOOVE it!!
Kara @ Mine for the Making
SO DARN CUTE! I love it! i TOTALLY did a tulle wreath for my daughter a few months ago… but I didn’t fill it in as much as you… (i didn’t have all the tulle colors i wanted) Anyhoo, I wanted it to look fuller like yours. Love the the crow and the black and pink, well done! Jen
this adorable! and pink?? for halloween?? LOVE it! i am soo making this when i move into our new house! yay!
this is too cute bev. Although I’d be really tempted to make myself a matching tutu to open the door with! hee hee
I love the pink and black! Awesome wreath!
this is so OOO adorable, i have a ton of orange tulle maybe ill make one…we all know i love WREATHS!!!
Awesome Job!! I really love what you did!
Nice tip for transferring the letters too. :D
KareyEllen
KareyEllenDesigns.blogspot.com
I LOVE love luv it! One of my favorite color combos is black and pink! You nailed it with this project! Gorgeous!!!!
Oh my gosh, I *love* the bordello comment!! Honestly, this is too cute (between the pink boa and the glitz) to be scary. :) But semi-scary maybe!! Love it, Bev!
Um. I’m sorry.
Clay bacon? For real, Bev? :P
I love your method of letter transferring. I need to get on ball with that, because a Cricut and a Silhouette have I not.
Also, did you use a paintbrush to fill in the letters or did you use some sort of paint pen or just your mind powers?
If I could paint with my mind the world would be a much pinker place.
I used a little brush. :)
Wow! That is way awesome! I love that you’re using pink :) Sometimes I forget that that could be an option. Long with purple. Why does it always have to be orange and black? :P Great job, keep up the good work. Oh, and thanks for giving that tip on transferring. I’ve never seen that method, and how easy is that? Awesome!
This is very cute not scary!
How stinkin’ cute is this?! I just love what you did with the tulle, well of course I love the whole thing! And you know I’m all about the bling!
SO SO SO cute! I love it! Gonna make one!
You should come link this up at Making It With Allie!
Allie
AllieMakes.Blogspot.com
I like it. Very unique idea.
Um, I’m totally loving the pink for Halloween! Trend setting is a very good thing! :) Love this idea and can see versions of this for all kinds of things! Thanks so much for sharing! I’m a new follower and would love for you to come check out what I’ve been up to at http://craftsandsutch.blogspot.com. :)
Erin
that looks great, pink and all! thank you for the great tutorial, especially for the plaque. love that!
wow! this is awesome. great tutorial also. must make! great job and color choices. plus-i love crows.
I knew as soon as I saw “Bacon is beauty” that I was your newest follower lol. LOVE everything about this post!!!
I think I need to swipe this from you. This is fabulous, and the flamingo pink would go with my little Florida shack so perfectly. Your stuff is always awesome.
I think it looks great and I like the pink! Thanks for stopping by sharing your project with us at Anything Related!
{Rebekah}
Ummm….I LOVE THIS! I think it’s my favorite Halloween wreath I’ve seen!!! SO FUN!
visiting from it’s so very cheri. What a cute idea!
That is BEAUTIFUL! I love the pink! Thanks so much, I’ll be linking.
That bird in the wreath is a fun touch!!!
I’m a new follower and look forward to meeting great new blogging friends! Your blog is super cute :)
Hope you can stop by and follow back when you get a chance :)
Happy Wednesday,
Shopper Gal
http://www.shoppergal.com/
its really great…looking so cute…thanks for nice tutorial….
I think I’m loving the black/pink Halloween combo. Very unique! And where were you a week ago when I made my own Halloween wreath and didn’t know how to transfer my spooky message to my wooden sign? Your method would have been much faster than cutting out every darn letter individually! I may have to hit the craft store tonight and start stocking up on netting. Yours looks great! Spotted you over at We Did It Wednesday.
I love it! And I love that hot pink is secretly making it’s way into the Halloween colors… :) Thanks for linking this up. Have a wonderful day!
The crow is very scary!
I love how this matches your witchy towels (at least if my colors on my computer are right).
I did the boa wreath last year…I need to spruce it up…maybe it needs a crow!
Love the use of pink in your halloween decorations. (Both my daughter and I love pink!)
So ca-ute!! :)
This is GORGEOUS! I love it! I had no idea you could buy boa material on a roll at Joanns! I especially love that you blinged out the beware sign. This is just fabulous. I’m dying to make my own now! Thanks for the tutorial in case I ever get around to it. LOL
Corinna
LOVE IT, LOVE IT, LOOVVE ITT!
I love it!!!
I also think that I would totally hang this at my house!!!!
=)
I just said out loud to no one in paticular “that is pretty freaking cute” haha!
I LOVE this!! Thanks for sharing! :)
The combination of netting and feathers and the colors, made me think of something, um, you’d entertain your man with! I just couldn’t help myself–I love the pink.
Wow I LOVE that! Thanks so much for the tutorial! I especially love the addition of the raven. :)
Love it. I googled “tulle halloween wreath” and found you. I think I might have get to the craft store tonight. Thanks.
~Kyleen
This is so awesome!! thanks for sharing
Love the color choices! Thanks for linking this one up to Thrilling Thursday too!
~Lori S.
Thrilling Thursdays @Paisley Passions
Adorable! I think Pink for Halloween is a great idea.
What a pretty wreath! Thank you for sharing!
This would be great for us…not to scary for my girls (and me haha). Loving all of the little details, especially the rhinestones on the sign.
Super cute! Love it!
Very CUTE!
Stopping by from the 504 Main hop and look forward to seeing more great stuff on your blog.
i love this! how cute and easy! stopping by from fun to craft. i’m so glad you list all the crafty memes you link up to in your sidebar. i’m always looking for some and when it’s time to link up, i can’t remember any!!!
This is adorable…so cute and I LOVE the pink. I am not much of an orange girl so this really caught my eye.
I also LOVE your cute personality.:)
How cute is this? Love the bold statement of colors. The pink is great!
Very nice! Thanks for sharing!
That is really cute!!
I’m loving this! Thanks for sharing it as a tutorial!
BEWARE! This is so cute you’re going to want to make yourself on immediately! I love it. I’m not sure I’ll make one for Halloween, but I’m thinking it would also be amazing for Christmas. Some silvery white tulle and a white boa with a dove and silver ribbon. I love it! I also think I’ll make one in pink for my granddaughter’s room with her initials. I’m totally inspired now. Thanks!!
By far the CUTEST, GIRLIEST Halloween wreath yet! Love it!
Thanks for sharing your great tutorial.
I love this idea. I have a weakness for anything wreath related. I cant wait to try it! Thanks for the idea!
~Jessica
http://www.myhappinessexperiment.blogspot.com/
Found your blog through links…If you ever need new recipes come swing by our blog. we also have a great give away going on now.. A free purse of your choice
Thank you for joining us at A Crafty Soiree again! Wow this wreath is stunning and I love the pink and black. I love that the BEWARE is done old school with pencil transfer and paint. I remember when that was the only way to get cute printing, before the advent of all the electronic cutters.
I’m a little concerned that Mr. F.T. KNOWS what Halloween decorations look like in a bordello!
Ha ha.
Actually, a very cute idea. Ominous without being icky. Good job!
I love it but I might use orange instead! :)
This is too cute! I saw a black tulle wreath last year that I loved! This is over the top adorable. I love the Halloween no longer has to be orange and black this new pink and black is so much fun~! Thanks for linking up to Topsy Turvy Tuesday’s!
Thanks for linking up with Make It Fantabulous! I am featuring you this Friday as a Party favorite! Come and grab a featured button! Joy @ mommaskindacrafty
LOVE this with the added bling! Thank you for sharing the info, too!
That turned out so cute!!
I’m featuring this on my blog today! Please stop by and grab a “I’ve been Featured Button” off my sidebar!
Super love this!!
I love black tulle. Thanks for the tutorial!
That is adorable. I love the untraditional colros for the Halloween decor. That is beautiful!
too cute. featuring your wreath on my blog!
I still can’t get enough of this wreath! Please, please, please come over to SewWoodsy.blogspot.com for my first ever link party today! This would be a fantastic project to link up!
I just wanted to stop by and let you know that I linked to this post today from the Home & Garden channel at Craft Gossip. :)
Your feature will appear in the main Craft Gossip RSS feed, on the main home page and can be found directly here
http://homeandgarden.craftgossip.com/black-wreaths/
If you would like a “featured by” button, you can grab one here!
http://homeandgarden.craftgossip.com/grab-a-craft-gossip-button/
Seriously very awesome what with the pink and all.
Oh, and I LOVE the flamingo dressed as “E” showing off his blue suede shoes. My own (little) Momma is just on her way back from visiting Graceland. Big fan of Elvis…he was our wedding mascot ~ in a tasteful way, of course. ;)
I’m not big on Halloween decorations, but this is so adorable. I am most definitely going to have this wreath on my door next Halloween :) Thanks so much for the detailed instructions!
Hi there! I was so inspired by your semi-scary wreath that I featured a winter white version on my own blog today! Thanks to your great tutorial, this was so simple to make. Thank you for sharing!
Betsey at b.bar
http://www.bybbar.blogspot.com
Love your blog and love this wreath! You inspired me to make my own, Valentine’s Day wreath (I credited you in my blog)!
Thanks, thanks!
~Peggy
http://turnerfamilyx4.blogspot.com/2011/02/valentines-day-countdown-tulle-wreath.html
Love your wreath! Plan to share on my Halloween blog at
Gracias las ideas estan fantasticas, me gustan todos. Gracias por compartir.
this wreath is absolutely gorgeous! I’ve just started getting ‘into’ them and will definitely be trying my hand at something similar to this one – thanks for sharing!
Was wondering what type of glue did you use? Thanks & btw this wreath is awesome!! :-)
There are many ruins that you can take a look at here. Complimentary breakfast is available on deluxe
& super deluxe rooms only, that rate from Rs. a stream where people can sightsee
the local wildlife (birds, crabs, fish, frogs, many exotic flowers,
etc.
This vehicle can accommodate a large group of people for it also allows passengers to easily communicate
with each other while on the road considering its ideal seat arrangement.
Some of these include the Melbourne Museum in Carlton, the largest and one
of the most popular museums in the Southern Hemisphere.
Numerous qualified experts from several countries such as
Persia, Italy and French were summoned to build his masterpiece.
I’ve got to make this wreath! So creative! Love your blog!