A couple of weeks ago I was browsing through a magazine and came across this pillow. Little birdies in a cage = super sweet pillow. $100 price = not super sweet.
So I set out to try and find a birdcage I could use for my version. I went to Graphics Fairy – she has a HUGE resource of vintage images and she lets you use them in any way you want. How nice is that?
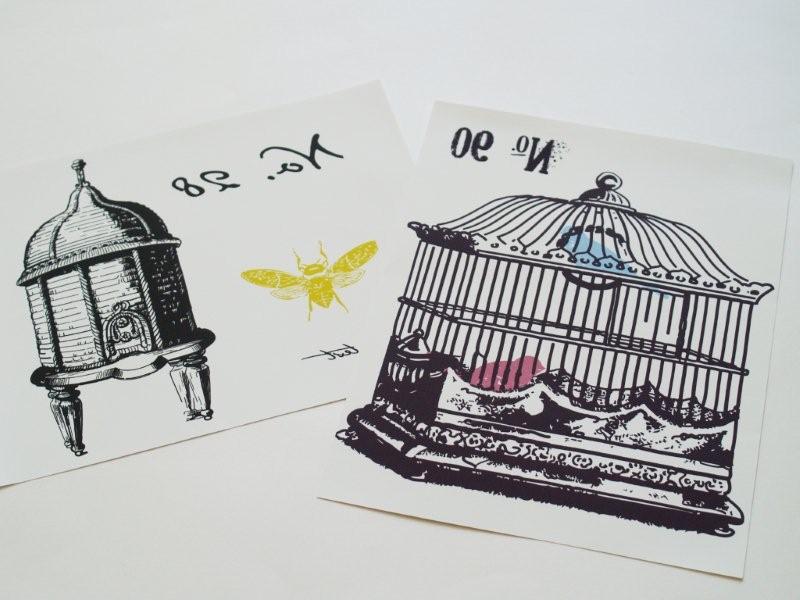
She has several sweet birdcages. This is the one I chose:

Love all the scrolli-ness and the little number.
But I also saw this image there this week:
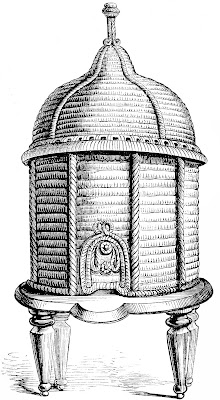
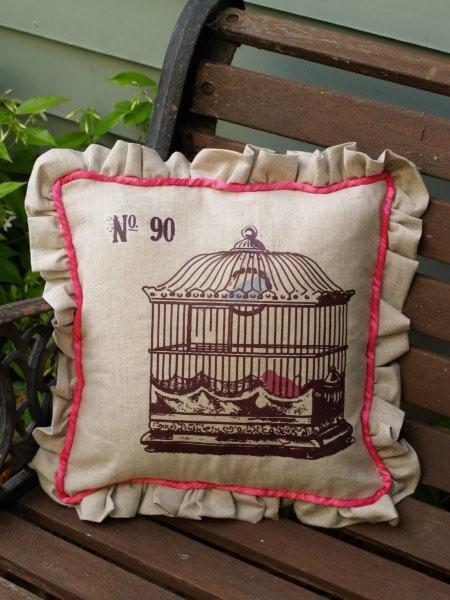
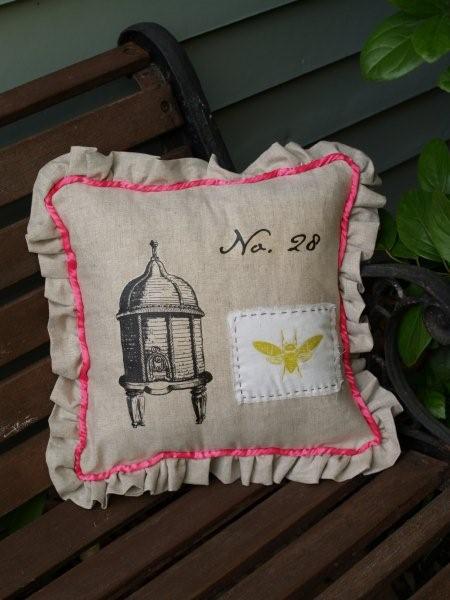
Both so sweet. So I decided to make two pillows. :) I took both graphics into Adobe Illustrator, traced them, made the images a little more rustic looking, and added some birds and a bee. I also changed the number and added numbers that meant something to me: 90 is the year we was married and 28 was the date. :)
Note: Up until a few minutes ago I had titled this post: Birds and Bees Pillows. Huh. That doesn’t sound right. Backspace, Backspace, Backspace.
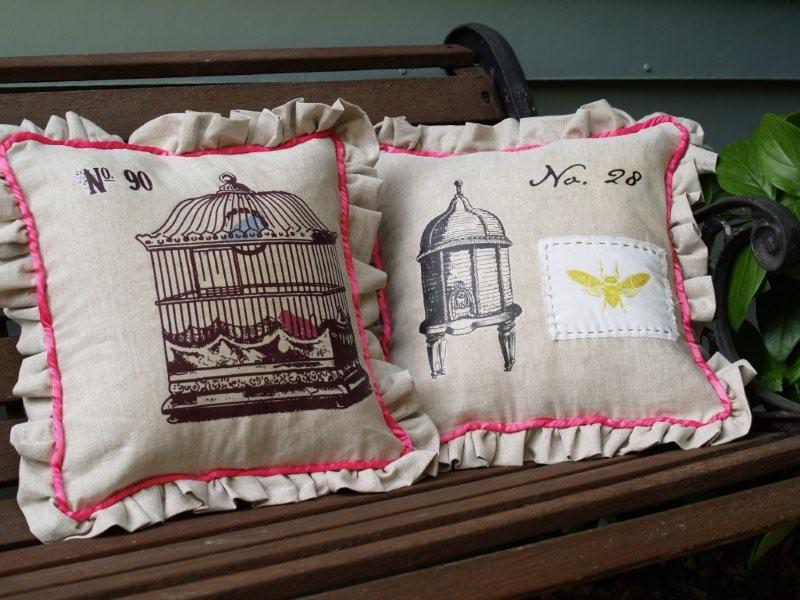
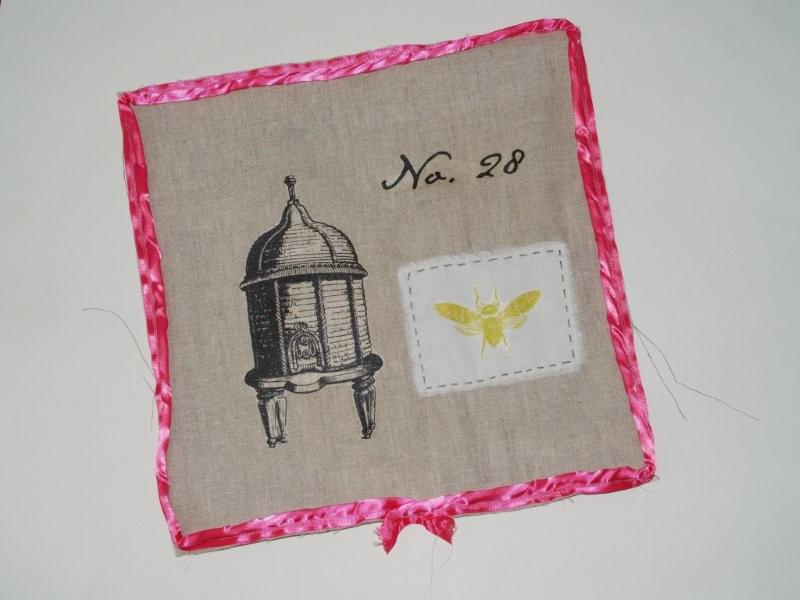
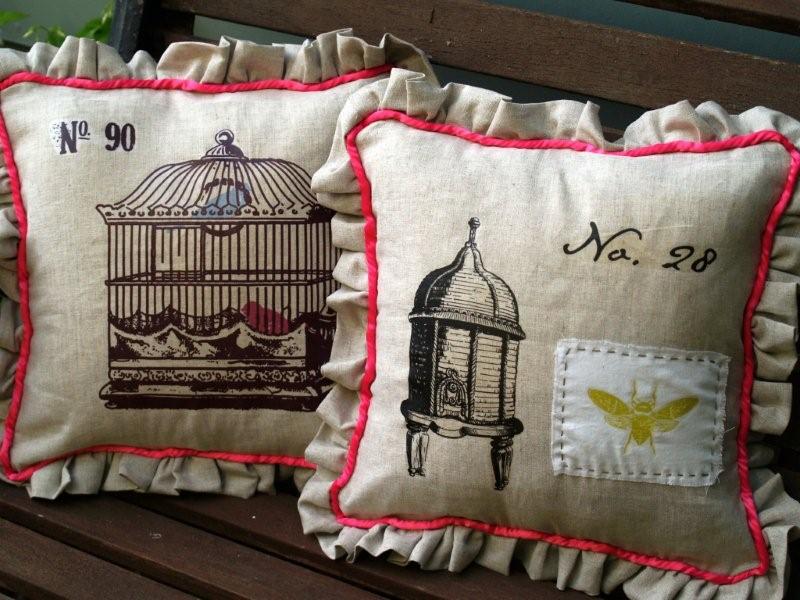
Here are the finished pillows. :)
Pillow Fronts:
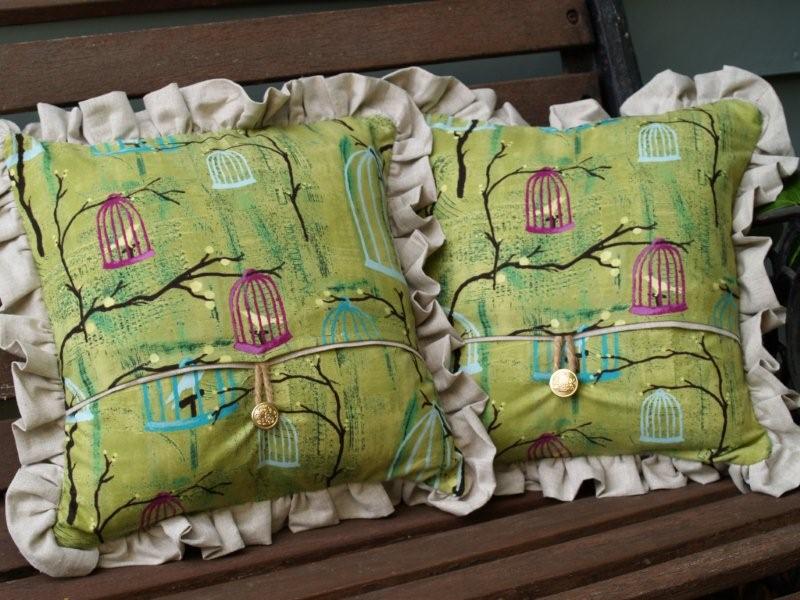
Backs:
I will confess, I’m in love. :)
Here’s a tutorial if you’d like to make your own.
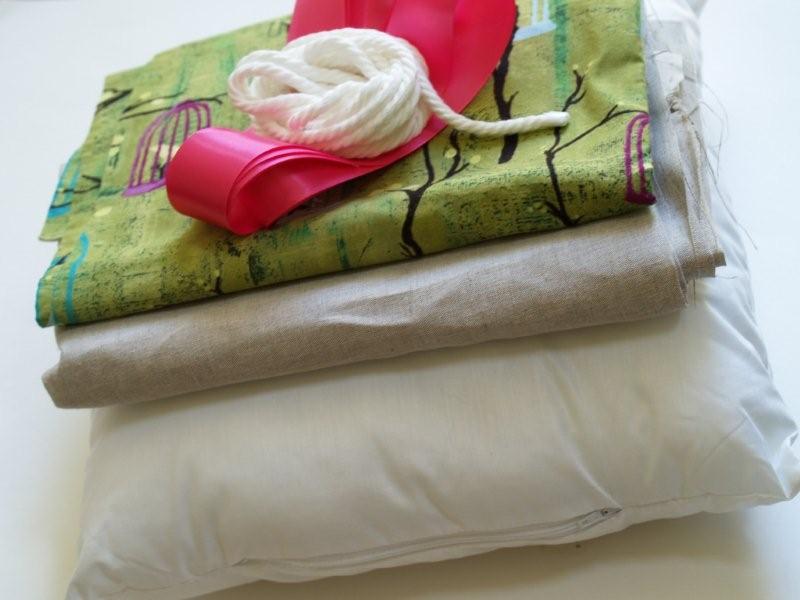
I gathered up the supplies. I used linen for the top, a Michael Miller print for the back, satin ribbon and cording for the piping, 14″ pillow forms, transfer paper, jute, a button, a small square of muslin or light fabric for the bee, and some contrasting embroidery thread. (I’m going to give the directions for just one pillow – you’ll just do everything twice if you’re making two. )
For the fabrics, I cut out:
14″ square out of linen for the front
1″ x 14″ piece of linen for the back fold
2 rectangles for ruffle out of linen – 5″ x 58″
10″ x 14″ rectangle for the top of the back panel
7″ x 14″ rectangle for the bottom of the back panel
4″ piece of jute for the back loop
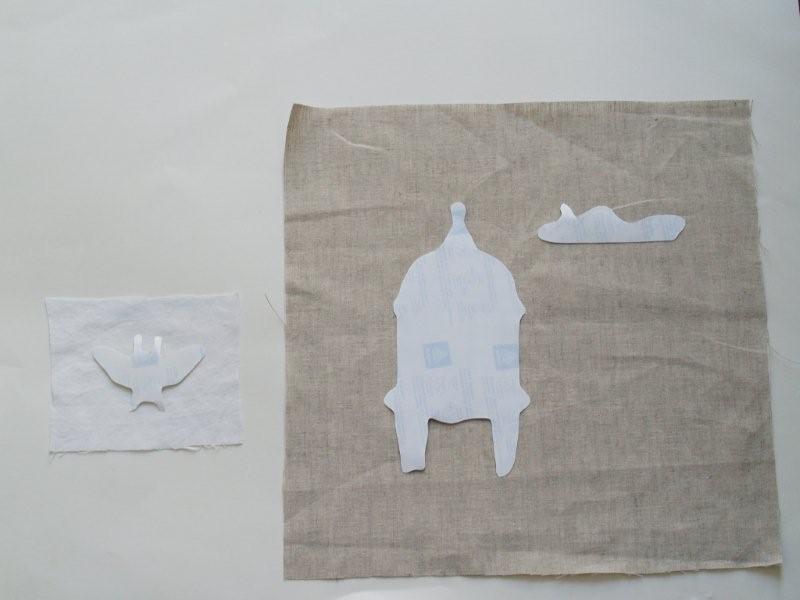
For the transfer, I printed out the images, in reverse, onto Avery transfer paper.
On the beehive transfer I also put the word “test”. I wanted to make sure the transfer would work well on the linen.
Following the instructions for the transfer paper, I cut around the images closely, and laid them on the linen where I wanted them.
Then I ironed them all on. I think I need a new iron. Mine is leaking gunk. Ugh.
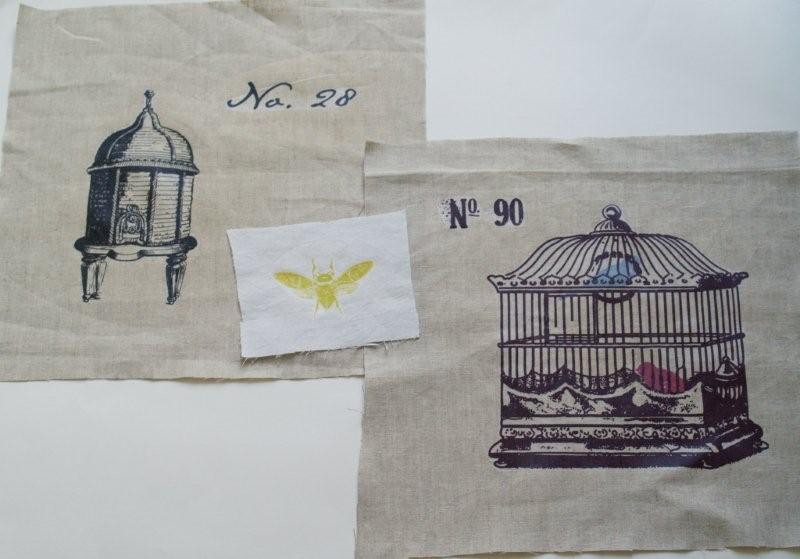
After that I trimmed around my little bee and sewed it onto the beehive panel with a running stitch. I used all 6 strands of the floss, then I frayed the edges of the muslin.

So the front panels are ready, on to the back.
I hemmed the bottom of the top panel and the top of the bottom panel. Then I folded the small 1″ linen rectangle in half and sewed it to the top panel, with the loop of jute between.
I laid out the two panels, overlapping them, and lined them up to make a 14″ square. I basted the sides together to hold them in place. Then I marked the spot for the button and sewed that on, so the jute would loop around it.

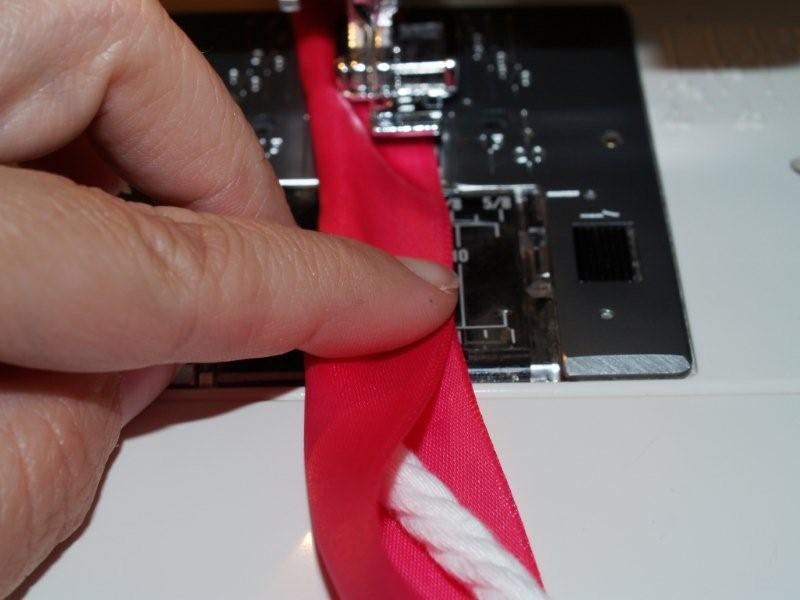
Now on to the piping. I wanted to do a satin piping, I love the contrast with the linen. I cheated just a little and instead of using satin fabric, I bought satin ribbon. To make the piping, I wrapped the ribbon around the cording and sewed it together, about 3/8″ from the edge.
Once the piping was ready, I pinned it onto the pillow front panel, overlapping the ends at the bottom center of the panel. I sewed around the piping, just inside the original piping stitching line.
Next step is to prepare the ruffle. I sewed the two long rectangles together and then folded the long sides together and gathered the cut side. I did this by holding the top thread up by the spool as I sewed. This causes the ruffle to gather as you sew. I have found that this works better if you don’t sew too fast.
I pinned the ruffle on the top panel and sewed around it.
Last step! Sewing together the front and back panels. :) I pinned the two panels, right sides together.
In sewing these together, it’s easier to sew with the top panel facing up, so you can see where the previous stitching lines are. You want to sew as close to the piping as you can, inside the other stitching lines.
I clipped the corners and turned right side out.
Voila! Two sweet pillows for a lot less than $100!
(I had to take photos outside – it’s a little too dark for a decent photo inside- but these are going on my couch that will be recovered later in the year. When I get brave enough. )
I’ve included the files for you to download if you’d like to make your own. Feel free to use my numbers :) or cut those sections out. If you would like your own custom numbered images, send me an email and I will make them for you.
Download here: (This file is kind of biggish. I wanted to keep the images high quality for printing.)
[dm]2[/dm]
![]()


Oh I just love these, I have been looking for this type of pillow for my outdoor wicker set (lots of florals and birds etc is the look I’m after) These are so adorable and I can’t thank you enough for sharing the tutorial. These are simply lovely!
By the way, I’m really new to blog land so its taken me a bit to figure it all out like “Following” and what that means, so now that I know, I can’t wait to check back frequently.
Terry
Oh my gosh–these are fabulous!!! And you are amazing!!! I just love your project–it is so special!
Hugs,
Cindy Adkins
http://www.recoveryartist.com
New Orleans, Louisiana
Luv lUv LUV them!! Thanks for sharing the tutorial with us(ME:) I {heart} your ideas! Happy Tuesday!
The pillows turned out way cute!!! I love them. :-)
Swoon! Where are mine?! You could totally sell these to Anthropologie. They are absolutely perfect.
These are fabulous. I loved the designs and the tutorial!
So, so, cute. I have been itching at getting my sewing machine back out. This just may have done the trick.
Thanks so much for the inspiration.
Love these! Especially the hot colored piping. Your stuff is always so cute and clever.
Great job! Very cute, too.
They are amazing! Thanks so much for the tutorial and the download! I’ve been hesitant to use the Avery transfer paper but your transfers look great!
FABULOUS! I love them … great job!! The ruffle is perfect & I love the images you selected!!
Visiting from Design LIFE!
Allison
These are darling! Thanks for the great tutorial and for linking up with Sugar & Spice.
Fantastic. Yours are much nicer than than your inspiration piece.
Kathy
Those pillows are terrific. I love the prints you used and I love the fabrics and colors. Great tutorial. Now I just need to practice my sewing skills that I just took up.
Wow! These are gorgeous! I had no idea that transfer paper would work that well for something like this! The textures and colors are just beautiful!
I love the pillows and the backing fabric is just perfect!! Can you tell me where you got the bee graphic? I really like it and would love to have a copy of it. Became a bee keeper last summer and am loving all things bees these days!
Thanks! I got the bee image at clker.com. It was a public domain image – nice and free. :)
Wow I really like this. You did such a great job and the pillows look amazing. It was worth saving the money but truth is your pictures are one of kind since you made them your own…and then made them into pillows! I’m so impressed!
Love it!
Blessings,
Debbie
Cute!!! I want to make me some.
You did an amazing job on the pillows. I have been wanting to made some but not sure how to transfer the picture to the fabric. Sounds pretty easy. Thanks so much.
I’ve got a chair to upholster. Let us know how the sofa goes.
~ ~Ahrisha~ ~
It was a lot easier than I thought it would be too! Thanks for the sweet comment. I’d love to hear about your chair. :) I’m afraid of my sofa. Very afraid.
The pillows are absolutly adorable! Love the birdcases you used from Graphic Fairy. So cute.
This cute project made my heart go pitter pat.
These are just so gorgeous. Thanks so much for the tutorial! I cant wait to give this a try!
WOW–your pillows turned out gorgeous! You did a fabulous job–thank you so much for sharing your technique.
xoxs
I love these. What a great use of the images. Very creative.
Those pillows are so cute, you did such a great job. Love them!
How sweet of you to share the ‘how-to’ for your project. I had no idea Avery made transfer paper … now I know how everyone gets those images onto fabric! LOL! I been trying to figure that out. There’s no stopping me now!
That’s so great! I’d love to see what you come up with. :)
I love the cages and the beehives. Fits in my decor! Glad to know abou the site too for some great artwork and that Avery makes transfer papers.
Wow! The giveaway was the first time I saw these. You are so talented. I SERIOUSLY LOVE these!
Wonderful! I saw these on Graphics Fairy. Really inspires me to try transfers.
Those are divine! They look like $100 pillows! AMAZING job!
Thank you so much for the tutorial and the images! That’s very nice of you to share those :) Did you print out the larger cage in a different color other than black? In your photos, it looks like a deep purple-ish, brownish color…just curious. LOVE them!
Wow, I’m absolutely floored by how great your pillows turned out! I need to get on the ball with sewing projects. I tend to avoid my sewing machine but keep collecting cool fabrics. I’ve recently purchased some fabric transfer sheets too, so I really don’t have a good excuse not to try a similar project! Thanks so much for the inspiration.
Hello!
I really like your blog, and these pillows are gorgeous. But I really can’t get it how you put a pillow into a pillow case? I am still a beginner in sewing and I am sorry for bothering you, but I really can’t get it. Is there a zipper somewhere?
Regards