These Patchwork Gingham Pillows are so fun to stitch up! They look great with the hand stitched quilting as well!…
Read More
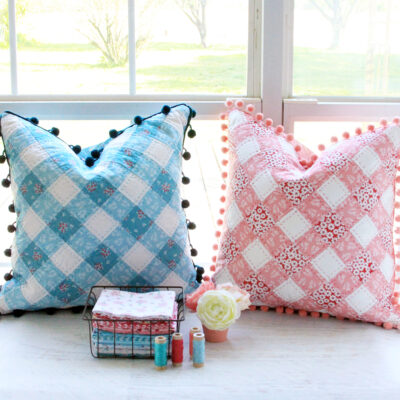
These Patchwork Gingham Pillows are so fun to stitch up! They look great with the hand stitched quilting as well!…
Read More
Happy Friday!! This month we’re doing Playroom projects for Must Have Craft Tips and I love the idea of adding…
Read More
It’s week three in our Vintage Adventure Blog Hop! I’m so excited about all the projects that these super talented…
Read More
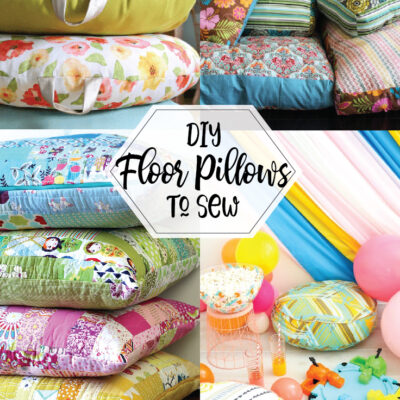
I love making new pillows. I love making Pillow Covers even more. Cause I’m fickle. I can make a sweet…
Read More
I just love making fun Christmas things for the house -but sometimes storage is an issue. (More for Mr. FT…
Read More
So last week I showed off my new Night Stand/Jewelry Cabinet for my bedroom. Yay for getting some of the redo done…
Read More
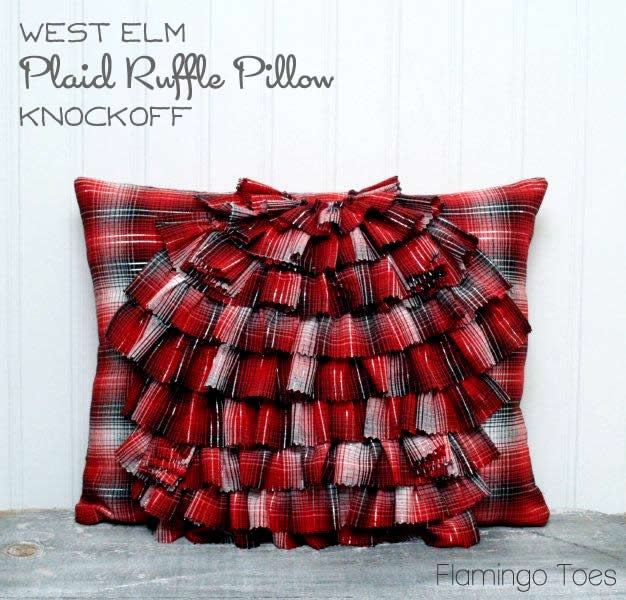
It has been approx. five months since I made a new pillow and almost 6 months since I made something…
Read More
So this is the last installment in the Handmade Gifts for Christmas this year! If you’ve missed the first two…
Read More
There’s something about writing a blog that makes you feel the need to come up with cutesy names for projects…
Read More
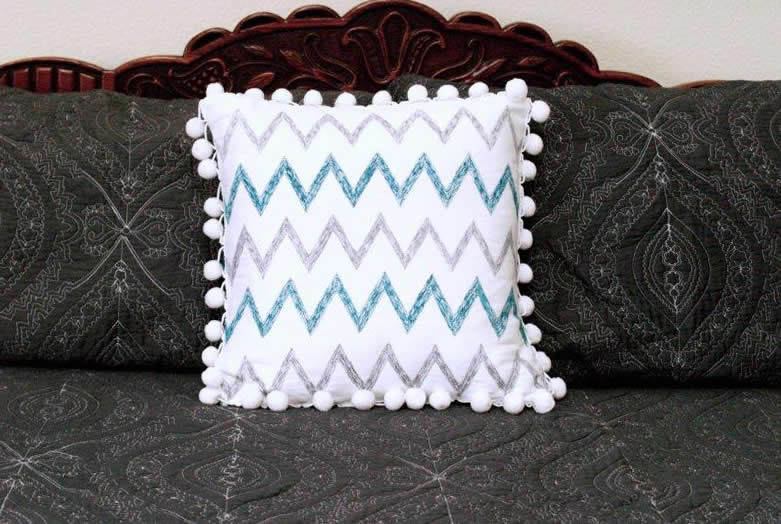
Can a person have too many pillows? I sure hope not. Maybe so though. Have you seen “Never Been Kissed”?…
Read More
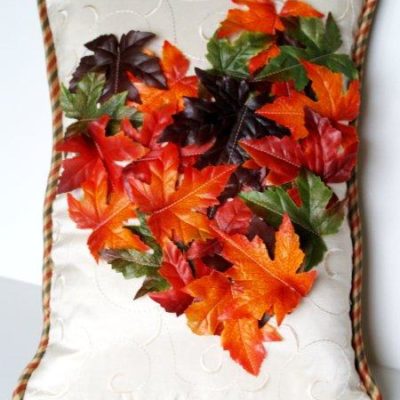
Oh my Goodness!!!! Can you see the Happy Dance? No? It’s just as well. It’s not pretty. But the reason…
Read More
Sewcialites 3 Block 16 is finished! ✨
This week’s block is Florabelle by Heather @ mysewquiltylife and I had so much fun sewing this one. I’m still stitching along with Correspondence and used a sweet blue + pink combo of prints for this block. 💙🩷
We’re officially just over halfway through the sew along (how did that happen?!) and I’ve loved seeing all these fun blocks come together each week. Every designer brings something so unique and this one feels especially sweet and floral.
My friend @the_tattooed_quilter`s Batik collection is shipping this month! I am honored to have my Patchwork Blooms quilt be made up in this gorgeous collection😍 Keep your eye out for Christopher`s Holiday Happiness this month!!
You can shop Patchwork Blooms in my shop🪡🌸
My friend @the_tattooed_quilter`s Batik collection is shipping this month! I am honored to have my Patchwork Blooms quilt be made up in this gorgeous collection😍 Keep your eye out for Christopher`s Holiday Happiness this month!!
You can shop Patchwork Blooms in my shop🪡🌸
I hope your June is off to a lovely start! A new month means a new $5 pattern 🌟 This month only you can snag my Starlight pattern for $5!
I hope your June is off to a lovely start! A new month means a new $5 pattern 🌟 This month only you can snag my Starlight pattern for $5!
We`ve finished our Sunday strolls on Main Street! 15 Sundays, 15 stops, 15 lovely little shops❤️
And yes, we do have a bundle😉 Shop all the Main Street Needle Minders in the shop!
Tell me your top three favorites!
We`ve finished our Sunday strolls on Main Street! 15 Sundays, 15 stops, 15 lovely little shops❤️
And yes, we do have a bundle😉 Shop all the Main Street Needle Minders in the shop!
Tell me your top three favorites!
A new cheater print and two widebacks for Correspondence 💕💌
What do you think?! I hope you guys love these. You can find Correspondence at your favorite quilt shops and in my shop!
A new cheater print and two widebacks for Correspondence 💕💌
What do you think?! I hope you guys love these. You can find Correspondence at your favorite quilt shops and in my shop!
✨ Sewcialites 3 Block 15 ✨
This week’s block is the Split Star Block by Lissa @modalissa and I’m still happily sewing along with my Correspondence collection! 💌🌸
I paired the prints with Dainty Daisy Vintage Pastels on Cloud for the background and I love how soft and sweet it makes the block feel. The angles in this star are so fun—and those little lace prints might be my favorite part! 😊
My Correspondence Machine Embroidery USB is now available!
This is my first collaboration with @rbdandme and I am so excited! I hope you all love these projects as much as I do 💕
My Correspondence Machine Embroidery USB is now available!
This is my first collaboration with @rbdandme and I am so excited! I hope you all love these projects as much as I do 💕
I hope your May was full of fresh cut blooms!
Delighted to share this beautiful bunch with you for the May Needle Minder of the Month unboxing💐
I hope your May was full of fresh cut blooms!
Delighted to share this beautiful bunch with you for the May Needle Minder of the Month unboxing💐
