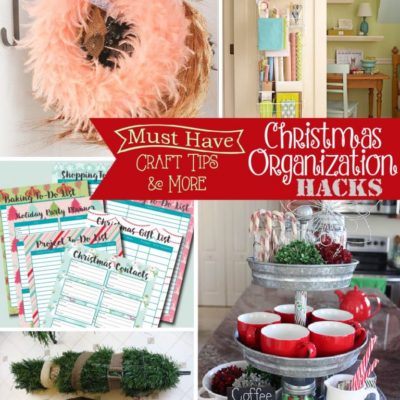
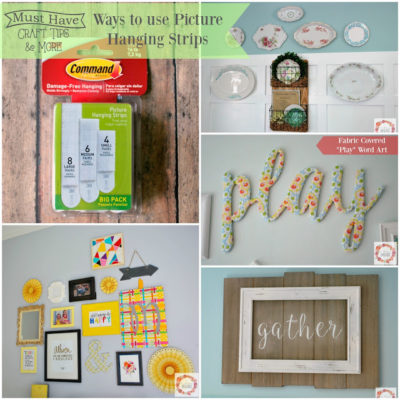
Hello friends! Welcome to another week of Must Have Craft Tips! Kara from Mine for the Making here this week…
Read More

Hello friends! Welcome to another week of Must Have Craft Tips! Kara from Mine for the Making here this week…
Read More
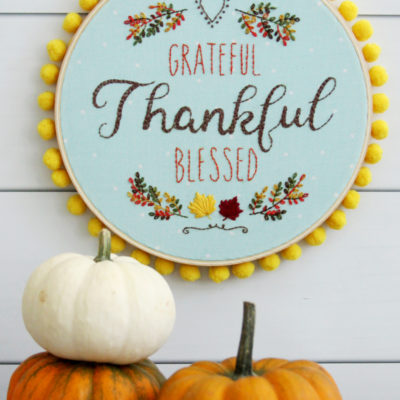
This Grateful Thankful Blessed Embroidery Hoop Art is so fun for Thanksgiving – it’s great for decor or for a…
Read More

This post is a partnership with Chesapeake Bay Candles. All opinions and ideas are my own. ;) One of my…
Read More
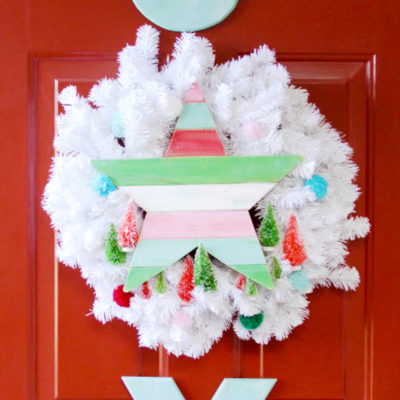
This post is a partnership with Plaid. All ideas are my own. :) I can’t resist vintage Christmas colors and…
Read More
Choosing the right color window treatments can be a bit tricky, but you can really add to the look of…
Read More
Last week I shared a fun collaboration I did with the other Plaid Creators for an entire Room Makeover and…
Read More
Hey, friends! Michele from The Scrap Shoppe here kicking off a new month of our Must Have Craft Tips &…
Read More
I have had such a blast working with Plaid this year! It’s been so fun working with different projects and…
Read More
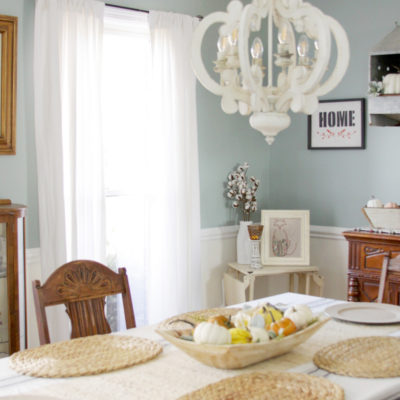
This Fall I’ve been working on some updates to my dining room and I’m super excited with how it’s coming…
Read More
Welcome to another segment of Must Have Craft Tips and More! It’s October, a new month for the series, but…
Read More
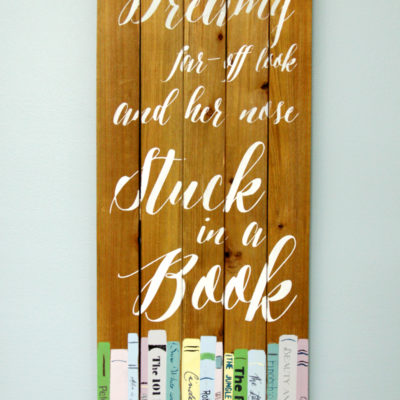
I have such a fun Disney inspired project for you today – Beauty and the Beast bookish wall art! Plus…
Read More
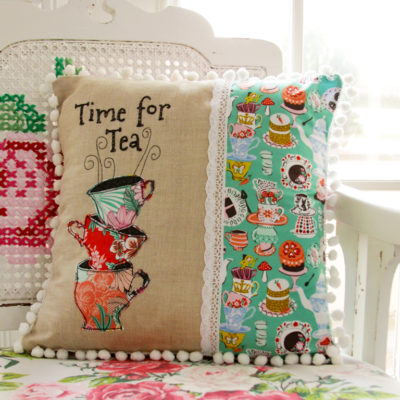
I have a fun new fabric line to show off you to you today! It’s called Wonderland and it’s by…
Read More
Hello everyone!
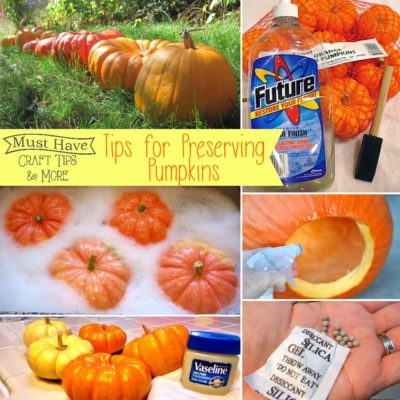
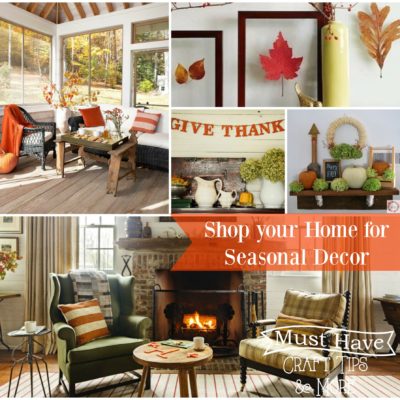
Are you ready for the last week of Must Have Craft Tips & More: Fall and Halloween Decorating Tips?
You don’t always have to go out and buy a ton of items to decorate for seasonal or holiday decorating. Just shop your home, inside and out, instead!
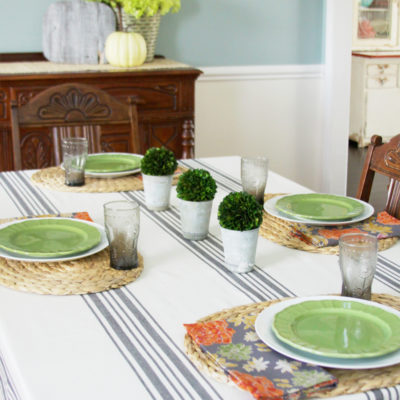
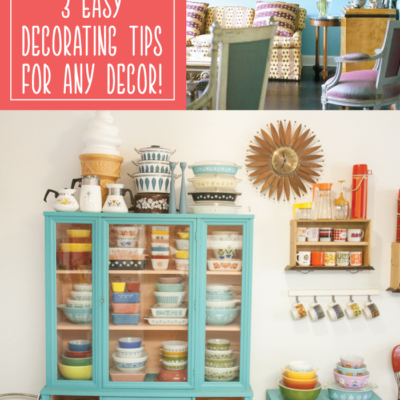
Now that it’s officially September 1, I am ready to start bringing out the Fall decor! One of my favorite places to start decorating is in the dining room. Today I’m showing off two Simple and Stylish Farmhouse Dining Room Decor ideas!
Hello again everyone! It’s Friday so time for another Must Have Tip! If you are new around here my friends,…
Read More
Welcome to another week of Must Have Craft Tips hosted by Michele from The Scrap Shoppe, Bev from Flamingo Toes,…
Read More
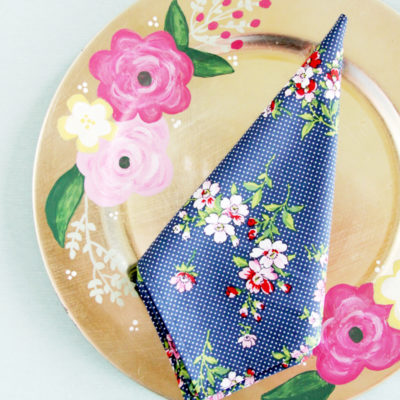
I just adore using fabric napkins! I know that it is a little extra work to wash them, but they…
Read More
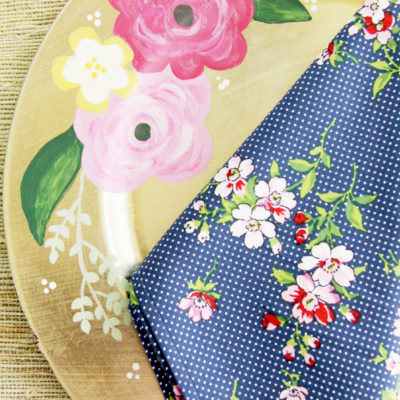
This Post is a partnership with Plaid Crafts. All opinions are my own. :) This DIY Floral Painted Chargers are…
Read More

Stitch up these sweet Be Happy and Be Kind – Hexagon Canvas Embroideries. They are so fun to make and…
Read More
Welcome to another week of Must Have Craft Tips – hosted by Michele from The Scrap Shoppe, Kara from Mine…
Read More
Block 17 of the @fatquartershop Sewcialites 3 sew along is here and this week we’re stitching up the Flutter Block by Sandy @gervaissandy! 🩵💚
I kept mine in soft shades of blue and green from Correspondence and I’m kind of obsessed with the clever little 3-D look this block creates. Such a fun design!
We’re getting farther along in the sew along and I’m loving seeing all these blocks come together. Have you made your Flutter block yet? ✨
It`s time for Cozy Autumn!🍂🧡
I`m so excited for my new fall collection, I have so much to show you!! Keep an eye out for Cozy Autumn arriving this month to shops!
It`s time for Cozy Autumn!🍂🧡
I`m so excited for my new fall collection, I have so much to show you!! Keep an eye out for Cozy Autumn arriving this month to shops!
You`ve got mail. 💌
The Yours Truly Quilt is one of those projects that just makes me smile. Whether you`re sewing it for someone special or keeping it for yourself, this is a quilt that`s full of charm from start to finish.
Find Yours Truly in the shop!
You`ve got mail. 💌
The Yours Truly Quilt is one of those projects that just makes me smile. Whether you`re sewing it for someone special or keeping it for yourself, this is a quilt that`s full of charm from start to finish.
Find Yours Truly in the shop!
Sewcialites 3 Block 16 is finished! ✨
This week’s block is Florabelle by Heather @ mysewquiltylife and I had so much fun sewing this one. I’m still stitching along with Correspondence and used a sweet blue + pink combo of prints for this block. 💙🩷
We’re officially just over halfway through the sew along (how did that happen?!) and I’ve loved seeing all these fun blocks come together each week. Every designer brings something so unique and this one feels especially sweet and floral.
My friend @the_tattooed_quilter`s Batik collection is shipping this month! I am honored to have my Patchwork Blooms quilt be made up in this gorgeous collection😍 Keep your eye out for Christopher`s Holiday Happiness this month!!
You can shop Patchwork Blooms in my shop🪡🌸
My friend @the_tattooed_quilter`s Batik collection is shipping this month! I am honored to have my Patchwork Blooms quilt be made up in this gorgeous collection😍 Keep your eye out for Christopher`s Holiday Happiness this month!!
You can shop Patchwork Blooms in my shop🪡🌸
I hope your June is off to a lovely start! A new month means a new $5 pattern 🌟 This month only you can snag my Starlight pattern for $5!
I hope your June is off to a lovely start! A new month means a new $5 pattern 🌟 This month only you can snag my Starlight pattern for $5!
We`ve finished our Sunday strolls on Main Street! 15 Sundays, 15 stops, 15 lovely little shops❤️
And yes, we do have a bundle😉 Shop all the Main Street Needle Minders in the shop!
Tell me your top three favorites!
We`ve finished our Sunday strolls on Main Street! 15 Sundays, 15 stops, 15 lovely little shops❤️
And yes, we do have a bundle😉 Shop all the Main Street Needle Minders in the shop!
Tell me your top three favorites!
A new cheater print and two widebacks for Correspondence 💕💌
What do you think?! I hope you guys love these. You can find Correspondence at your favorite quilt shops and in my shop!
A new cheater print and two widebacks for Correspondence 💕💌
What do you think?! I hope you guys love these. You can find Correspondence at your favorite quilt shops and in my shop!
