This month for Must Have Craft Tips we’re sharing all sorts of Laundry Room Ideas! So you know I had…
Read More
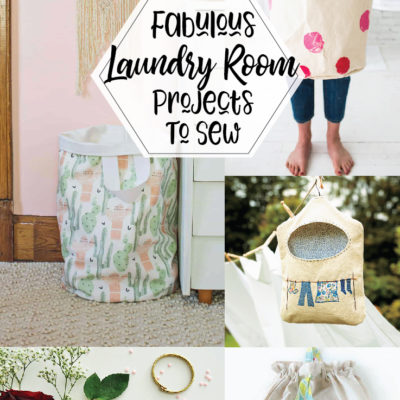
This month for Must Have Craft Tips we’re sharing all sorts of Laundry Room Ideas! So you know I had…
Read More
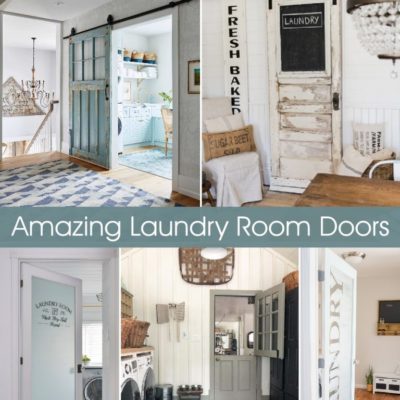
Michele from The Scrap Shoppe is here this week with a new room to highlight and some amazing inspiration! I…
Read More
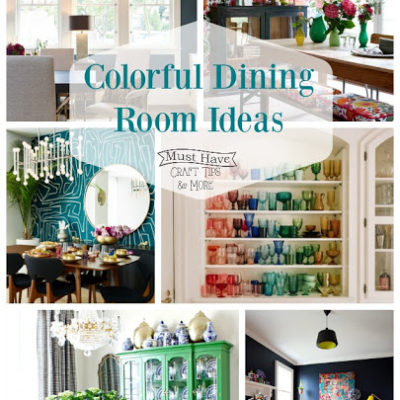
Allison from A Glimpse Inside is here this week with some gorgeous Colorful Dining Room Ideas!! ~~~~~~~~~~~~~~~~~~~~~~~~~ Hello everyone and…
Read More
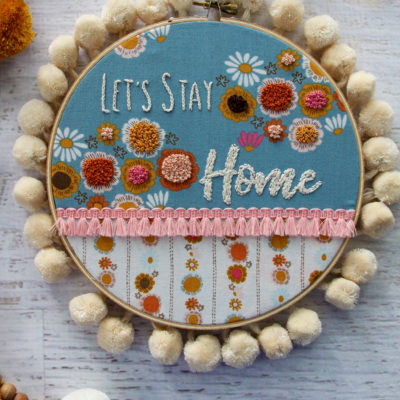
Some fabrics are just meant to have fun embroidery added to them and when I saw the fabulous Guinevere line…
Read More
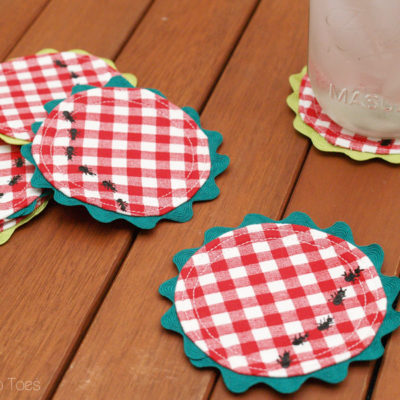
These Easy DIY Gingham Summer Picnic Coasters are perfect for any summer gathering or just to add a fun bit of…
Read More
How about a free pattern for kicking off the weekend?!
Heart to Sew is a fun free pattern with @rileyblakedesigns in my Dainty Daisy basic and I think it deserves another feature on the gram!
Download this free pattern today!

How about a free pattern for kicking off the weekend?!
Heart to Sew is a fun free pattern with @rileyblakedesigns in my Dainty Daisy basic and I think it deserves another feature on the gram!
Download this free pattern today!
The Gazebo Block from Doug @dougleko is here for Sewcialites 3! 💕🩵
I used pink and aqua prints from my Correspondence collection for the center, then fussy cut pieces of the tan stripe print for the corners. Those tiny florals and little lace details were just too cute to pass up!
Happy Friday and happy sewing! 🪡✨
Free pattern link is on my website!
Glamour shots for Correspondence!🤩
This layout feels like a collection of letters or postcards stitched together!
This pattern is 10" stacker friendly and would also be perfect for fussy cutting from your stash to give your favorite fabrics a moment to shine.
Shop Correspondence today!
Glamour shots for Correspondence!🤩
This layout feels like a collection of letters or postcards stitched together!
This pattern is 10" stacker friendly and would also be perfect for fussy cutting from your stash to give your favorite fabrics a moment to shine.
Shop Correspondence today!
It’s Week 2 of the @fatquartershop Jolly Tree Farm, and this block is tree-mendously cute. 🎄
I loved sewing up all the little tree sections, but that star on top absolutely stole the show — especially once I tucked a tiny Mrs. Claus right in the center. Sometimes a fussy cut just tells you where it belongs!
I’m using Claus & Co. from @polkadotchair for this sew-along and loving all the Santas, candy canes, and sweet Christmas prints. The free pattern link is on my website if you want to join in!
Three new Needle Minders have arrived in the shop! Which one will you add to your collection?🪡
Happy 250th America!🇺🇸
We wish you a fun and safe holiday weekend❤️
That`s a wrap on last year`s Needle Minder of the Month! What a fun year🩷 I can`t wait to show you the first one for the next round, stay tuned!
Want to subscribe for this program? Check out some of these fabulous shops to sign up today!
@happylittlestitchshop
@shabbyfabrics
@fatquartershop
That`s a wrap on last year`s Needle Minder of the Month! What a fun year🩷 I can`t wait to show you the first one for the next round, stay tuned!
Want to subscribe for this program? Check out some of these fabulous shops to sign up today!
@happylittlestitchshop
@shabbyfabrics
@fatquartershop
It’s Christmas sewing time! 🎄
@FatQuarterShop`s free June Christmas sew along starts today, and this year’s quilt is Jolly Tree Farm. We’re kicking things off with the first block, All Spruced Up — a row of darling little trees!
I’m sewing along with Claus & Co. by Melissa @polkadotchair and using Dainty Daisy Cloud Peony for my background. Those tiny pink flowers make the sweetest backdrop for all this Christmas cuteness.
Grab the free pattern and sew along with us!
