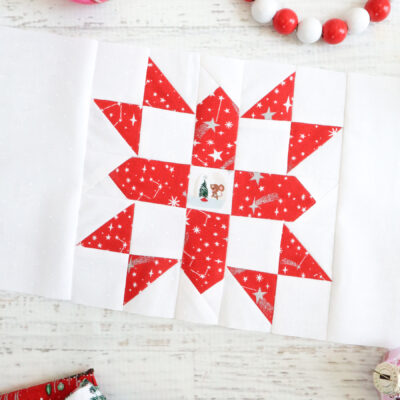
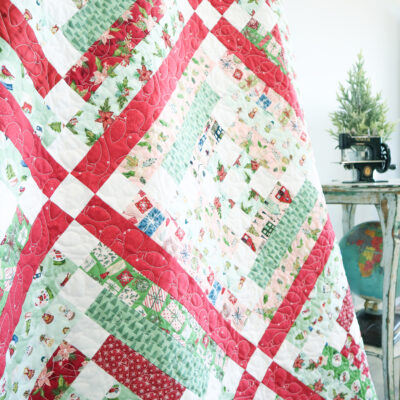
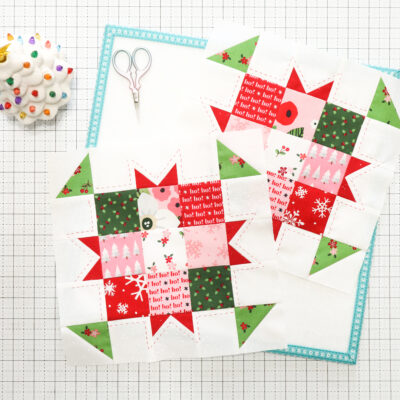
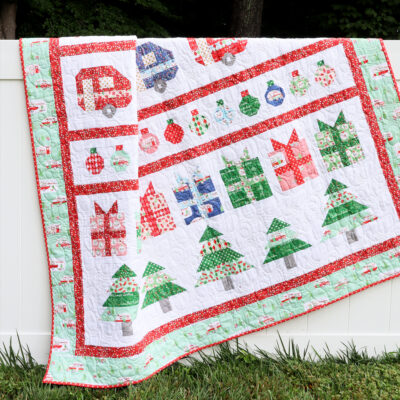
We are on our last week of this fun Fat Quarter Shop Sew Along! This is the Evergreen Mystery Quilt…
Read More
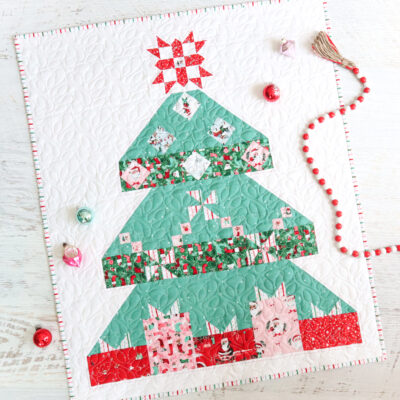
We are on our last week of this fun Fat Quarter Shop Sew Along! This is the Evergreen Mystery Quilt…
Read More
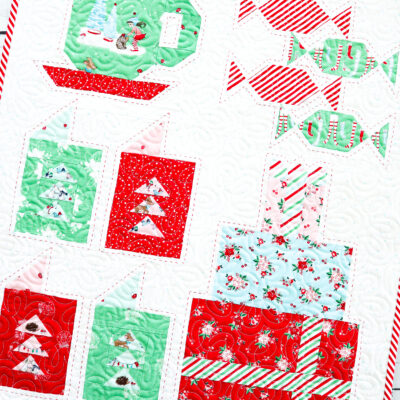
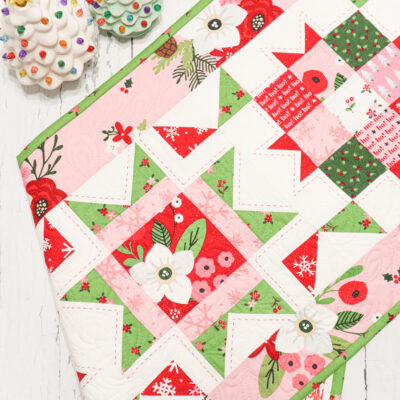
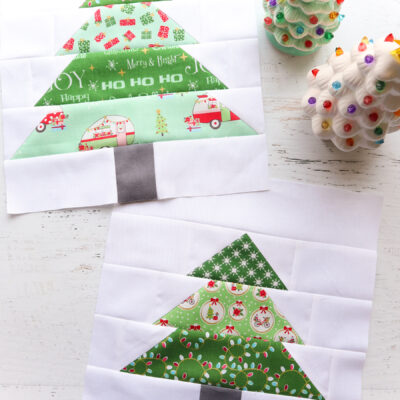
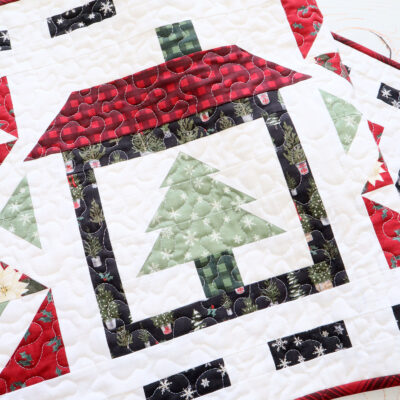
Today we are topping off our trees in our Fat Quarter Shop Evergreen Mystery Quilt Along Week 4! Over the…
Read More
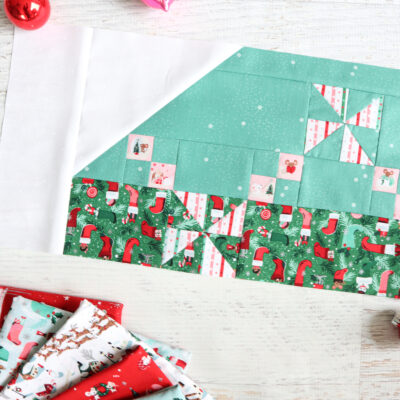
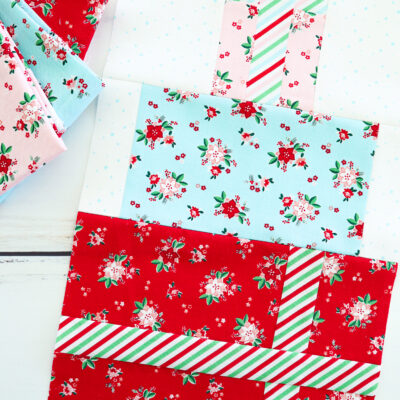
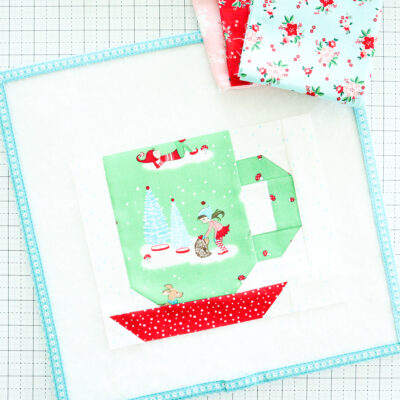
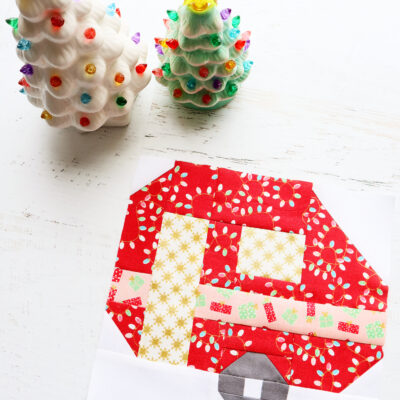
Today we are sewing up another section in Fat Quarter Shop’s fun Christmas Sew Along. This is the Evergreen Mystery…
Read More
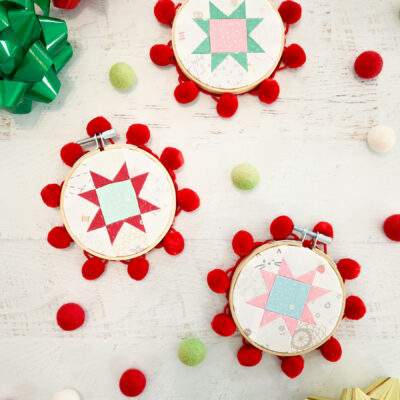
I just adore making little hoop ornaments! These Sweet Quilt Star Ornaments are quick and fun to put together –…
Read More
I’m so excited – I have a fun new quilt to show you! Jessica Dayon has come out with a…
Read More
Oh my goodness, I had so much fun joining in with this quilt along! Today I’m showing off my Christmastime…
Read More
It’s time for another block in the Fat Quarter Shop sew along – this is Christmastime Mystery Quilt Week 4!…
Read More
We are having so much fun in the Fat Quarter Shop Christmas Quilt Along! Today they are releasing the Christmastime…
Read More
I’m ready for some Christmas sewing!! I’m joining in with Fat Quarter Shop and their darling Christmas sew along –…
Read More
This little sew along was so much fun!! This is the last week so today we are doing our Day…
Read More
I am having a blast sewing up this sweet table runner with you! This week we are making up the…
Read More
We are kicking off a fun new sew along! This is the Day Dream Table Runner Sew Along Block 1!…
Read More
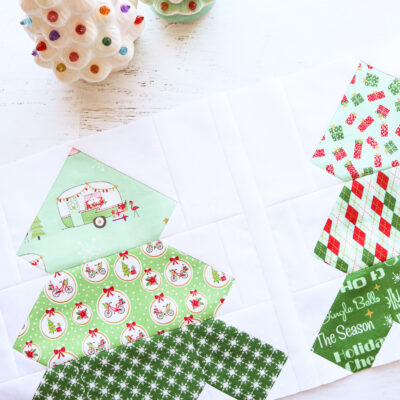
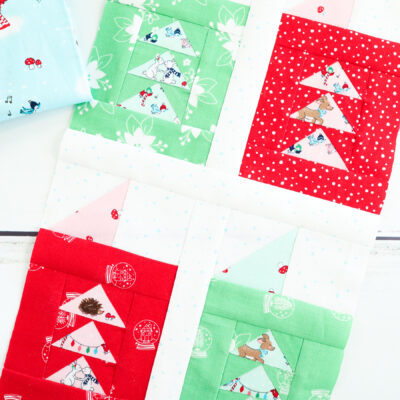
It is Week Four in the Fat Quarter Shop Mystery Quilt Along! This week we are making up the Tree…
Read More
It’s our last week in the Christmas Adventure Quilt Along! This week we’re working on the Borders and Finishing in…
Read More

It is Week Two in the Fat Quarter Shop Mystery Quilt Along! These blocks are so darling – this week…
Read More
I can’t believe it – we’re on the last row of our cute Christmas quilt!! This week we are sewing…
Read More
I’m so excited to be joining in with Fat Quarters Shop’s new Mystery Quilt Along over the next few weeks!…
Read More
It is time for Row Four in our fun Christmas Row by Row Sew Along! This week we are sewing…
Read More
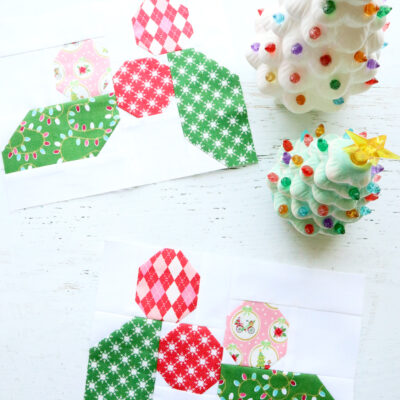
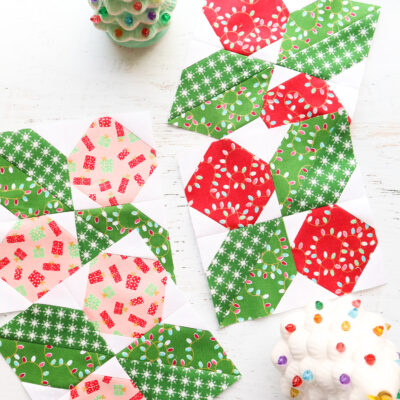
It’s Week Two in our Christmas Quilt sew along! This week we are sewing up our sweet Holly Blocks in…
Read More
This Christmas on the Farm Table Runner is such a fun project to make! It has a great farmhouse style…
Read More
Block 17 of the @fatquartershop Sewcialites 3 sew along is here and this week we’re stitching up the Flutter Block by Sandy @gervaissandy! 🩵💚
I kept mine in soft shades of blue and green from Correspondence and I’m kind of obsessed with the clever little 3-D look this block creates. Such a fun design!
We’re getting farther along in the sew along and I’m loving seeing all these blocks come together. Have you made your Flutter block yet? ✨
It`s time for Cozy Autumn!🍂🧡
I`m so excited for my new fall collection, I have so much to show you!! Keep an eye out for Cozy Autumn arriving this month to shops!
It`s time for Cozy Autumn!🍂🧡
I`m so excited for my new fall collection, I have so much to show you!! Keep an eye out for Cozy Autumn arriving this month to shops!
You`ve got mail. 💌
The Yours Truly Quilt is one of those projects that just makes me smile. Whether you`re sewing it for someone special or keeping it for yourself, this is a quilt that`s full of charm from start to finish.
Find Yours Truly in the shop!
You`ve got mail. 💌
The Yours Truly Quilt is one of those projects that just makes me smile. Whether you`re sewing it for someone special or keeping it for yourself, this is a quilt that`s full of charm from start to finish.
Find Yours Truly in the shop!
Sewcialites 3 Block 16 is finished! ✨
This week’s block is Florabelle by Heather @ mysewquiltylife and I had so much fun sewing this one. I’m still stitching along with Correspondence and used a sweet blue + pink combo of prints for this block. 💙🩷
We’re officially just over halfway through the sew along (how did that happen?!) and I’ve loved seeing all these fun blocks come together each week. Every designer brings something so unique and this one feels especially sweet and floral.
My friend @the_tattooed_quilter`s Batik collection is shipping this month! I am honored to have my Patchwork Blooms quilt be made up in this gorgeous collection😍 Keep your eye out for Christopher`s Holiday Happiness this month!!
You can shop Patchwork Blooms in my shop🪡🌸
My friend @the_tattooed_quilter`s Batik collection is shipping this month! I am honored to have my Patchwork Blooms quilt be made up in this gorgeous collection😍 Keep your eye out for Christopher`s Holiday Happiness this month!!
You can shop Patchwork Blooms in my shop🪡🌸
I hope your June is off to a lovely start! A new month means a new $5 pattern 🌟 This month only you can snag my Starlight pattern for $5!
I hope your June is off to a lovely start! A new month means a new $5 pattern 🌟 This month only you can snag my Starlight pattern for $5!
We`ve finished our Sunday strolls on Main Street! 15 Sundays, 15 stops, 15 lovely little shops❤️
And yes, we do have a bundle😉 Shop all the Main Street Needle Minders in the shop!
Tell me your top three favorites!
We`ve finished our Sunday strolls on Main Street! 15 Sundays, 15 stops, 15 lovely little shops❤️
And yes, we do have a bundle😉 Shop all the Main Street Needle Minders in the shop!
Tell me your top three favorites!
A new cheater print and two widebacks for Correspondence 💕💌
What do you think?! I hope you guys love these. You can find Correspondence at your favorite quilt shops and in my shop!
A new cheater print and two widebacks for Correspondence 💕💌
What do you think?! I hope you guys love these. You can find Correspondence at your favorite quilt shops and in my shop!
