I’m so excited to be finally revealing my sewing room studio today!! We’ve only lived here four years haha! I…
Read More
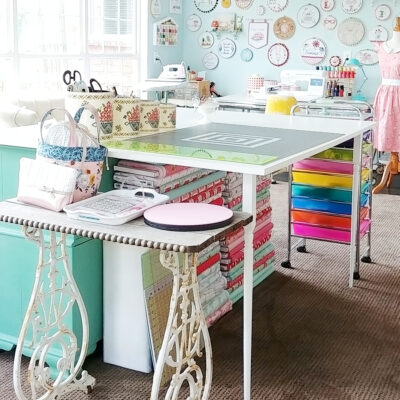
I’m so excited to be finally revealing my sewing room studio today!! We’ve only lived here four years haha! I…
Read More
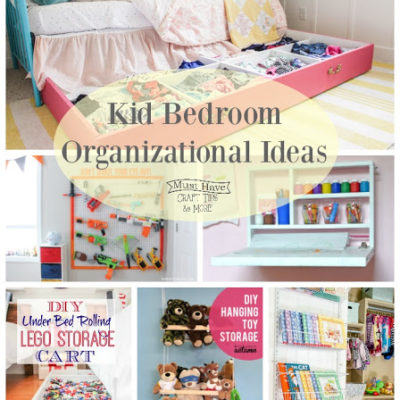
Hello everyone and happy Friday! All month we’ve been sharing tips for kid’s bedrooms. We’ve shared DIY beds, cute pillows…
Read More
Happy Friday! For our Must Have Craft Tips focus this month we are highlighting Kids Bedrooms! There are so many…
Read More
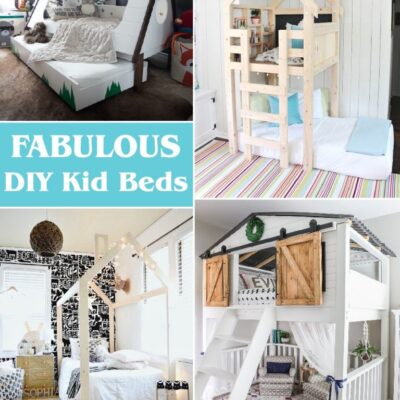
These Creative DIY Kids Beds are so fun and fabulous! There are all levels of DIY here too so you…
Read More
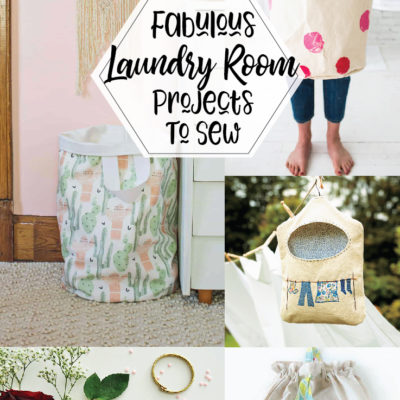
This month for Must Have Craft Tips we’re sharing all sorts of Laundry Room Ideas! So you know I had…
Read More
It’s Christmas sewing time! 🎄
@FatQuarterShop`s free June Christmas sew along starts today, and this year’s quilt is Jolly Tree Farm. We’re kicking things off with the first block, All Spruced Up — a row of darling little trees!
I’m sewing along with Claus & Co. by Melissa @polkadotchair and using Dainty Daisy Cloud Peony for my background. Those tiny pink flowers make the sweetest backdrop for all this Christmas cuteness.
Grab the free pattern and sew along with us!
Going, going, *almost* gone! I have a few precuts available and the coordinating Wide Backs for Sweet Freedom currently on sale in the shop!🧨
Going, going, *almost* gone! I have a few precuts available and the coordinating Wide Backs for Sweet Freedom currently on sale in the shop!🧨
Meet Correspondence 💕
10" Stacker Friendly & as cute as can be. Find Correspondence in the shop today!
Meet Correspondence 💕
10" Stacker Friendly & as cute as can be. Find Correspondence in the shop today!
It’s my turn for Sewcialites 3!! 🎉
Block 19 is the Pinwheel Dash Block, and I’m so excited to finally show it off! I designed this block for the sew-along, so even though I’m making the 9" blocks for my quilt, I had to make all three sizes — 3", 6", and 9". Because how could I not?! ✂️
I’m sewing with my Correspondence fabrics, and I love how the little florals, pinwheels, and dashes all play together in this block. It’s such a fun one for mixing prints!
You can grab the free pattern from Fat Quarter Shop as part of the Sewcialites 3 sew along. I can’t wait to see your Pinwheel Dash blocks! 💕
Have you been over to @cottonandjoy`s shop lately?! So many new beautiful things! I am smitten with these two patterns in Fran`s next fabric collections😍 Twirling Tulips and Star Struck are the pattern names! Be sure to pop over to her shop to see many more beautiful patterns, cross stitch patterns, notions, and more!
Have you been over to @cottonandjoy`s shop lately?! So many new beautiful things! I am smitten with these two patterns in Fran`s next fabric collections😍 Twirling Tulips and Star Struck are the pattern names! Be sure to pop over to her shop to see many more beautiful patterns, cross stitch patterns, notions, and more!
A new Needle Minder is floating your way! I just had to do the June unboxing poolside with this fun design😎🦩🌊
This is the final box of the 2025 year subscriptions and it includes a quilt pattern that uses ALL of the embroidery designs!
Can`t wait to show you the first design of the 2026 boxes next month!
Make sure you are signed up again- you don`t want to miss any of the cuteness heading your way!
Sweet Summertime indeed❤️💕💙
Make this cute runner this summer! You can find the Popsicle Block pattern OR the complete runner pattern available in the shop!
Sweet Summertime indeed❤️💕💙
Make this cute runner this summer! You can find the Popsicle Block pattern OR the complete runner pattern available in the shop!
I love these fresh Batiks fabrics in these quilts💙 My Watercolor Daisies Batik collection is currently on sale in my shop!
I love these fresh Batiks fabrics in these quilts💙 My Watercolor Daisies Batik collection is currently on sale in my shop!
