Sooooo – I’ve been working on redoing my bedroom for a while now. It’s a slooooooooow process.
Mainly because I have crafting ADD and I always get distracted by new, fun things.
But I’m really going to buckle down now and try to get some awesomeness done in there over the next few months.
(with the holidays and the SoCal Social and vacations and everything else I’ll have plenty of time right?)
One of the first things we did in the room was change out the furniture – when my Grandma passed away we inherited the furniture from her guest bedroom – which I love and is gorgeous.
Only problem? No night stands. Which means that for a little while the lamps sat on the floor. Hard to read in bed that way.
So we went hunting around for something I could put a little DIY spin on and found something fun at Ikea!
And my favorite part? It was super easy to convert my nightstand into a Jewelry Cabinet!!
Because let’s face it. All those necklaces rolling around in a drawer just wasn’t cutting it.
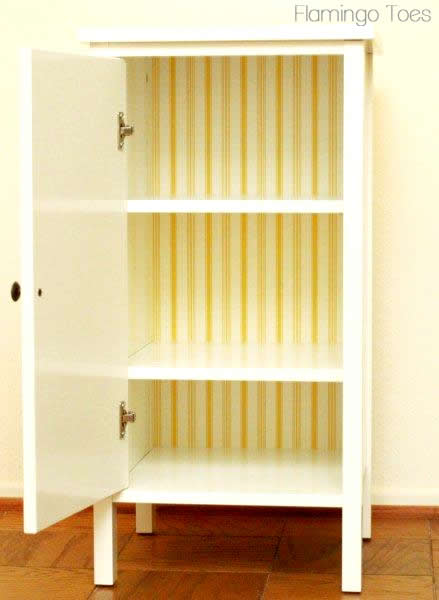
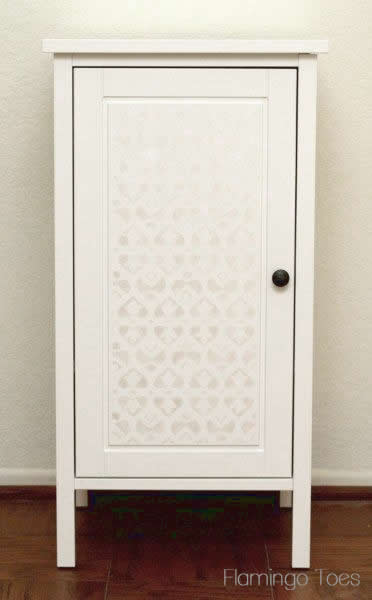
So are you ready after that ridiculously long intro to finally just see the thing already?? Here it is!

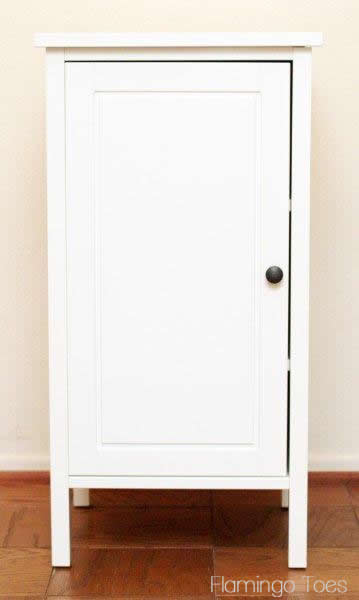
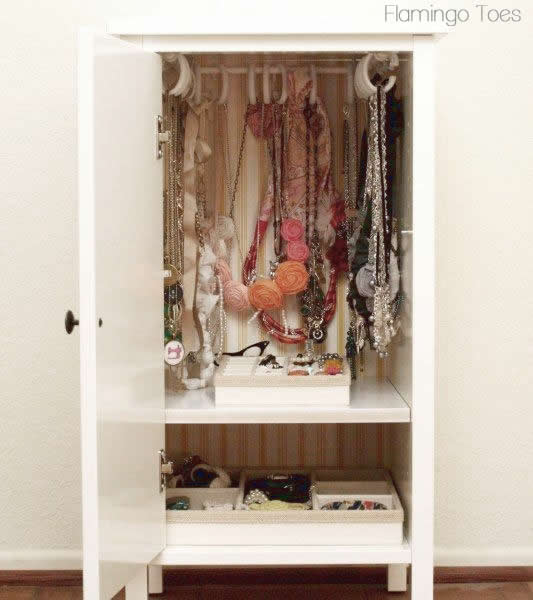
I LOVE these new night stands. They are tall and thin – perfect for our space and they hold tons of stuff.
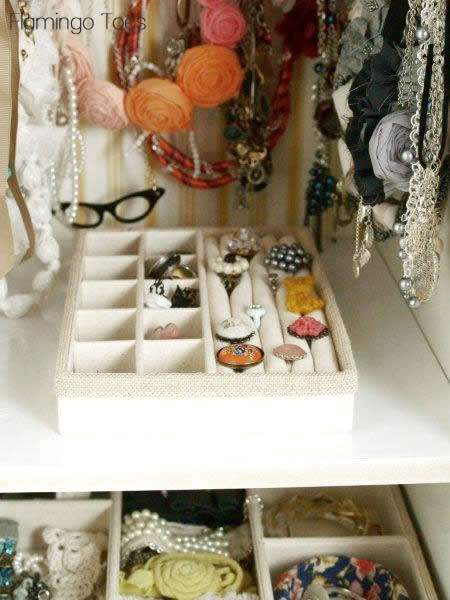
Which means in mine I can put all my necklaces, bracelets and rings – for super easy access.
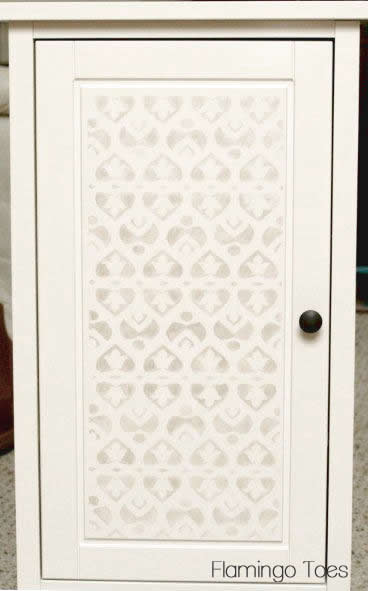
I also stenciled the top and door with my fave Martha Stewart paint – the pearl color. So it gives it almost a tone-on-tone look that changes with the angle and lighting in the room.
I’ll be honest here. The paint portion of this project caused me some trouble. So this is a here-is-what-I-did-I’m-sure-you-can-do-better sort of tutorial. :)
Feel free to give advice (nicely) in the comments. haha.
Ok – so I started with our new Ikea night stands. Did I say they were on clearance?? Yep. $30 bucks a piece. Crazy.
It also had this pretty yellow stripe pattern on the back!
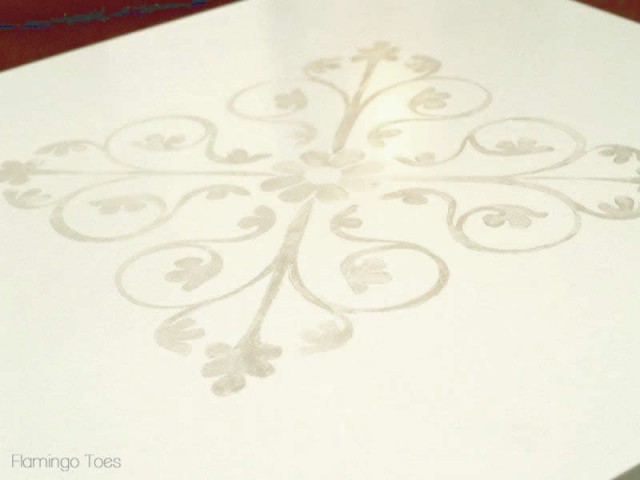
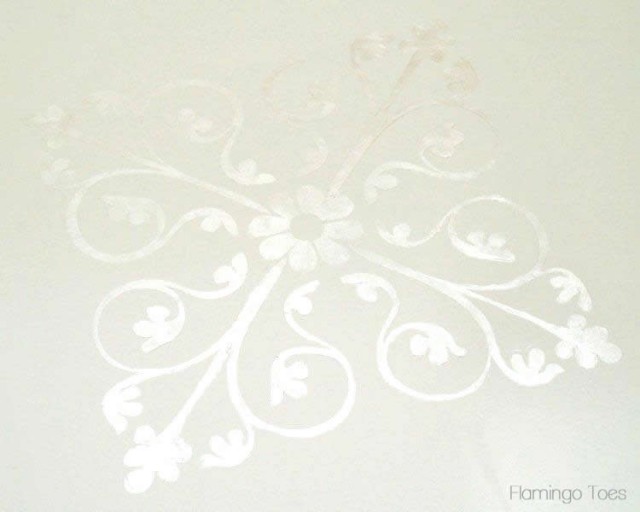
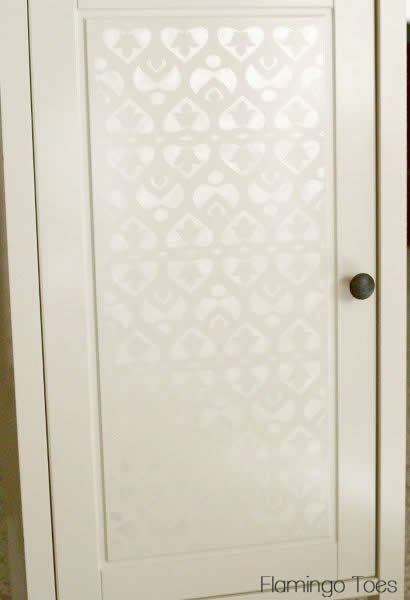
I started by cutting out a stencil with my Silhouette. I used a medallion look for the top and a repeating pattern for the door.
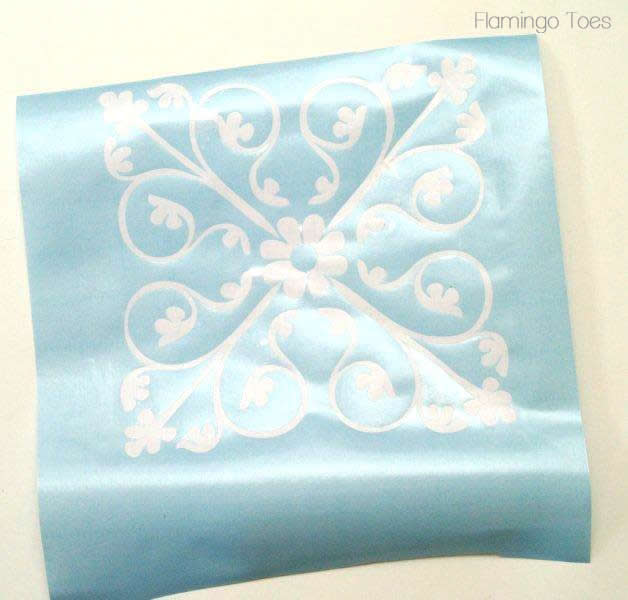
I applied the stencil and happily brushed on my MS Pearl Paint. (Note I’m still happy at this point.)
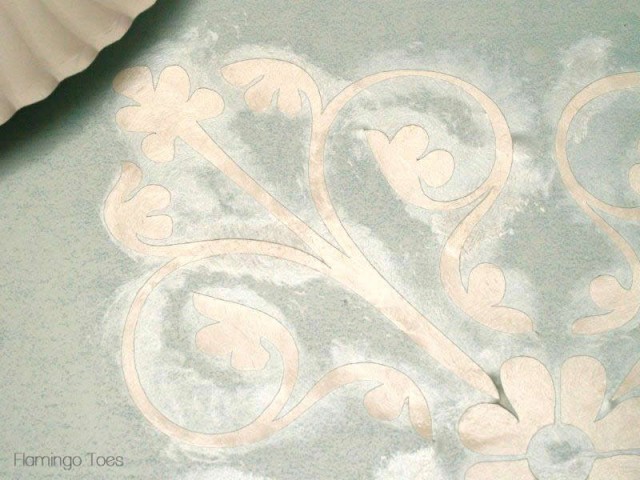
Here’s where we run into problems though. When I lifted the stencil – the edges of the paint came up too.
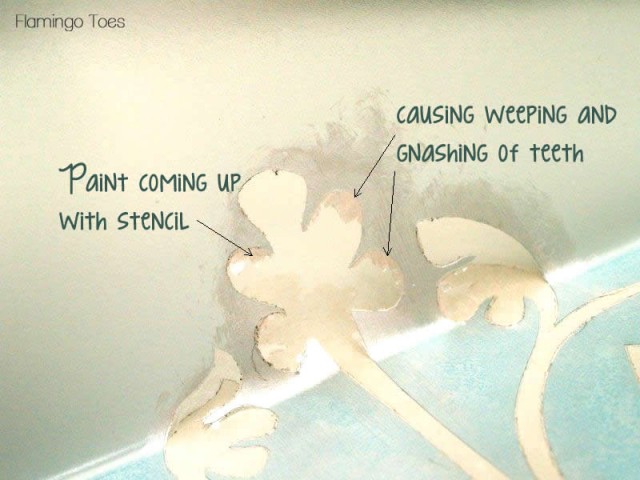
I whined asked for help on Facebook about the problem and everyone pretty much agreed it was because the paint on the nightstand was glossy.
Well. I wasn’t going to sand it – I didn’t want the whole top stenciled.
So here’s where I just kind of did what probably isn’t the best way to do this. I pulled up the stencil and filled in the parts that needed paint by hand.
I repeated that for the design on the front –
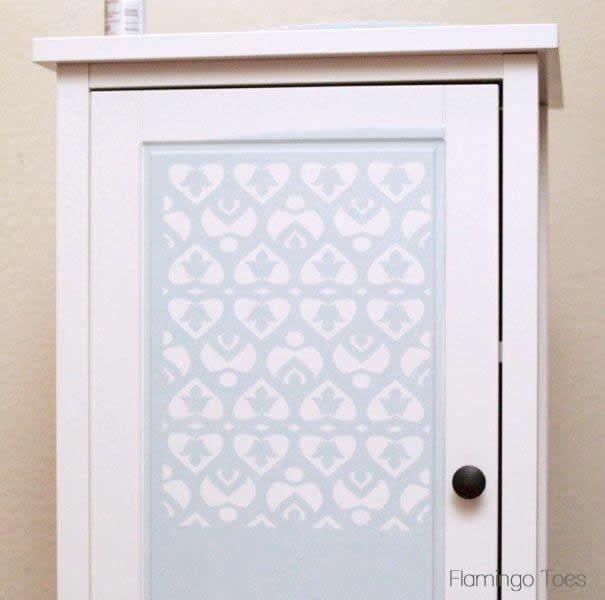
I love how it looks – it’s such a subtle look – almost gray in some lights, in others it just looks like I painted a flat design over the gloss of the nightstand. So pretty.
(But hard to photograph)
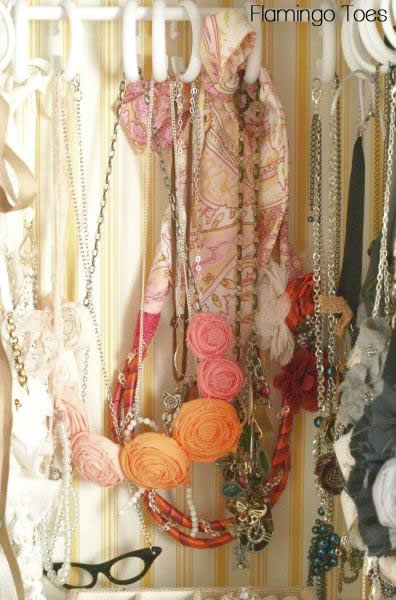
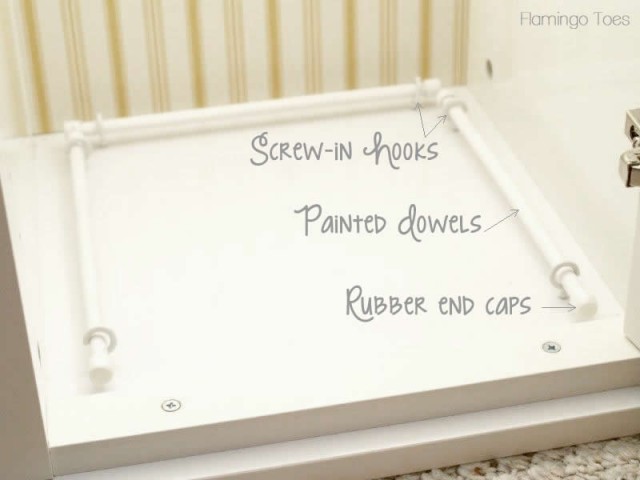
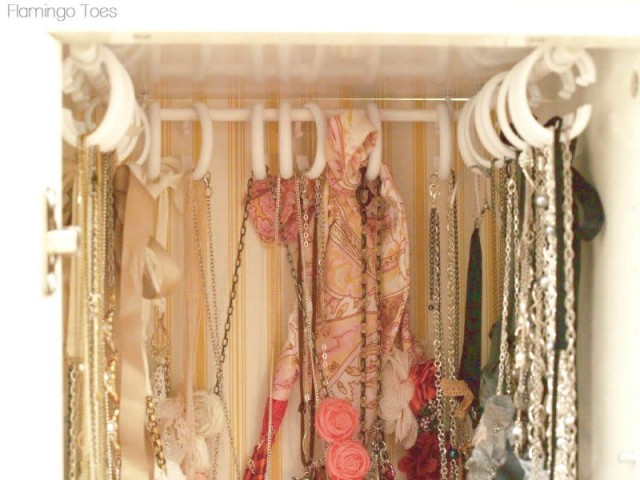
Once the painting was all finished – I flipped it on its top to add in the rods for hanging the necklaces. I measured and cut three small dowels – each the length of the sides and back of the cabinet.
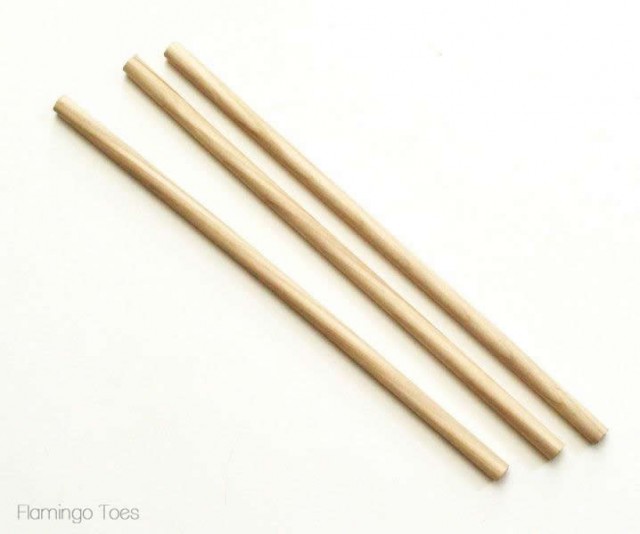
I spray painted these white and added rubber caps on the ends to prevent the dowels from sliding out of the hooks. Then I measured and drilled holes for 6 screw-in hooks.
I screwed in the hooks and slipped the dowels in.
Here is the top all assembled.
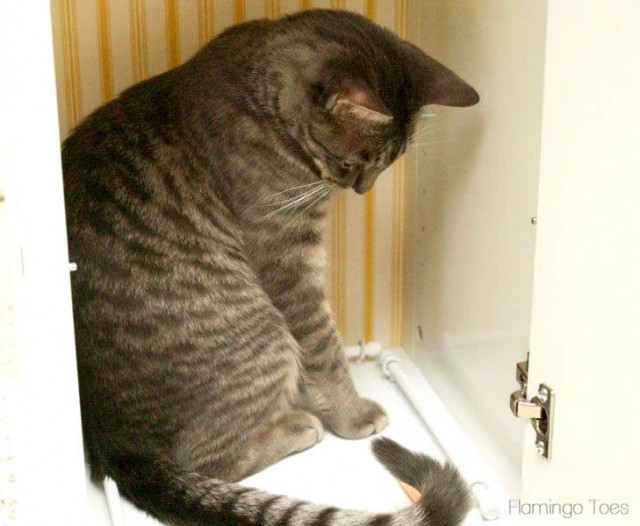
Get an inspector to check your work.
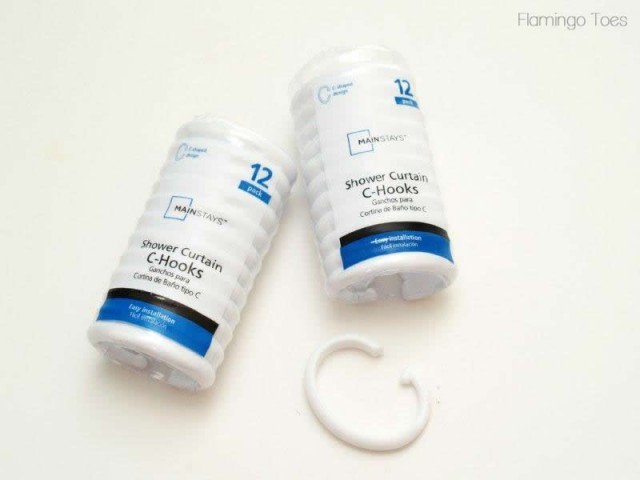
For hanging the necklaces, I wanted something easy to move, and easy to get the necklaces on and off of. I found some white shower curtain “C’s” at Wal-Mart.
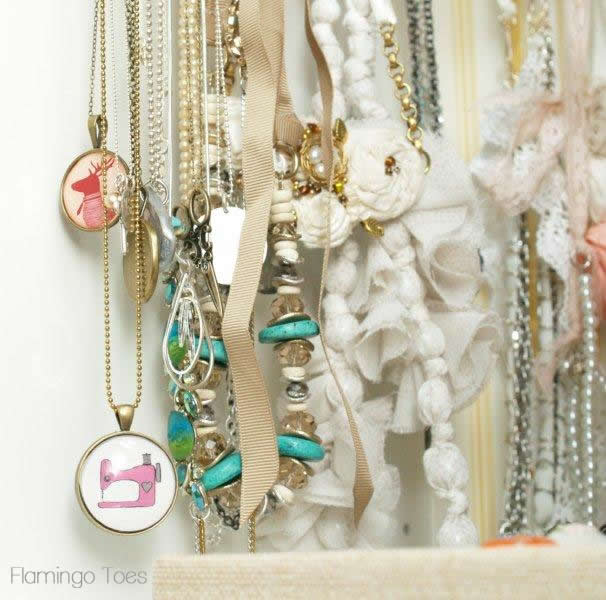
I hung those on the dowels and started adding in my necklaces!
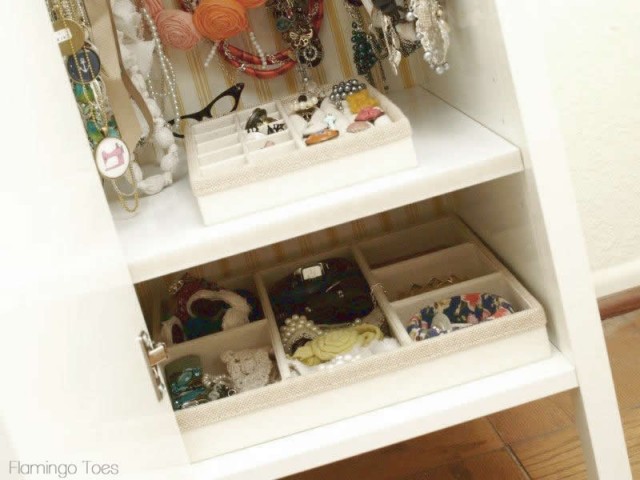
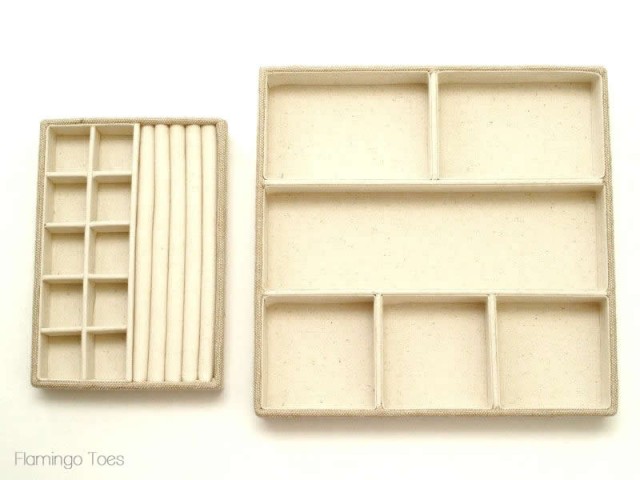
I also wanted to have a place in the cabinet for bracelets and rings and I found these fabulous jewelry trays at Target. They’re a pretty linen fabric and they weren’t too pricey either.
I filled them all up and the cabinet was all done! I’ve used it for about a month and it’s been SO nice to have easy access to everything – and for it all to be so organized!

Here’s my question. I haven’t had any problem with the paint coming off – but do you think that will last? Do I need to spray the top and door with some kind of sealant? And if so, what? I don’t want it to yellow. And be ugly.
Help is appreciated. :)
What do you think? Isn’t it fun?
Linking up at Sunday Scoop, Today’s Creative Blog, Met Monday, Skip to my Lou, Tutorials & Tips Tuesday, Shabby Creek Cottage, My Repurposed Life and the other fabulous parties on the party page – make sure you check them out!


I absolutely love that! Brilliant! ( and I must say, I have complete jewelry envy!)
Can’t find fault with perfection. I am jealous of your creativity. Wish I could find the magic bullet to jump start my creativity Have all these projects and no creative juices lately.
Looks great!
oh wow, this looks so great! What a good idea for jewelry storage – and the cat is a nice addition too ;)
You must have o more than one of these…I have seen all that jewelry you make. Great idea!
Oh Bev, just beyond brilliant!!!! You nailed the stencil work!!! And I am more than happy to store some jewelry if you run out of space :) I wish I knew how to help you with sealant though…
PS. I love your inspector more than I should :D
This is SO fun, Bev! I love this little conversion you did. The stencil looks great, and I’m loving all of your new jewelry storage!! I’m totally inspired to get to work on mine. I have so many earrings I have a hard time keeping up with them. ;)
I think you should try a spray sealer over the stencil. Krylon maybe?
I love it! Your adorable helper is too cute!!
this is AMAZING!!!! i adore this sweet little cabinet and now i am fairly certain i need one and need to figure out where to put it. my jewelry is overgrowing the top of my cabinet!!
You went through a lot of work, but look at how cute AND practical it turned out..
Love the yellow stripe…
:-)
Very cool! Neat transformation! I’d love for you to share it at my linky party, Twirl & Take a Bow at http://www.houseontheway.com.
Hope you can stop by!
Leslie
I love it, especially using shower hooks to hang jewelry and scarfs. What a neat idea!
Awesomeness! I love a good IKEA hack. This is fabulous. :)
you are one clever girl!
i’m running into trouble storing these long necklaces as well. this is perfect!
xo
kellie
This looks so pretty! We’d love for you to link this up at our party! http://housewivesofriverton.blogspot.com/2012/09/riverton-housewives-round-up-31.html
oh, your are a genius bev! Love this cabinet!!! Stencil problem? Was the paint too dry when you tried removing the stencil? It needs to be a little wet still.
catching this great tute!
gail
Very nice job! I don’t think I would have had the patience to fill in all of the unpainted areas. With all of that work you should definitely seal it because it will peal off the slick surface if if gets nicked with anything especially if you did not sand. I hate to burst your bubble but I think you can fix it easily with professional quality inexpensive spray on sealer such as Krylon. I order mine from Dick Blick online but fine art and craft stores carry it. It does not yellow, dries fast and repels dirt. It is made to protect paintings. Good stuff.
Love your “inspector”. Hahaha! XD. LOL My sides are hurting! Great job. love your DIY trays/hooks solution. :)
Bev, Awesome job and great idea. I am running out of room in my jewerly box and this would be a nice idea. Thanks for sharing always.
This is so AWESOME! I love your creative brain! It turned out great!
Hey
first of all I love your idea!!! i have tons of jewelry and with 5 cats i really need something to keep the my things away from playful paws.
i would love to know which nightstand model you bought?
i went on the ikea (us version) website but couldn’t find it or anything similar.
thank you
You could have used the paintable textured wallpaper instead of stenciling.