Anthro Necklace Week is here!!
This is one of my favorite – and most fun for me – weeks on the blog!! This week we’ll have FIVE Anthro Necklace Knockoffs – and on Saturday we’ll have giveaways for all FIVE!!
Are you ready to dive right in and see what our first necklace is? Me Too!!
We’re starting off the week with a beaut! It’s the Anthro Electrolier Necklace!
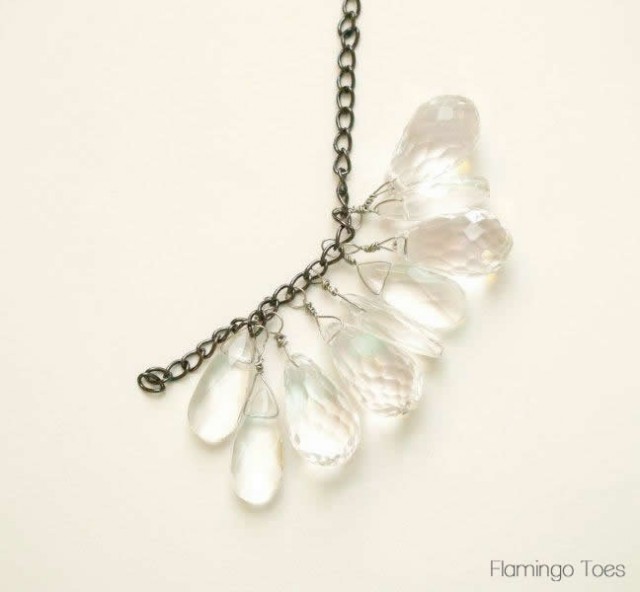
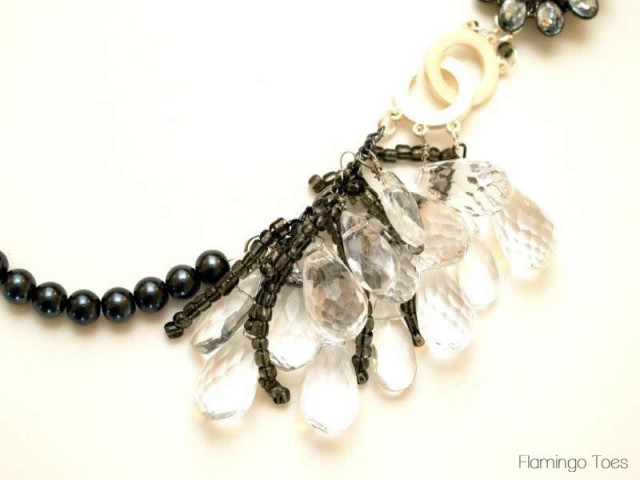
Here’s my version!

Isn’t it pretty? And so easy to change out for different colors and beads!

Here’s Anthro’s Version – coming in at a whopping $198.
Yeah – we can beat that.

Pretty fun right?
Ready to get crafty?
Here’s what you’ll need:
- 8 mm pearls – 18″
- two sizes of teardrop beads – about 15 or so
- small lengths of chain – about 8″
- toggle closure
- pin or other decorative focal piece
- 24 gauge wire
- seed beads
- heavy duty thread
- beading cording
- 4 jump rings
- 2 crimp beads
- optional – bail
- Jewelry tools
All the supplies came from Michaels.
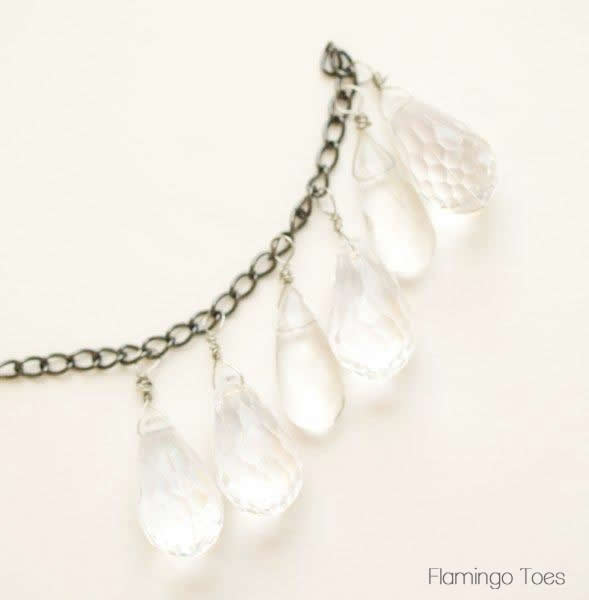
We’re going to start by adding the tear drop beads to a length of chain. You don’t have to cut it yet, it will be easier to work with if it’s not super small.
Check the How To Do That page for a tutorial on how to do wire wrapping for tear drop beads – or briolettes.

Add a few tear drop beads to 1 1/2″ of the chain. Use both sizes – on my strand I have 8 beads.
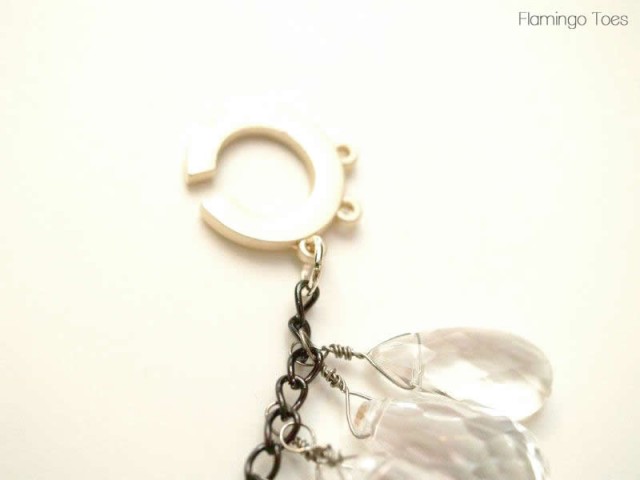
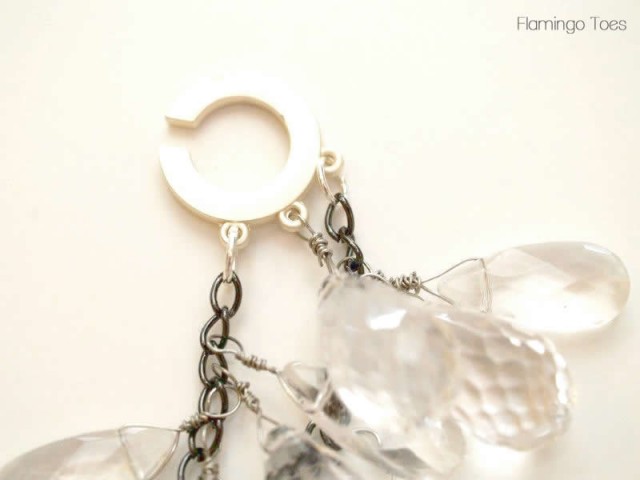
Trim the chain to 1 1/2″. Add a jump ring to the top loop of chain, and add this ring to your toggle closure.
On mine I have three loops – if you only have one, that’s fine, all the rings can attach there.
Add more teardrop beads to another length of chain. These can be spaced a little farther apart – the length should be about 2 1/2″.
Cut the chain to 2 1/2″ and add the top loop of chain to the toggle closure.
I also added another tear drop bead to the center loop of the toggle closure. If all your chain is in one place, you might not need this one.
Totally up to you. :)
Connect the other ends of the two chains with a jump ring.
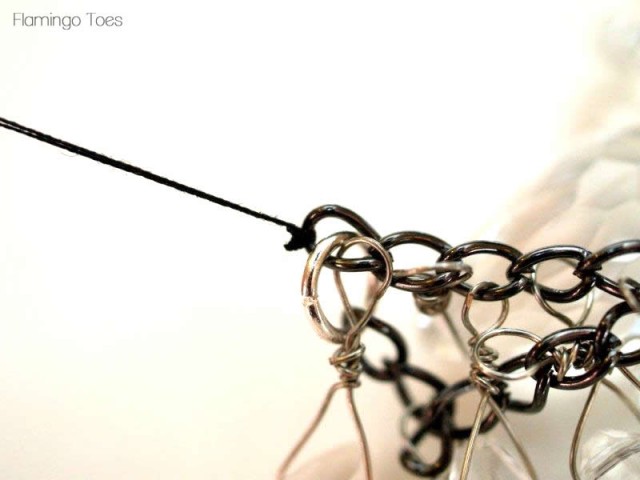
Thread a small needle with heavy duty thread or thin cording.
Knot it well around the last link of short length of chain.
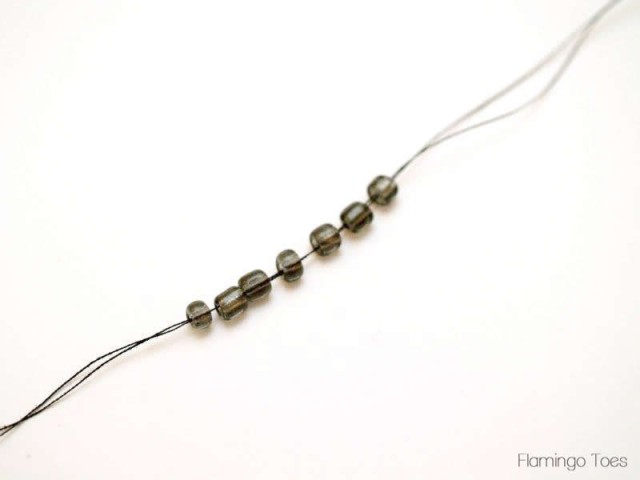
Thread the needle through a few seed beads – about 1″ in length.
Bring the needle back through all the beads, except for the last bead.
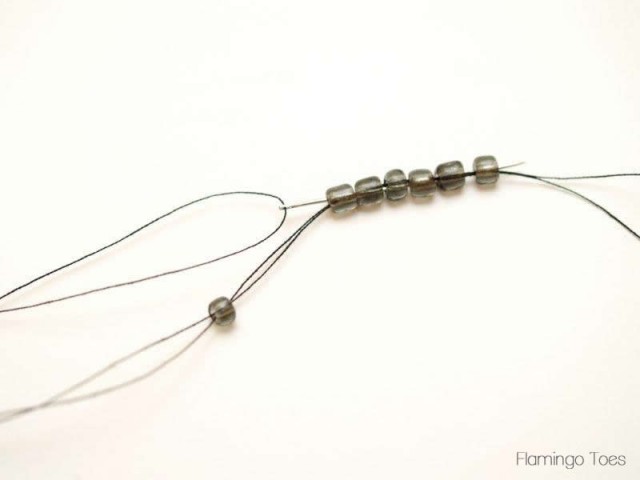
Pull the thread up snuggly against the chain and knot the thread well. Move onto the next link of the chain. Tie a knot in the next length.
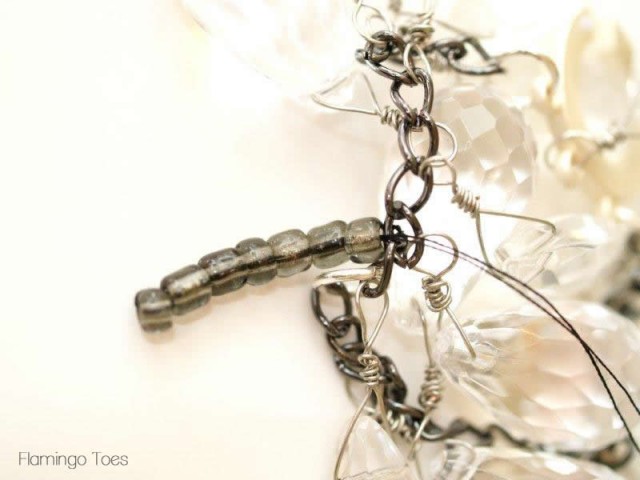
String another strand of seed beads – repeating the process from the first strand.
Vary the lengths of the seed bead strands – working your way all down the length of the small chain.
Add just a little bit of glue (I used E-6000) to your knots to help hold them.
The strands should just lay through out the beads for a slightly messy look.

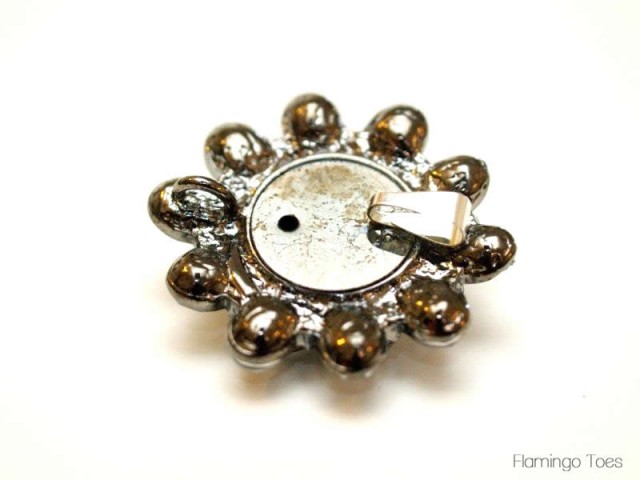
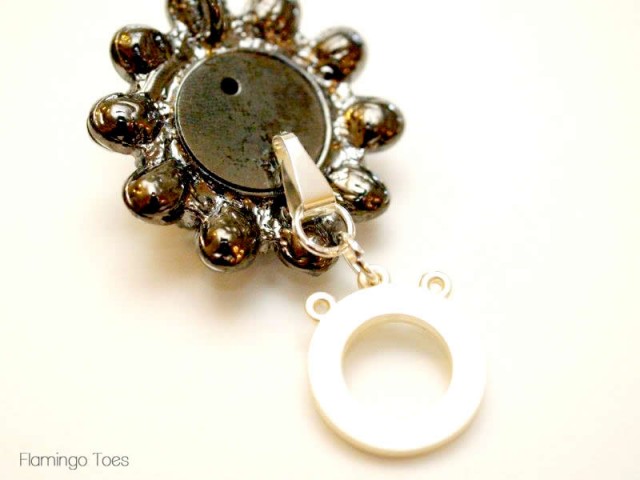
If you pin or focal piece doesn’t have loops on two sides of the back, glue one or two bails on the back. You’ll need to be able to connect to both the top and bottom of the piece.
Add the other part of the toggle closure to the bottom of the piece. I used 2 jump rings so the closure would lay flat.
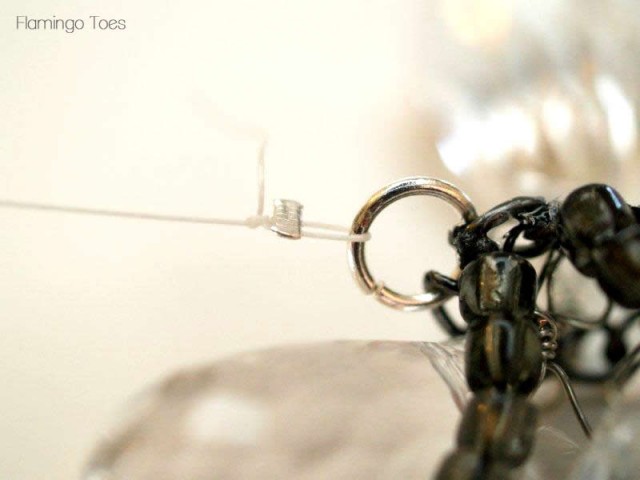
Cut a length of beading cording about 24″ long. Attach the cording to the jump ring at the end of your chain pieces (not the toggle side) with a crimp bead.
Begin stringing on your pearls – make sure that these first few cover the small end of the cording as well.
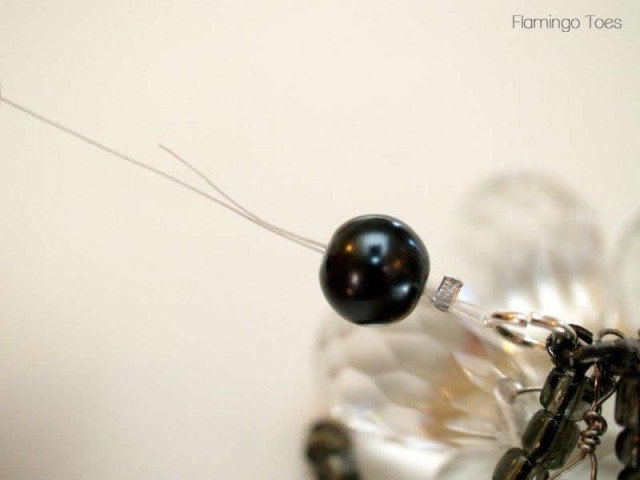
Continue stringing pearls until you have an 18″ strand.
Attach the other end of a strand to a jump ring with a crimp bead. Add this ring to the top loop of your focal piece.

And that’s it!

The closure should go on the side instead of the back like most necklaces –
I think it’s such a pretty necklace! I love the look of the little tear drop beads all clustered together.


I hope you like it too!!
Come back tomorrow for Day 2 – we’re going to get all chained up!

Linking up at Sunday Scoop, Today’s Creative Blog, Met Monday, Skip to my Lou, Tutorials & Tips Tuesday, Shabby Creek Cottage, Quilt Story, My Repurposed Life and the other fabulous parties on the party page – make sure you check them out!


Super pretty! I love how it looks on. The closure is so interesting.
marissa
rae gun ramblings
That turned out great! I love this week- you’re so talented!
I think that all of your “knock-offs” are much prettier than the originals; perhaps Anthro should consult you first before they make the finals so you can “tweak” them to perfection!
Absolutely agree!!
Doesn’t the weight of the focal point make that whole part fall towards the bottom when you wear it, rather than staying at the side?
This is really beautiful! Great job!
*gasp* This is gorgeous!! And (as usual) I love your version better than the anthro version. I’m going to have to try this one (wonder how many times I’ll say that this week!)
Lovely Bev!
I love your version…its awesome… I really hope I win it in the giveaway :)
That is so cool! I love the teardrop cluster. As always, I like yours more than Anthro’s (they DO love their gold, don’t they?).
See you tomorrow, same time, same place :D
Amazing as usual! So excited this week is here again:)
Wow, what a great necklace and I like yours better. thanks for the tutorial also. makes it look easier than I thought it would.
I really love the look of this necklace! I’m ready to go through my collection of vintage pins and maybe those lonely vintage single earrings. I think they would look great with this necklace! Thanks so much for sharing!
Beautiful necklace Bev. I really love yours much more than the original, especially the price. LOVE that you’ve made matching earrings too although you never mentioned those. ;)
thank you for the great tutorial
Gorgeous, Bev!!! You started off with a bang. :) I love the teardrops and the entire color scheme. And yay for being all fashion model-y!! :)
this is so similar to the original design! You’ve done a great job, I love it!
I LOVE it!!!!! Oh, Bev, what a piece to kick start the Anthro Week!!! And you know what, I have a perfect focal piece and teardrop beads waiting to be turned into a beautiful necklace (hooray!) :) AND you look so trim, give me your secret!!!!
This is so much fun! I’m excited to see what else you have in store!:)
I got so confused…yours looked so much better than the Anthro necklace that I thought it WAS the Anthro necklace. I’ve just recently stumbled upon your blog and I’ve been waiting with baited breath for this week. Thank you for doing what you do!!!
Bev, your first one is awesome and look forward to the next ones. Thanks for sharing with us.
Simply fabulous! Thanks for sharing!
VERY nice; can’t wait for the rest of the week to come and have you show more knock-offs. If they’re as beautiful as this one, and I’m sure they will be, there’s gonna be one lucky reader on Saturday!! $198!!! No way. I like yours better.
Janet
LOVE it!!!
yeah, I’ll say it too, YOUR VERSION IS BETTER!!! :) love it…and now it’s official, I’ll get NOTHING done this week, as I frantically fun back and forth to various craft stores so I can spend all my free time, and some that is NOT free time, working on my new jewelry! Yippee!
Oh my goodness Bev – this is STUNNING. Simply stunning. I am so in awe. Wow – and today is just Monday!!! What could the rest of the week possibly have in store! Amazing job hun!
this pretty much rocks!!! and i seriously love how your version is ALWAYS better than the overpriced original!
As usual, I much prefer your version of the necklace. It is gorgeous. I need to live closer so you can help me make some of these things!
Love it…..you make it look so easy. Can’t wait to see more….
I’m newish to your blog. Your necklace is so definitely better. I wouldn’t wear that other one.
Fantastic! Could you please share suppy links?
sometimes i like yours more than the original! this is one of those times!
LOVE IT!!!
LOVE!!
Bev – I’ve been to MIchael’s looking for the supplies for this piece and I’m stumped. Either you have the best Michael’s in the world, or I’m just blind. I couldn’t find anything like the toggle you have or any teardrop beads there. Any suggestions/help you could provide would be greatly appreciated. I can’t wait to make this necklace! Thanks again for a spectacular week!
So beautiful! Thanks for the tutorial!
Very pretty. The dark pearls give it a bit of an edge and prevent it from looking too much like Grandma’s pearls.
BEV!
this is amazing.
so pretty! i love the crystal dangles. it’s amazing how much a statement necklace can complete the outfit.
beautiful job.
kellie
Really lovely, Bev! I just love those gorgeous beads. :) Great job!
Love it! So cute and fresh!
I would love it if you’d link this up to The Pinterest Project!
http://adayinthelifeofamomandawife.blogspot.com/2012/08/the-pinterest-project-linky-party-5.html