Today I’m over at sweet Mique’s place – 30 Handmade Days for her Funner in the Summer series! And since summer…
Read More
Archives for July 2012
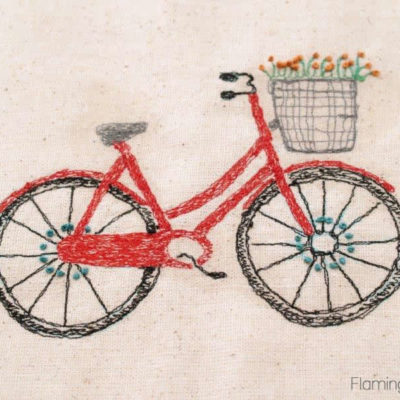
Sketchy Retro Bicycle Dishtowel
I am so loving this Christmas in July series we’re doing! I hope you are too! One of my favorite…
Read More
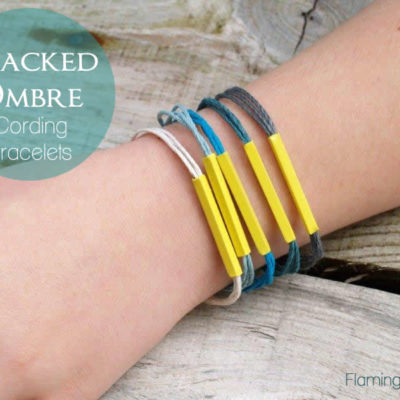
Stacked Ombre Cording Bracelets
I am kind of in love with all the cute stacky bracelets right now. I love mixing and matching leather…
Read More
Off Visiting!
One of my favorite things is to get to meet bloggers in “real life” that I’ve met and love online. (Though…
Read More
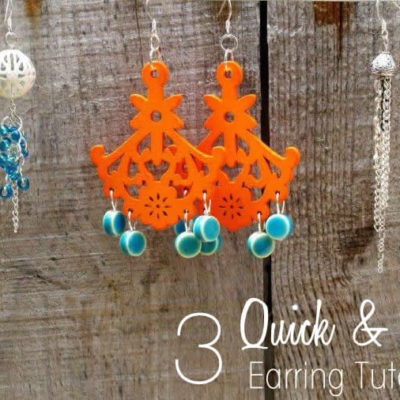
Three Quick & Easy Earring Tutorials
Are you playing along with us for Christmas in July? Any gifts started? Well I have another fun idea for…
Read More

