I thought it would be fun to do a Slouchy Summer Bag – and this one is super quick!!
I did it in under 4 hours – so you could make up your bag in the morning and carry it to your beach party or picnic that evening!

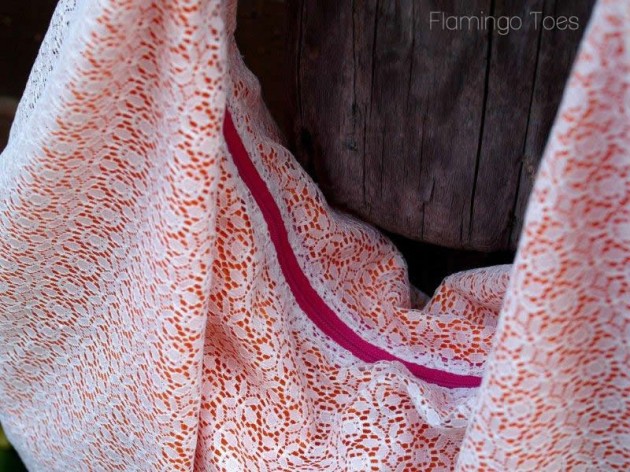
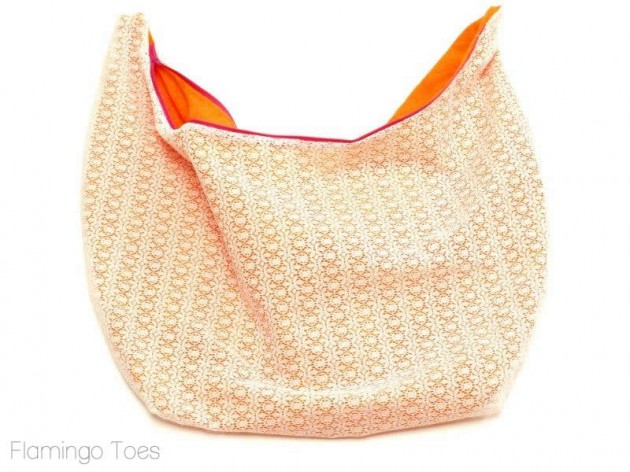
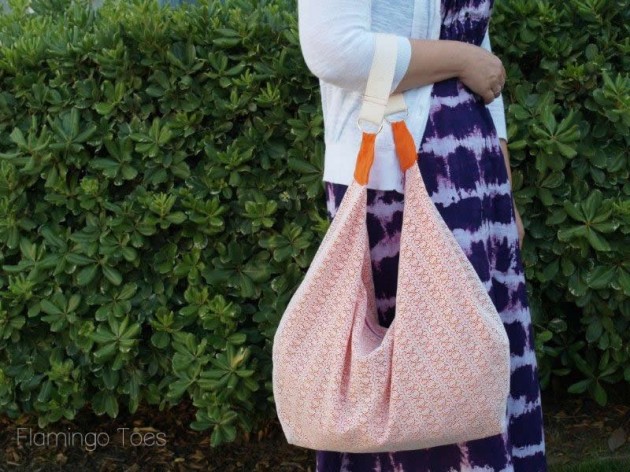
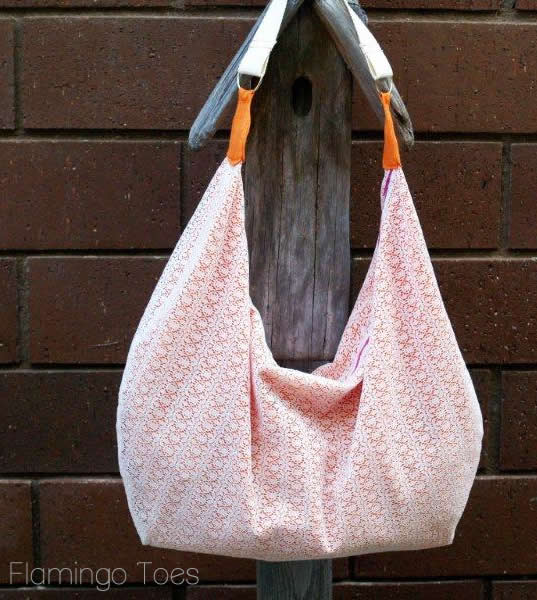
It’s a cute lace Hobo bag with a fun bright orange lining and tabs for the strap. I used a bright pink zipper for contrast – I think it’s so fun!
Ready to get started on your own?
Here’s what you’ll need:
- 2/3 yd lace
- 2/3 yd fabric for lining
- 22″ zipper
- 2 D Rings
- 18″ of webbing for strap
UPDATE: Click here to Download the Free Pattern if you’d like to use mine. (You can always draw out your own following the instructions below if you’d rather.)
(As with all Flamingo Toes Patterns, this is for personal use only. Please do not sell or redistribute the pattern in any way. Thanks!!)
Start by drawing out your pattern. This doesn’t have to be exactly like mine, but you want to create a pattern for half of the bag. It should be about 13″ wide and curve in on the sides and the top.
Make the top about 3″ and leave about 7″ at the bottom as a straight line. This will be the fold at the bottom of your bag.
Get a helper to keep the pattern flat.

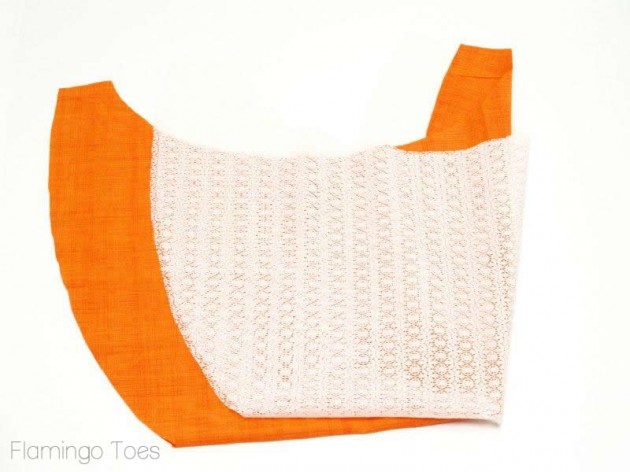
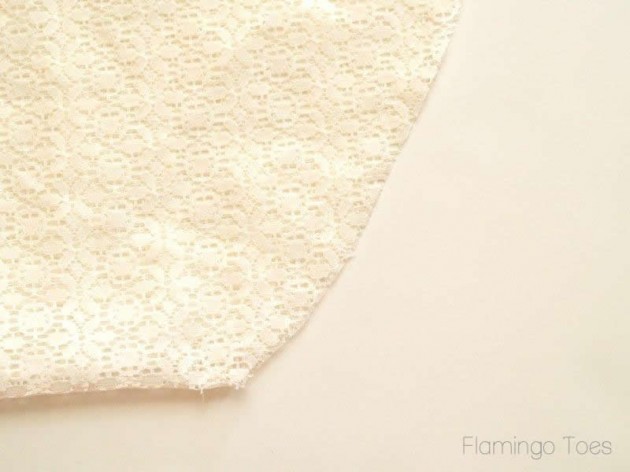
Fold your outside lace fabric in half with the selvedges together. Then fold the fabric in half again, vertically. Place the pattern piece so the straight side is on the vertical fold and the bottom is lined up with the horizontal folds. Cut one out of your lace and one out of your lining.
You should now have one outside piece and one inside piece.
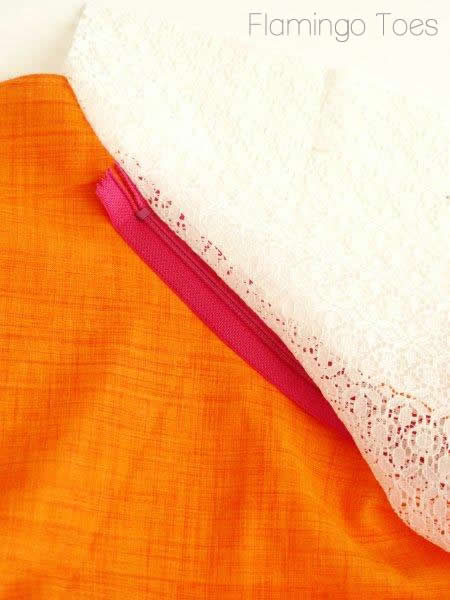
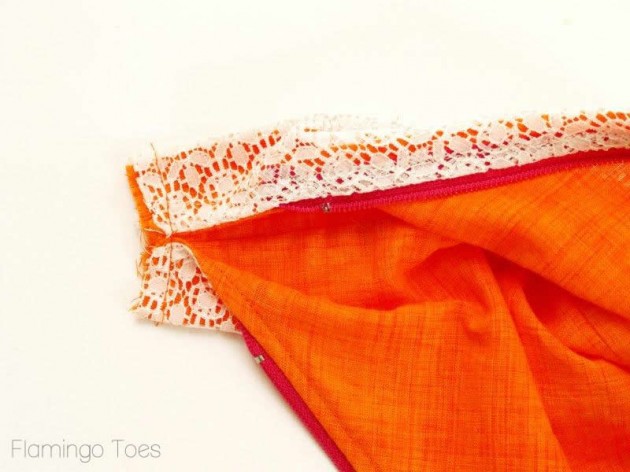
Center the zipper along the top curved edge, between the right side of the lace and the right side of the lining. The zipper should be completely inside, between the two pieces.
Sew the curved edges together, 1/4 from the edge, sewing the zipper in place as you go.

Here’s what the right sides will look like after you sew that seam.
Repeat this step for the other side of the zipper, and the other curved edges of the lace and lining.
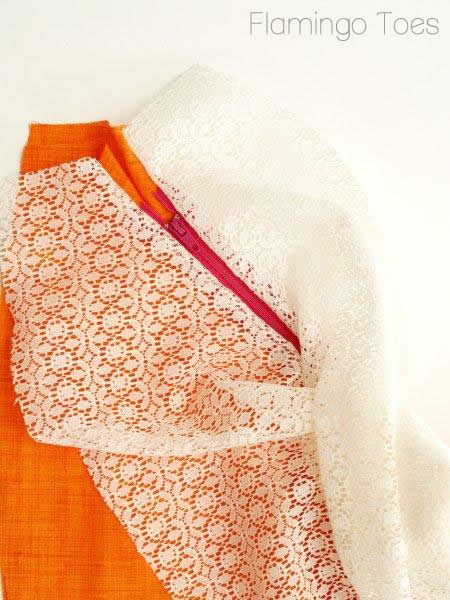
Open up your zipper before this next step, it’ll be easier.
With your lining pieces out of the way, sew your lace pieces together along the two sides, right sides together.
Repeat for the lining.
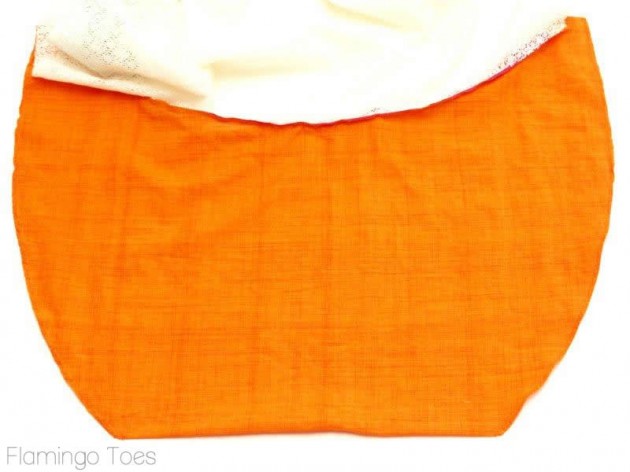
Turn your bag right side out, through the little sections at the top of the bag between the sides and the inner curves.
Press the lining inside.
Top stitch along your zipper. Fold the seams on the top corners to meet in the center. Sew across the top of each side.
Your zipper should be centered as well now.
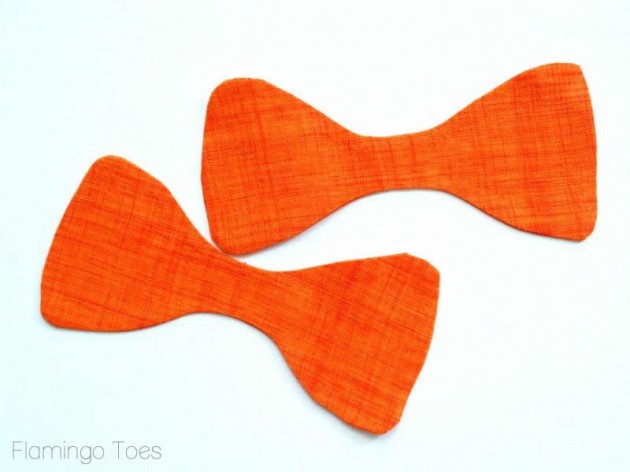
Cut out your two side strap connectors. These will look like a bow shape and you’ll need 4 of them.
You want the center part to be the width of your D ring (probably about 1″), and the outer width to be about 3 1/2″. The whole piece should be about 7″ long.
Sew two pieces together, leaving an opening for turning. Turn right side out and press. Repeat for the other two pieces.
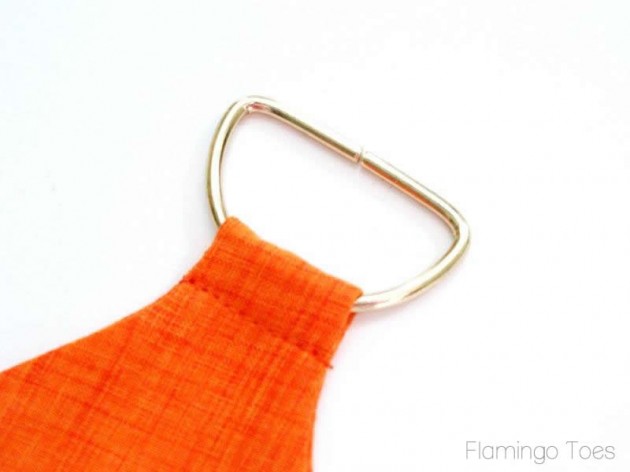
Feed half of the strap connector through a D ring and fold the piece in half. Sew just below the D Ring across the thin section of the connector.
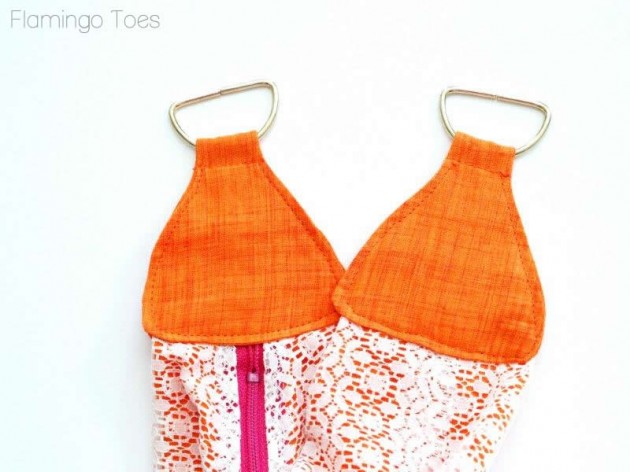
Place the top sides of your bag between the two connector halves. Make sure the bottom of the connector is just above the end of the zipper. Sew the connectors to the top of the bag on each side just inside the edge of the fold, all the way around.
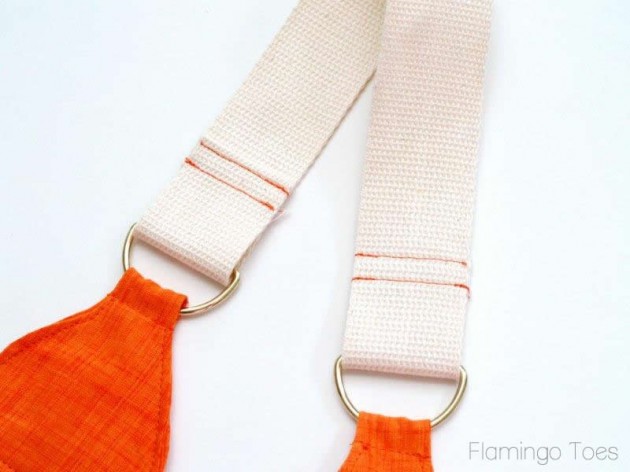
Fold your strap webbing around the D rings on each side. Turn the edge under on the back side of the strap on each end.
Sew the strap together right at the fold, then again 1/2″ away to give it a little extra strength.
And that’s it!! How quick and fun was that?!
It’s a lightweight bag, so if you want to carry around books or something crazy, you might want to go with a heavier weight fabric, like a twill.
I hope you like it!
Linking up awesomeness at Sunday Scoop, Today’s Creative Blog, Met Monday, Skip to my Lou, Tutorials & Tips Tuesday, Shabby Creek Cottage, and the other fabulous parties on the party page – make sure you check them out!


A great use of lace :) Added this to my ‘projects to do’ list!
oh goodness – I love this Bev!!! The fabric you chose – how fabulous is that?!! Thank you so much for sharing! I really think its time for a new bag for myself – itching to get back to my sewing machine. And on another note – I saw your first bag pattern over at Go To Patterns – love it! CONGRATULATIONS on that! I featured it yesterday on SewSet.
Thanks again Bev! You are awesome.
Love the bag!! The lace adds just the perfect touch :)
I pretty much love everything about this bag, Bev! I love the size, the shape, the colors, the LACE!!! Its beautiful!!
Super cute! Love the whole thing-fabric and pattern! I like the way you did the tabs at the strap.
what a lovely bag! thanks for the tutorial
Ooh, I love the lace over the top. It looks fantastic.
Precious bag!! Love how you gave the lace a modern look. :)
I love bags and this is a cute one!
Such a gorgeous bag and I love the lace and orange combo. Great size too!
What a great hobo! Adding this to my to-do list. :)
this is darling!
love the orange & lace. so of fun, you clever girl!
xo
kellie
Happy Saturday Bev! Seriously though, you are just amazing. This bag is awesome, and the more I look at it – the more I love it.
I featured it as one of today’s top patterns over at SewSet, I just adore this purse!
Thank you again so much for sharing!
– Jess, SewSet.com
this is amazing!!!
Would love it if you could share this on my link party Serenity Saturday @ http://www.serenityyou.blogspot.com
I would love to make one for myself but I can’t find the link for the pattern. Any help would be great.
Love this bag! I need to make one for a co-worker and this is perfect! Thanks so much!!!
I’m usually not a big fan of lace,but you made me a believer lol. I love this bag it is so very cute. Gonna make one soon.
Thank-you so much for sharing this tutorial it is greatly appreciated.It is just so cute.I have been a follower of yours for a while now and I love your site,all the info and tutorials you do a wonderfull job. Again thank-you for all you do and all you put into your site.
Oh I love this! I think I’ll try sizing it down and adding a longer handle so I can wear it crossbody.
What type of fabric did you use to keep the connectors fron unravelling?
Thanks. Looks really great!
Thanks for your comment!
If by connectors you mean the two orange pieces that connect the bag with the d-rings on the strap, they are the same cotton that is used for the lining. They are sew, turned right side out and top-stitched, so they are pretty sturdy. I haven’t had anything unraveling. :)
I hope that helps!
Bev
I have a pc of heavy upholstry fabric,,,could I make one of these bads w/it? Or would it be to stiff? Of course it will need to be lined…correct?
If the fabric is stiff a lining is up to your preference. I recently made a bag with a tweed like upholstery fabric. I used a lining but it could have been fine without it.
This bag looks very useful, and cool. Lucky for me I have the right kind of helper to hold the pattern flat. I hope it doesn’t make a difference that he is Siamese. He’s a very willing helper in all my crafts. Thanks for a great tutorial.
this only took 45 minutes to make I don’t see where on earth you could spend 4 hours making this!
She had already completed all of the designing and test sewing for you, so you had the advantage. Possibly she is a slower seamstress or more of a perfectionist than you. It is extremely rude of you to reply in this manner.
She had to take all the pictures so you would have them.
Heavier fabric would be great for this and yes you would line it…I use heavy fabric all the time to make all kinds of bags! Just make sure you double stitch the handles and use a 1/2 inseam . If you do not have a serger for the seams make sure you do zig zag all seams because if you don’t the fabric will fray causing the bag to fall apart…I use the serger first then a sewing machine to make sure my bags are sturdy!
I am thrilled to discover this pattern! I have been trying to copy a similar bag I found in a junk shop but it defeated me. Now I know how to do it! Thank you so much.
I cannot print the directions for this pattern, from the website screen of the 4-hour slouchy summer hobo bag.. I printed your pattern pieces off the e-mail I got, but my website won’t print the instructions. I really need them. Could you e-mail me the instructions, please.
I will appreciate it immensely. Thank you, Jennifer L. Espejo 951-305-6196 1272 Brentwood Way Hemet, CA. 92545
It is really not a good idea to put your address and name out for anyone to see. There are a lot of people that are more than eager to take advantage and find a way to give you a lot of trouble. Be careful please. Also there is an excellent you tube video that show how to make a bag with a top zip closure. Or list this on your favorite list and it will be easy to find. Good luck. I’ll bet you do great. One tip, if you are confused by something try it out on scrap fabric.
I have a ton of fabric samples. They are 28″x26″.is this enough
Fabric to make this slouchy bag? Of course I’d use 2 pieces. Also do you happen
to have an easy “box type” bag pattern that I could use with these samples as well?
Thank you. A
Oops, got the zipper in….. And inside out.. How do you kn
Which way the zipper should be facing? Good idea to explain
That in the tutorial. Please.
I can’t sew at all. 45 years since 8th grade home-ec. Took me about 4 hrs to 1) create a pattern on some wrapping paper (not much of a free-hander at cutting), and 2) sew up. Even managed to get the zipper in corectly the first time. Planning to get better material and try again, now that I see how easy it is. This is fantastic for novice sewers like me. Thanks so much for being so thorough with the instructions, and not assuming everyone (like the rude comment from Cherie) is an expert sewer.
Bev, I think you did a great job on this tutorial. It would be great if you could do a tutorial on installing zippers. I like your color choices in this tutorial. I made the steps easier to see. I hope you will do more tutorials, you seem to have a knack for it. . I am going to do this bag for my neice and maybe one for me.
I made 3 of thee my granddaughters. They love them & use all the time. Ages 14,16, 18. Your tutorial was very easy to follow. Thank you very much!
Thank you for the inspiration. I saw and read your tutorial and decided to make a similar bag. Mine is made from recycled old cargo pants, left over fabric I bought in the market for half price, strap was taken from an old bag I couldn’t use any more and even the zipper in the change bag was taken from an old bag. The result is a slouchy, shabby Hobo Bag. It was fun making it.
Hi from Greece. I just finish a bag like yours for my daughter, with fake leather and lining (I added another one little zipper outside the bag and I left the lining open to one side – cause the leather is too tough for the tiny opening at the top – I sew this side with topstitch). Thanks for the tutorial. :)
Hi!
Thank you for this great tutorial! I have just sewn my own 4hourslouchysummerhobobag and absolutely love it (http://diekleineschneiderei.wordpress.com/2013/05/06/sewing2gether-projekt-no-1-ist-fertig)!
Lots of love from Bavaria,
Désirée
I love it. Now I have something to do this weekend.
Love this bag. But also your dress!
D
Just got through sewing one for my sister. Now I have to sew two for my best friends. And I’m sewing one for myself. I love the tutorial and the free pattern was very helpful. :)
Just made myself one with a floral print canvas and I love it! I can’t wait to make another one.
You’re tutorial was well written and very easy to understand. Thanks so much for sharing!
Love this idea. Also, it’s nearly impossible to exclude the cat from the project.
I love this pattern!!! I am going to make my Sister and Daughter-in-Laws one for Christmas. And several for me!!
Best regards,
Mary
Hei..im 14..i love sewing crosstich…im bored so i look up at this website and saw this bag tutorial..i really love it..but since i am young i dont know what is your talking about..haha.. i live in malays and its the holiday so im bored..i decided to make bags..i dont even know where to get the supplies..thanks for the inspiration
thank you for this interesting tutorial!!
i love this bag
this is my version!
http://lalio-parda.blogspot.com.es/2014/02/bolsoslouchy-summer-hobo-bag.html
Wow. Love your version.
Looks really cute gives me lots of ideas. Thanks for the wonderful set of instructions
Thanks for the tutorial, I managed to made a weekend hobo bag for myself, so happy with it! :)
I posted it here…
http://funwithlittleones.blogspot.com/2014/03/handmade-my-weekend-hobo-bag.html
You certainly give good ideas and instructions. I especially liked the way that you showed
us how to make the purse “our own.”
Thank you
Thank you so much for this DIY. I love this bag and sewed them four times already.
That’s so great Tine! I am so glad you like the pattern! :)
Bev
I love the bag! I just can’t seem to figure out how to do the zipper… Do you have a video or do you know if someone else did a video with a longer tutorial?
Me too :( i can do one side but struggling with the other the sew it in the same fashion……
I did eventually figure it out. A little too hard for me to explain though unfortunately.. however, your comment was quite some time ago so you most likely figured it out – hopefully :)
I made 2 of these today in heavier material and winter colors. Don’t let the title fool you they do not take 4 hours. I made both in about 2.5 hours total. Thanks for the pattern!
I have gathered my items to make this bag but I have one question. The 22′ zipper seems way too long for this bag. Did you use a shorter zipper?
Thank,
Stephanie
This is freaking adorable.I want to learn how to sew just so that I can make this. Thank you so much!
I love this pattern and this bag! I have made two of them and have used the strap idea on another. I wish I could show you mine! Thanks so much for this tutorial, it was so easy!
This is so stylish!Thank you so much!
Bev, I love the bag-I would love to know how you sink the end of your zipper when inserting it. I’ve looked all over the web and can’t see anything on it. I like it more than other alternatives and wish I could figure it out. Can you help?
Thanks.
What’s the finished size? Couldn’t see that in the description.
I would like to know this too. Usually patterns include this info, but I can’t find it.
great pattern and instructions. Thanks for the share! Now time to experiment. Happy days to you
I love this hobo bag. It will be on my list of projects. Thanks so much for shah our pattern.