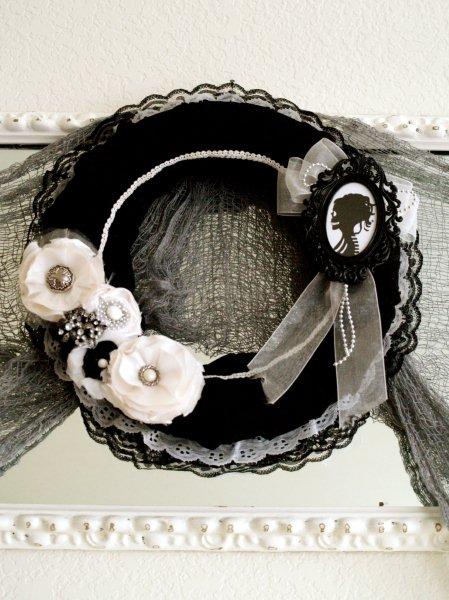
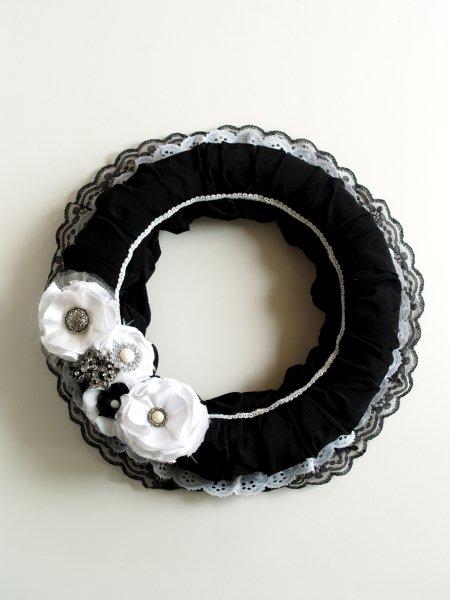
Ok everyone!! I am soooo excited to share my new Gothic Halloween Wreath with you!
This year I’m going for a Gothic Halloween kind of vibe – and I shared my Halloween pennant for my mantel last week.
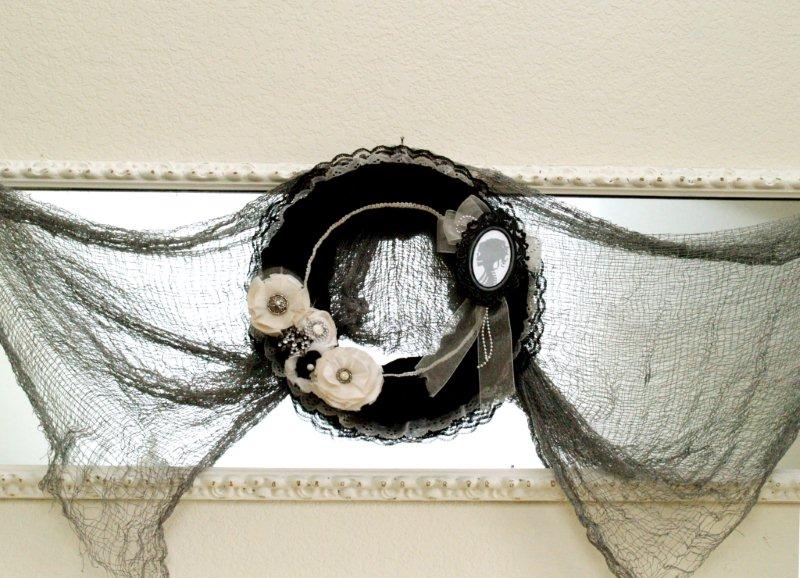
I have this giant mirror over my mantel and I wanted a fun wreath to hang in the center – and match the Gothic/Spooky look of the pennant.
I think it’s just the right amount of creepy and Gothic!
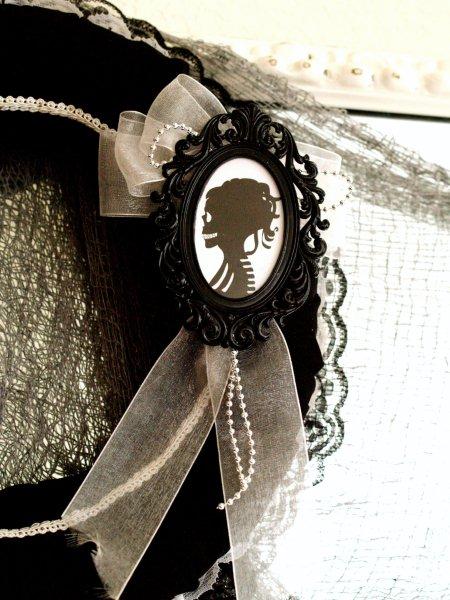
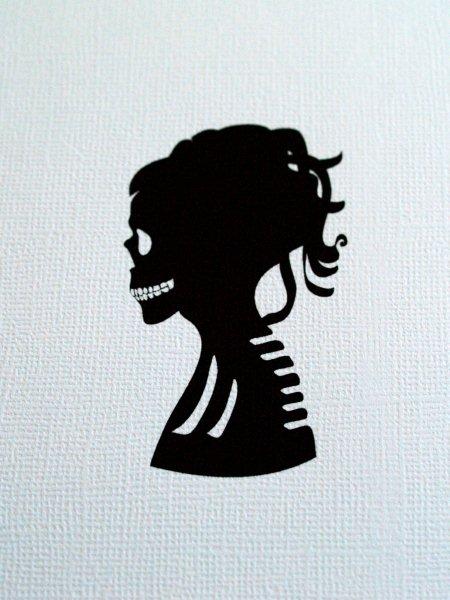
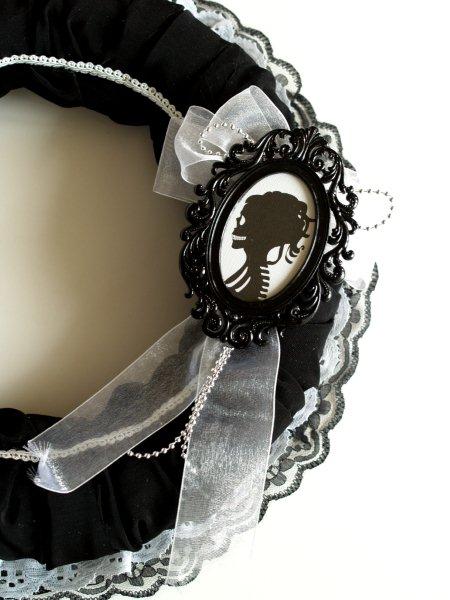
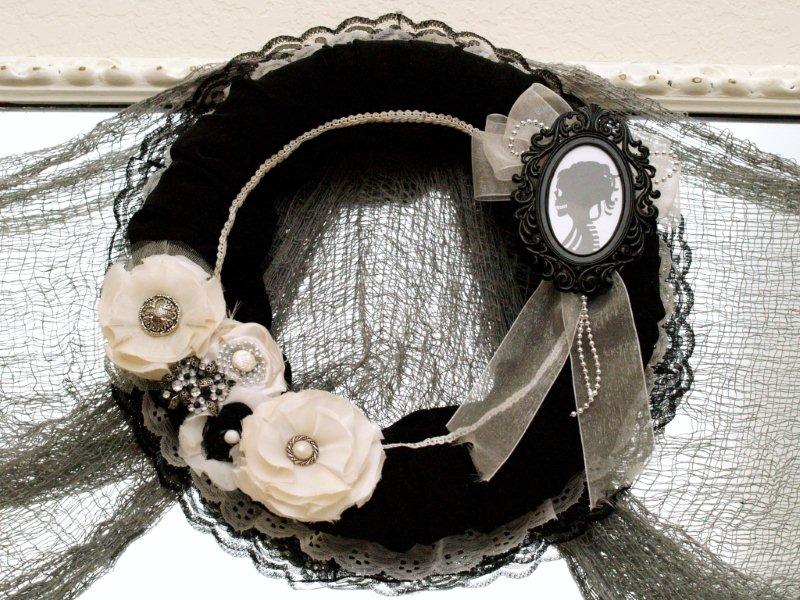
Isn’t my cameo fun? It’s a scary little skeleton! With curly hair. Of course.
I had seen some skeleton silhouettes before – and I knew that would be a fun addition to the wreath – I created this one and I think it’s a great touch!
Ready for a tutorial?
You’ll need:
Foam wreath form
Black fabric – about 1/2 yard
Lace and trims
White satin – about 1/4 yard
Buttons
Small Frame for Cameo (Mine came from Michaels)
Cameo image – click here to download
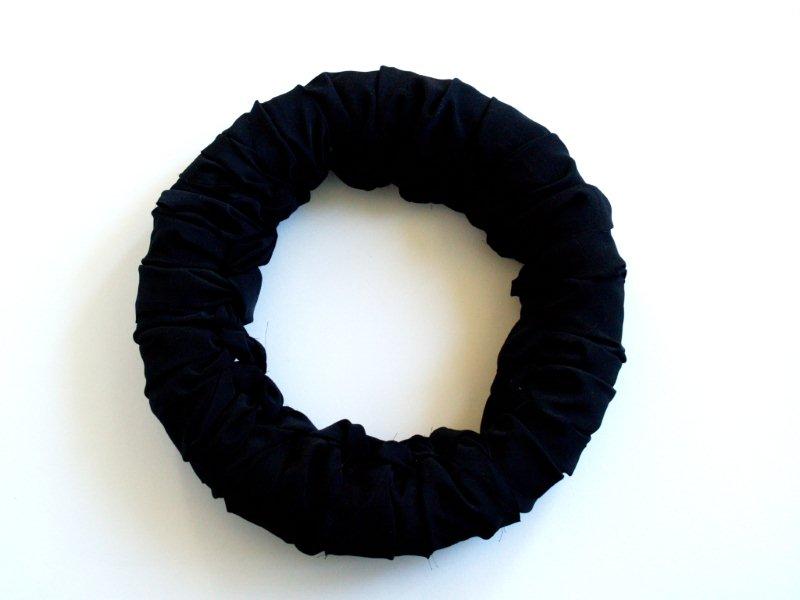
Begin by cutting your black fabric into strips, about 4″ each.
Knot the end of one long strip around the wreath form, gluing the short end onto the back.

Loop the fabric around back to front and pass the long strip through the loop in the middle to make another knot.
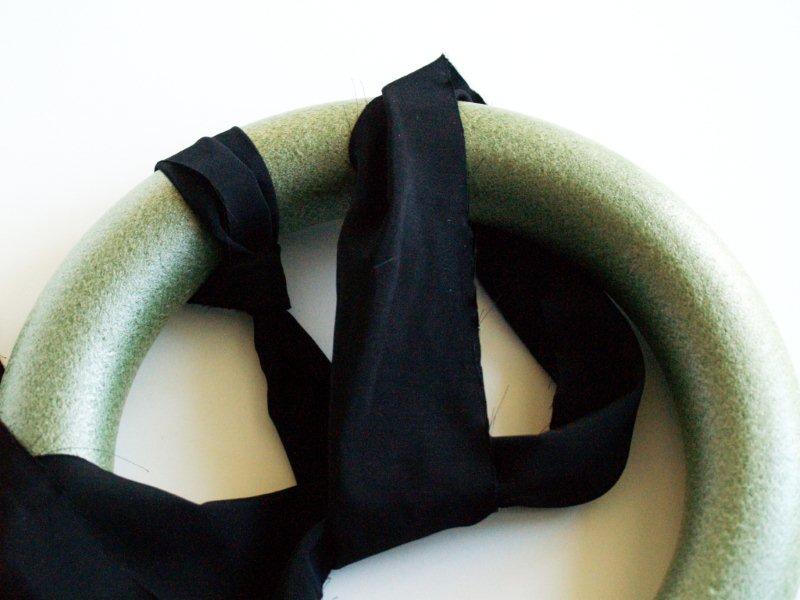
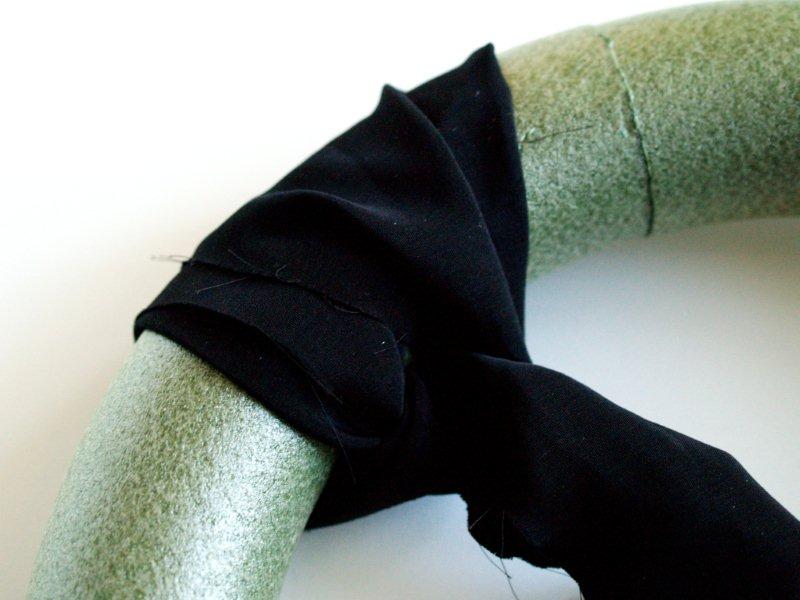
Continue to knot strips around the wreath, covering the entire wreath form.
You don’t want to tie them too tight – the knots should be loose – so they almost look like rosettes.
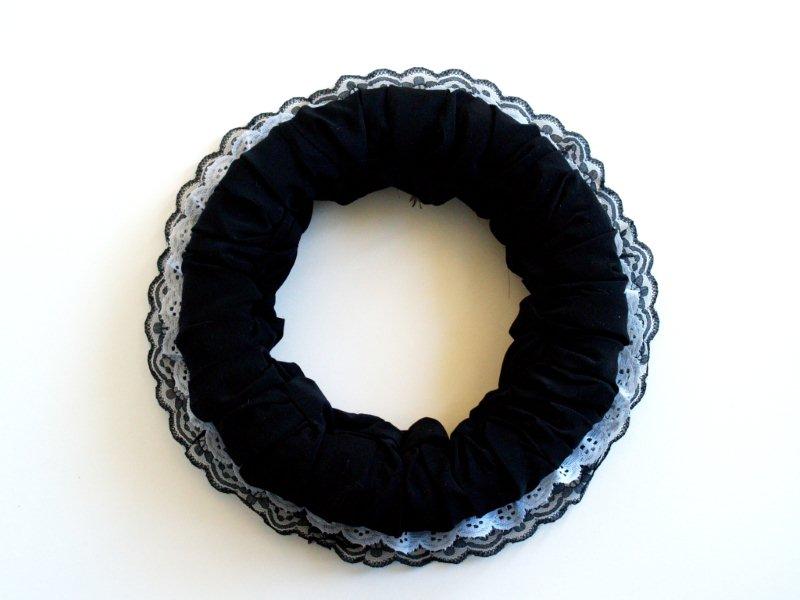
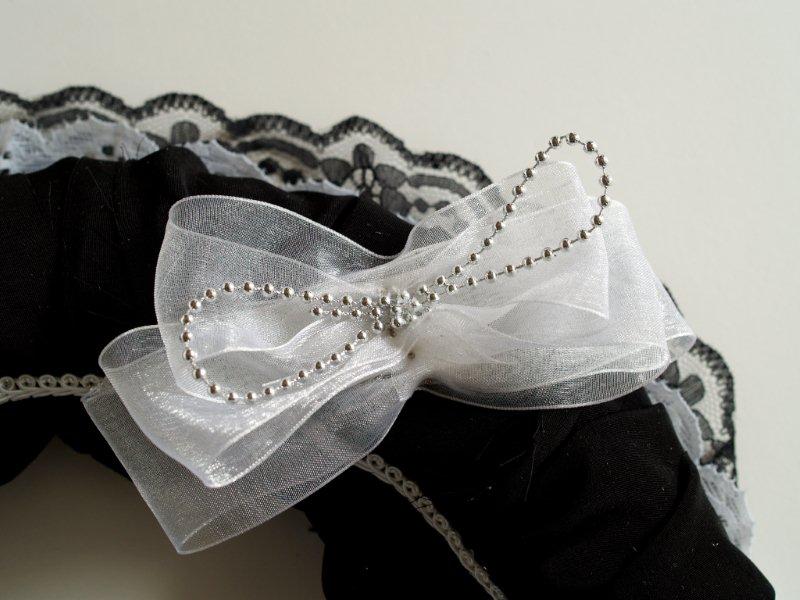
Glue two rows of lace to the back of the wreath – one white and one black. I think the black lace is 3″ wide and the white is 2 1/2″.
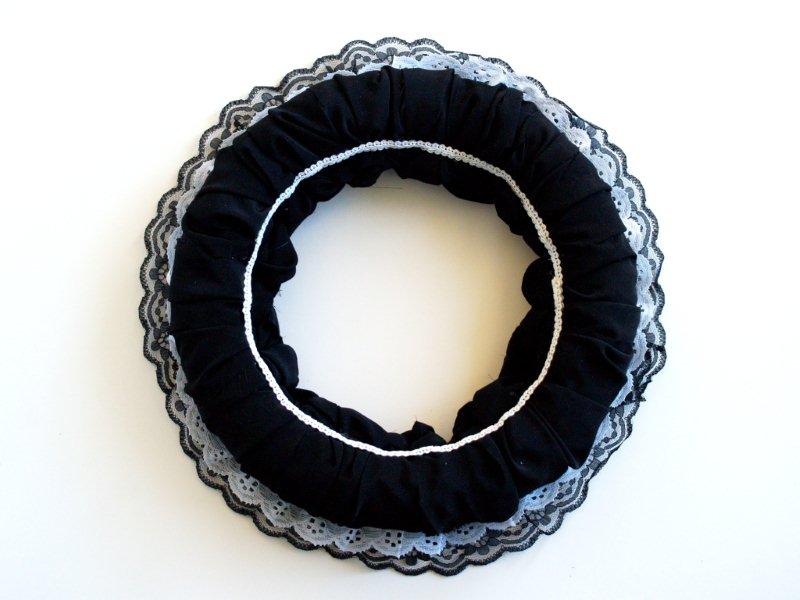
Add a strip of white braided trim on the inside of the wreath, just inside the knots.
I originally glued mine, but it wasn’t laying very nicely so I added some super tiny pins all around to help hold it on.
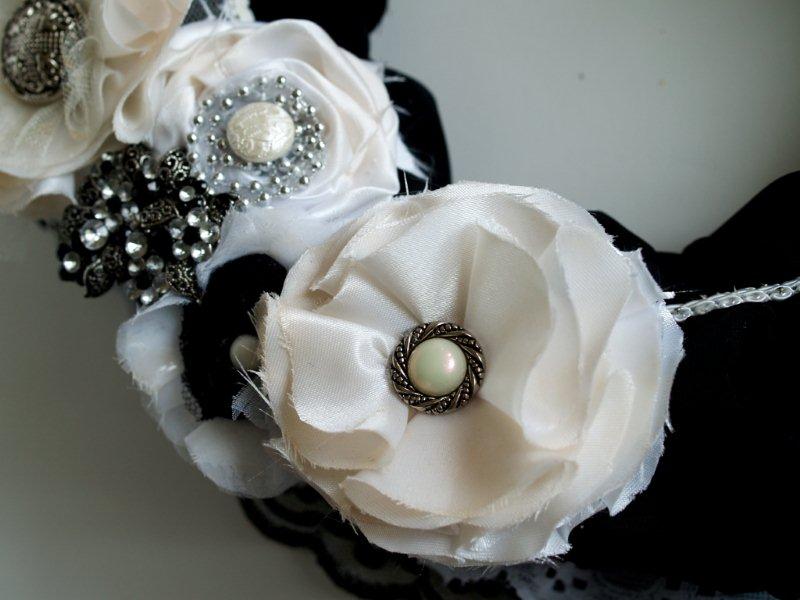
Make some fabric flowers for the side of your wreath. I like the a combination of rosettes and ruffled flowers – with different fabrics and trims.
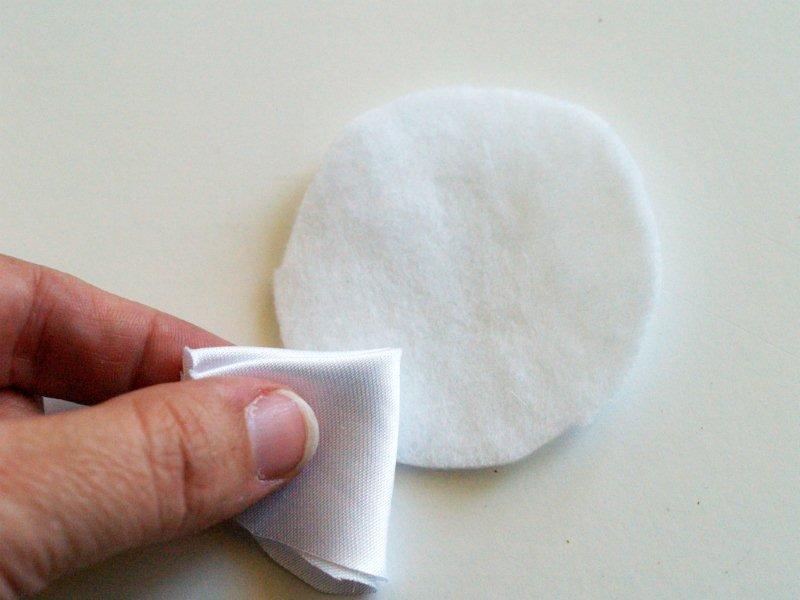
You can find a tutorial on the rolled rosettes here. To make a ruffle flower, cut 12 circles out of white satin. The bigger the circles, the bigger your flower will be.
Fold the circles in half, then in half again. Glue the point to a felt circle.
Cover the rest of the circle with one row of folded circles, then add another two or three rows, depending on how full you want your flower.
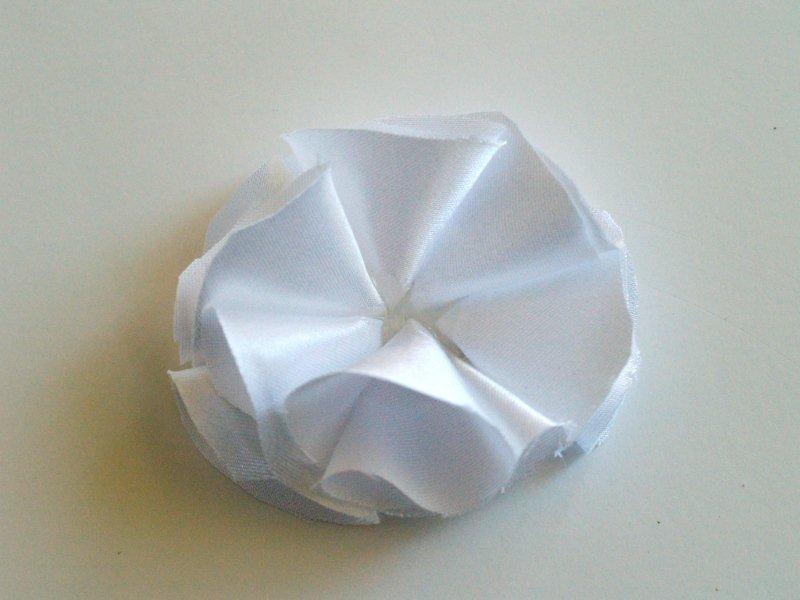
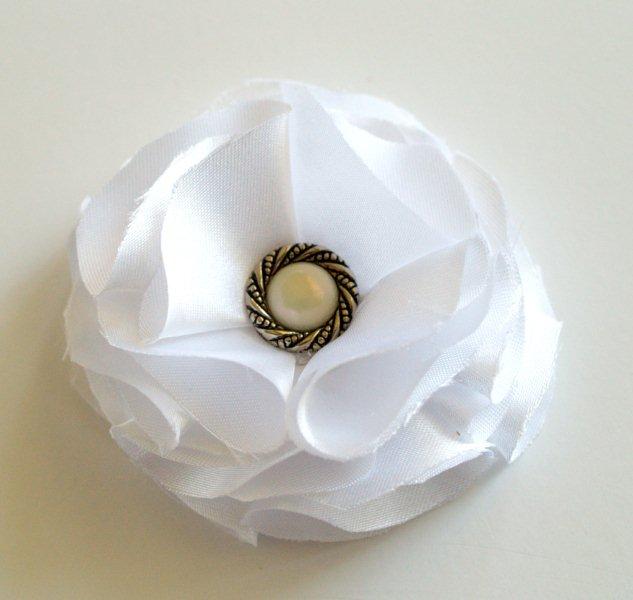
Add a button to the center and fluff up the circles.
Make more flowers with other fabrics, trims and buttons. Glue the flowers onto the left side of the wreath. Add a fun vintag-y brooch too if you have one.
Print out your Cameo Skeleton. Isn’t she cute? Sorta?
Pop her in a fun scrolly frame. Cut two strips of sheer ribbon and some trim. Glue them to the bottom back of the frame. These will be the tails of your fake bow.
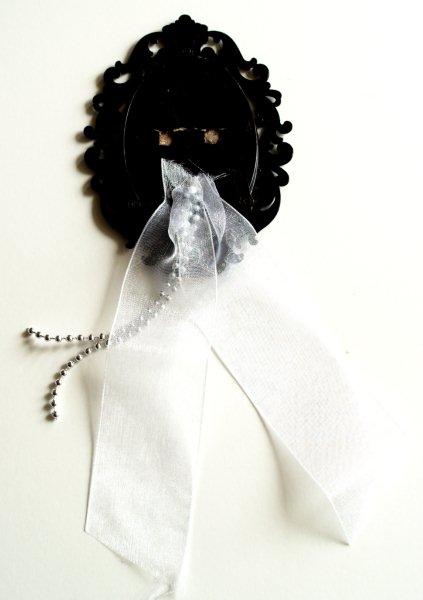
Loop more pieces of the sheer ribbon and pinch them together. Pin them to the right side of the wreath, towards the top.
Add more trim.
Glue the Cameo frame to the wreath so the top of the bow is covered by the top of the frame.
Now we need to age our flowers just a bit. No self respecting Haunted House has a New Wreath in it. ;)
Brew a smallish cup of tea and let the tea bag sit in it for a while. Dip a paint brush into the tea and blot it – you don’t want it dripping wet.
Brush the tea onto the edges of the flowers and lace. This will yellow the satin and fabric and give it that “old wedding dress” look.
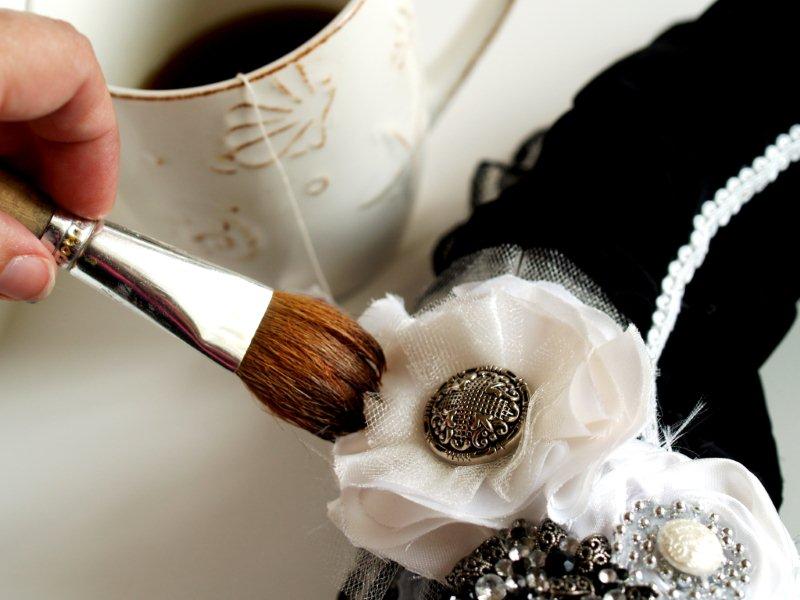
It’s a little hard to tell in this picture – but it looks cool. I promise. ;)
Hang your wreath as desired – I used a small knotted loop of ribbon pinned to the back.
That finishes it off!!

I hung it in front of some gray mesh fabric I found at Party City for 99 cents. Score. ;)
I pretty much love my Cameo girl. . .
Isn’t it fun?? I’d love to know what you think!!
The whole Mantel Reveal is coming up in a few days – I can’t wait to show you!
**Update – you can see the Mantel Reveal here!**
I’m linking to Sunday Scoop, Today’s Creative Blog, Met Monday, Skip to my Lou, Tutorials & Tips Tuesday, Quilt Story, and the other fabulous parties on the sidebar – make sure you check them out!


Nice, Beverly! I haven’t seen anything like this!! Knotting the fabric around the wreath form seems like a cool technique! I can’t wait for the reveal
Oh, Bev, it is postively adorable!! (In a super spooky sort of way!) Loving every.single.aspect!!!
I love it – thanks for sharing! The cameo totally makes it. :o)
I really like it! Super unique and interesting and the cameo is “to-die-for” adorable! Great job:)
This is such a fun creative take… I love it!!!
OMG! LOOOOOOOVE this!
Quite possibly my favorite DIY decorations posted on any blog so far this season. Love the cameo!
I think it looks lovely! Very elegant and very gothic. Love the curly haired skeleton – so fun!
Thanks for the tutorial.
Cheers,
Tracy
Love it, you have the best taste for halloween wreaths! Love this one and one you did a while back that I took inspiration from and made an almost look alike. I loved the one you did with tulle and I think a hot pink feather boa, so AWESOME! LOVED it also! Great job, keep sharing!
Natalie
http://www.projectdowhatyoulove.wordpress.com
This is such a beautiful wreath! I love all the elements, the lace, the cameos and using tea to give the flowers just the right vintage look. Great job!
I’d love for you to link this up to my Monster Mash Bash! http://afishwholikesflowers.blogspot.com/2011/10/lets-do-monster-mash.html
LOVE the way it turned out bev!! It’s totally goth and I love it for halloween! Cant wait to see the entire mantel :)
That wreath is GORGEOUS, I’d have it up all year round.
So so cool! You could even use it after Halloween if you removed the (really awesome) cameo! I love it…thanks for sharing!
Great job Bev! This is really nice. I love the details!
I love this wreath. This was an amazingly great idea. I bet your mantle is going to be spooktaculious.
Yes! I love it! Thanks for sharing!
The cameo skeleton just kills me! -no pun intended-
I love this! And I have the same little black frame downstairs, so I think I now know what needs to go into it!
OMG — She’s glorious! Bev, your link-up caught my eye, and even though I don’t usually visit the links on “A Little Birdie…” till Sunday or Monday, I couldn’t resist the impulse to click and see who was behind this amazing creation. Of course it was you…of course!
Bev, this couldn’t be any more lovely!! Pinning it right now!
Utterly love that wreath! It’s one of my favourites of the Halloween-themed wreaths I’ve seen :) Pinning it!
Oh I love it!!!! Love for you to share this at my link party http://www.projectqueen.org
Awesome tutorial too!
Love the skeleton cameo. So cool and funny!
Thanks for sharing.
liZ
(simplesimonandco)
WOW – this ROCKS… What an awesome blog,,Im officially following ya with smiles.. This is great inspiration..Found ya on linky and had to stop in.. So much creativity dwells here.. Im Marilyn via http://theartsygirlconnection.blogspot.com ..Hope you can stop in sometime..TY
that skeleton cameo is Amazing! i love your wreath–it is beautiful and gothic at the same time…
This is so fun and festive- I love how it has the gothic feeling while still being really pretty! Stopping over from A Crafty Soiree!
-Zoe
Great job, LOVE the skeleton silhouette!
Amazing, I love it.
I love this wreath! I think it’s very victorian looking. The skull cameo is the best!
Oh my goodness – LOVE!! This is so unique – somehow you pulled off pretty AND creepy at the same time! Very impressive! I think your skeleton cameo is my favorite part. I’d love if you would link this up to our Fall Wreath Craft Party this month!
This is beautiful and that cameo skeleton is HILARIOUS! I totally want one now!
I am hosting a really fun giveaway at my blog. Would LOVE for you to come and check it out!
http://ohhbabydesigns.blogspot.com/2011/10/exciting-announcement-and-giveaway.html
I would love it if you would link this to my link party. It just started :)
http://diycraftstomake.blogspot.com/2011/10/whacha-got-weekly-linky-party.html
Very cool wreath!! I love it!!
This is the very best wreath I’ve seen for Halloween. It is so different, elegant and spooky, too!!! I am in love with it.
Thank you for sharing this fantastic idea.
I am having a giveaway on my blog. I hope you can stop by.
Ruth
i love this! seriously. love. love. love. i would love for you to link this or any other post up to my link party flashback fridays….a place where bloggers can link up vintage, retro, old posts, or anything that comes to mind when hearing the word “flashback”.
here is the link if you are interested:
http://lovenotesbylauryn.blogspot.com/2011/10/flashback-fridays-6.html
{love} lauryn @ lovenotesbylauryn.blogspot.com
This is absolutely fabulous! I adore the gothic look – the lace, the pearls, the cameo… Well done!
Really sweet Halloween decor.Spooky but elegant.
Hi Bev, just featured this as part of my BFF Open House Wrap Up! Feel free to grab a featured button if you like!
Bev another amazing week! I couldn’t help it, I HAD to feature you this week again, I love your skeleton silhouette cameo, SO cute (love the ribs and curly hair!)
Bev, thank you so much for linking up to “A Little Birdie Told Me…”! Your wreath is one of this week’s features!
Jenn
SOOOO in love with this wreath, Bev! Great job!!
creepy fun! :) that’s what I call your fabulous wreath!
gail
YOU HAVE BEEN FEATURED ON COM TODAY, Thank you for being a part of the “Talent Show.” winks-jen
a really adorable wreath!! really amazing…
I linked to your tutorial on my blog – thanks for sharing!
doro K.
Thanks, it is beatiful. I love the wreath.
First I love this and I’m trying to make this but I am really a novice so I think I’m reading into this too much “Knot the end of one long strip around the wreath form, gluing the short end onto the back” , am I supposed to actually use glue? and the next step is slightly confusing too “Loop the fabric around back to front and pass the long strip through the loop in the middle to make another knot.” does this just mean keeping making knots around the wreath or is this special way to tie off the ends? thanks for your patience