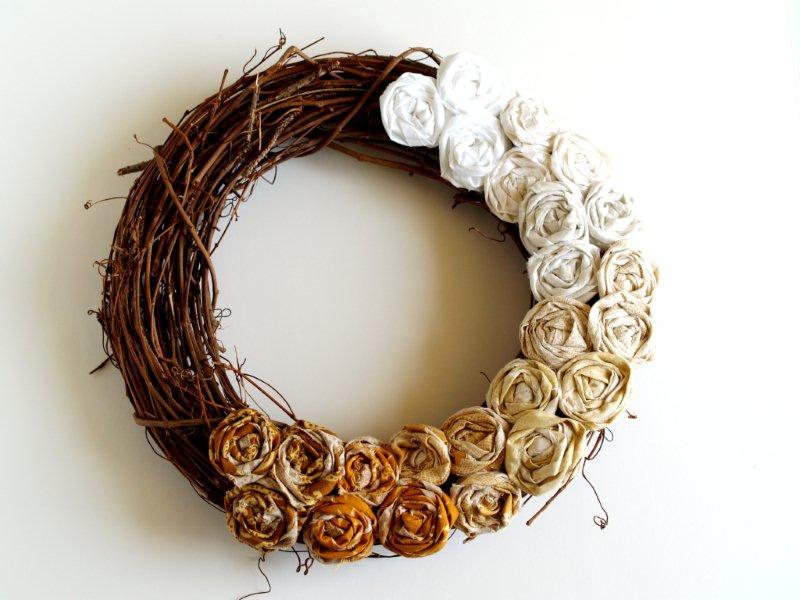
I have been really inspired by all the Ombre projects that are so popular right now, and I thought it would be fun to use that idea to make this Fall Ombre Rosette Wreath to share with you today!
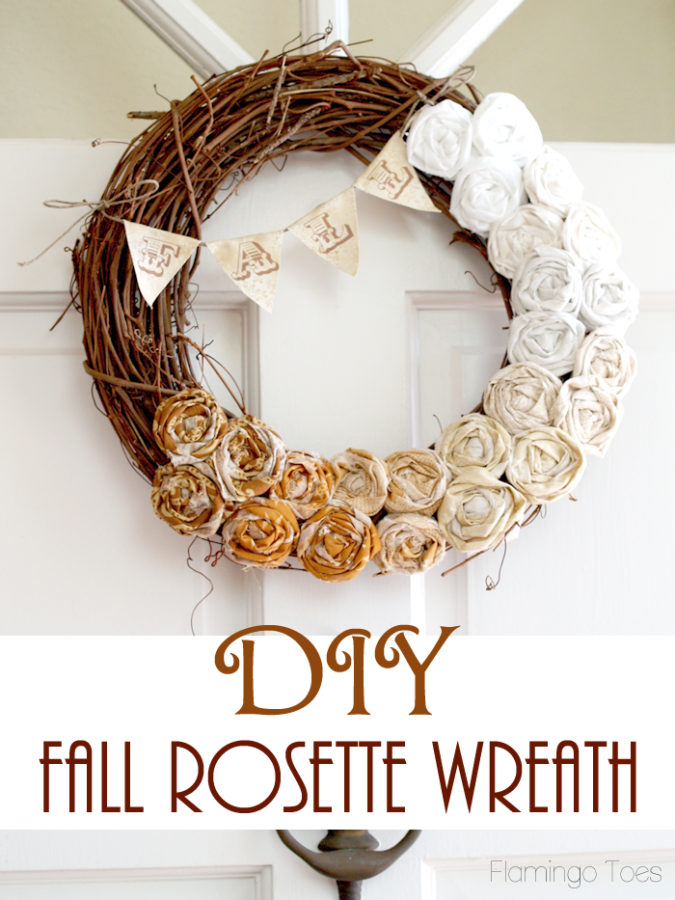
Isn’t it cute? It’s really quick and easy too!
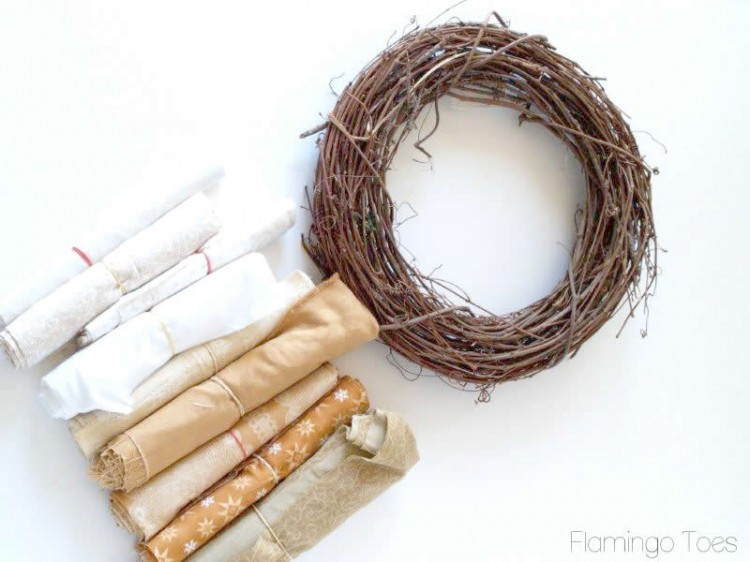
To make you’re own snazzy new Ombre Fall Wreath you’ll need:
1 Grapevine Wreath
Fabrics in Graduated colors. I used 8 shades ranging from white to a dark goldish-brown
Felt (enough for 24 – 1 1/2″ circles)
Freezer Paper
Twine
Hot Glue
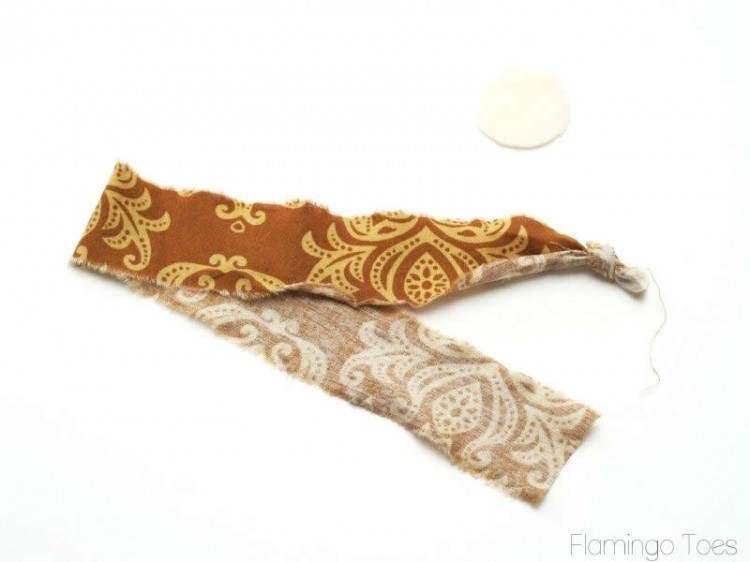
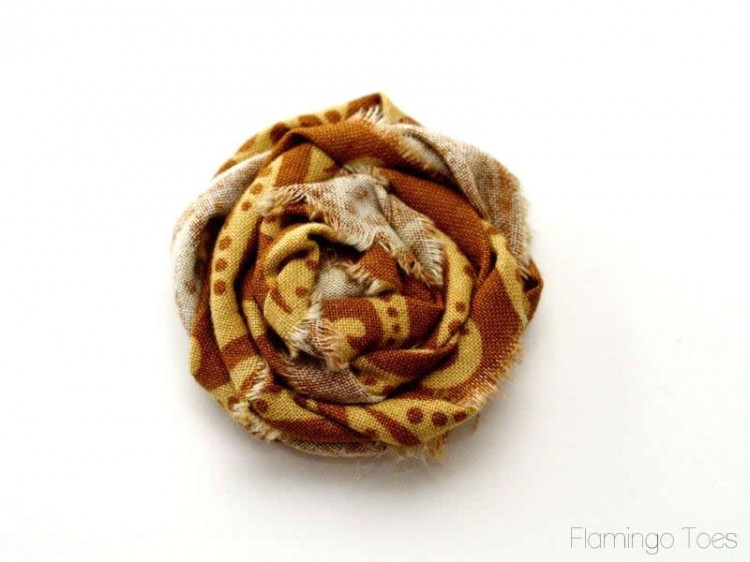
Begin by getting your strips ready for your rosettes. Tutorials for these are all over – but I thought I’d do another just for fun. (and so you don’t have to go hunt one down.)
I like to tear the strips for the rosettes – they have slightly frayed edges that way and it makes the rosettes all cute and scruffy looking.
The strips should be about 1 1/2″ wide and about 18″ish inches long.
Cut 24 – 1 1/2″ circles of felt for the bases.
For each rosette you’ll need one strip and one felt circle. Tie a knot close to one end of the fabric strip.
Hold the knot in your left hand and begin twisting the strip loosely with your right hand. Start to wrap the twisted strip around the knot.
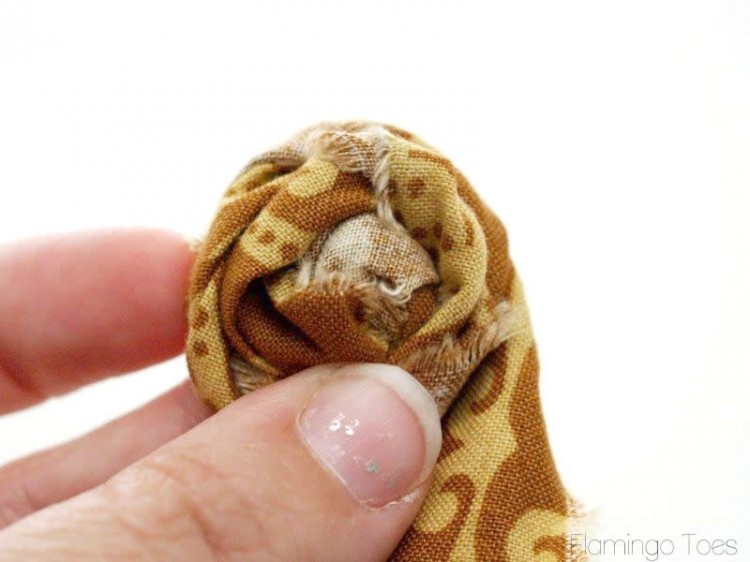
(Ignore my scritchy sad little painted fingernail please. :)
Keep wrapping until your rosette is a little bigger than your felt circle.
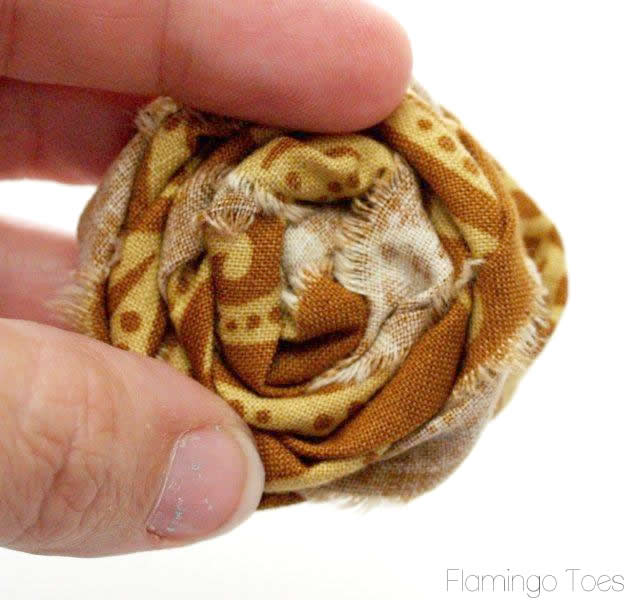
Tuck the end under the rosette and hot glue it to the felt circle.
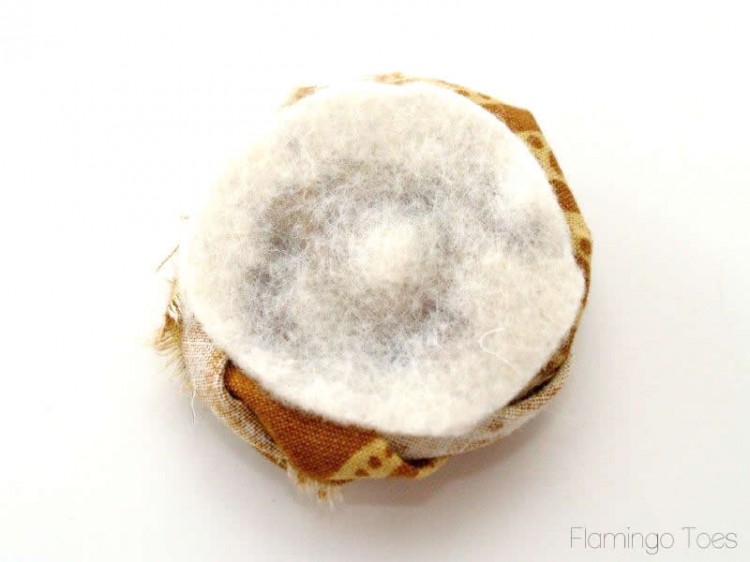
Now you have a cute little fabric rosette!
Make 23 more of these – 3 in each fabric color.
You should end up with only 5 – 15 glue gun burns by the time you’re done. Not that I’m speaking from experience or anything.
Once the rosettes are made, start gluing them onto the wreath. You want them started off center on the right side.
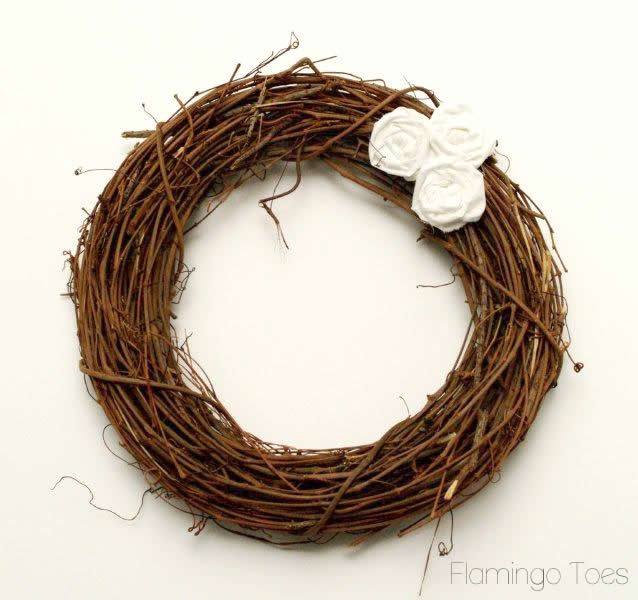
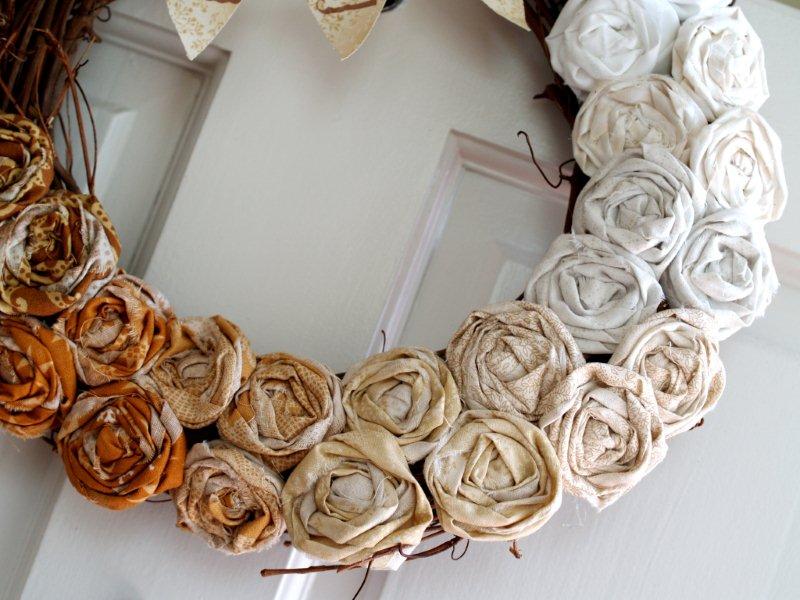
Keep gluing the rosettes on, graduating to the darker colors as you go.
So cute right? :) Now we’re going to add the pennant.
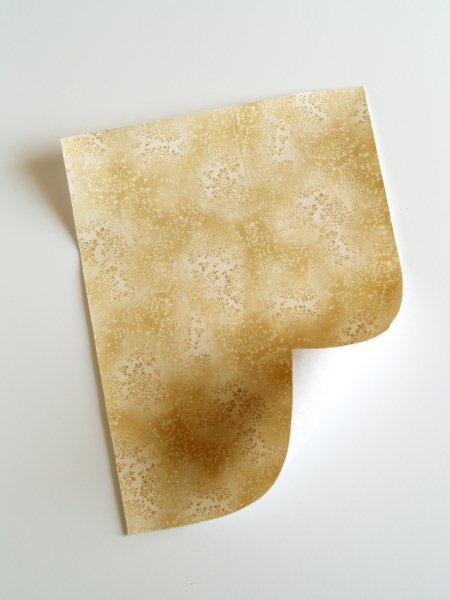
For mine, I printed on fabric – which is super easy. You could also do the same thing with paper. You can just skip the next step.
Cut an 8 1/2″ x 11″ piece of fabric and the same size piece of freezer paper. Iron the shiny side of the freezer paper to the wrong side of the fabric.
Trim around all four sides so that they are straight and even. This will help the fabric go through the printer easily.
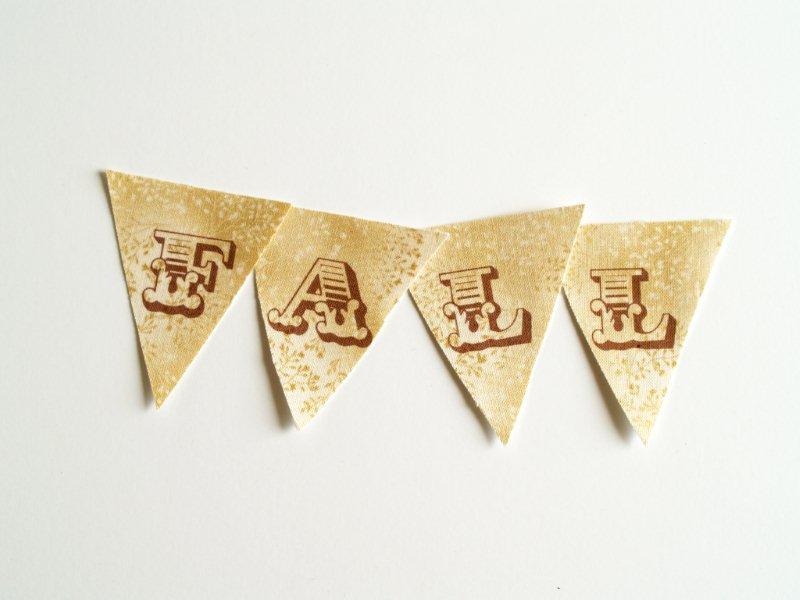
I printed out the word FALL – but you could do anything! If you like this – here is the PDF of the image to use.
Once you’re fabric has printed, cut out triangles around the letters for the pennants. Peel off the freezer paper.
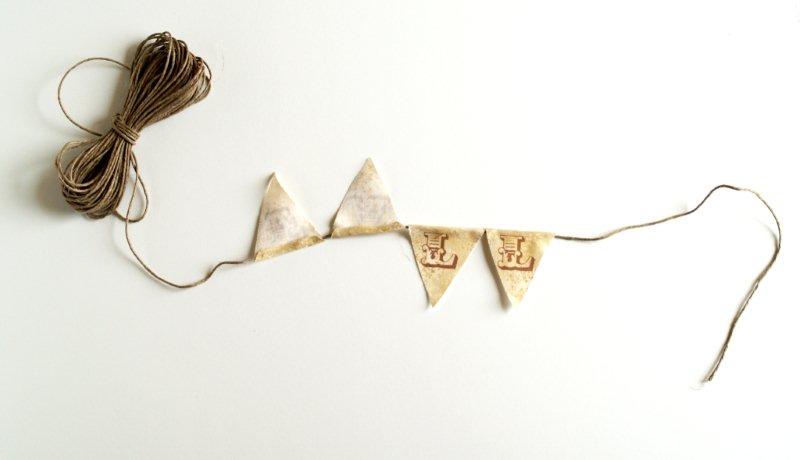
Cut a long piece of twine and glue the pennant to the center by folding the top of the triangles around the twine.
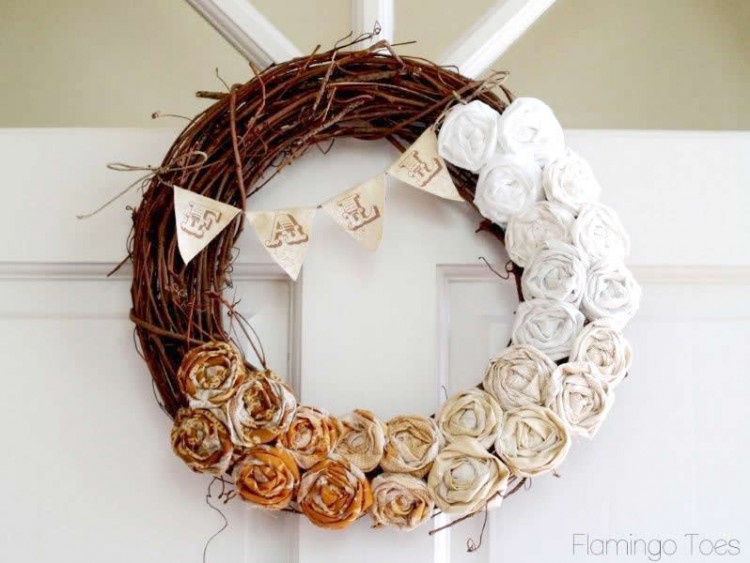
Tie the twine to the wreath just over the top rosette on the right and a little above the last rosette on the left.
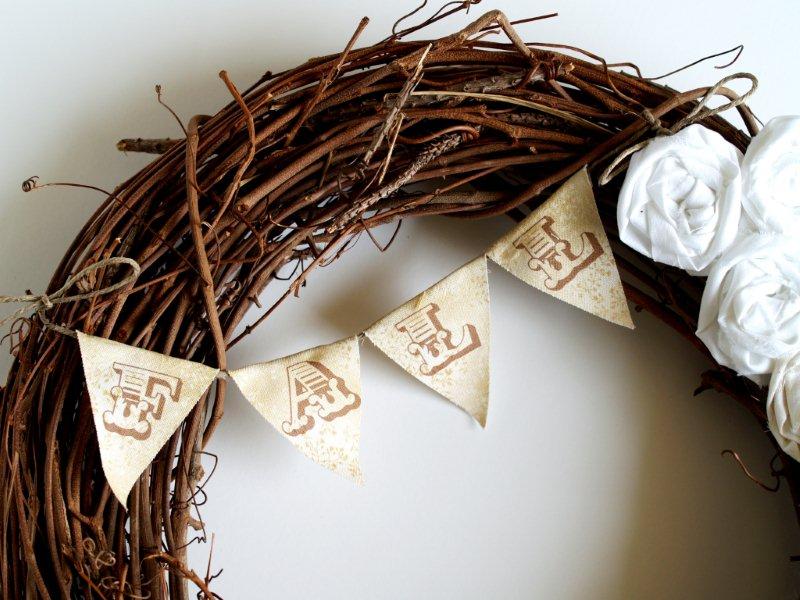
Now you have a super cute wreath for Fall!!

I love how cute the pennant is and the gradient of color in the rosettes!
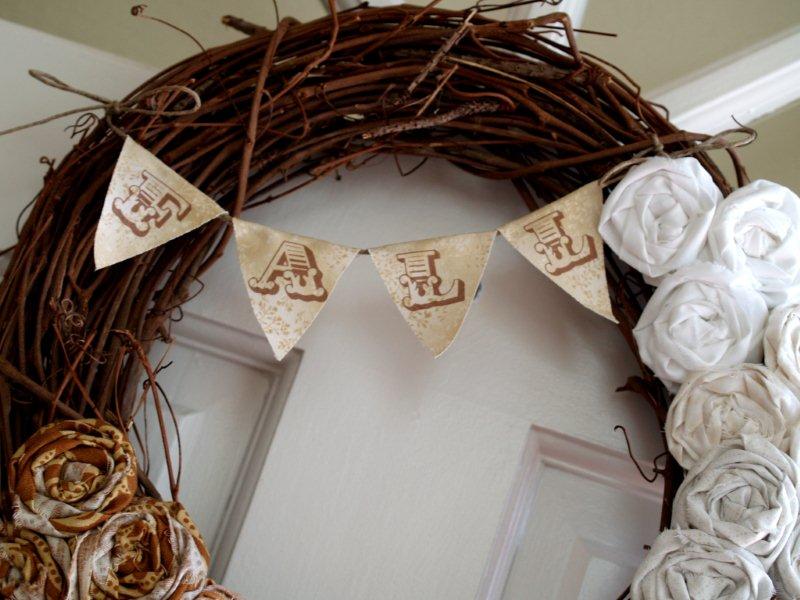

I hope you like it too!


This is gorgeous! I totally laughed at your hot glue comment….I did the same thing this weekend and have the blisters to prove it. Ouch!
this is really cute! If only I didn’t find rosettes tedious to make! Love it!
LOVE it Bev! I totally pinned this, as I am ombre obsessed. Your PSA about the glue gun burns was clever and made me giggle out loud!
this is lovely–would look great in any home :) thanks for the tut!
Too cute, Bev! I love it! Love the ombre and love the banner. :)
This is super cute and I am tucking the freezer paper printer trick away for future use! It is definitely time for me to pull my glue gun back out to use. Thanks Bev!
BEAUTIFUL! I love it!
Beautiful!!!!
This is so lovely and really well explained – I am going to have a go at making one for my front door for Christmas. Thank you.
Jill
I love this! The colors of the rosette look great!
i LOVE it! another great tutorial :)
Fantastic! I had to laugh though…I did a wreath like this this past weekend and will be posting it to my blog too! Although, I LOVE the addition of the printed fabric pennant. I do believe I need to add that to mine!
Love this Bev! Love the idea and the colors….swoon! I swear I’ve burned off my fingerprints because of hot glue! And it looks so classy when you’re paying for something at the store and you notice dried hot glue on your fingernails!
This is gorgeous!!! I love it!!!
OH.MY.CUTENESS! How adorable is this! I love rosettes…and ombre is so sassy! L.O.V.E it!
This is so pretty! I love the Fall colors cascading down the one side. Great idea for printing on fabric…..I always forget to try this. Thanks for sharing!
I love how natural this looks. great tutorial and it looks super easy. Thanks for sharing.
OH BEV!!! It’s GORGEOUS!!! I love it! I’m pinning it too!! NOW! I have to tell you I had a classic “AMI” moment proving that “blonde moments” are FALSE!! I THINK I’ve been making “ombre” wreaths! I have 3 posted to my blog NOW! I have NO IDEA! I googled the definition! LOL BUT ANYWHO! I LOVE THIS! It’s beautiful! I love the Fall pennant sign too! :)
I love this! The bunting is great! : ) I’d LOVE for you to stop by and share at my party!
http://www.cherishedbliss.com/2011/09/printing-on-fabric-silhouettes.html
Gorgeous! I love the gradual change from white to tan in the color of the rosettes. Really beautiful. I would love it if you would stop by and share at the crafty link party going on right now at Lines Across My Face.
I hope to see you soon,
Rachel
http://linesacrossmyface.blogspot.com/2011/09/cure-for-common-monday-10.html
Just Beautiful !!!!
Beautiful! Well done.
this is lovely! I love the color scheme :)
This is SUPER SUPER cute Bev! I love those rosettes!!
I can’t even describe how great this is!! It looks amazing! I am stopping by to say hi because I just registered for the SoCal Social!! I look forward to meeting you next weekend! Hope you have a great week!!
Michelle
http://www.delicateconstruction.blogspot.com
Beautiful! I love your fabric choices!
Your wreath is gorgeous. It is so different from other fall wreaths and I just love it.
Ruth
This is just beautiful! I love it! So classy and elegant. I am pinning it, and I will be featuring this on my blog tomorrow for Three Things Thursday, so I hope you’ll stop by and check it out.
Thanks for sharing-
Valerie- http://www.occasionallycrafty.blogspot.com
This is awesome!
Precious!! I seriously love this! The rosettes look so cute and I love that banner!
Love this wreath, super cute! Found you on Transformation Thursday. I will be back, I joined as a follower. Hope you’ll visit The Corson Cottage sometime:)
OoOohhhh I lurve the graduating colors!!! Newest follower and can’t wait to read your blog!
Erica
threeoclockwinds.blogspot.com
I can’t lie, you are the inspiration for my fall wreath this year!
I just love this! I have been considering a pennant banner for a wreath, but didn’t know how to pull it off. Yours looks great! So professional. Really lovely!
This is gorgeous! I’m loving ombre too – this is so great & pretty!
So pretty! I’ve seen tons of wreath images recently, but yours is my favorite by far! Thanks for sharing.
**Sigh** I love this, so pretty. You did a fabulous job! Just right with the bunting.
Really cute! I have loved making rosettes lately and love the look of pennants too! Great job.
Bev, I have seen the word Ombre countless times in the past few weeks, but you did it BEST! As always your version rocked! Love it! 24 rosettes! that IS a commitment :)
Beautiful. You picked the perfect fabrics. Featured you on my blog today:
http://diykindagirl.blogspot.com/2011/09/friday-finds-93011.html
This is beautiful! I love that it carries a fashion trend in to seasonal decor.
This is so very pretty! Great job!
This is just darling…so delicate and yet so fun, too! What a great wreath – I love fall stuff! Beautiful!
Becky B.
http://www.organizingmadefun.com
Organizing Made Fun
This is just gorgeous. I really really love it. I pinned it so fast. The bunting is the perfect touch. Everything you make is so pretty. :)
So glad you linked up your gorgeous wreath! I just adore it!!
What a great wreath! Great job. :)
Ummm this is genius! I love the “ombre” look.
I love how this turned out. It looks so great. Oh, and the tutorial on making the rosettes was great because I often wonder how people do it.
Gorgeous! I love the ombre, and your rosette wreath is the most elegant and artfully done that I’ve seen!
Well done! Thanks for sharing!
LOVE this idea! Thanx for sharing and giving us all the details! I think I may have to make me one!
LOVE!!!! I pinned, tweeted and stumbled. :)
Just love your wreath! Rosettes can make anything pretty ;)
Shared onSimply Cottage Love’s Face Book page . This is gorgeous!!
This is such a gorgeous wreath – absolutely LOVE it! The pennant adds such a whimsical touch. I love how you used the graduated shades of fabric. I included it in our roundup of gorgeous fall wreaths !
this is absolutely gorgeous. you did a fantastic job. I love the color changing rosettes. beautiful!
new follower!
kathryn
http://www.thedragonsfairytail.blogspot.com
Oh my bev!! I love your wreath! I need to do more crafts. So envious of your talents!
gail
STUNNING! Thanks for the tutorial and inspiration.
Loved it so much I also included it in this post: http://simplycottagelove.blogspot.com/2011/10/fall-wreaths-decorate.html
Thanks again for the inspiration : )
I originally saw your wreath over at Every Creative Endeavor and love it so much that I featured it on my Fall Wreath Round up. Come check it out and grab a featured button if you’d like. Carissa @ Carissa’s Creativity Space
I saw your wreath on The CSI Project! So so pretty! Beautiful :)
I love the wreath! That could also be a cute Christmas idea. You are such a talented girl!
But why is the word “ombre” used to describe this wreath– and so many other crafts– right now? I cant seem to figure out the connection.
Michelle, “Ombre” is a french word meaning shaded or graduated in tone. Anytime you see color tones fading into eachother, that’s described as an ombre effect. It’s super trendy right now, you see it in home decor (the rosettes that fade from dark to light above) and even in the way people are coloring their hair.
Hi there! Love this wreath and you did a great job on the tutorial! I hope you don’t mind but I shared your link/tutorial on my site: http://bellastoriablog.blogspot.com/2012/10/ill-soon-be-posting-my-halloween-mantel.html Let me know if you want me to take it down, but I just wanted to share with everyone how sweet and festive your rosette wreath is! :) I especially love the “Fall” banner.
I just can’t wait to make one, on my way to FL, and as soon as I unpack I will be on my way to get my
to get the supplies I need. Such a great I deal. Will let you know how it turns out. Thank You Thelma
Love this! You are inspiring my fall decor!
This is stunning! By the way did not notice the nails till u mentioned it :-)
HI there, another gorgeous project–can you tell me what kind of freezer paper you use, that you can iron to fabric?
So adorable! Thank you for the tutorial on the flowers! :)
This is adorable! Very country chic. I love it, makes me want to redo my fall wreath!
It is fabulous. Great job! I recently did my fall wreath and made rolled flowers! I adore yours!
Thank you for sharing your fabulous wreath at Inspire Me Monday at Create With Joy!
I love it – and I’m delighted to include you among our guests at this week’s upcoming party #199!
Have a lovely weekend and look forward to seeing what you create this week Bev! :-)
This wreath is so pretty and I love the ombre coloring to the rosettes. I am sharing this at The Creative Corner tomorrow evening! Thank you and I hope you continue to link up in the future with us!
Carrie
curlycraftymom.com
I love your wreath Bev, and I like to make these rosettes, your inspiration has given me an idea for a smaller one to use in a vignette for my mantel.
Thanks for sharing on the #OMHGFF hope to see you next week!
Pinned to share!!
Hope you have a great week!
Thank you for this beautiful wreath. I made my own version of it and have the horrible blisters to prove it. You were not kidding about that!
sweet bev, love the ombre idea! thanks for sharing on craft schooling sunday!
This is so pretty! It is very different than what I have seen thus far for fall wreaths, love it!