It’s Back to School Week!!
Which means there are a million things to do. Shopping for clothes and shoes (because my son apparently wears holes in his shoes and doesn’t mention it), school supplies . .
not to mention registration and all that entails.
Can you believe Yearbooks in high school are $85???
What are they buying? Gold plated photo albums?
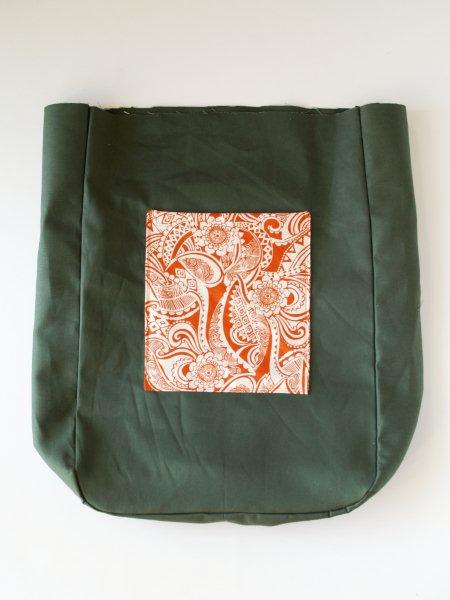
Of course they need something to put all those school supplies in. My daughter doesn’t carry a backpack anymore – she’d rather carry a cute book bag.
So I got out the sewing machine rather than brave the malls and made her one this year!
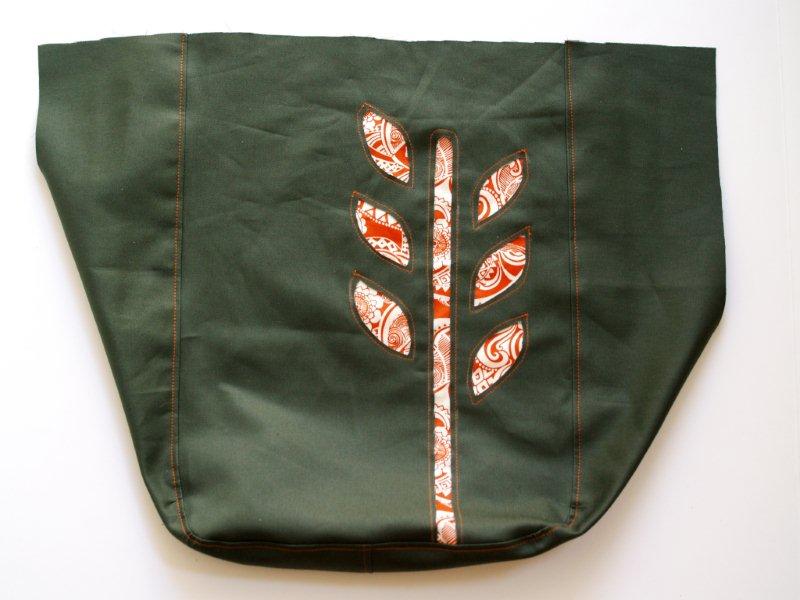
Here is her cute new Paisley Leaves Book Bag!
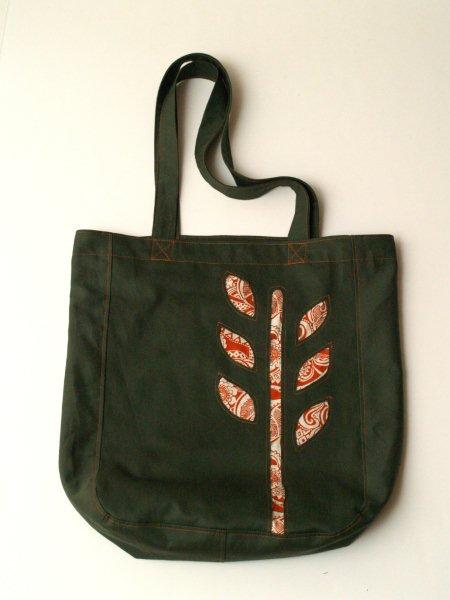
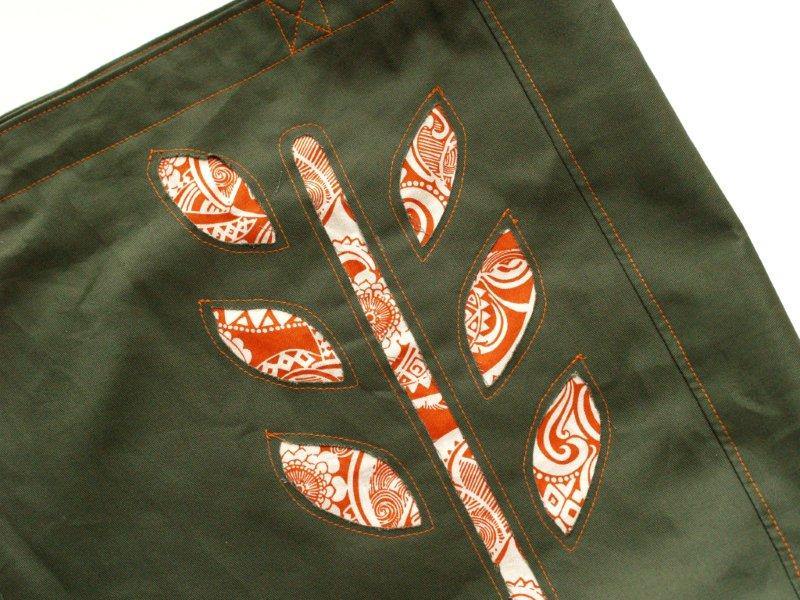
I’ve been wanting to do some reverse applique and this was the perfect project for it!
The leaves are made from a fun paisley print that is sewn behind the outside fabric. And the process is super easy!!
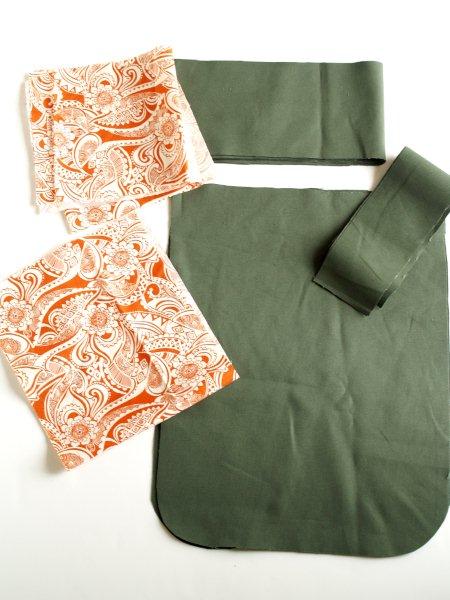
Here’s what you’ll need to get started!
Outside Fabric & Lining (I used the same fabric for both because I wanted it strong) – 2/3 yard of 60″ material
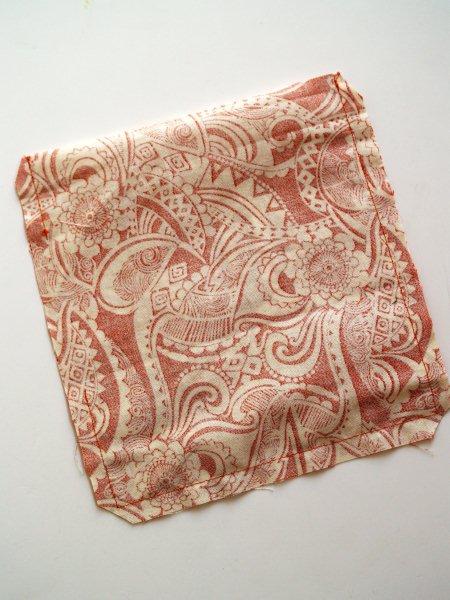
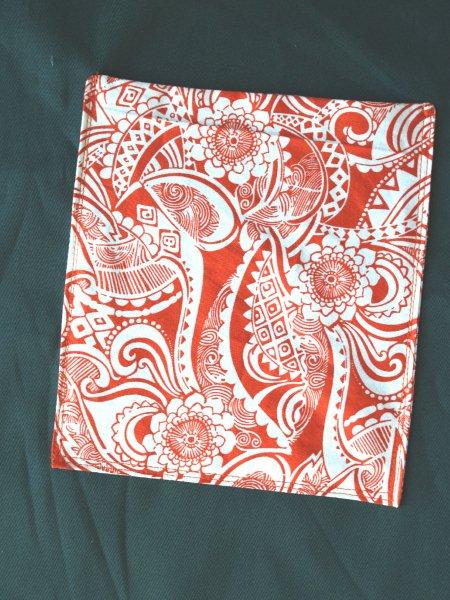
Decorative Applique fabric – 1/4 yard
Thread to match applique fabric
Start by cutting out your fabric pieces.
You’ll need to cut out of the bag fabric: 4 pieces 16″ x 12″, 4 pieces 21″ x 5″ and 2 pieces 28″ x 2 1/2″
Out of the Applique fabric you’ll need a piece 7″ x 14″ (or the size of your applique if you are doing a different design) and 2 pieces 14″ x 7″ for the pockets.
For the large bag pieces, round the bottom of the rectangles just a little bit.
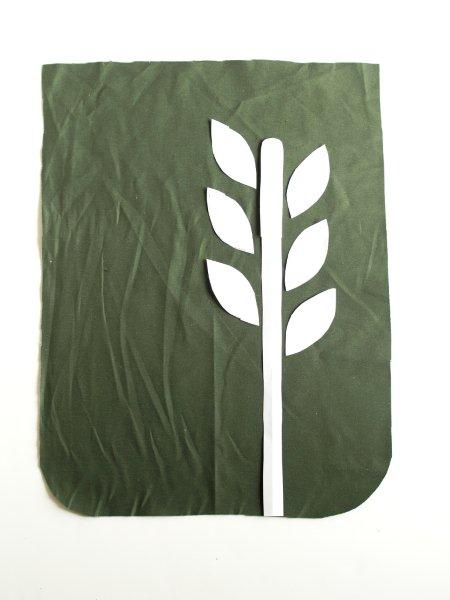
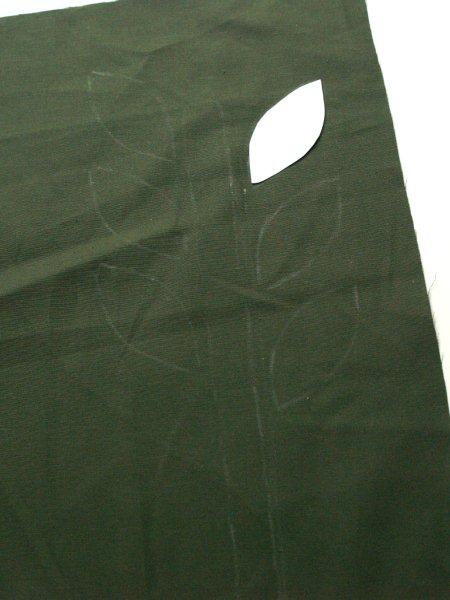
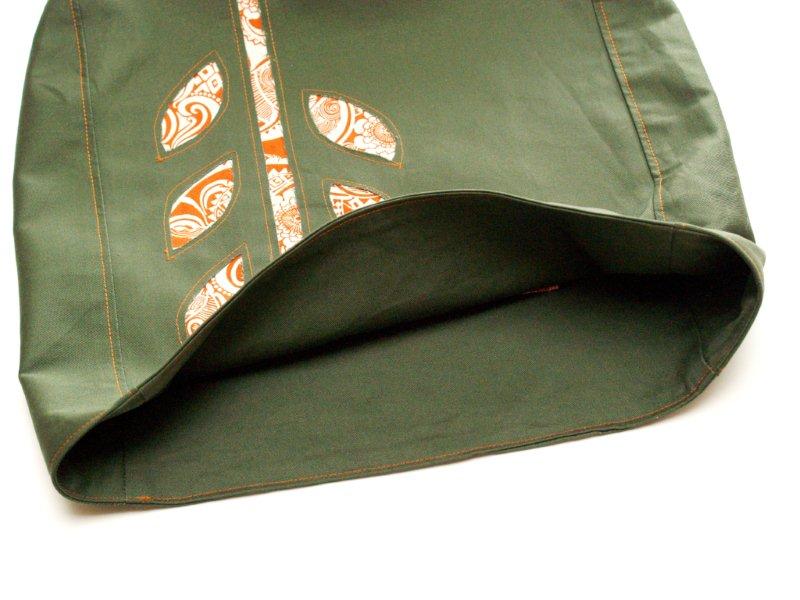
Draw and cut out a pattern for your applique. Mine is a simple leaves pattern.
The line in the center is 13″ tall by 1″ wide, and the top is rounded. The leaves are 3″ long and 1 1/2″ wide.
I’m obviously not an enthusiastic iron-er. :)
Trace around the design with a marking pen. These will be your stitching lines.
Lay out the large piece of applique fabric behind the bag fabric. Pin in place.
The right side of the applique fabric should be facing the wrong side of the bag fabric.
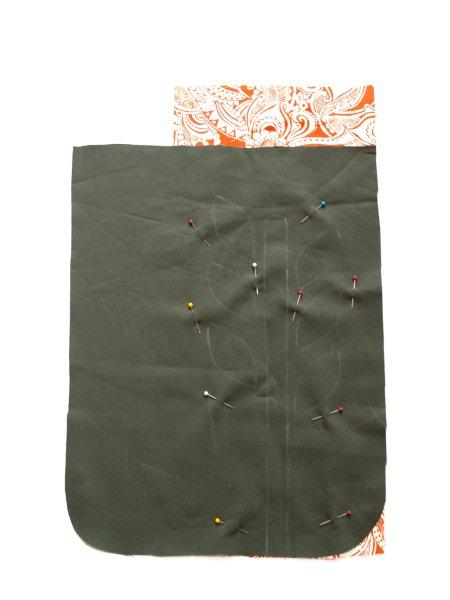
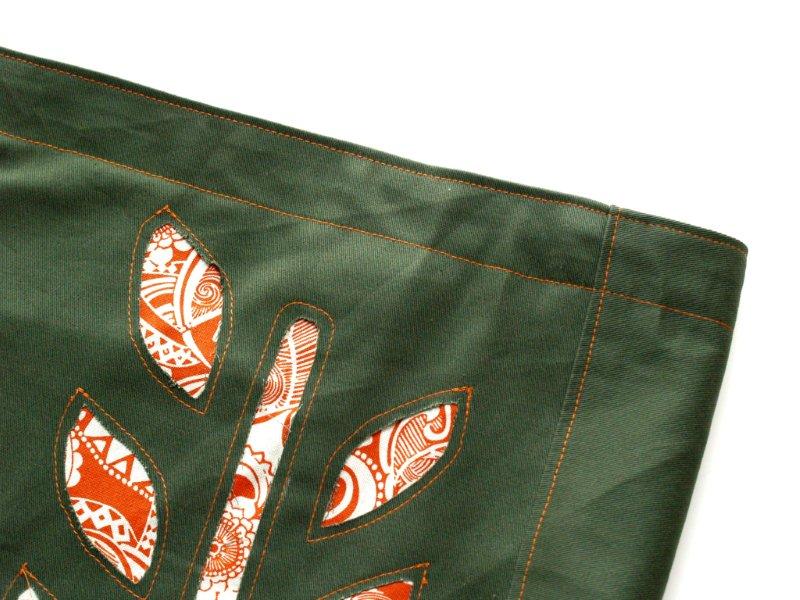
Sew along all the marked lines. I used a contrasting thread that matched the applique fabric so it would stand out a little more.
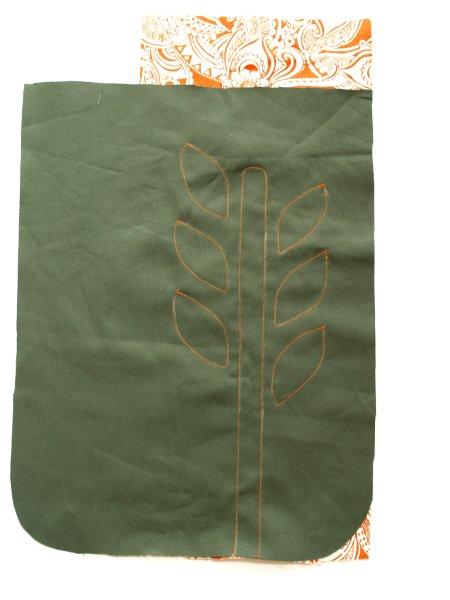
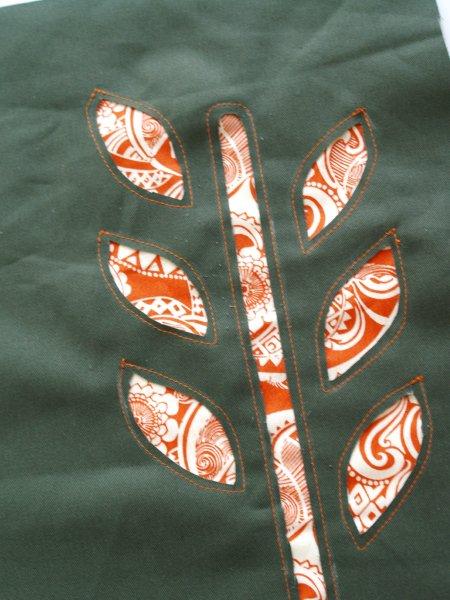
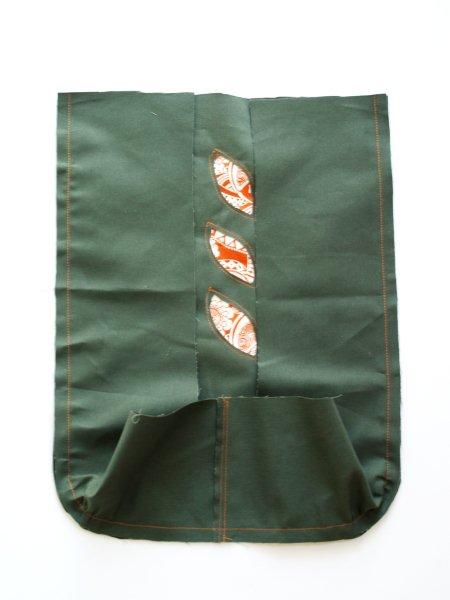
On the back, trim away most of the applique fabric. Don’t cut too close to the stitching lines.

On the front of the bag, cut away inside the center line and the leaves, leaving about 1/4″ of fabric inside the stitching.
Make sure you don’t cut the applique fabric underneath.
Isn’t that cute already? And it’s so easy too!! :)
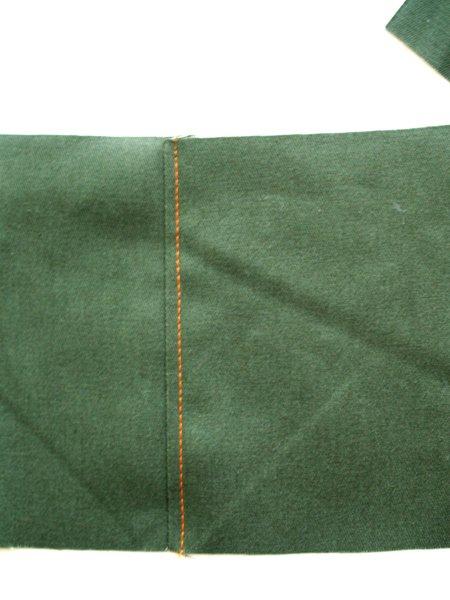
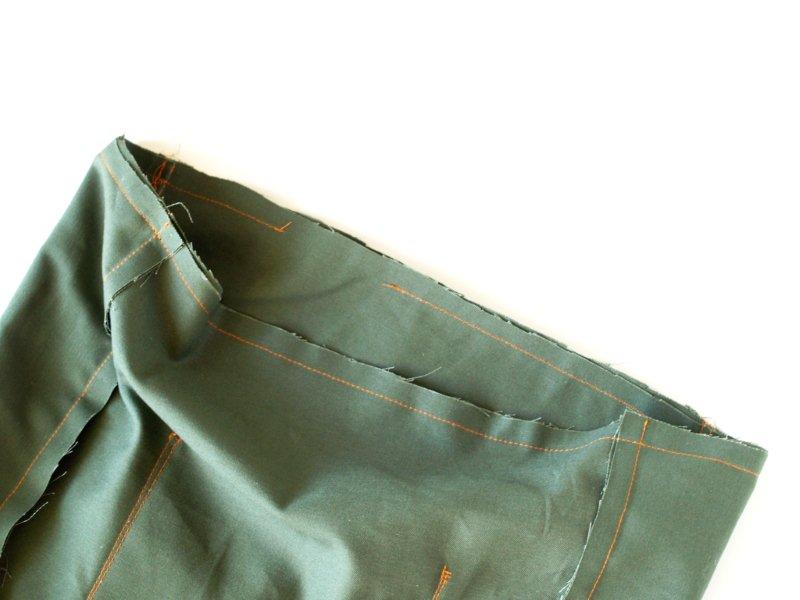
For the sides of your bag, line up to of the 21″ x 5″ pieces, right sides together. Sew along one short side with a 1/2″ seam allowance.
Open up the pieces and fold the seam to one side. On the outside, sew a line just outside the seam line for some fun topstitching.
This looks cute and will strengthen the bottom of the bag.
With right sides together, pin this band around the two sides and bottom of the bag front. Sew in place.
You might have a few little tucks as you go around the bottom corners. Don’t worry about that.
Clip the corners well and turn the band right side out. Fold and press the seam towards the band and topstitch the seam down like you did with the bottom of the band.
Sew the back of the bag to the band, just like you did with the front. Topstitch this seam also.
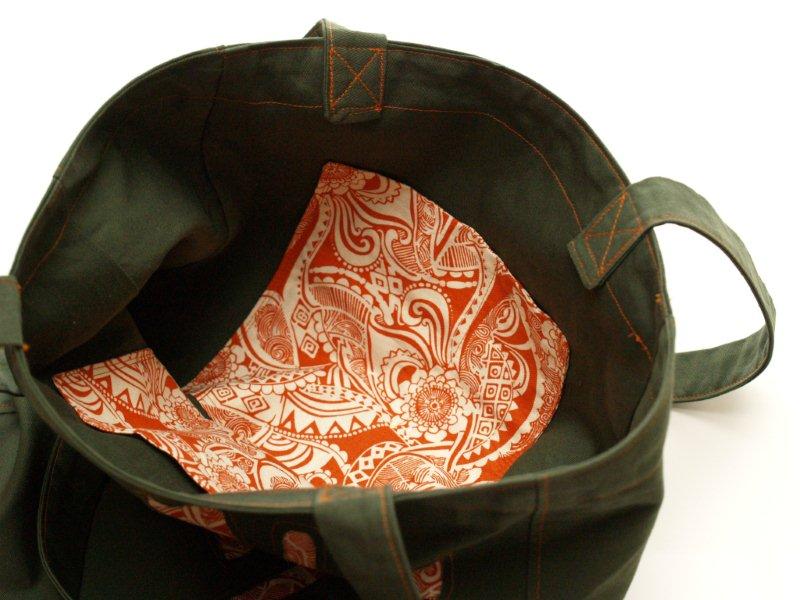
For the pockets in the lining, fold one of the 14″ x 7″ printed pieces in half. Sew around the three sides, leaving a 2″ opening for turning.
Clip the corners so they look nice when you turn it right side out.
Turn right side out and press.
Center the pocket on one of the lining pieces, 4″ from the top. The folded side should be towards the bottom.
Sew around the two sides and the bottom with two rows of stitching.
Add another pocket to the other lining piece, just the same way.
Sew the lining and side pieces together just like you did with the outside of the bag. You don’t need to do the topstitching on the lining.
Turn the lining wrong side out and place the outside of the bag inside it. The right sides of the bag should be facing the right side of the lining.
Sew around the top edge with a 1/2″ seam allowance. Leave a 3″ – 4″ opening for turning on the back side.
Note in the picture my turning opening is NOT 3″ – 4″. This makes for a frustrating turning process. Trust me. ;)
Once you’ve turned the bag right side out, tuck the lining inside and press everything down. Press down the opening section also.
Topstitch around the top of the bag, just inside the edge.
Sew another topstitch seam 1″ below that one.
Now we’re going to work on the straps.
Fold each of the 28″ x 2 1/2″ pieces in half, right sides together. Sew along all the open sides, 1/4″ away from the edge. Leave an 2″ opening in the center of the strap for turning.
Clip the corners.
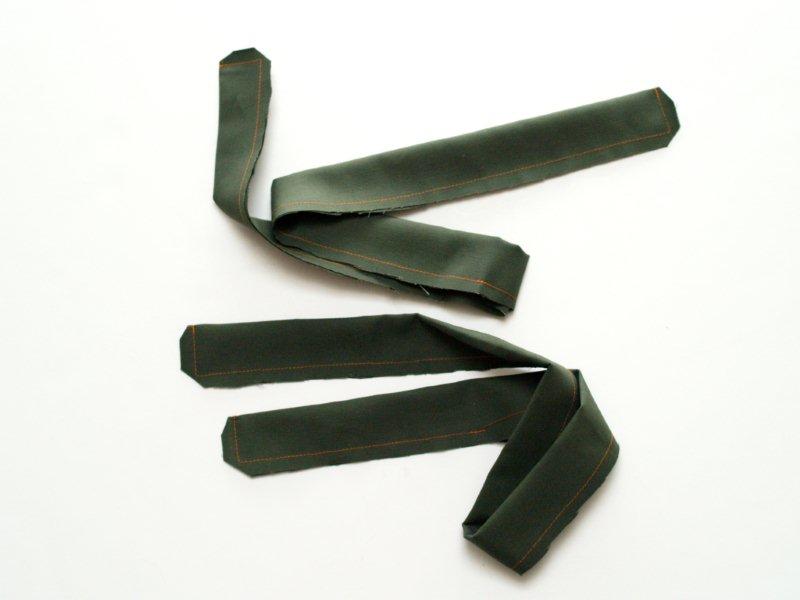
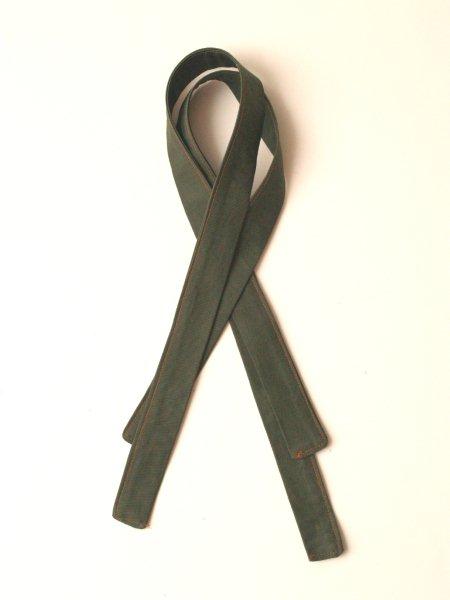
Turn the straps right side out and press. Topstitch the three sides with the seam, just inside the edge.
Pin one end of a strap on the inside of the front of the bag, 2″ from the left side seam. The strap should extend just below the second topstitching line.
Pin the other side of the strap the same way, 2″ from the right side seam.
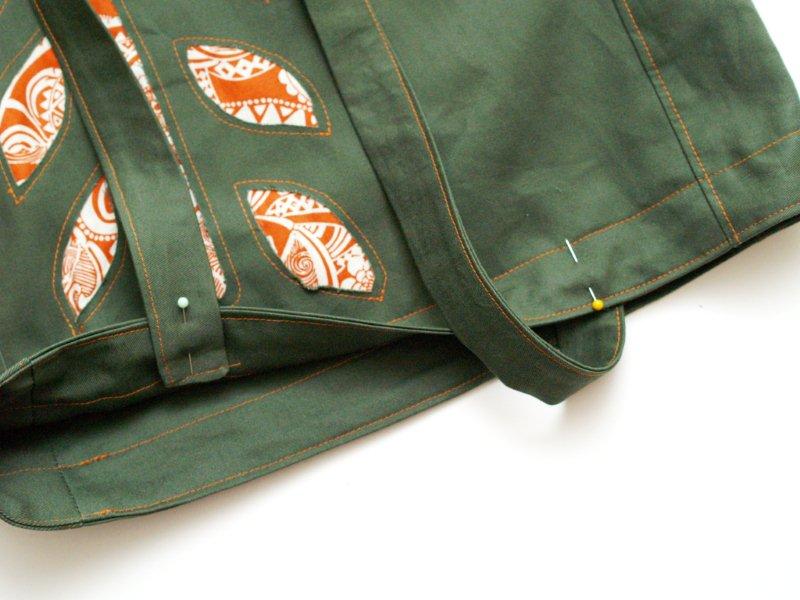
On the front of the bag, sew the straps on with a square that is just smaller than the width of the strap. Then sew an “x” inside the square. This will make the strap nice and strong.
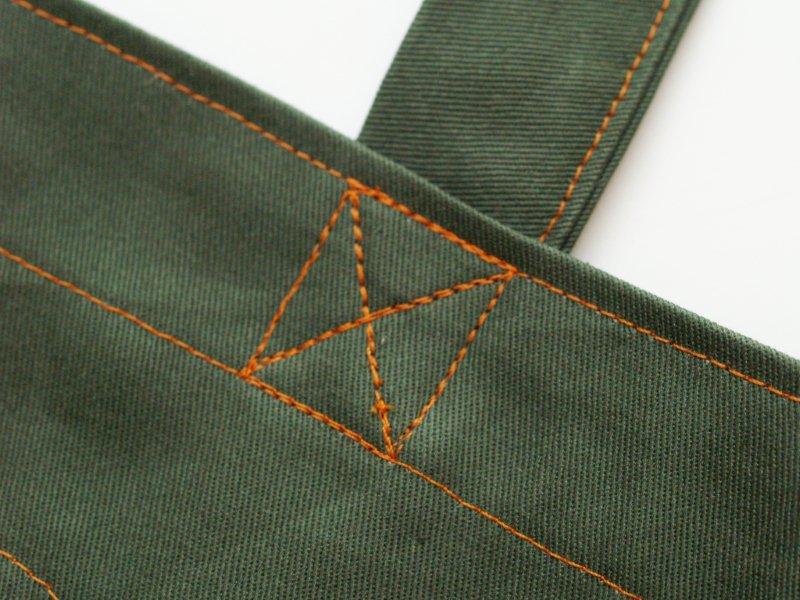
Repeat for the other side of the front strap. So the back strap on the same way.
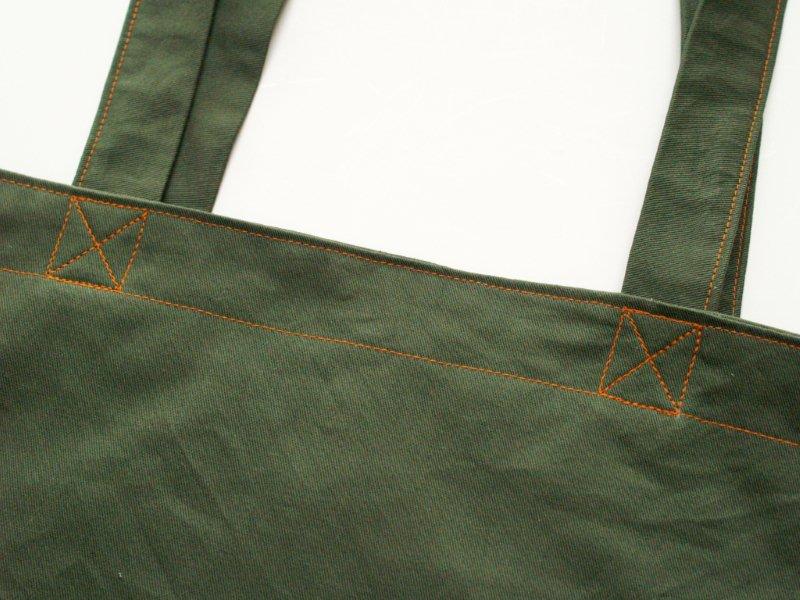
And that’s all there is to our cute book bag!
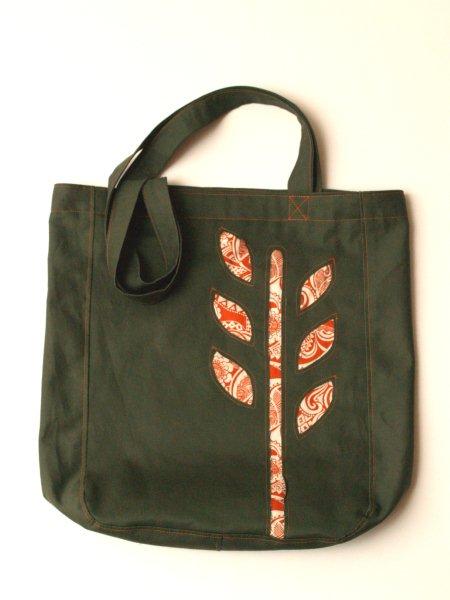
Quick and easy and perfect for teenagers who don’t want to use backpacks anymore. ;)
There’s room inside for a binder or two and all the other school paraphernalia – without being so huge that it’s a pain to carry.
All ready for school!
Now to fill the thing up! ;)
I’d love to hear what you think!
I’m linking to Sunday Scoop, Today’s Creative Blog, Met Monday, Skip to my Lou, Tutorials & Tips Tuesday, Quilt Story, and the other fabulous parties on the sidebar – make sure you check them out!


I want that tote. Like…so bad. Love the colors, love the reverse applique, and the paisley pattern. Fantastic tutorial too…thanks for taking the time to write one up. Another fab project <3
interesting :)
Love the detailed tutorial !! thankssssss
LOVE this! The colors are great! My daughter also loves a great bag/tote!! :) The tutorial is perfect! Thanks for sharing!
That bag looks lovely! Thanks for the tute, reverse applique always looks pretty daunting to me!
I’ve nominated you for the versatile blogger award. Please check out this post about it on my blog! http://unfortunatelyoh.blogspot.com/2011/08/versatile-blogger-award.html
So so cute! I love that orange fabric….well I just love orange! Thanks for sharing!
What an adorable bag! Thanks for a wonderful tutorial! Looking forward to giving this one a try. :)
What a great tote! Your tutorial doesn’t miss a thing. Thanks!
This is great! Thanks for the inspiration! I love your choice of colors.
I so love this bag! I have been wanting to do reverse applique for a while now. Thanks for the refresher! Love that orange fabric!
Very cute, Bev! And reverse applique is very popular right now. Your daughter will be stylin’! :)
I really wished we lived closer so you could rub some of your sewing skills off on me. Oh who am I kidding, I just want you to make me stuff! lol!
I found you at “A Little Birdie Told Me”
What a Great way to personalize a bag for someone!
I like the bright orange against that dark material.
Yearbooks are $85?!?!?! WOW!!!
Cool tote! And great reverse applique tutorial!
This is great Bev! One of these days I’m going to try reverse applique. This would be a great tutorial for me when I decide to tackle it. Have a great week!!
this is a really great tutorial. I love the details you included and the photos are super helpful. And that bag is downright adorable! LOVE IT!
oh yeah. and I am pinning. because. duh.
Absolutely LOVE your blog! Great tutorials, thanks so much. Looking forward to reading more!
I have been wanting to try reverse applique and you may have just jump started my motivation to do it! Very thorough tutorial, thanks. Btw, new follower :)
this bag is so cute! I love it and the colors you chose!
I would love it if you would share this and/or any other projects you have been up to at Tuesday Talent Show at Chef In Training! Plus there is a fun giveaway too! Thanks so much and I hope to see you there!
-Nikki
http://chef-n-training.blogspot.com
Love the applique and the tutorial on reverse applique is great. Thanks for sharing!
I’m visiting from Topsy Turvy. Have a great week!
That is fantastic!!! I have seen tons of reverse applique shirts, but never a bag. Gotta do this. Visiting from Show and Tell Wednesday.
~ Kimberlee at The Spunky DivaÂ
This is SO creative! I love how you put it all together. Love the fabric as well!
I would love to have you share this at my link party, Show & Share!
http://southernlovely.blogspot.com/2011/08/show-share-3.html
this is great!! you should sell it on Etsy!!!
This is great – I was thinking of a reverse applique for a pillow…but I’m also planning a messenger bag for my daughter so maybe I’ll do that first. Inspired!
What a great idea! I love the look to it!
Visiting from Katie’s Nesting Spot!
Ooh I love it! Thanks so much for the tute, I’ll be linking.
SO cute Bev and very Anthro looking! Great back to school style!
This is adorable!
I am seriously considering doing a version of this in a halloween theme for trick or treaters to carry around!
How great would that be?
Biz
Very pretty! Love the fabrics you chose.
I love the orange and grey together, Bev! Such a chic bag! Thank you so much for sharing and being a regular (and awesome) part of my linky party!
thank you for this great and useful tutorial!
elenor
I’m addicted to bags lately – reusable grocery bags, overnight bags, gym bags – I can’t seem to stop, lol !
My decorating has thus far been limited to “coordinate fabrics”. Kinda.
I love this though – and I have GOT to try it – hmm.. what other bags might I need !