As I mentioned last week with my Ribbon Necklace, I was able to participate in M&J Trimming’s Blogger Challenge last month!
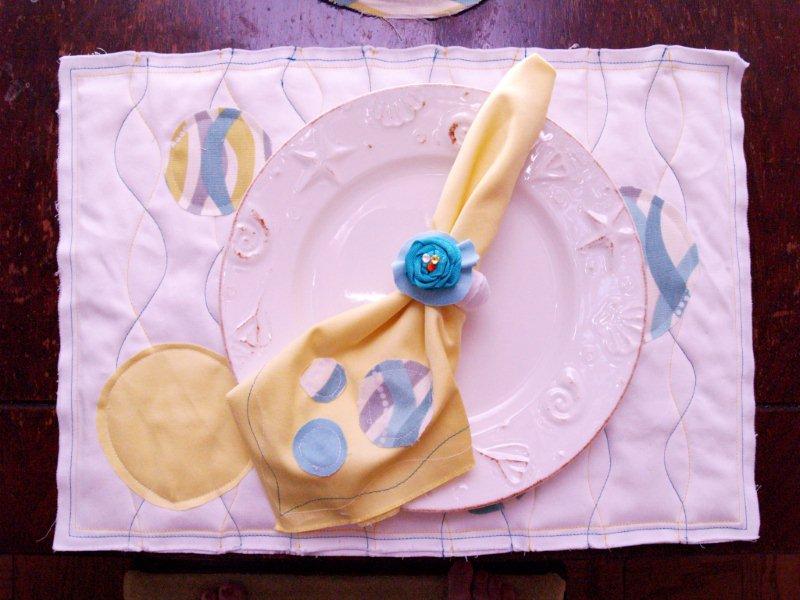
This fun table set makes up the rest of what I made for the Challenge, the Circles and Waves Set I created for the dining room.
Placemats, Napkins, Napkin Rings, a Table Runner and a Pretty Vase to go with it!
I’m breaking this into two posts because it would be crazy long with all the pieces in one.
Part 1 will be the Placemats and Napkins, Part 2 will be the Table Runner and Vase!
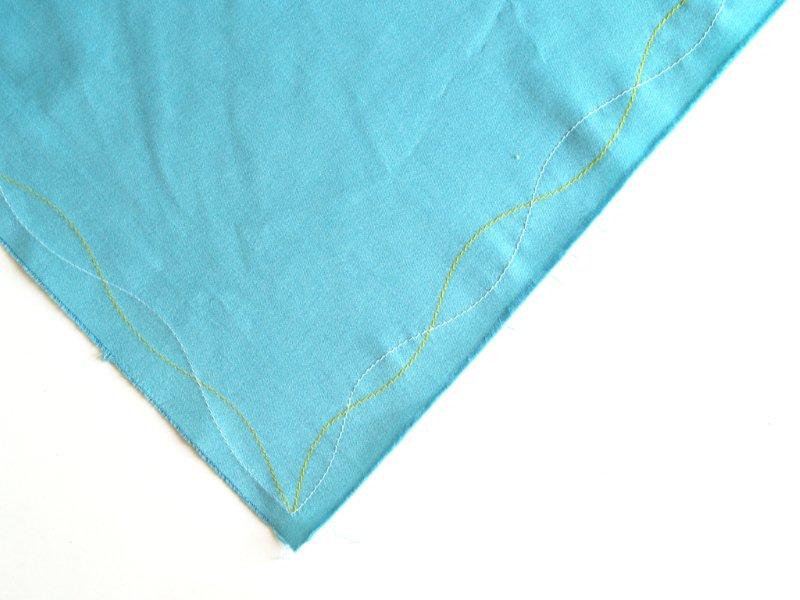
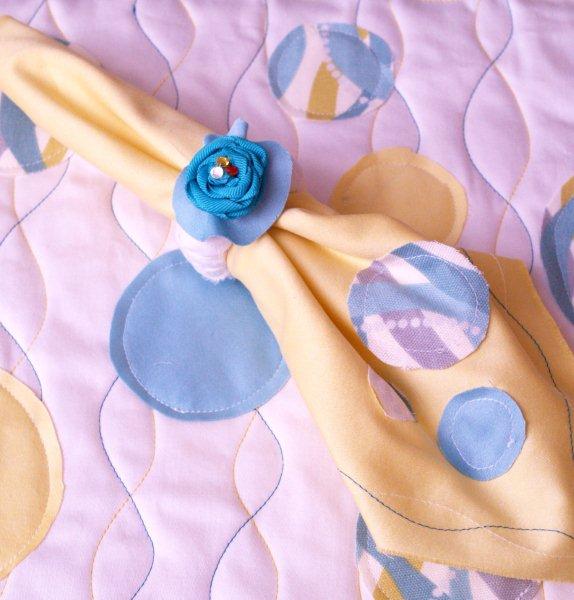
I love the raw edges of these – they look so fun and rough – I think it makes a great contrast with the quilting!

Materials you’ll need:
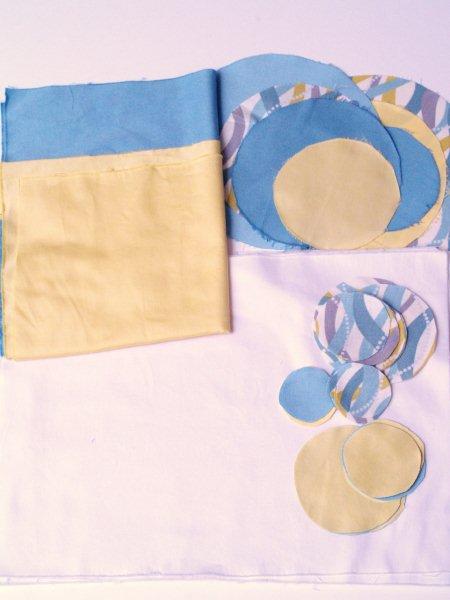
• 3 yd of 60″ white cotton fabric
• 2 Colors of Rit Dye
• 2 Coordinating Threads + a spool of white
• 1/2 Coordinating Print Fabric
• 1 1/2 yd cotton batting
• 4 Wooden Napkin Rings
• Grosgrain Ribbon
• Coordinating Color Rhinestones
• Glue (I used hot glue)
Steps:
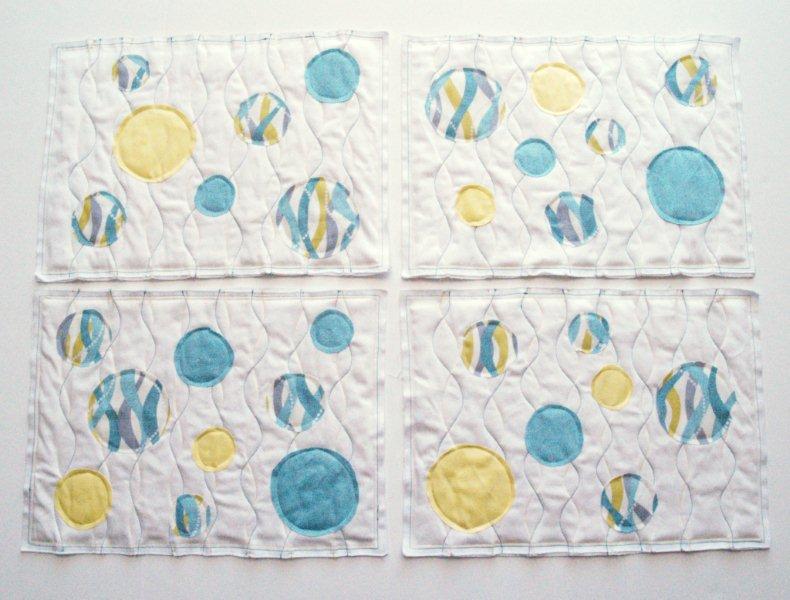
Cut out all your pieces. You’ll need 8 rectangles 14″ x 20″ for the placemats, 4 – 19″ squares for the napkins and assorted circles for the embellishing the napkins and placemats. I used circles from 4″ – 6″ for the placemats, 1 1/2″ – 3″ for the napkins and larger 6″ – 12″ circles for the runner out of the white. Cut out several circles from your coordinating print as well.
Following the instructions on the packages, dye the napkins along with several of the circles each color. I dyed 2 napkins in each color. Plus several extra circles. It’s better to have too many than not enough. :)
Oh – and disposable gloves are not big enough to protect your hands from the dye. I promise.
Also – when you are dying blue and yellow – and your gloves are too small – you make green. Hands. So pretty. Or Zombie-like as my son said. Nice.
Wash, dry, and iron all pieces.
Cut pieces of batting 13″ x 19″ and layer each piece between two placemat pieces. Pin together well.
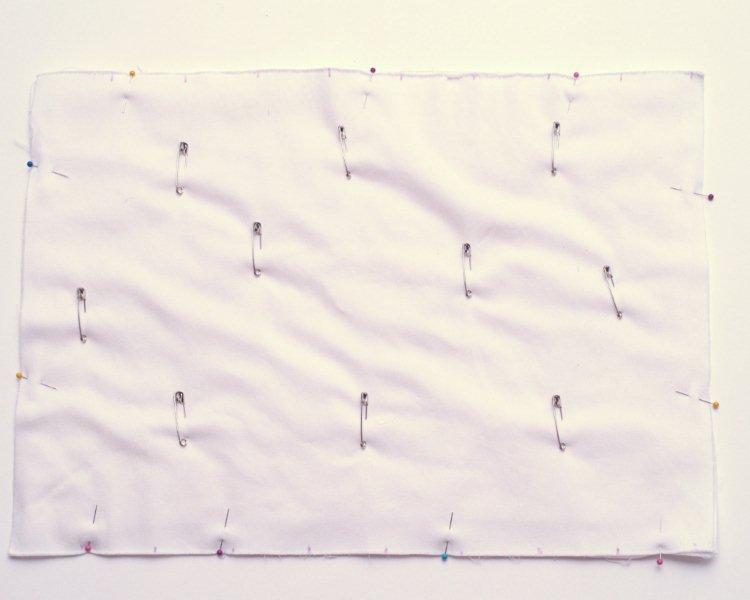
Mark along the top and bottom every two inches with a disappearing marker.
Start at the far right mark and with your first color of contrasting thread, sew a wavy line down the short side of the placemat that ends at the first mark on the right at the bottom of the placemat.
Repeat across the placemat working your way to the left, sewing wavy lines down. Try and make the waves different with each line.
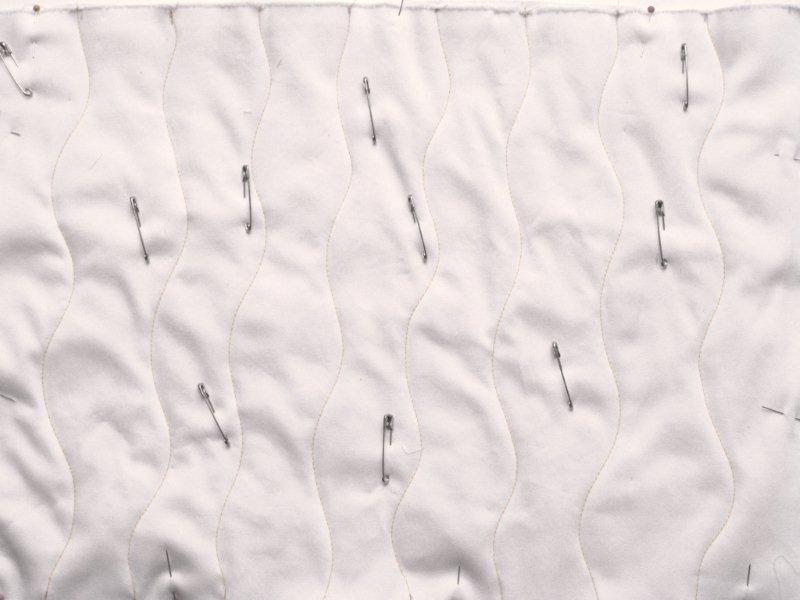
Change out your thread and sew contrasting wavy lines down the placemat, starting and ending at the same marks, but making your waves move opposite the stitching you did before.
Don’t overthink this too much. They don’t have to be perfect, just wavy. ;)
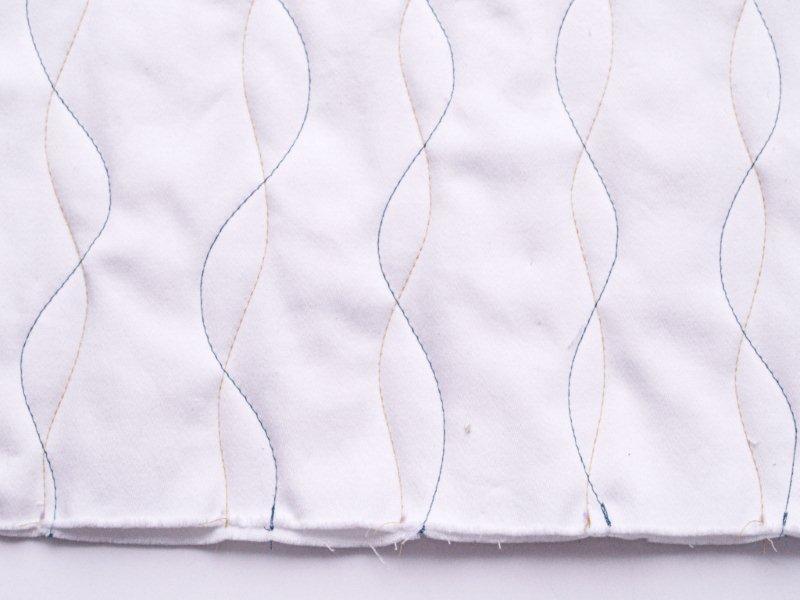
Stitch around all 4 sides of the placemat, starting with your darker thread, 3/8″ from the edge. Sew another line with the lighter thread 1/4″ inside this.
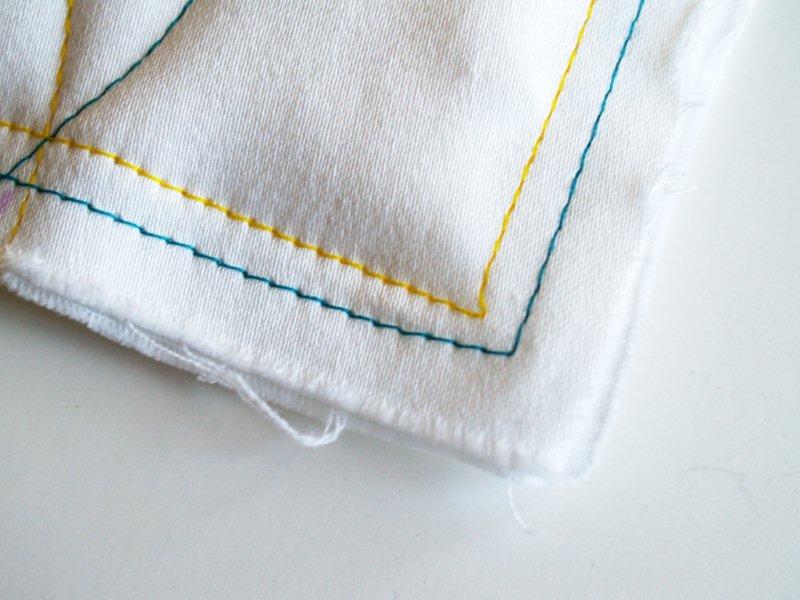
Lay out an assortment of circles in prints and solids on the placemat. Sew them down 1/4″ from the edge.
Now your placemats are all done!
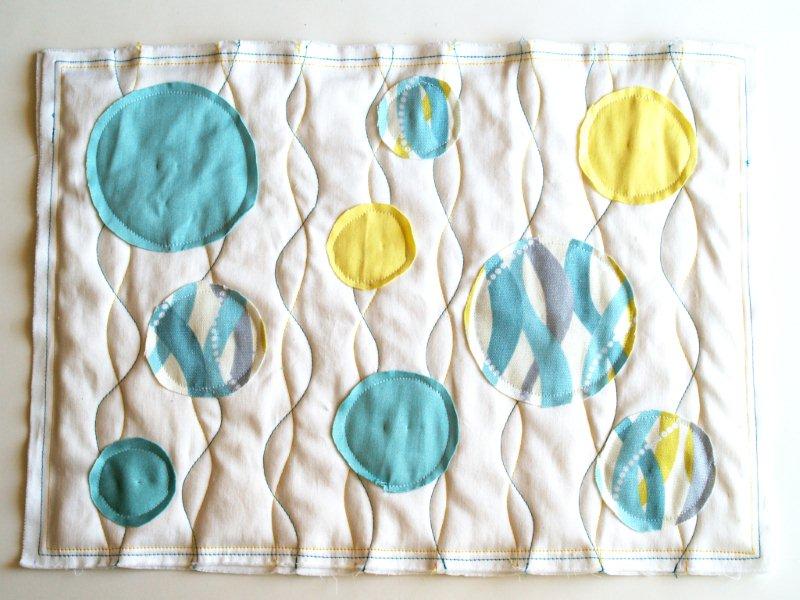
I put the circles in different places so each placemat would look just a little different.
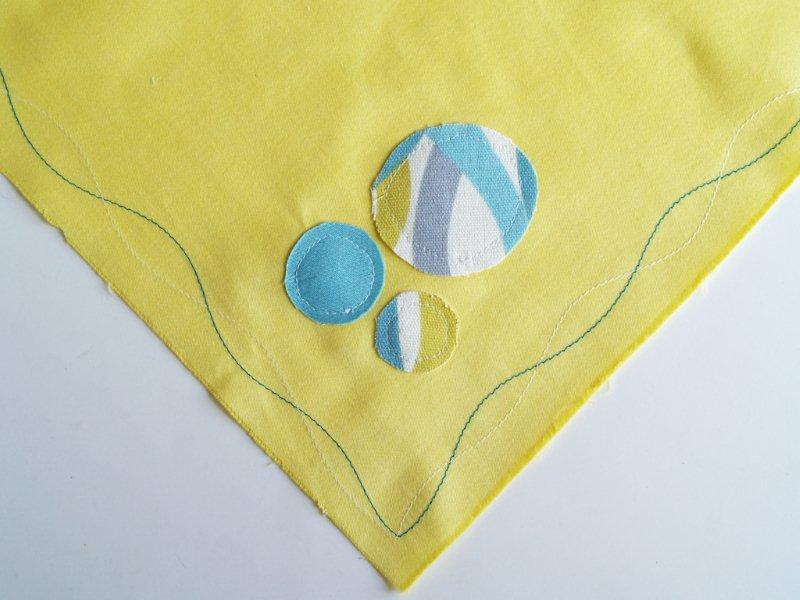
For the napkins, sew around all 4 sides with a wavy stitch. Use thread that contrasts with the napkin color.
For the blue napkins I used yellow & white and for the yellow napkins I used blue & white.
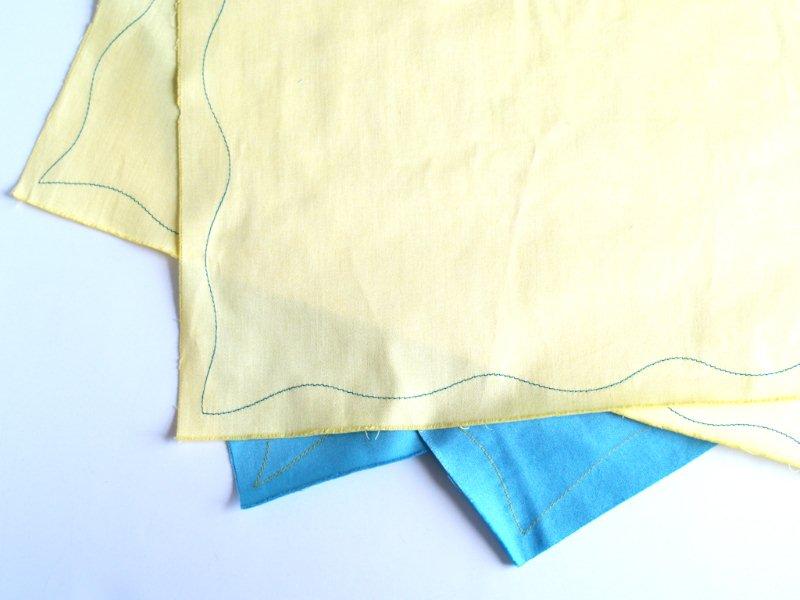
Sew around all four sides again, with your contrasting thread. Make your waves in this stitching opposite what you sewed before.
Choose three small circles that contrast with the napkin color and sew them on one corner of the napkin.
That finishes off the napkins!
(After you wash these, there will be a little fraying. Just trim the loose, longer threads off. You’ll be left with pretty frayed ends!
If you don’t like the frayed look, you can easily hem up the sides then do the waves above them.)
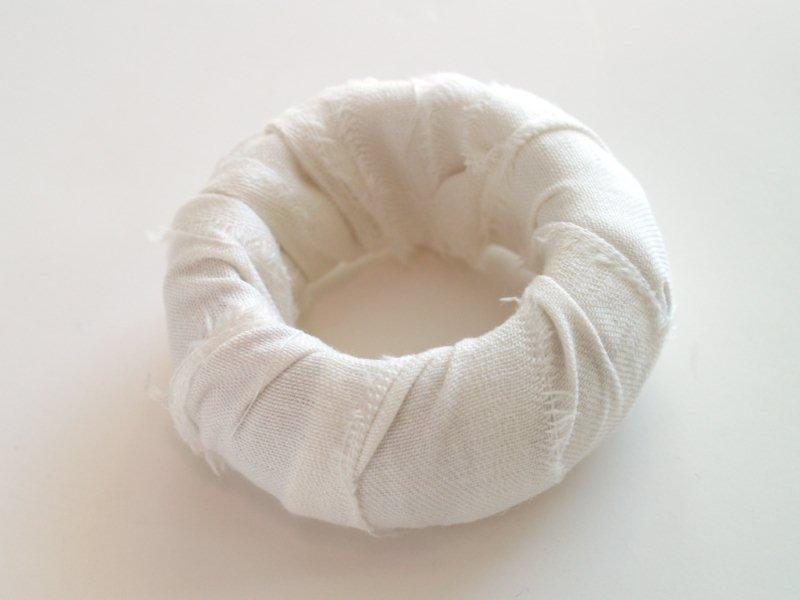
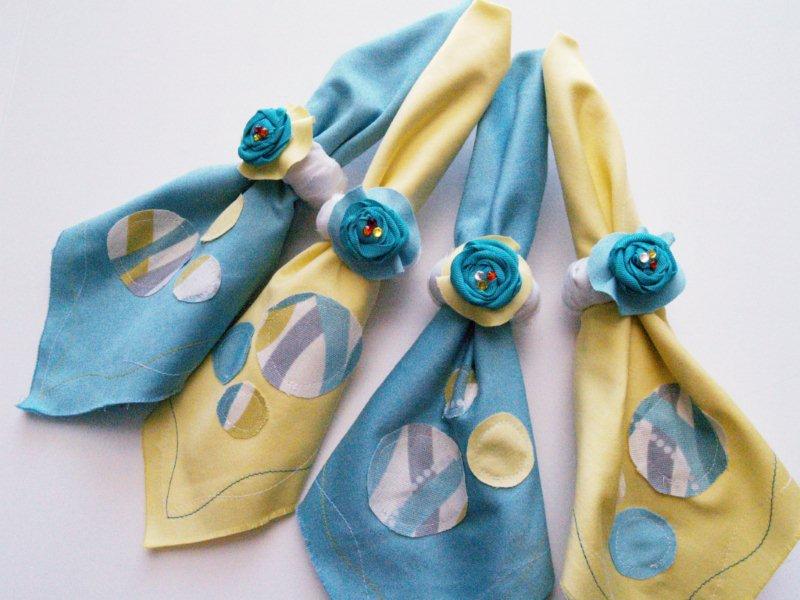
For the Napkin Rings, tear 1′ – 1/2″ strips of white fabric. This will make straight strips with raw edges.
Wrap them around the napkins rings.
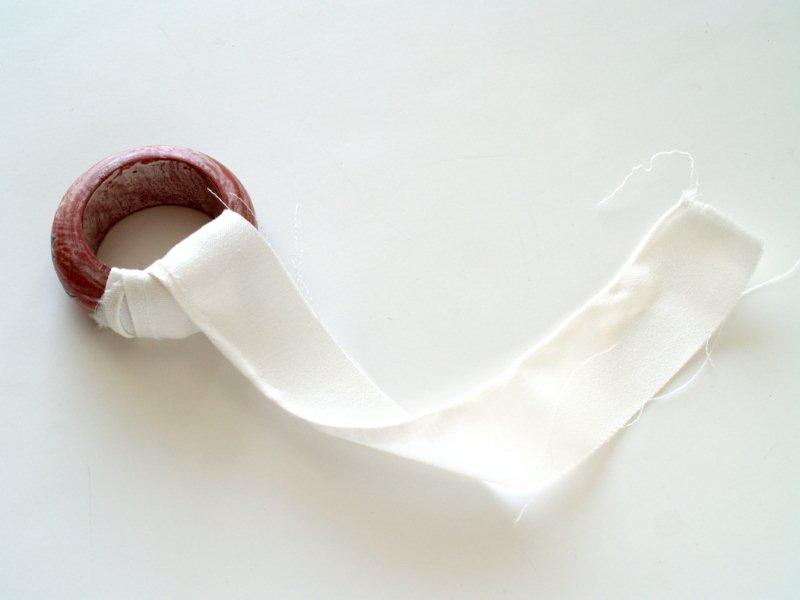
Continue wrapping until your ring is covered. Glue the end down.
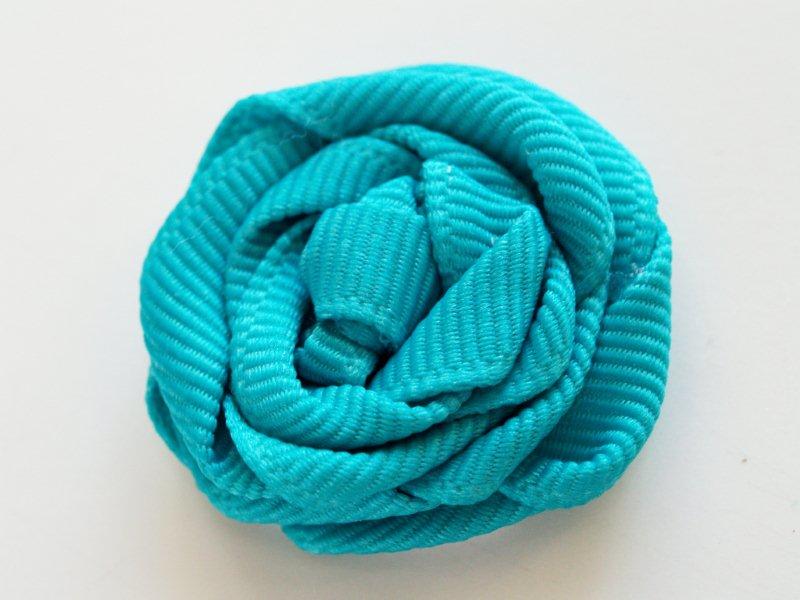
Make a Ribbon Rosette out of pretty coordinating grosgrain ribbon.
Add rhinestones to the center of the rosette for a little bling.
(I love the tools they provided with the rhinestone kit! It made picking up and gluing the rhinestones super easy!)
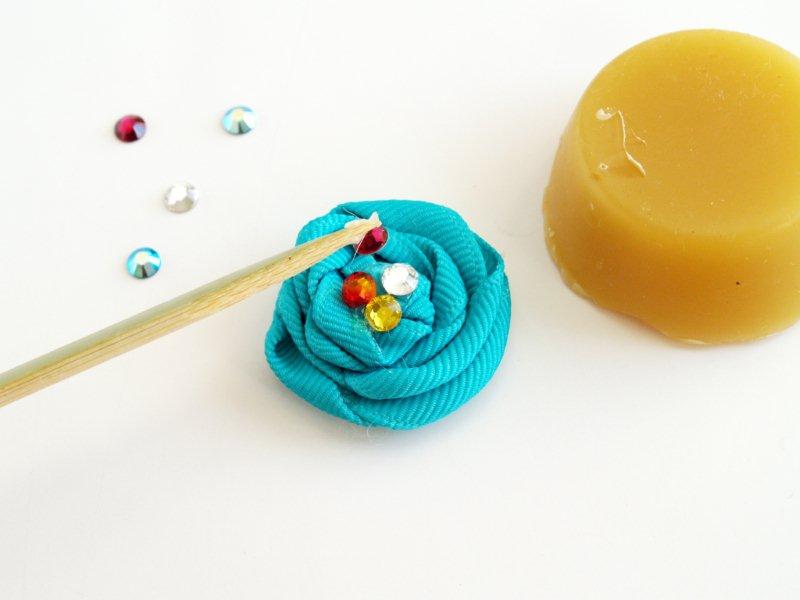
Glue a small dyed fabric circle behind the rosette.
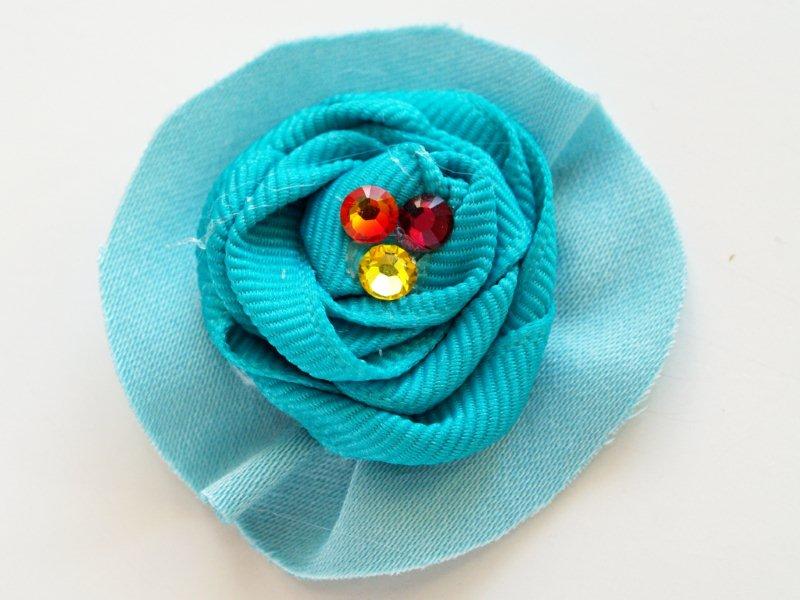
Glue the rosette onto the napkin ring and you’re done.
They look so sweet with the matching napkins slipped in!

I hope you like them! I think they’re fun and they were easy to do!
Come back tomorrow for Part 2 – the table runner and matching vase!
I’m linking to Sunday Scoop, Today’s Creative Blog, Met Monday, Skip to my Lou, Tutorials & Tips Tuesday, Quilt Story,
and the other fabulous parties on the sidebar – make sure you check them out!


These are super lovely! I’m saving this as inspiration for the Blogger’s Dinner Party. :)
I love these, Bev… especially the place mats. Great quilting :)
This set is just sooo cute, Bev! I love all of the little details. And the sewing is exquisite!
That is so fun and cheerful! Thanks for sharing! I tweeted!
These are so cute! I am always a fan of circles and polka dots in decor! I would love for you to link your table set up at my Savvy HomeMade Monday blog party if you have the time! :)
Wow! Those are so pretty! You did a fabulous fob Bev:) I need to start quilting!!
So cute!!! I need to find my sewing machine and take a refresher course…
Incredibly Adorable!! Thanks for sharing Bev!!
Nancy
Very pretty Bev- perfect for summer!
The placemats are my favorite! I love the waves! I believe this is well beyond my sewing ability. Someday… :)
love it very pretty and love the fun I see in it come see me at http://shopannies.blogspot.com
These are all SOSOSO cute! I absolutely love the circle table runner! The colors are so fun and you tied everything together so well! Thanks so much for sharing!
I love the color combination and the waves! The whole collection is so much fun. Thanks for sharing at this week’s BFF link party!
awww bev! these are so cute! I love the raw edges! super job!
gail
Those are darling! We would love for you to share this at our link party and come enter our free digital scrapbooking software giveaway!
Love,
The Sisters @ Six Sister’s Stuff
http://sixsistersstuff.blogspot.com/search/label/Strut%20Your%20Stuff%20Saturday
http://sixsistersstuff.blogspot.com/2011/08/my-memories-digital-scrapbooking.html
Your work is so stylish and perfect. I love the fabric you used. The Napkin ring has to be my favorite. Thanks for inspiring.
We have a link-up party going on – Tea Time Thursdays @ Kreative Korner. I would really appreciate if you’d link up some of your awesome posts there. Hope to see you at the party.
http://tanyaanurag.blogspot.com/2011/08/tea-time-thursdays-2-and-features.html
The possibilities are endless. Thank you so much. Dyed fabric has always held an interesting look for me. It is soft an homey.