Yep. I’ve gone visiting at my favorite website to knock off again. . .
Oh – you’re new here?
I occasionally like to make things that can be found at Anthropologie.
Sometimes.
Ok. A lot.
But their jewelry is like a siren’s call – I can’t resist it.
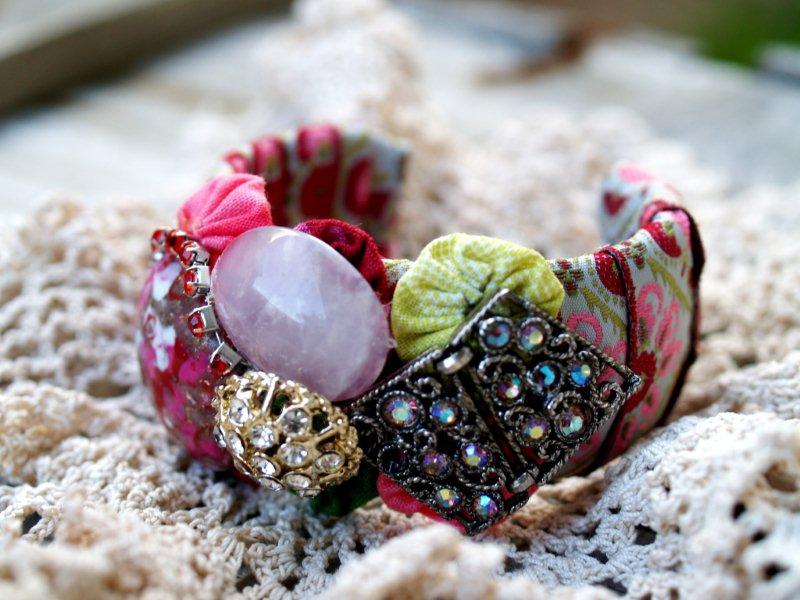
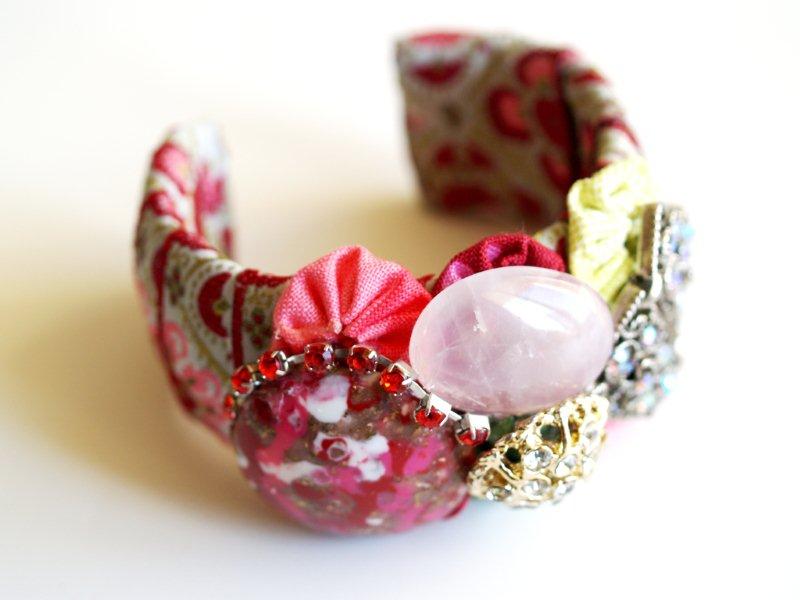
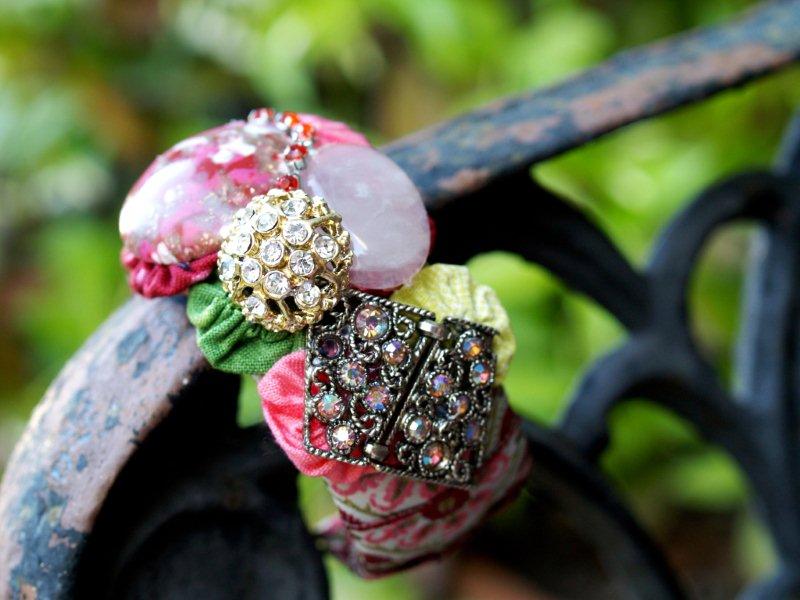
My latest? Anthropologie calls it the Dutch Wax Collage Cuff.
I call it my cute new bracelet.
Here’s mine . . .
And here is theirs . . .
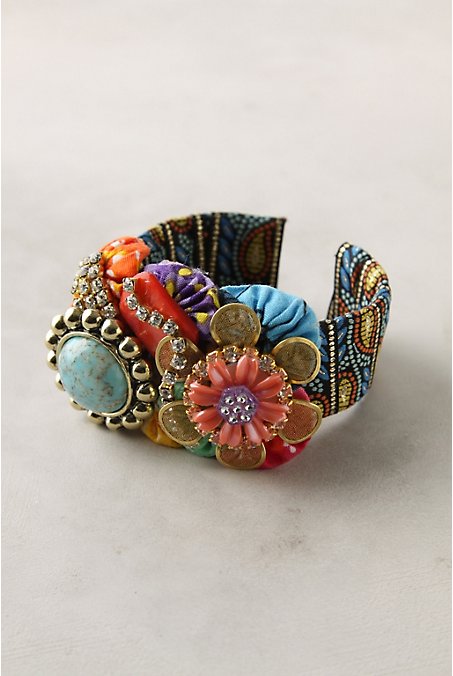
Isn’t it fun? I love all the colors and textures!
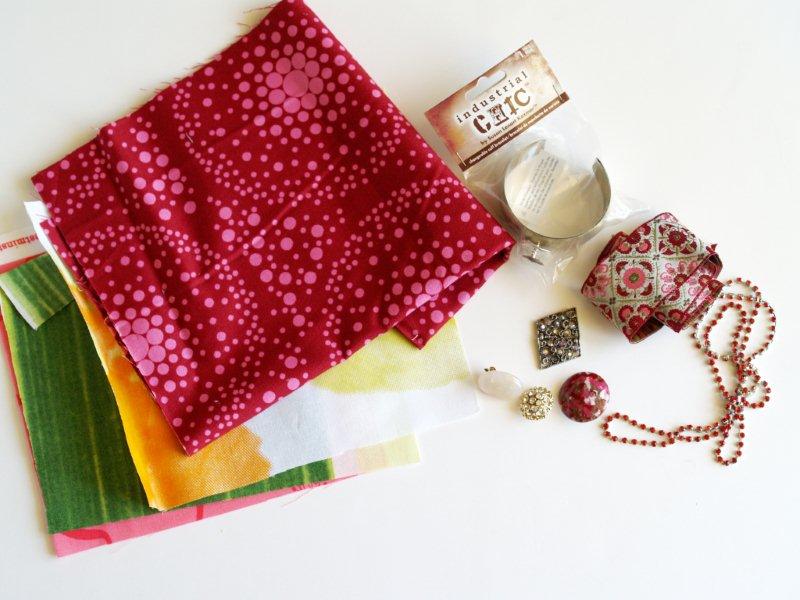
This little cutie is super easy – here’s what you’ll need to create yours:
• Bracelet Cuff
(Mine came from Michael’s – their Industrial Chic line)
• ribbon or fabric for wrapping (my ribbon came from here)
• scraps of fabric for yo-yo’s
• assorted buttons, beads or vintage pins
• rhinestone strand
• glue – I used E-6000 and it worked great!
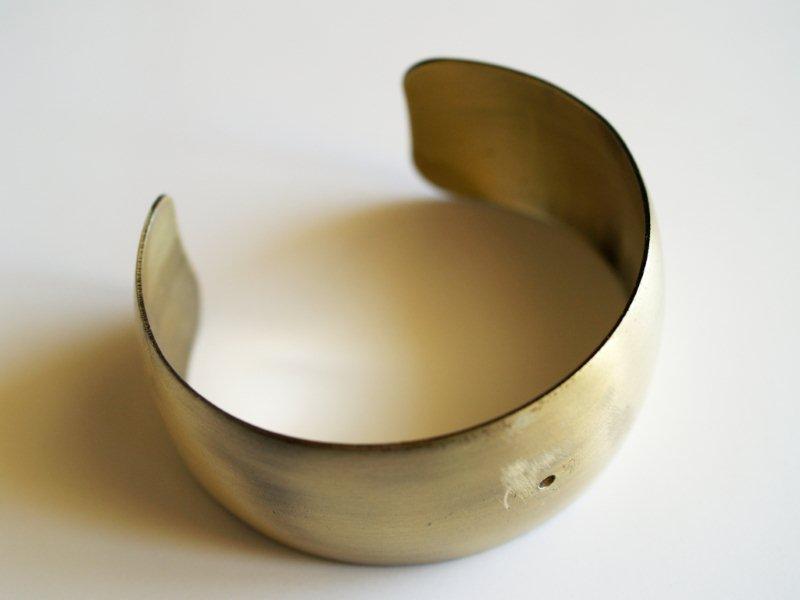
Start by getting your cuff ready.
The only one I could find had some hardware in the center. I removed that so it had a flat surface.
Begin wrapping your ribbon around the cuff.
Make sure the end is covered so that no raw edges show.
Glue the end down so it is secure.
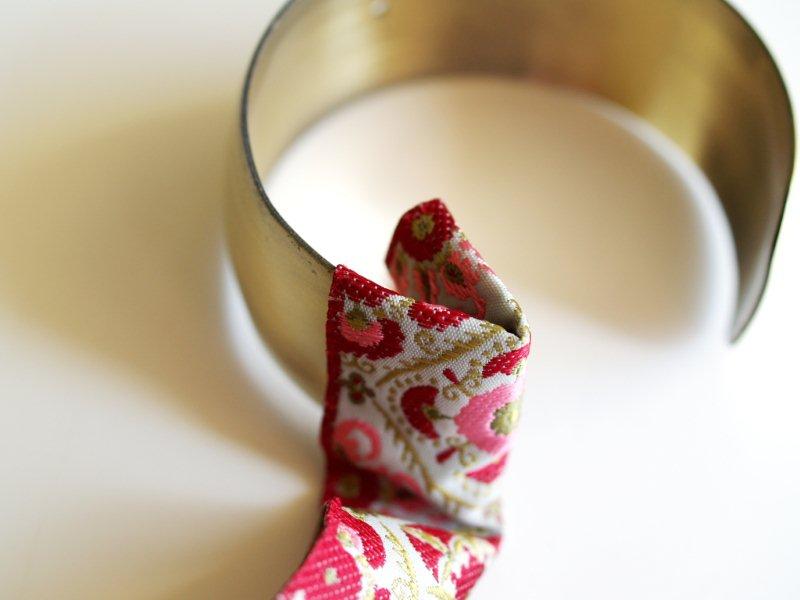
Continue wrapping and gluing . .
and wrapping and gluing. . . until you reach the other end.
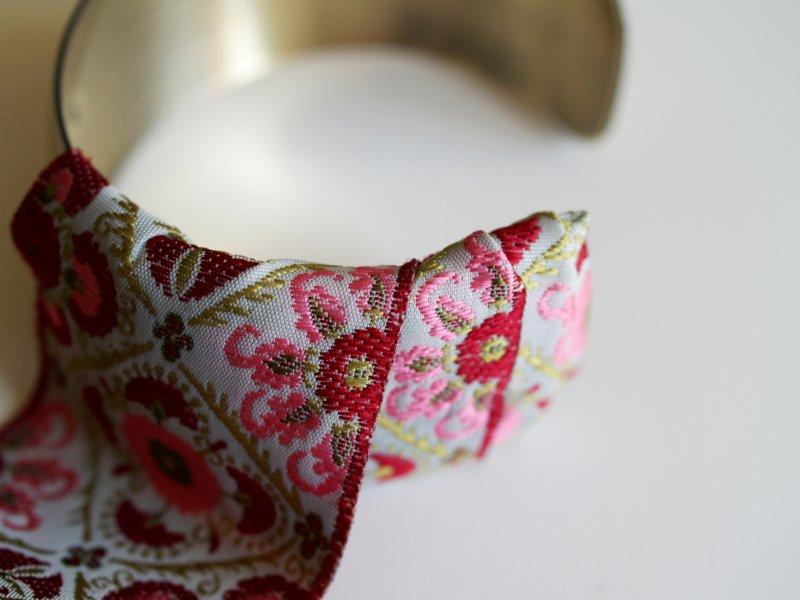
Tuck the ribbon around the end and fold over. Glue the end down.

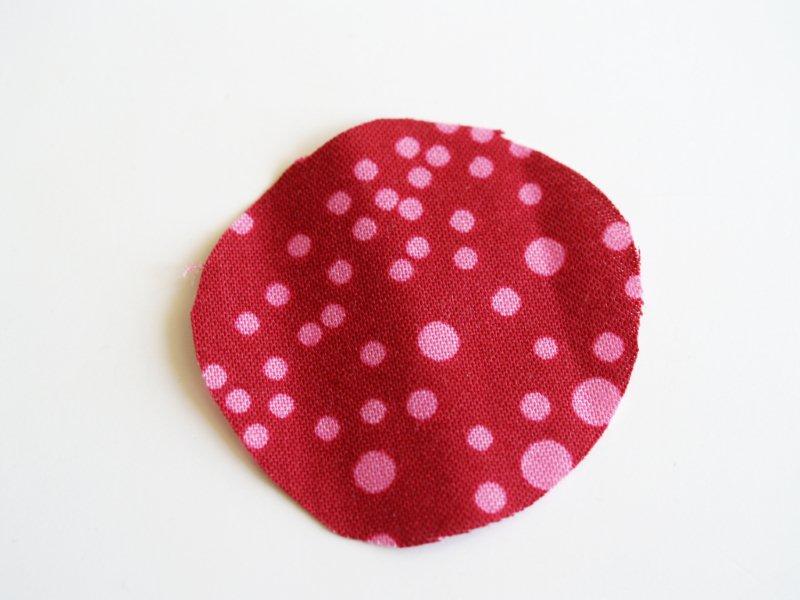
Cut circles from scrap fabrics for your yo-yo’s. (yes. the dreaded yo-yo’s. The things we do for our knockoffs)
Mine were about 1 1/2″.
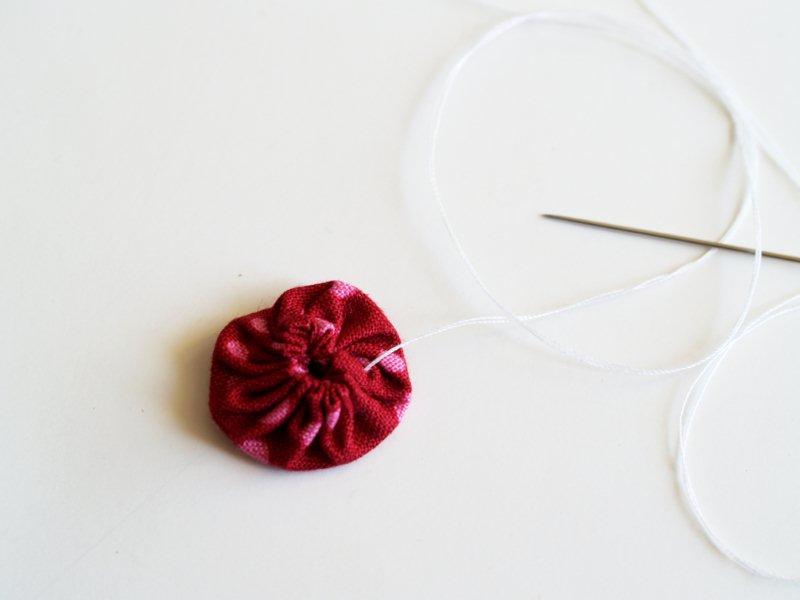
To make a yo-yo, fold under the edge on the wrong side of the circle and hand sew a gathering stitch all the way around.
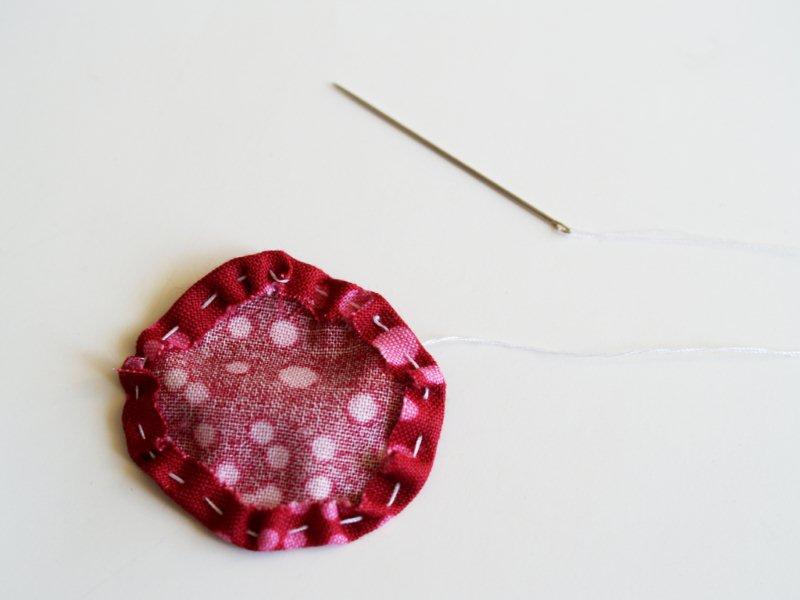
Pull the thread up so that the edges come together in a circle.
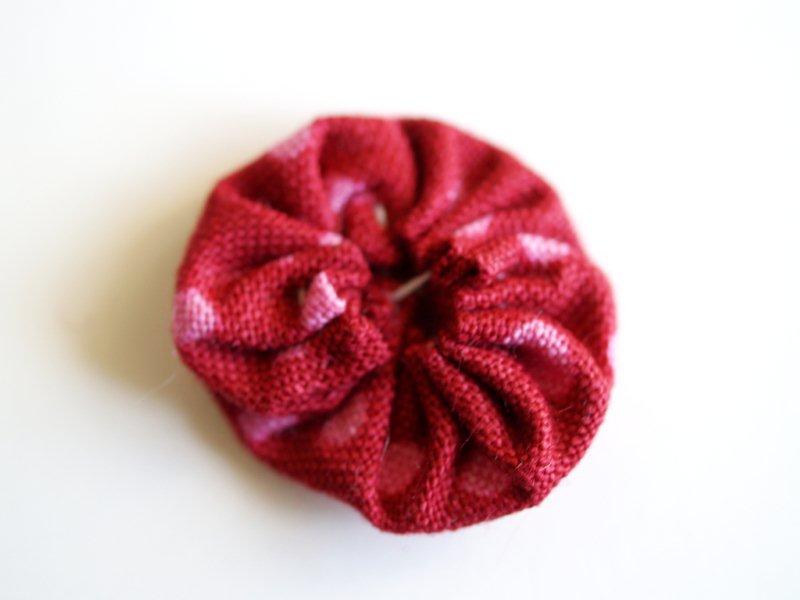
Flatten the yo-yo by pushing down the center section.
Knot the thread – now you have a cute little yo-yo.
Repeat 5 more times, until you have 6 small yo-yo’s
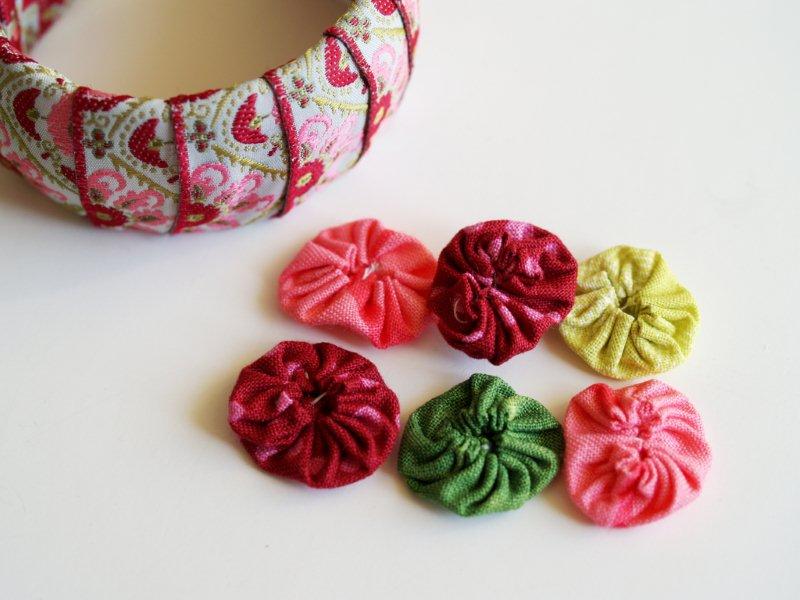
Glue the yo-yo’s onto the bracelet. I recommend starting with the center two, then working out for there.
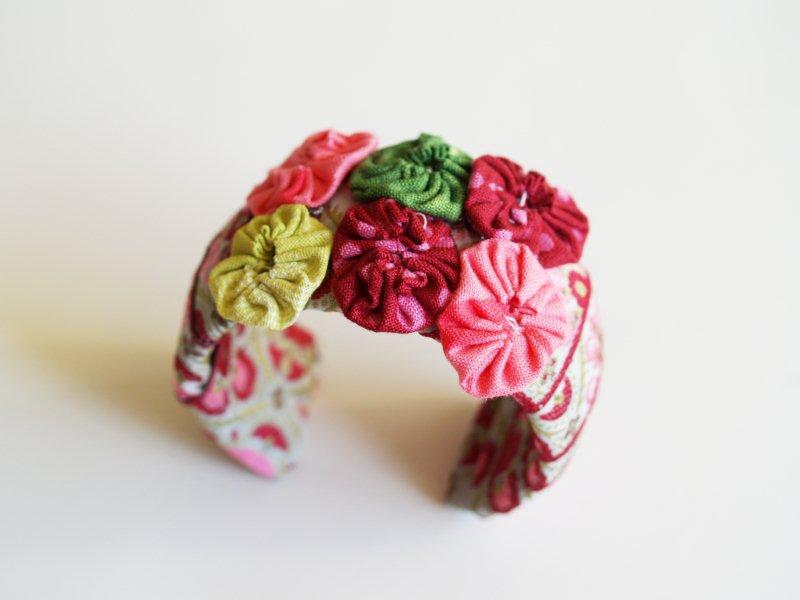
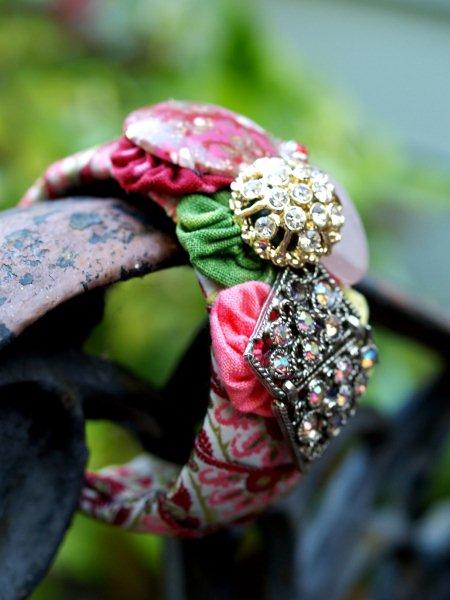
Now glue on your assortment of beads/buttons.
I also used a couple of clip on earrings that were my grandmothers. I removed the backs so they had a flat surface to glue down.

Find a flat spot and wind just a bit of the rhinestone strand around one of the beads. This isn’t necessary but it adds a fun pop of bling. ;)
That’s it! Pretty easy right??
It’s also definitely less expensive than their $38.00 version.
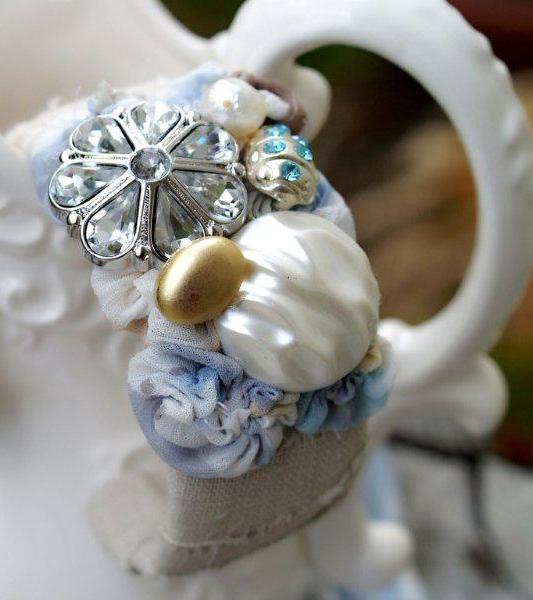
I also made a more neutral version for May’s Follower giveaway – you can see that it is pretty in any color combination!
(All the embellishments on this bracelet are buttons I found at Michael’s and Joann’s)
I love it!! I hope you do too. ;)
I’m linking to Sunday Scoop, Today’s Creative Blog, Met Monday, Skip to my Lou, Tutorials & Tips Tuesday,
and the other fabulous parties on the sidebar – make sure you check them out!


this is gorgeous!!!! i wonder where i can find some awesome jewels like yours? hmmm
I get almost all my jewerly at thrift stores, yard sales, estate sales, I just saw your questions, nthought I would let you know.
My favorite place to shop for my craft projects using jewerly. AND You also can find some pieces that are valuable.
Doubles your fun !!!! And can pay for your other pieces. But you may be like me n start another habit!! Lol have fun!!
*sigh* You make it look so easy!! I’m in love with this bracelet! You did a fab job. Yo-yo’s and all. ;)
ok… this is just ridiculous.
1. can you be any more amazing?
2. i want to be like you when I grow up.
for. real.
LOVE this! Great job~and I like it better than the original!
These are way too cute and clever! I just might have to make me some! I want to be like you too…if I grow up :)
Stunning! I gotta check out Anthropologie more often. Beautiful tute!
adorable! I really like it
So cute!! Now I have another project to add to the list. One day I promise that I will post pics of all of the fab knockoffs that I have copied from you!!
Wow! Pretty!!!
your amazing!
These are “stinkin’ cute!! Love them…..love bracelets……BUT am wondering: Waht is Dutch about them?? LOL asking because I am Dutch ;)
should be WHAT …duh…it is early…my spelling brains are still sleeping ;)
Love it! I need to find a bracelet blank. I may just cut a ring from a plastic Kool Aid tube container and use that as the base (with an opening to be like a cuff instead of bangle).
PS: Be sure to check Grandma’s brooches for signatures. I just found out that one of my Grandma’s costume jewelry brooches is worth about $500 now. I had been planning on taking it apart for a necklace LOL!
WOW! I just found your blog through Tidy Mom/Today’s Creative Blog…and I can tell I’m going to immerse myself in your tutorials just as soon as daytime rolls around (why am I wide awake at 3:30AM?!?). This tutorial is just awesome and I know several friends who would love one of these (including little ol’ me!). I’ll have to ask my mom if she has any of my grandmother’s costume jewelry she’d be willing to part with…
And I’ve never really looked into anthropolgie stuff…but I might just have to now for craft inspiration!
Thanks for some beautiful eye-candy!
Very very pretty, Bev. As always, a clear and thoughtful tutorial. I feel like I’m writing a review–lol!! ;) It’s totally a “I can make this” project…
i like you bling-bling better! both yours and the neutral one :D good job !
awesome! I love the colors you chose!
That is really awesome, I would love to have it, even with the missing rhinestone….lol
Teddie
Portland, OR
This is awesome. Love it. Thanks for the tutorial. Great inspiration :)
Its beautiful..n I have been wanting to own the it for quite some time..I dot have a spare cuff..so I tried making it wit cardboard and plastic, without any success. But with this inspiration, I think that i’ll try again
It looks great, Bev!
Just popping in to tell you CONGRATS on being featured on Today’s Creative Blog!!! :-)
OH WOW!! Way to go this is beautiful!! I may actually like yours a little better.
-I am your newest follower :)
WOW! that is amazing! i just found you through your feature on Today’s Creative Blog! love the bracelet, i bet i have all the stuff at home to do this, too!
ps – adding you to my blog list!
phenomenal! i think this might be my favorite ft project ever an that’s saying a lot since i heart all your stuff!
These are so great! I make a different version of the cuff bracelet but I’m going to try yours! You can get aluminum cuff blanks on ETSY at the shop gattagetadeal for a good price. You might want to check them out.
We’re onto you, Anthropologie! Haha, LOVE Anthro knock-offs. Thanks for this!
Love this Bev! You always have the best stuff!
Just amazing! Those are some creative toes you’ve got ;) My gift is paint and illustration, but oh how I wish it were jewelry making! Hugs!
Gorgeous! And I too want to be crafty like you when I grow up!
oh yes! That is gorgeous. I totally want to make one and WISH I had read this this a.m. because I just got back from Michaels…guess I’ll have to drag myself back out there soon ;)
I’m not usually a fan of bracelets because they bang on my desk when I type, but this is gorgeous and one I”d have to try!
And I personally like yo-yos. I’m planning on trying my hand at a few when I get my work room cleaned up!
OH MY GOSH! Bev ~ I LOVE this. I think this might be my most favorite of all your fabulous creations so far. It’s just beautiful! Thanks for the tutorial.
Cute! Come to join our link party: http://fabricbowsandmore.blogspot.com/
I cannot believe I’m just not finding your site!!! I LOVE it. I will have to make a bracelet for our daughter! Looks like just the “bling” she loves! Thanks for such a great idea. I’m going to be spending a lot more time here checking out your projects!!! Thanks! If you get a chance, please stop by and visit me at Jeremiah 29:11….or Wise Old Owl Designs!!! HOPE you have a great Memorial Day Weekend!
Oh wow! How did I not know about your blog before today? You are amazing!
SO TOTALLY AWESOME!
I’m so “J-J” (jealous) of your creative gift! YOU ROCK!
Thank you for sharing the “how-to’s” for those who are craft-challenged!
I actually like this better than the anthro one. I love to knock of anthro too (:
Of course I love it! Don’t I love everything you make? :) Both versions are yummy, and I think my creative juices might just have started flowing again after being absent for way too long. Yep, they deffo have- thank you, thank you so much!
I LOVE this!!
LOVE this!!!! WOW! Your version is SO beautiful!!
http://jandmseyecandy.blogspot.com/
Isn’t it such a shame that everything at Anthropologie is so expensive? I actually think I like your version even more than theirs :)
If you get a chance tonight, I’d love for you to link this up to my Not “Baaad” blog hop. There’s a weekly award for the best post!
OK yours are way cuter than theirs. Sorry…said it! And as always, thanks for the great tutorial and for linking up!!
omg. so so so so cute! i love it! i keep looking at those exact cuffs @ michaels wondering what i could do with it! thanks for the inspiration! :)
Love it! I will be making me one too : )
These are so pretty and very classy. Love your stuff!
Very cute, thanks for sharing! :)
This is so cute. I will be making one for my summer look. great job!!!!!!!!
Wow! Your bracelet is absolutely gorgeous. This is my first visit to your blog. Coming from Met Monday.
This is gorgeous, girl!
Oh my goodness I LOVE this! so stinkin cute! found your blog through today’s creative blog! thanks for sharing!
I swoon, I want, I adore. Your jewelry is so amazing. winks-jen
Love this Bev, so pretty! Thanks for linking up @ memakingdo!
Gorgeous!!! seriously adorable!!
I love this, it turned out so beautifully! And I happen to have a plain cuff bracelet just waiting to be decorated….
Girl… you are so freaking talented!! Love it!
My first time visiting your blog, saw the bracelet featured over at Under the Table… and just had to add my compliments to the others — its fantastic!! I am definitely inspired to try making one too.
Oh Beverly – Love this and totally what one ;) the jewels are fabulous!! Thank you so much for linking to the Sunday Showcase Party. Hope you have a lovely week ~ Stephanie Lynn
These are FABULOUS!!!!!!!!!!!!!!!! Haven’t been doing the blog thing much lately but decided to blog hop today and found yours. Now a new follower!
OMG! That is the cutest thing ever! I’m going out tonight and buy some supplies. You are an inspiration!
Bev! I love this! I’d like to include it in a DIY bracelet round up I am doing next week. Could I have permission to snag 1 photo and your link please? let me know asap! :)
Thanks for letting Megan post this AWESOME bracelet on her blog. It brought me here. After looking around here a bit, I think I’ll just move in, lol.
Amazing! That is such a cute idea!
Love the colors you chose!! So pretty!
Oooooh, I love this! You are so amazing! :)
Love your bracelet and so want to make one. Don’t have a clue what kind of glue to use though! Would you be so kind as to email me what to use? I love how I can’t see any evidence of glue in the pics of your bracelet.
I would also like to know what glue to use to adhere the heavy metal and plastic items. I used fabric tac to wrap the ribbon and that worked great, but I don’t know what to used for the embelishments. Thanks for any suggestions!!!
Jen
My first visit here too! Amazing. Found you on Pinterest, and don’t want to miss another blog entry ever again! This bracelet is so beautiful, so seemingly simple, but you have to work out how to do it, and that you’ve done for us. Thank you, I’ll give it a try.
Hey there:) I was looking for a way to use that plastic cuff thing that comes on the bead wire.. The wire i buy from Wal Mart. And here it is!! and its freeeeeee. So thanks and imma gonna try one….!
Hi!!!
Thank you for sharing this fun project!!!! I have made one of these, but can’t find a glue that works to adhere all of my heavy metal accents to the fabric yo yos… What do you use to adhere metal to fabric??? And do you use the same one for plastic buttons etc… I’m giving these for Christmas gifts, and I want them to be durable, and not have things falling off of them… Thank you!!!!
I love your blog!!
Jen
Wowwwwwwww wonderful to this very easy tutorial. I published on my blog as a Christmas gift suggestion
Love, Dolly
Just love this idea! making them for teenage grandaughters for christmas…using the tacky quick grabbing clue but it is not working so well…do you have another reccomendation as I really would like them to turn out well:))))
These are gorgeous! i just came over from pinterest and am so glad that i did, you are very talented! t.xoxo
Could you please tell me what kind of glue you use for the bracelets??
Thanks, Sharon
I think yours is much prettier than theirs. LOVE IT!!
great idea I love it and easy thanks
That bracelet is adorable…I especially like the neutral one!
I love this bracelet! Cannot wait to give it a go! You make it look relatively easy!
Love yours better than original. This combines my fav things- junking for broken jewlery and repurposing.
Loved the bracelet you made. Went looking today for fun stuff.
LOVE this!!
This bracelate is so nifty I got everything to make a few. Thanks for sharing LOL
In all honesty, I like your version better than the anthro one. :) It’s beautiful!
I love the bracelet so much that I just finished one using the same techniques. Thanks for the tutorial.
Just love this bracelet, will make one for my daughter – Jasann
so glad I found you….love the cuff bracelet and love how easy you made it look!!!
Absolutely gorgeous! Can’t wait to make!
Wow beautiful, I much prefer yours!!!
Your bracelet is way, way cuter than the one from Anthropologie!
I AM SO IN LOVE WITH THIS! Which means I need to type in capital letters, apparently. ;-) My mom collects vintage buttons and she is super excited to find some for a bracelet or two. Fabulous idea!
quel support je peux faire si je n ais pas de bracelet en metal merci
OMG!!!! I LOVE THESE!!! Thanks for sharing this.
I love this. I have everything I need to make one, just need to go play in the stash! Thanks so much for the tutorial.
I had a broken pin from my great grandmother. I was holding onto it for just the right use. It looks great incorporated into this cuff bracelet. Thanks for the idea.
I just love this tutorial. I am going to use the instructions for the young girls at my church. Thank you for sharing!
ADORABLE!
Love your ideas! Yours much better than…….
Hi Bev
I love these. I especially like the last one with the buttons. Very cute and simple.
Thanks for sharing.
Although maximum site owners are familiar with these concepts, but they may lack
the expertise to do it the correctly. They
only want your money and they want as much of it as they can possibly get.
To report stolen email addresses at Yahoo, click Yahoo.
Love it! I wish you had instructions on how you tucked and glued the ends of the bracelets.
I love your bracelet so much that I shared the pin with my beading group. This is something that inspired me to make one too and I just finished. I posted mine on my wordpress blog. Thanks for Sharing!
Wow! I’m making one this weekend! Love!
I love these bracelets they are all so creative and would be fun to wear. Thanks for the inspiration.