Do you ever have projects that just pop into your head – all ready to go?
I don’t have it happen too often – half the time I start out with something in mind and then by the time it’s finished – it’s something different. :)
Or I have an idea that I’m sure will be just the most amazing thing ever and when I get about halfway through it I realize it looks like something my cat coughed up.
(Case in point – the Valentine’s Wreath FAIL that is now mocking me from the corner of my dining/craft room. Seriously. It’s hideous.)
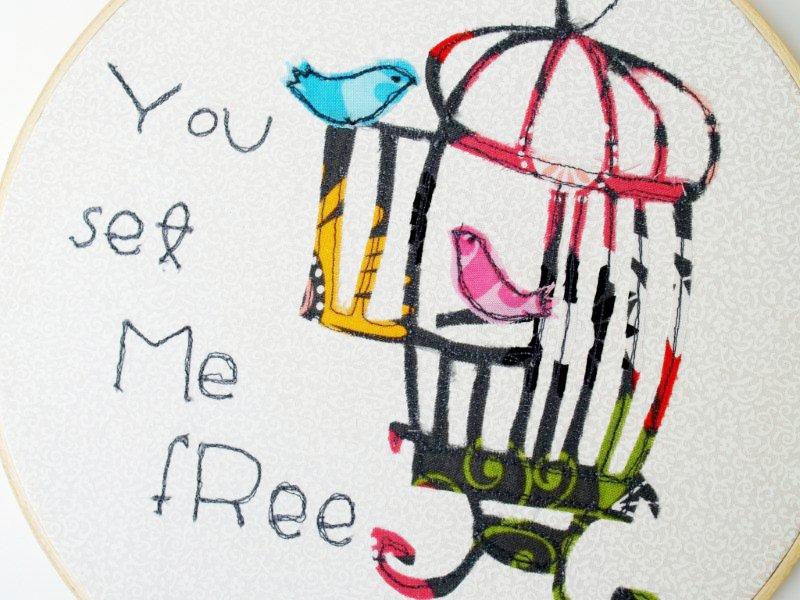
But in the case of this little stitched art – the great rarity happened. I had the idea – all ready to go – and I like how it turned out!
I’ve been wanting to do something that combined embroidery hoop art and machine stitching and this is what I came up with:
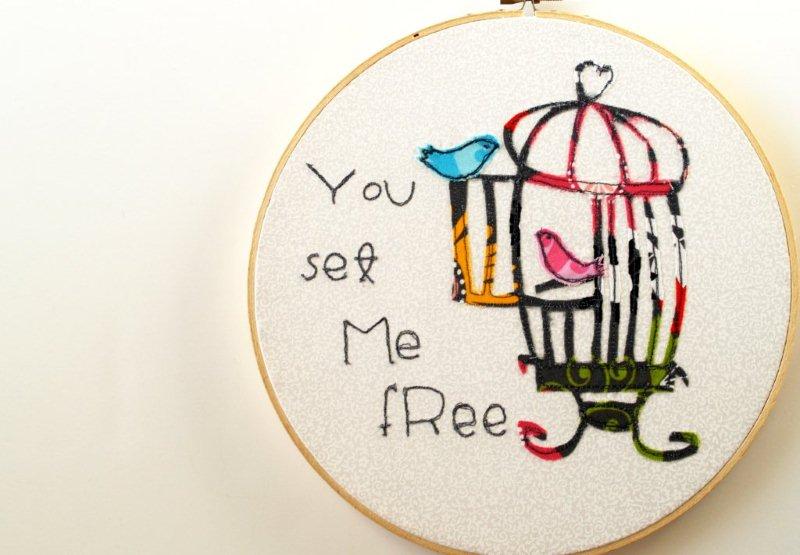
I love that it’s Valentine-ish but not so much so that I can’t leave it up through the spring.
It’s all machine stitched – kind of a free-form/follow-the-lines thing.
Want a tutorial? Sweet! I happen to have one right here. :)
You’ll need:
Embroidery Hoop – this one is 9″
Fabric for base (about 11″ square), cage (about 8″ square) and birds (scraps)
Contrasting Thread
Pattern – click here
Reversed image of birdcage – click here
Begin by cutting out the fabric for your base. It just needs to be a few inches larger than your embroidery hoop.
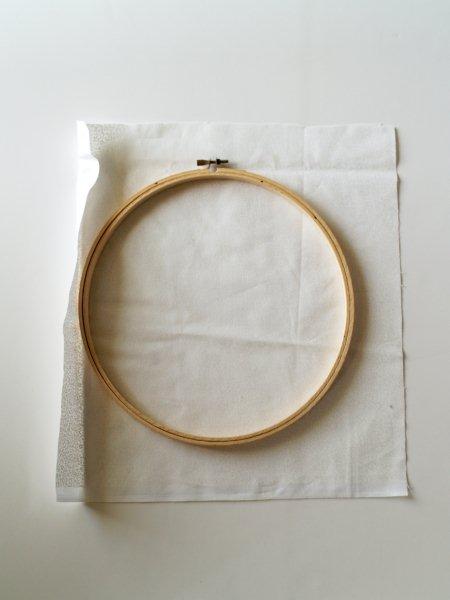
(This is so not ironed.)
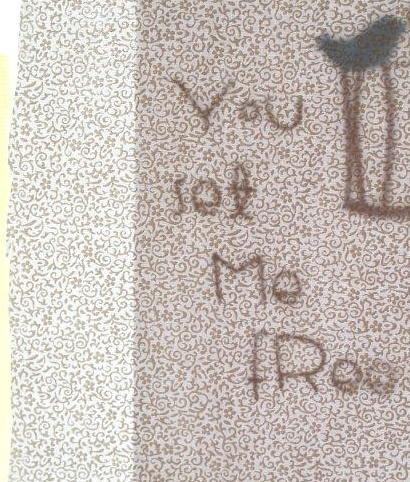
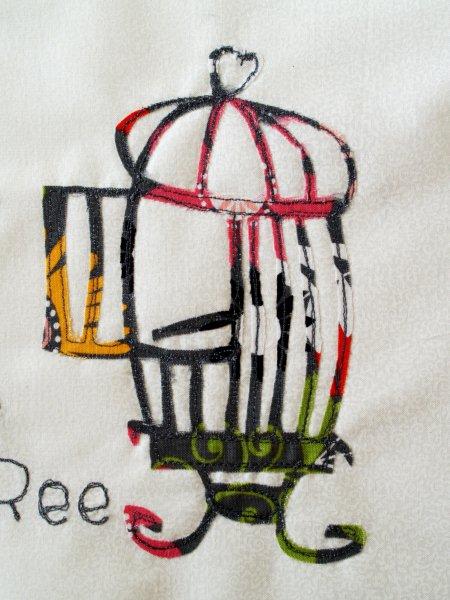
Print out your pattern and trace the lettering onto your fabric.
An easy way to do this is to tape the pattern on a window, then tape the fabric over it. You can easily trace your lettering with the light shining through.
I didn’t put any kind of interfacing or stabilizer on the back of this, but I think maybe you should. My fabric held up pretty well, but if you have thin fabric in might cause some puckering.
I recommend practicing this on a scrap piece of fabric to get the hang of the lettering. Also, try different speeds and stitch lengths to see what works for you and your machine.
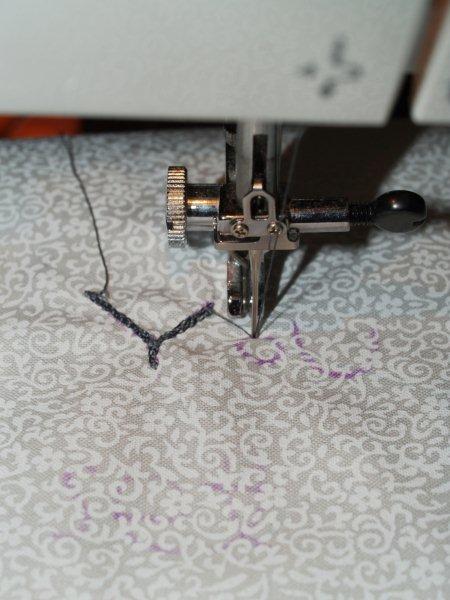
Take your presser foot off. This will let you move your fabric as you need it and it will help you see your marks too.
Because your presser foot is off, you will be moving the fabric through. So if you pull fast, the stitches will be long, if you don’t move it much, the stitches will be very tiny.
Start at the top of the “Y” and sew down and then back up the, covering the marked lines. Repeat this 3 or 4 more times.
Once the letter looks the way you want, move onto the next letter. Don’t worry about clipping your threads, you can do that when you’ve finished the word.
Don’t worry about wonkiness in your stitches. You can cover it up if it’s crazy with the next pass of stitching, and some wonkiness adds to the fun look of the lettering.
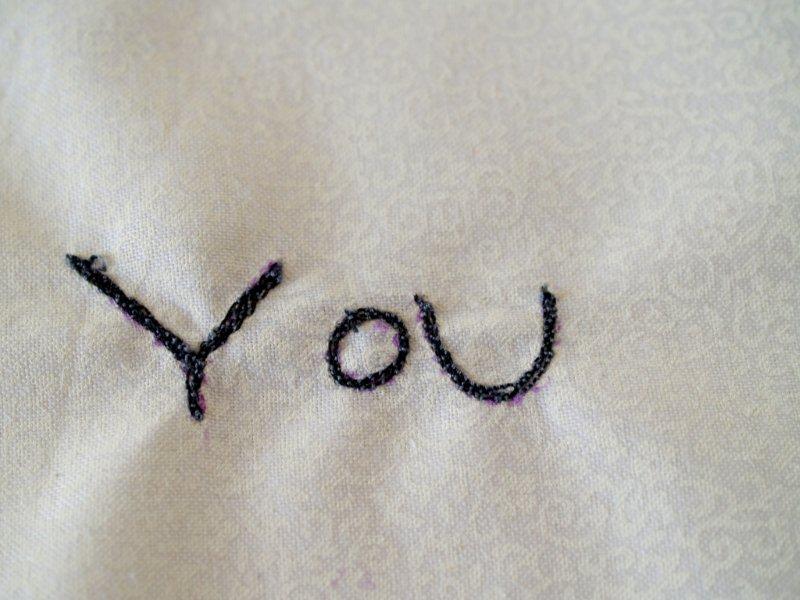
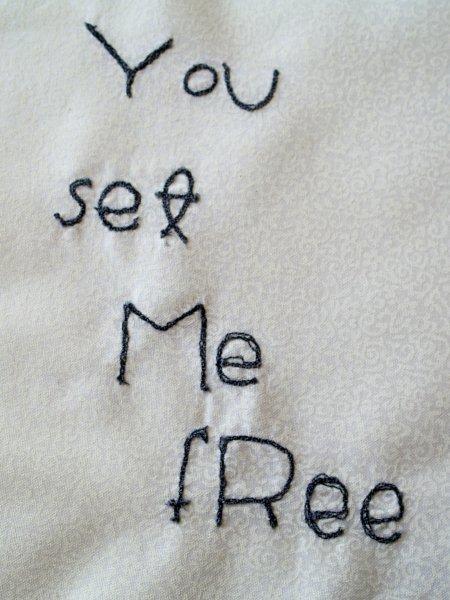
Continue stitching in all your letters. Press the fabric to remove any wrinkles or puckering.
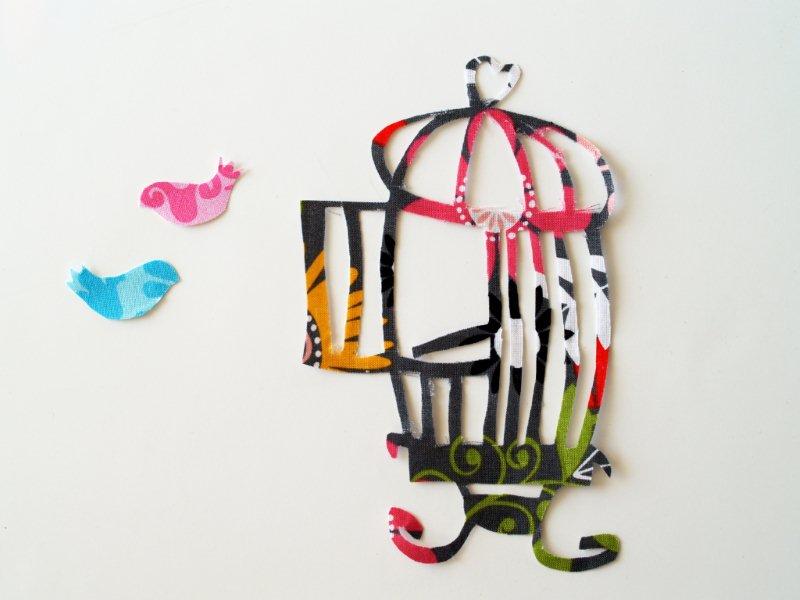
I wasn’t sure what the best way to do the birdcage was – I was worrying about the thin lines of the cage and trying to cut them out with a pattern.
But then I thought, “If you can print on freezer paper and fabric, can you print on heat-n-bond”?
It turns out you can!
I cut out a 8 1/2″ x 11″ piece of fabric and a piece of heat-n-bond (or other iron on adhesive).
Iron the fabric onto heat-n-bond.
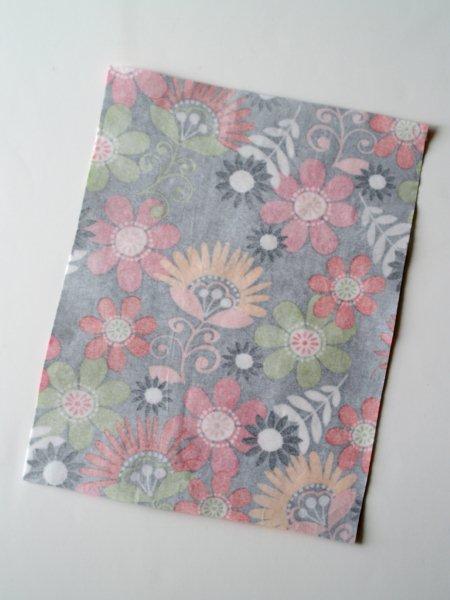
Run the fabric piece through your printer so that the image (use the Reversed Image of the Birdcage) prints onto the paper backing of the heat-n-bond.
Do this when the hubby isn’t paying attention so you don’t give him a heart attack about the crazy things you’re running through the printer. Again.

Cut the birdcage out with scissors or a sharp exacto knife. I used a combination of both.
Iron small pieces of heat-n-bond onto your bird fabrics and cut them out as well. Make sure you reverse them so that they face the right way on your final image.
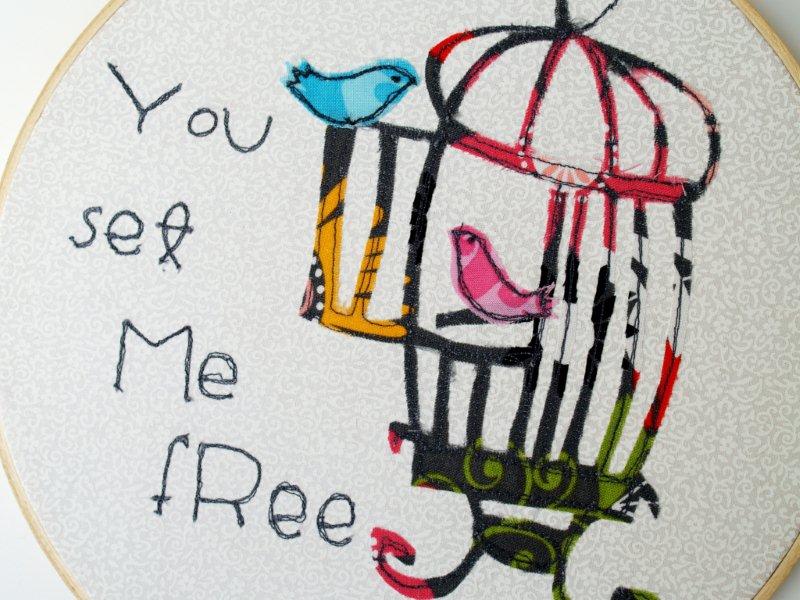
Peel off the paper and iron the birdcage onto your base fabric.
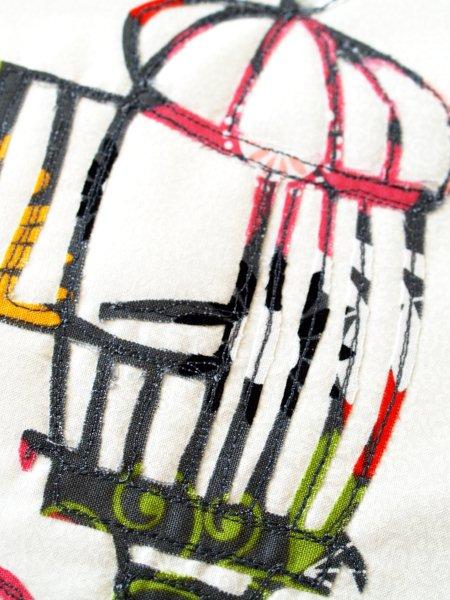
Stitch over the birdcage the same way you did with the lettering. Go over as many times as you like – I used 2 passes on the cage bars and 3 or 4 on the wider parts of the base and top.
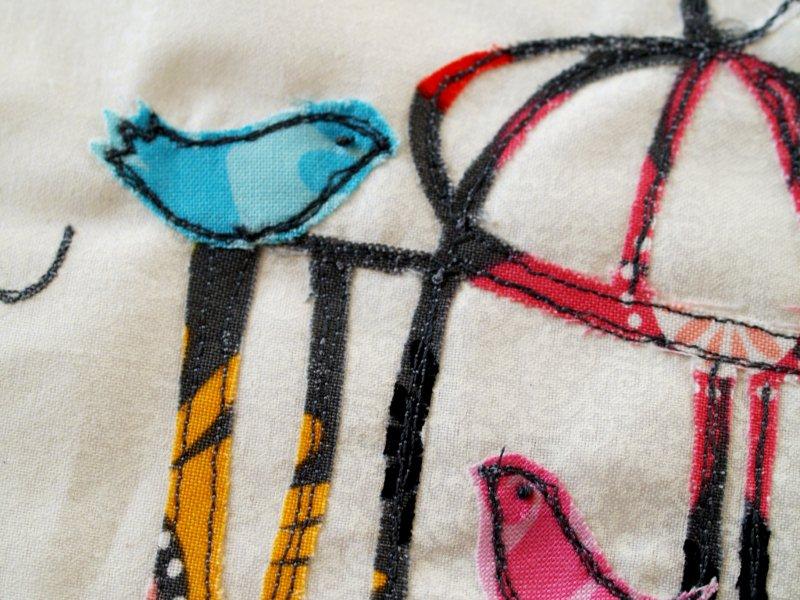
Iron on your birds and stitch them on as well.

Sew on little dots for eyes with your machine, or do a small french knot.
Place your fabric in your embroidery hoop and make sure it’s on tightly.
Trim about 1/2″ around the edge and glue down the fabric to the inside of the hoop with hot glue.
And you’re all done!!

I love it.
It’s kind of mushy – but considering everything that Mr. F. T. and I have been through – that’s how i feel.
Ok. Maybe really mushy.


I’d love to hear what you think!


Ok that may be mushy but adorable! I just read how to do this exact process in a magazine last night! Between this and the PS I love you, your man should totally know you love him!
Oh my gosh! I adore this! So charming! I want one! :)
CUTE CUTE CUTE!!! Great job! I LOVE it!
This is absolutely fabulous!! So adorable! I’ll be sharing a link to this on my blog’s, A Glimpse Inside, FB page.
http://www.facebook.com/#!/AGlimpseInside
I love it! It’s super cute!
I want this sweet little graphic on a shirt for my baby girl. Another winner Bev!
This is darling! The smallness of the pieces scare me a little. Not sure i have the sewing skill for the pattern but I’m adding it to my crafy to do list. I’ll pick a day when I’m full of pomp and give it a go. Thanks so much for providing the pattern!
I love this, I really like how it isn’t so Valentine-y but still kinda is..
Oh, I love the little birdies! I love this kind of hoop art and have been practicing FME myself to try to make something like this, it’s just getting the idea to start with that’s the problem!
didn’t realize that Bondaweb could go through printer………you have truly inspired me and my mind is whirling with all sorts of ideas……..thanks………keep up the good work
Great tutorial! As soon as I saw it, I thought. Whoa. No way I can do that, but your tutorial made it seem easy! It turned out beautifully. I love birds, too.
I know exactly the type of projects you’re talking about! I have a whole stack of them sitting in the corner where they can mock me in their awful and unfinished state. But this is definitely not one of them – so cute and so well made! I love your inventiveness to print on fusible! Totally filing that idea away.
Another great tutorial Bev. I laughed out loud at the “crazy stuff through the printer” part…you are not alone there!
Beverly – love it! I am happy about it being machine stitched! I’m not so good with the whole embroidery thing :)
Super cute, Bev!! Fantastic project! I love my x-acto knife, but I’m not sure even I would be willing to tackle cutting that birdcage. Its magnificent! And perfect decor for well after v-day!
Adorable! And printing directly onto the Heat n Bond is pure genius!
SO COMPLETELY ADORABLE! love it!
I love this! What a sweet project for this time of year. Thanks so much, I’ll be linking.
What a great project! I love your tutorials…I’m a “newbie” in the blogger’s world and you have inspired me for sure! I just made the Romantic Bracelet this weekend and LOVE it! Thanks for all the good ideas:-)
Michelle
this is AMAZING!! I cannot believe what you can run through the printer!! If you have a chance I’d love for you to come link up to Handmade Tuesdays @ ladybug blessings. http://www.ladybug-blessings.com
This is adorable!!!! Thank you for the tutorial. I have always been leery (fear of failure) of machine quilting or embroidery but I want to try this. I think I will give it a shot! Thanks again for sharing your creativity.
This is gorgeous!!
Just stopped by to let you know that I linked back to you in my post today. I made a Valentine’s Placemat using your Thanksgiving Chalk Cloth Placemat idea. Thanks!!
http://www.she-wears-flowers.com/2011/02/lesson-in-failing.html
I love the cage and bird embroidery. I feel like that little bird sometimes.
Wow Beverly! This is awesome! I have a soft spot for birds. LOVE!
Love it! As usual:)
Thanks for the great idea and tutorial!
Lindsay @ Diary of a Crafty Lady
This is just the cutest!
Oh Bev, my dear. Do you know how amazing you are?! I mean, seriously. Who dreams up this kind of creativity?! These could be sold! I am just so impressed… and the idea of ANY of your projects looking like a cat coughed it up just makes me laugh!!
I had no idea that you could put fabric in the printer! I am so going to try that! Thanks for the tutorial!
This is fantastic! You are so talented. Im not sure I could handle cutting out something so intricate. I can’t wait to try printing on fabric.
~Sarah
That is so stinkin’ cute!! Love the little birdcage. :)
This is really adorable!
I am stopping by from Take a Look Tuesday.
Would love to have you stop by and check out my blog as well!
http://xsurvivingmotherhoodx.blogspot.com/
This is adorable!!!! Love it!
This is beautiful! Great job on the free-motion sewing…I have always wanted to try that but I’ve been too chicken!
Incredible. Such a great tutorial. Thank you for sharing this!
i have tried and tried free form stitching with a free form foot….not very successful. have never tried it without a foot. i am going to try your tutorial..if all works out well, then im going to share this on my new blog….thanks so much for taking the time to show how you do this.
Creative genius! I love it! I found an old hoop in the closet yesterday and had been wondering if there was something I could do with it. Thanks for a great idea!
How wonderful! I just love bird cages.
I LOVE this, I love how you used the material for the birdhouse, just so beautiful! I am stopping by from 504’s link party and am a new follower!
Very pretty! I just love it! Thanks for sharing the tutorial.
I love this!!! I love little birdies- this is so creative!
please come link this to our party over here: http://www.bubblynaturecreations.com/2011/02/project-party-weekend-heart-shaped-ice.html
Have a great weekend!
Genius! And SO cute! I have never put fabric through the printer before, backed or not… This is cool!
Thanks for linking up to Making It With Allie! I can’t wait to see what you have for next week!
AllieMakes.Blogspot.com
That is just about the cutest thing I’ve ever seen! I love it and while I don’t sew, I think I could handstitch something like this pretty easily. Thank you so much for the tutorial!! I found you through Tatertots and Jello…
amazing!
i can’t believe you stiched around the birdcage! you have some serious skills, my friend!
this is an adorable project!! couldn’t be any cuter.
happy weekend.
kellie
Wow, I love the clean yet grundgy look of these… So fun.. I love the detailing of the bird cage!
Visiting from The Shabby Nest. Love this! Have you thought about selling them?
That is so stinkin’ cute! Can you tell I like it?
So cute. Love the tutorial too. Thank you!
Really really love this…now I’m inspired to break out the new sewing machine I got for Christmas :)
I’ve put together a final round up of Valentine projects on Craft Gossip and included your fun post here
http://homeandgarden.craftgossip.com/25-valentine-crafts-wreaths/
If you would like to share the Craft Gossip love and show your visitors you’ve been featured, you can grab a button here!
http://homeandgarden.craftgossip.com/grab-a-craft-gossip-button/
SO CUTE!!! I love the scrappy fabric look. So fun :)
Beverly——Oh my goodness this is adorable! Took some serious, patient cutting and sewing skills but love it~
~Pam
love this! i featured it on my blog, here: http://punkprojects.blogspot.com/2011/02/make-it-monday_14.html
-Katie
Bev, I wish you and Holly and I could just hang out and craft our days away. Every single one of your projects are one’s I’d like to actually do! Thanks for sharing another top quality project at “A Little Birdie Told Me…”
Happy Valentines’ Day!
Jenn/Rook No. 17
You amazing me yet again! love it! I’m featuring this (of course) tonight! thanks yet again for the inspiration and for linking up to Topsy Turvy Tuesday’s!
I found your website thru Kam’s giveaway! I just love the birdcage needlework and fabric combo. I have never seen this before. I don’t think I have the patience to do this myself seems very tedious. You did an awesome job ! lov your work.
Would love to own one of these one day.
glad I found your site.. I am also a new follower.. yea!
When I saw this, I knew I had to have it! Since I’m participating in “thing-a-day”, the timing was PERFECT! I didn’t make the hoop art per se, but I made a pillow that I absolutely adore!
Thank you so much for sharing this! Every time I walk into my bedroom it just makes me happy!
It was also kismet that I had fabric frighteningly similar to yours! This pillow was just meant to be!
Thank you! Thank you! Thank you!
If you wan to see what I came up with, I blogged about it here:
http://knitnswim.typepad.com/mom/2011/02/is-it-so-wrong-to-be-in-love-with-a-pillow.html
Thanks for this cute tutorial!
You are seriously amazing! This might be my favorite project I’ve seen in a while… makes me wish I’d brought my sewing machine with me to Virginia! :]
Saw you on Paisley Passions linky party…
That is just a lovely design!
i am in love with this:)
gina
This is an adorable pattern & a unique way of sewing it. Congratulations. I will give it a try.
Thanks for the tutorial on the Applique bird cage,,just really got myself going with Applique, it’s like making your own artful items.
Kudo’s to you,
Linda J
VA
This is the most wonderful thing I’ve ever seen. And I have checked around a lots. Thanks for sharing. Will be my next project.
Ecarp
I just found this via Pinterest, and I LOVE it!
I just wanted to let you know the inspiration you gave me to start up my own blog again! I absolutely loved this project, and felt me finding it was nearly heaven sent. thank you so much for such clear concise directions and enthusiasm!
I tried putting the freezer paper-backed fabric through my printer and almost ruined the printer. I’m sure it’s something I did wrong, so Lord willing I’m going to try again. Maybe I’ll try this too, with the heat-n-bond. One of them has GOT to work! LOL By the way, I love this project – found it on AllFreeSewing.com. Thanks so much for sharing.
I ABSOLUTELY love this!!! I am obsessed with birds, and this is so fun!!! I will be trying this!!!!!!! Time to dust off the ol’ sewing machine!
I am as usual a day late and a dollar short but I just found this pattern on your website and HAVE to have it. Of course, I am out of ink on my printer but first thing tomorrow morning, I will go purchase and get started on this project I love it. In fact, there are several things I plan to try in the very mear future. Thank you sooooo much for sharing your talent with those of us who are wannabes!!!
Happy quilting, Mae Carroll
I love this! I’m thinking instead of putting it in a hoop, I could do many different designs and quilt with them. Or course it would be fun to do ‘life lesson’ type designs or other important epiphanies, or on a theme like love, family… and it would take years to accumulate them… I just love it. Great tutorial!