With Valentine’s Day around the corner I decided I needed some new jewelry.
Yes. It’s a weak excuse but I’m using it. :)
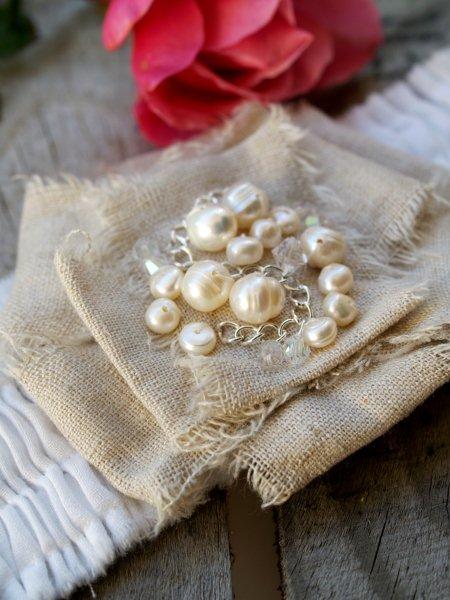
I wanted something that was girly and romantic, but something that could be worn year round.
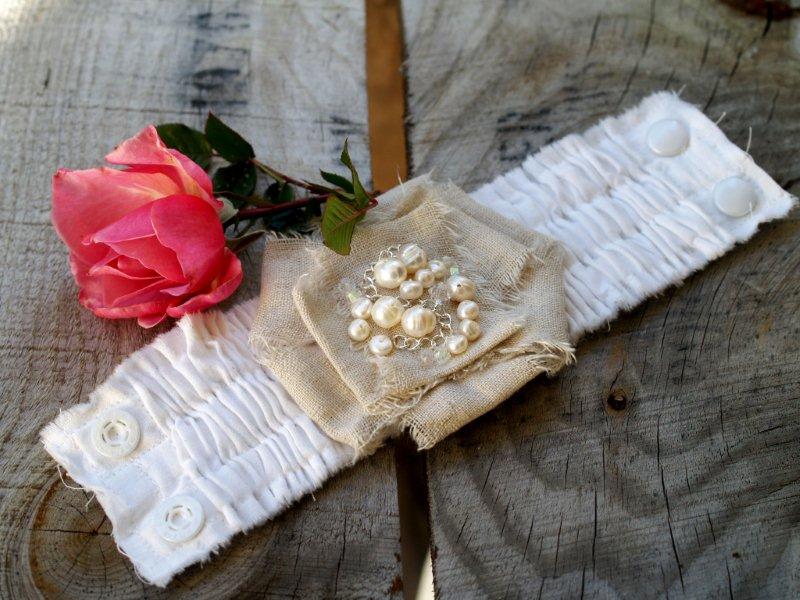
I love the combination of cream, tan, and white together and it’s been a while since I’ve made a bracelet. – here is what I came up with.
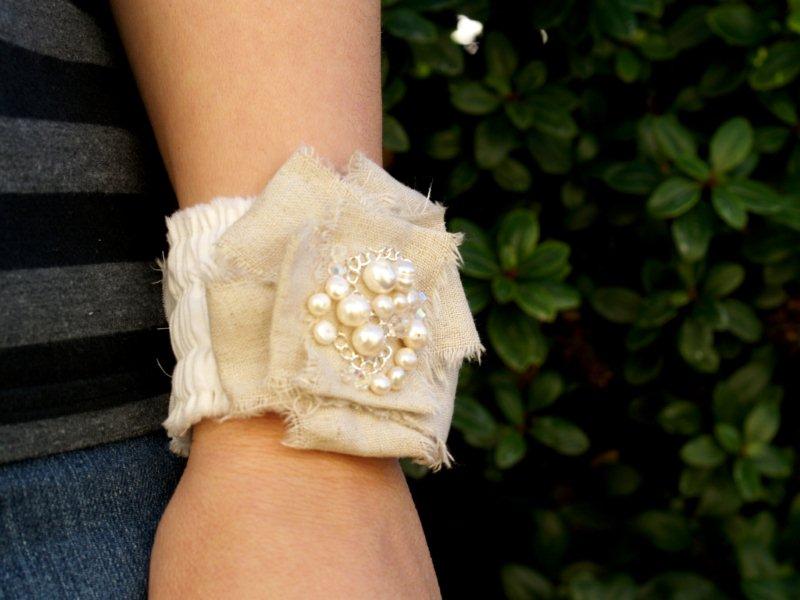
I found the inspiration for this bracelet at Ann Taylor Loft and their Stretch Corsage Bracelet.
Mine has raw edges and is a little more casual – cotton, linen and pearls rather than satin and rhinestones.
Awww. So romantic. ;)
Ready for a tutorial?
Here’s what you’ll need.
• fabric for bracelet – 2 1/4″ x 36″ piece
• fabric or ribbon for flower portion
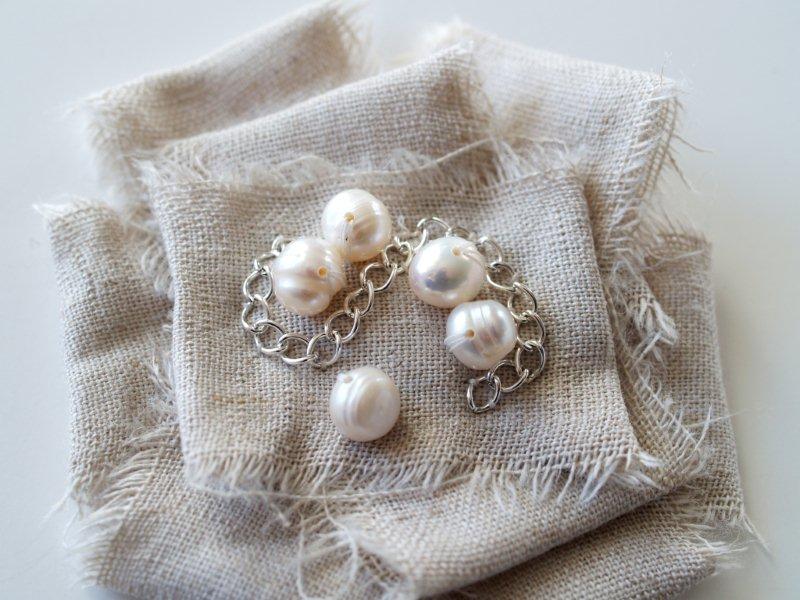
• beads or pearls and small piece of chain
• 27″ of 3/8″ elastic
• snaps
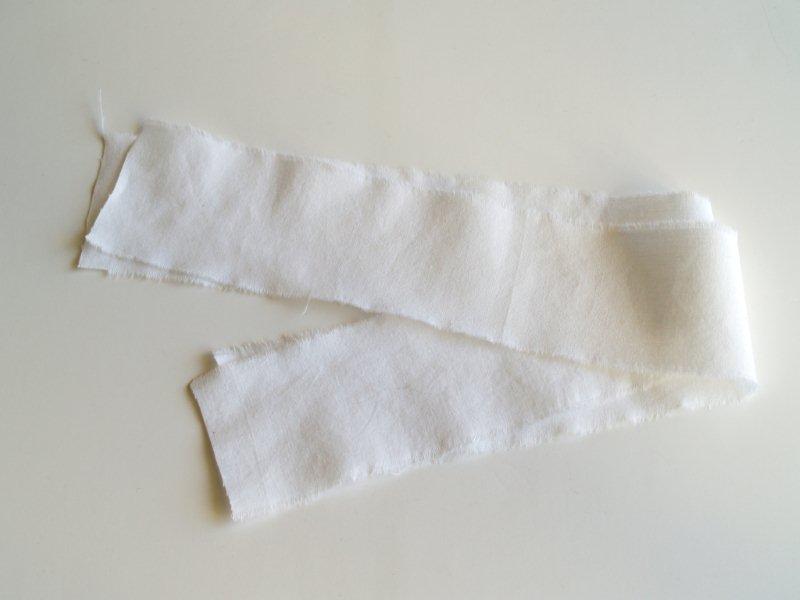
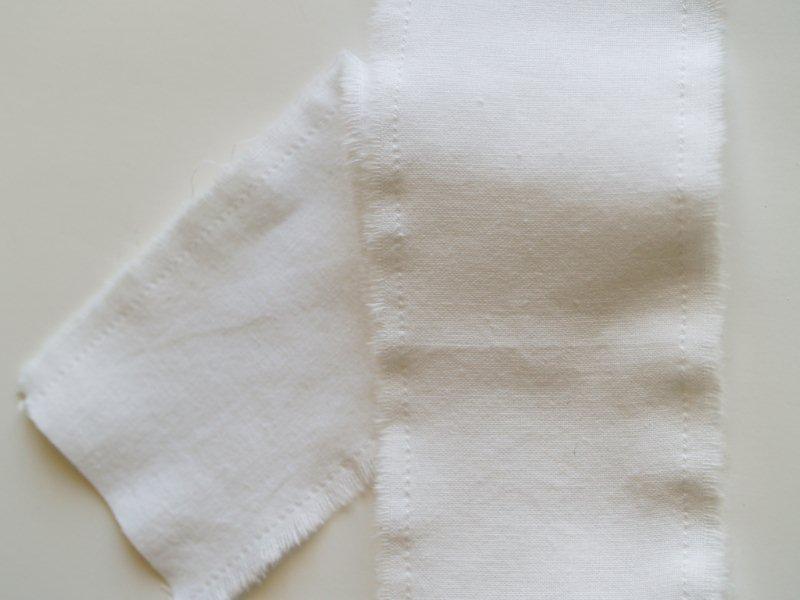
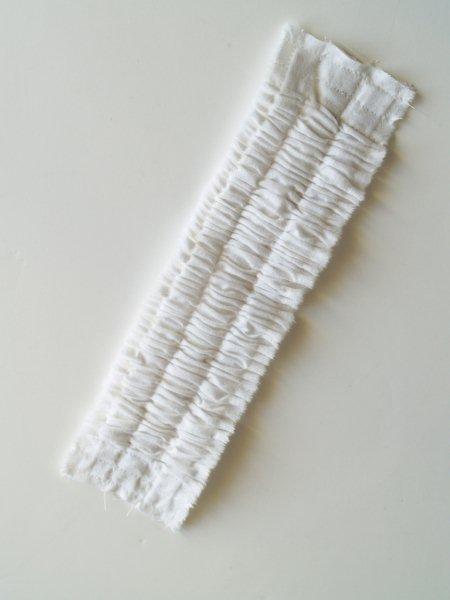
Start with your pieces for the bracelet. A great way to get straight raw edges is to tear your fabric. Make a small slit near the edge of your fabric and tear the small strip off. This will be your first edge. Then measure 2 1/4″ over and tear your fabric. You will end up with a long straight strip with raw edges. Nice and easy!
Cut 2 strips 18″ long out of the strip you just tore.
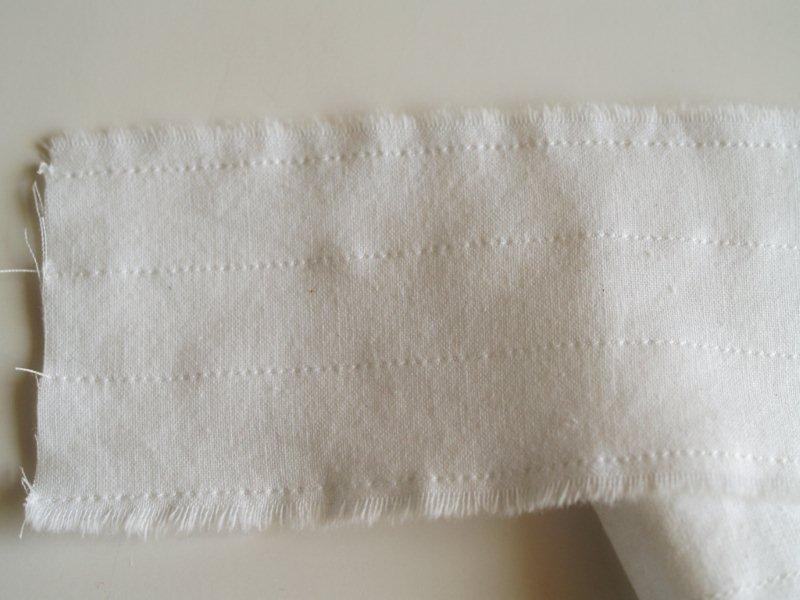
Lay your strips together and sew a seam 1/4″ away from each raw edge.
Sew two more seams 5/8″ away from the outside seams.
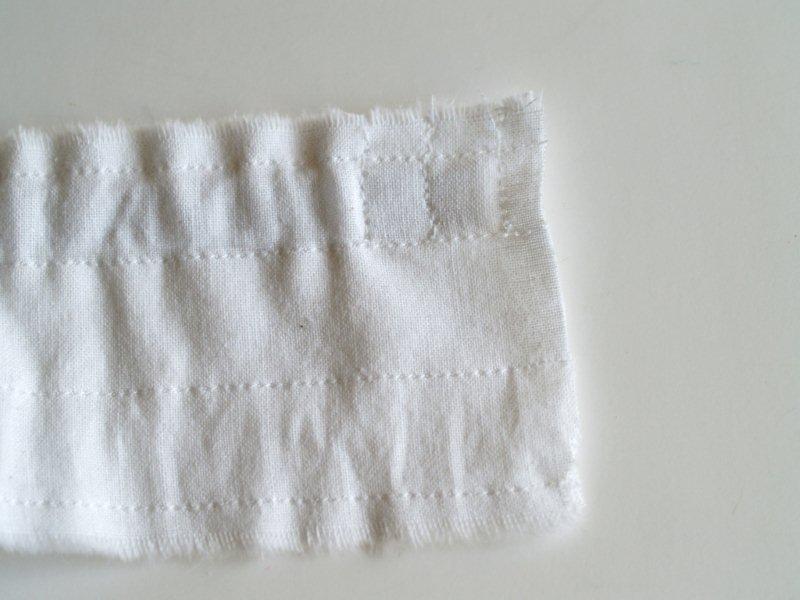
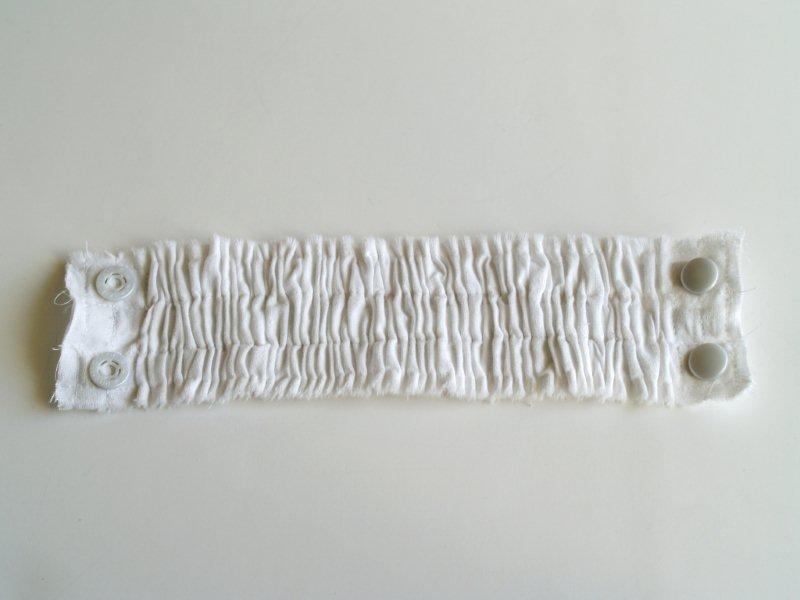
Cut three pieces of elastic, each 9″ long. This should fit around your wrist comfortably with about 1″ overlap. If you need to, adjust the measurements of your elastic.
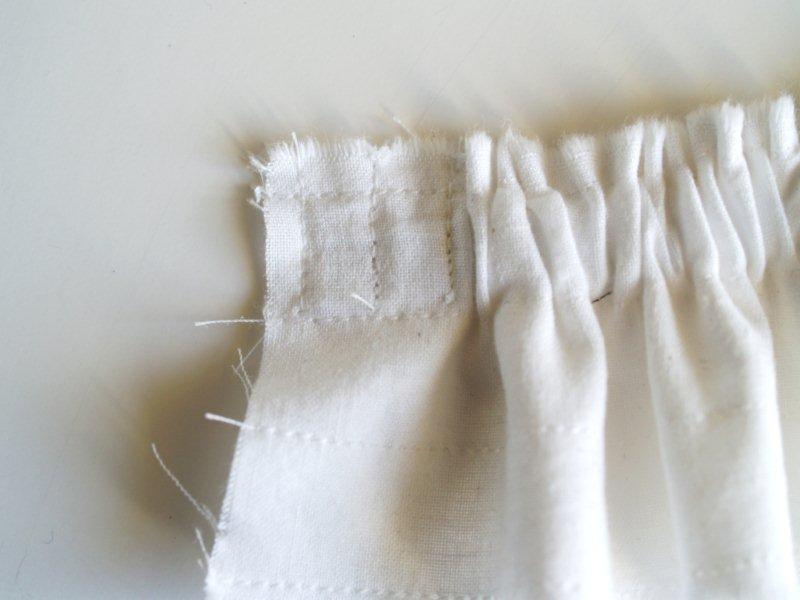
Pin a small safety pin to one end of a piece of elastic. Feed the elastic through the top casing by pulling on the safety pin, but stop feeding it through when the other end of the elastic is just past the raw edge of the fabric.
Sew a small seam right inside the edge of the top casing only. You should not be sewing over the elastic. It should be just on the other side of the seam.
Move the needle over and sew a second seam, using your presser foot as a guide along the first seam. This should sew down the elastic. Repeat a third time.
Pull the elastic the rest of the way through the casing, and sew the three seams on the other edge.
Repeat with the other two casings and the remaining pieces of elastic.
For the snaps, I used Colored Snaps. Which were white. ?
To put them in you need to buy a little plastic tool that is sold seperately.
I was worried about this part – but it was sooooo easy.
Just follow the instructions and place the snaps in the tool, with the fabric between them.
Put a towel down to protect your floor.
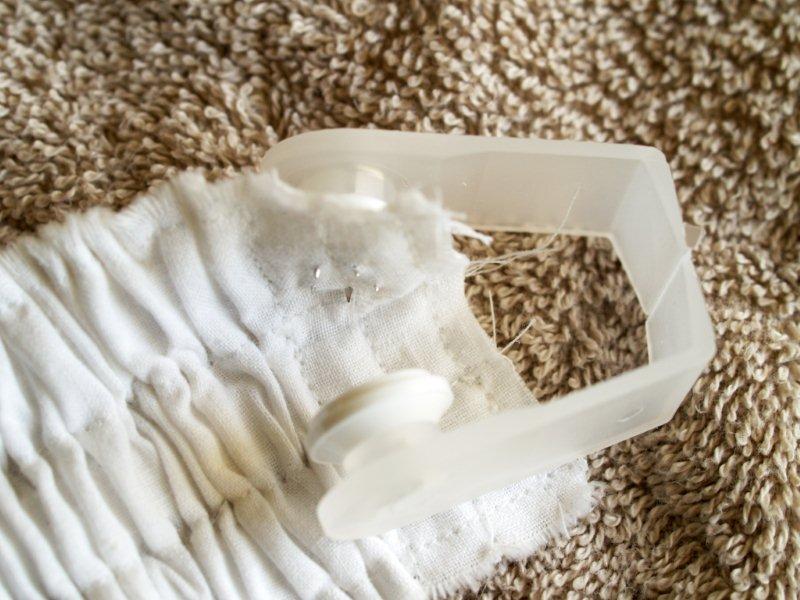
Hammer the snap in place. Ta da! Super easy.

Put all four snaps in. The two on the right side should face down and the two on the left should face up.
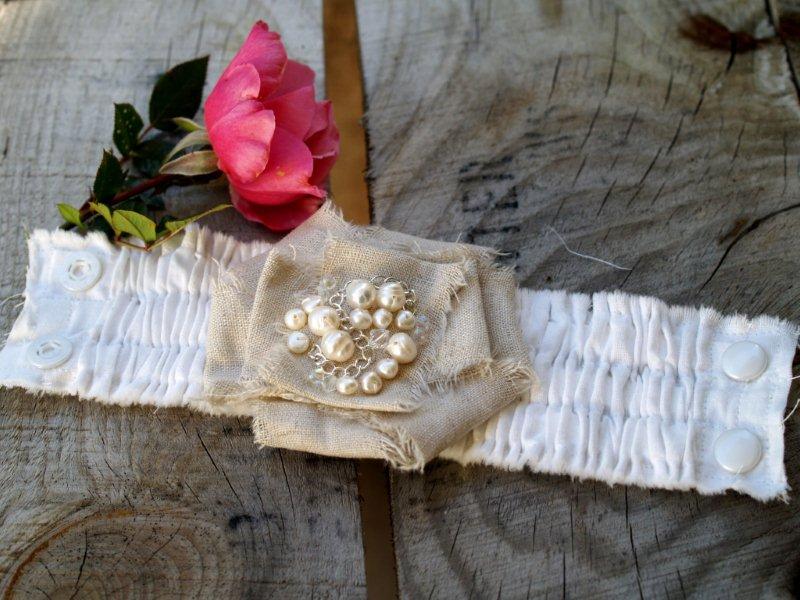
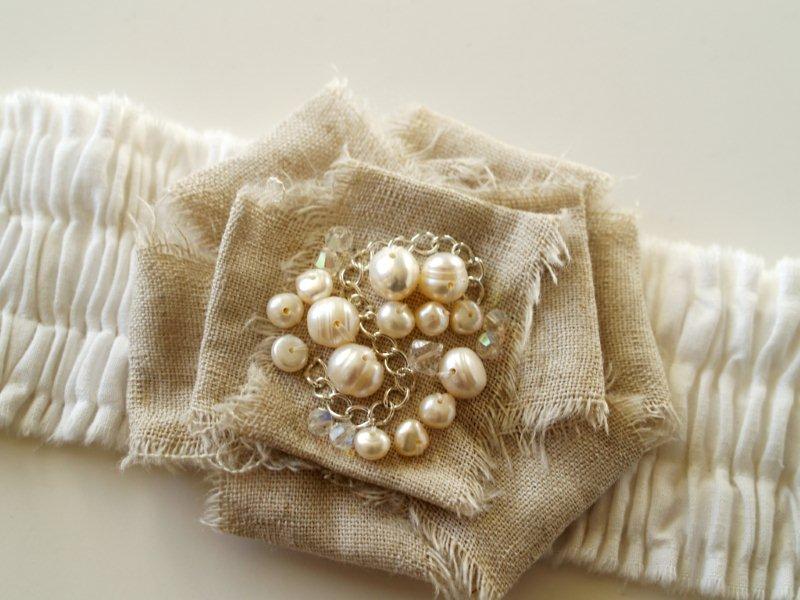
For the flower part of the bracelet I used 1 1/2″ strips of linen. I folded them so that they resembled a flower, with folds that were gradually smaller towards the center.
I don’t have pictures of the process because it took me several times to get it the way I liked it. Just keep folding and trying different layouts until you get your flower layers the you want.

Sew on your beads, pearls and chain. I tried to keep the larger pearls towards the center, the smaller beads towards the outside.
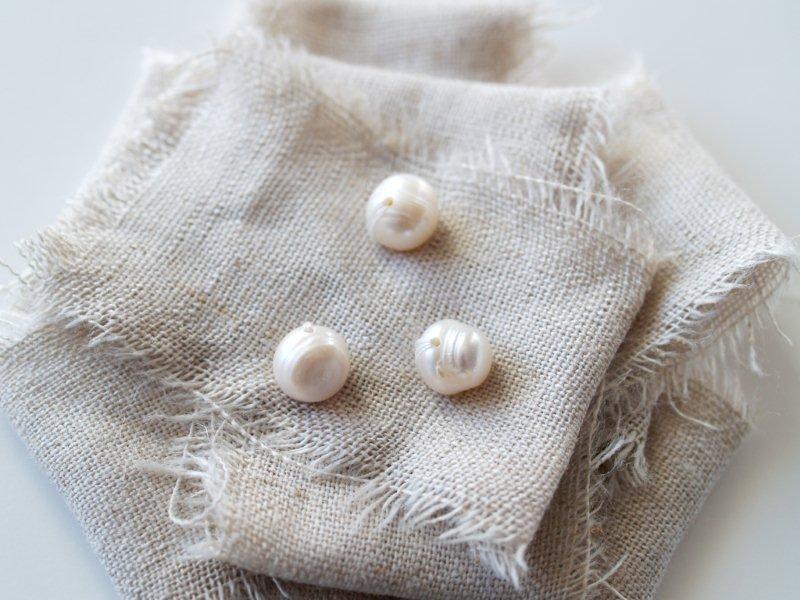
Swirl a small piece of chain in an “S” shape around a few of the larger beads.

Sew your flower piece to the outside of the gathered bracelet piece.
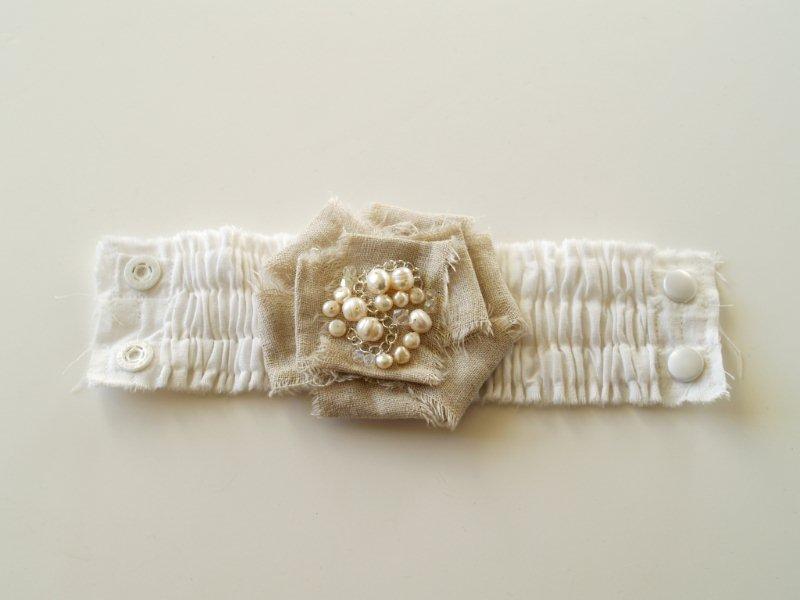
All done!! What do you think?
I’m in love with it.
Which is handy since it’s my Valentine’s Bracelet. :)


Fantastic tutorial! Love it!
you are so dang amazing bev!
so adorable! You are so creative. I love those colors too! Great Tutorial.
so pretty!
Gorgeous! I like your version better by far.
So very chic and cute! Love it!
I am in love…it’s divine Bev. I have to make this…
Gorgeous! And very chic. I love the raw edges!
really romantic…but being the lazy bum…I am I would just make the rosette myself and just attach it to elastic bands that are readily available on the street for cheap ;)
Wow –that is awesome!! You are so talented.
I like yours better than your inspiration peice! It is fantastic! Thank you for the great tutorial!
Love it, as usual!
Very pretty. I can see it in severl colors to match different outfits.
Fabulous! You are so talented.
Oooo, I love this! So dainty and feminine… perfect for a date night :]
ooh – i love this!!! So clever… I need to learn to sew. If you need new jewelry, check out my DIY (J.Crew inspired bracelet!) at stripesandsequins.com
xx
Grace
How chic! This is something that I would definitely buy if I saw it for sale in a boutique! Of course I think it would be fun to make too…and your tutorial is wonderful! Thank you so much for sharing!
Amanda
p.s. visiting from Craftomaniac!
I’m in { L O V E } with it too! Great job, thanks for sharing, you are so kind.
OMGOSH! I am so in love with this!!! Thank you so much for sharing!
Very pretty! That would really add a nice accent to the right outfit. Love the pearls, too. Thanks for linking!
It is a cute creation. I wish I could make one. Keep it up!
So Pretty!! I made something similar last week! Come check it out!
Also, I’d love for you to link this up to my linky party, Tute {Yourself} Tuesday!
LittleEme.blogspot.com
Very pretty and I love the rough edges!
I love this!!!! It is super adorable. And is so close to the original. Maybe once my sewing skills get a little better I’ll try it out.
This is so so adorable!! You are very creative!
I can’t wait to make one :)
Hi Beverly, What a beautiful copy! I<3 it! Hugs, Kim
What a beautiful piece, Bev! So feminine and pretty. Love it!!
I like!
Very nice! Thank you for the tutorial!
so very pretty! Thanks for the tut.
Totally gorgeous! My favorite part is the swirl of chain among all the dainty pearls.
I love this! It’s beautiful and perfect for Valentine’s Day!
The bracelet looks gorgeous. Love the color combination, very chic and elegant.
This is so pretty! thanks for the great tutorial, I’ll surely be making one soon! I’ll take any excuse for some new jewelry, V-day or not ;)
this is so pretty! i love the way you did the flower! thanks!
Holy gorgeous,Batman!!!! What a fantastic tutorial…
Thanks for providing a tutorial…this is gorgeous! And, so romantic!
beautiful – love it!
Now this is one beautiful idea…thanks so much for sharing it. I would love to have you join me at my weekly party…it’s NIFTY THRIFTY TUESDAYS…hope to see ya there:)
Blessings,
Linda
Totally gourgeous! Thank you for your idea!
This is beautiful, I can’t wait to make one!!
I LOVE this bracelet! Great version – and so simple – I’ve shown it to my two little girls to help with our inspiration today in making things from my fabric scraps!!
Have a lovely weekend!
Well, this is just beautiful! I love it :)
If you haven’t already, I would love for you to come link up at my linky party and have the chance to be the Best of the Best for January!
http://www.thesaturdaymorningsblog.com/2011/01/strut-your-stuff-like-you-mean-it.html
I love your cuff you did a great jThanks for linking to Your so Very Creative! I featured it today at Featuring You Friday! Go check it out and grab a button! http://memakingdo.blogspot.com/2011/01/featuring-you-friday_21.htmlob!
This is so cute! It would even be cute without the flower on it. Adorable.
Come enter to win a free wine cork!
http://gigglesglitzandglam.blogspot.com/2011/01/elephants-trunk-giveaway.html
how wonderful beverly! i bet anthro and ann taylor visit YOUR blog for inspiration ( -:
This is just gorgeous, I am going to have to try to make one of these!
This is purely inspired!!! SO beautiful!!!!
XO
I love your bracelet–and I like your more casual version! :)
I really really really adore this Bev!!! I am soooo going to make one…or two… :) Thanks for sharing!
this is so cute!! If you ever have a chance I’d love for you to come link up to handmade tuesdays @ ladybug blessings. http://www.ladybug=blessings.com
Adorable! I love the casual look you created with the perfect amount of girlieness. Thanks for sharing!
I love it. It is so cute. Thanks for the tutorial.
Ruth
Beverly,
It is so pretty. You have such an amazing style and uniqueness to your work…even when you are knocking somehting off. Just beautiful!
Bev….oh, Bev…You are so amazing at creating things. Now, if only you could conjure me up some free time, so I could make all of the wonderful things you share with us! I want to make them all!!!!
This is so gorgeous. Just wanted to let you know that I featured it on FTF today. You can grab a featured button if you don’t already have one! Thanks for linking!
AHhhhh! Bev, this is so incredibly gorgeous, I want to scream!!! I love everything about it, and I just can’t say it enough–you are a genius!!
I think it’s amazing and I think I am going to have to make one of those flowers but I have a suggestion. You should have made your bracelet so that you can change out flowers, put a clip on the flower and have a place to slip the clip in and change out for different colors and use the flower for your hair or coat or necklace. But yours is beautiful, I liked it way better than the inspiration!
This is the first post I read. I read some others and now I’m back here. I really like your anthro knock-offs. Thanks for sharing your ideas.
Sew adorable!!! I need one! Now…just to find the few to sit down and make me one up! I’m for sure keeping this tutorial! Thank you sooo much for sharing it, Bev!!
Happy hugs to you,
~Terrell @ Frou Frou Decor~
That is so great! I wish I knew how make the flower part! I am so challanged that way! Great work, I am so impressed! I just found your blog and have fallen in love! I am enjoying your creativeness and great personality! Thanks for all you’re doing! Keep it up!
I made one from old ACU’s (army uniform). I used the bottom from the pants to pretty up the flower.
http://i7.photobucket.com/albums/y279/voyageintotrance/DSC00201.jpg
http://i7.photobucket.com/albums/y279/voyageintotrance/DSC00200.jpg
Wow sew cute! I would love to try this out. I like better than inspiration you got it from. I hope this is easy enough for me.
You are totally awesome! Make more tutorials!
You have some seriously awesome tutorials. I’m pinning everything! Thanks for the inspiration and know-how!
Audrey @ lonelypaperdesigns.com
I had some wide elastic, that is already ruffled, that I was going to use as a waistband on a skirt and made a quick flower and stuck it on to see if that worked, I’m very pleased with it!
http://www.facebook.com/media/set/?set=a.201848983257275.40295.157191711056336&type=1&l=37ecea3377
I posted a couple of the pictures of this incredible bracelet on my blog at http://www.lizjfoxdesign.com and directed pointed readers to your blog for the tutorial. I’m just getting started, so I hope that’s ok. You are so creative I want people to know about you. Liz
I think this is so creative and easy to do. I will do this with my 8 yr old granddaughter. She will love it and make one for her best friend, I’m sure!!
Be sure and post when you do!
Thank you for sharing …..we have three grand daughters…I am going to make and give them…they are going to love those….Thank you