We have been enjoying writing down the things we are thankful for on our Write On Frame – and surprisingly they are not all cured meats. ;)
But it got me thinking about my little nieces – they are really too young for something like that. I thought these fun Chalk cloth placemats would be perfect for them. You’ve probably seen Chalk cloth Fabric Placemats around – this is similar but with a Thanksgiving twist!
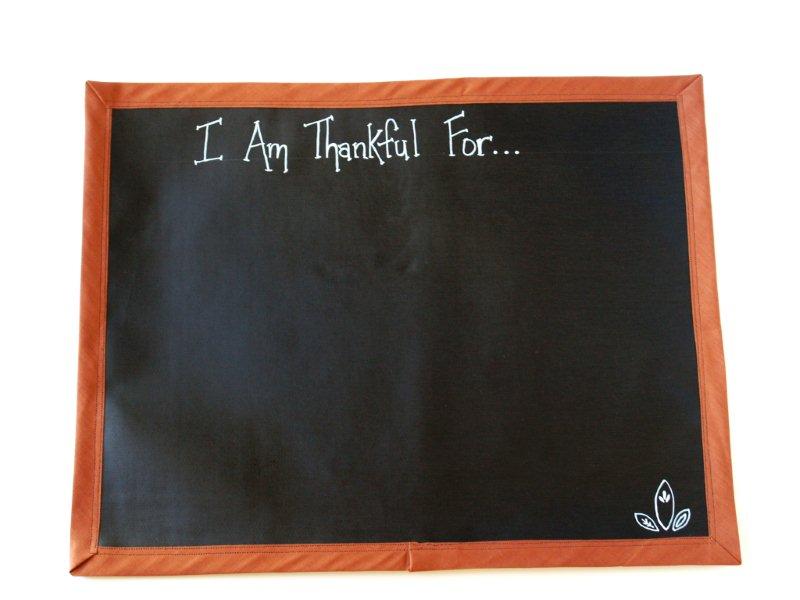
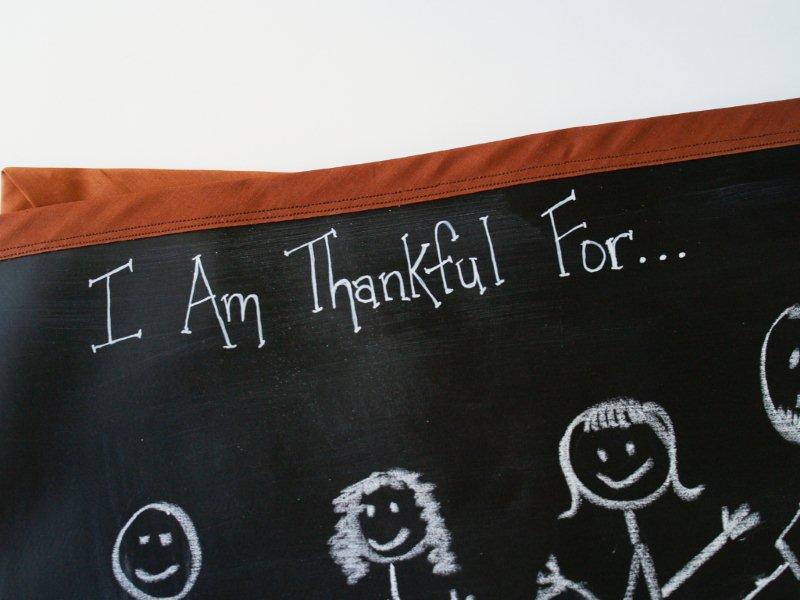
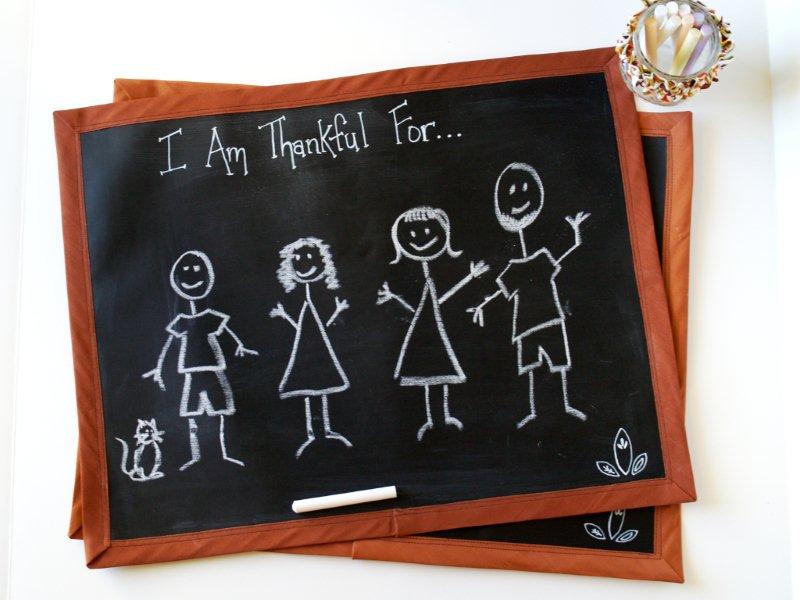
The placemat says, “I am thankful for” and they can draw out what they’re thankful for, and easily erase it and draw something new.
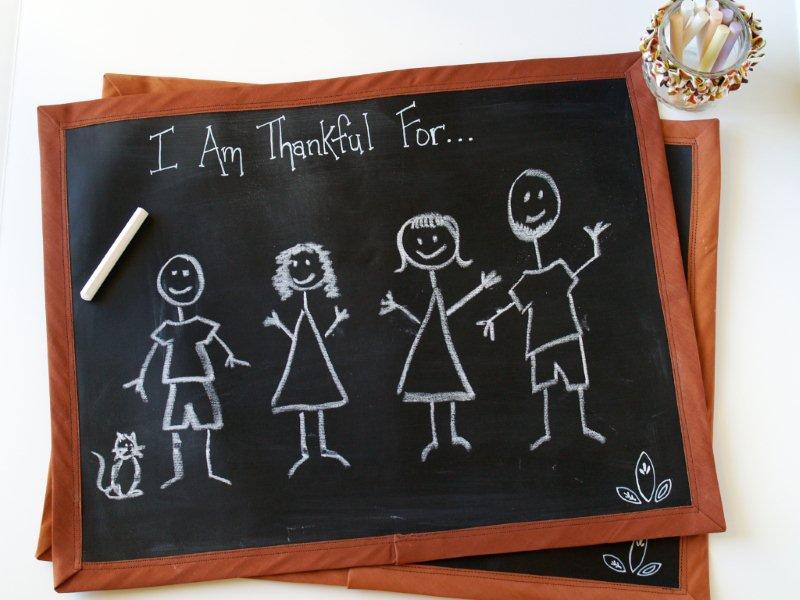
(No laughing at my stick figure family. I’m no Roo. :)
If you are not familiar with Chalk cloth – it’s a black leather-like fabric designed to be used just like a chalkboard, but you can sew it. Sweet huh?
I ordered mine from Fabric.com, but I believe that is is available at Joann’s now. You can’t wash it – it just wipes clean with a cloth.
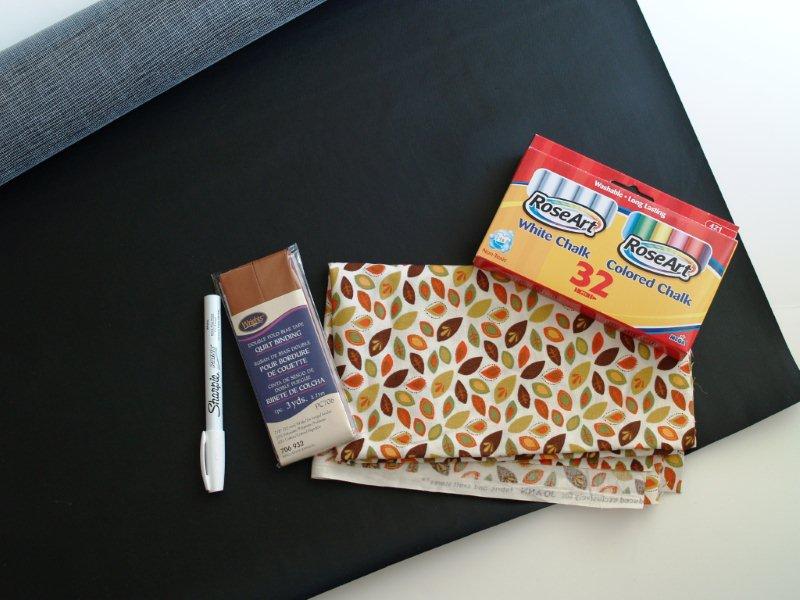
Here’s what you need if you’d like to make a placemat or two for your little ones!
Materials:
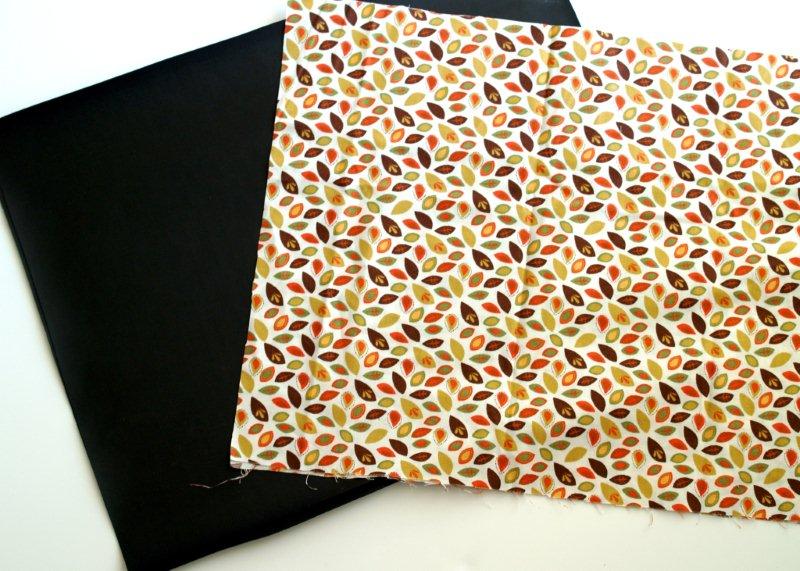
- Chalk cloth – 14 1/2″ x 18″ per placemat
- Fabric for backing – same size
- bias tape or similar binding
- paint pen
- chalk
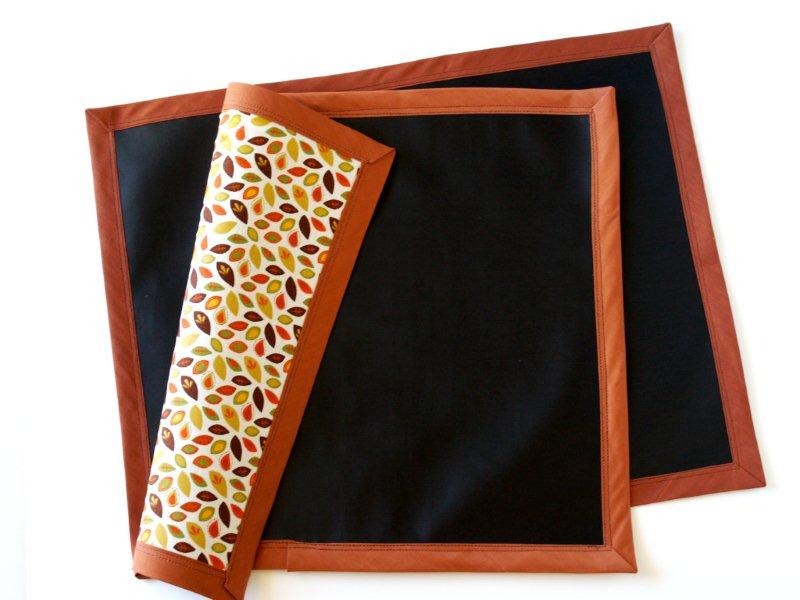
Cut your placemat pieces out.
Place your pieces together, wrong sides together. If you pin the pieces together, pin them very close to the edge so the binding will cover the holes.
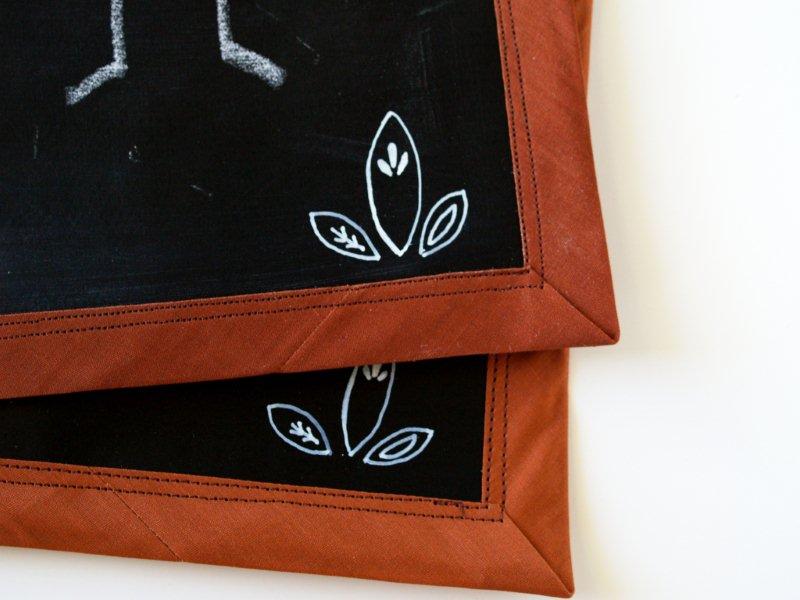
Sew your binding around the edges of the placemat. I used two rows of straight stitching. One placemat takes most of a package of double fold quilt binding.
Using a paint pen, write out what you’d like to say across the top of the placemat. I wrote, “I am thankful for . . .” across the top and then some of the leaves from the fabric in the bottom right corner. I am going to add each girl’s name in front of the leaves because you know it’s always easier when things are marked with names. ;)
To prepare the chalk cloth for writing on, rub a piece of chalk over the whole placemat.
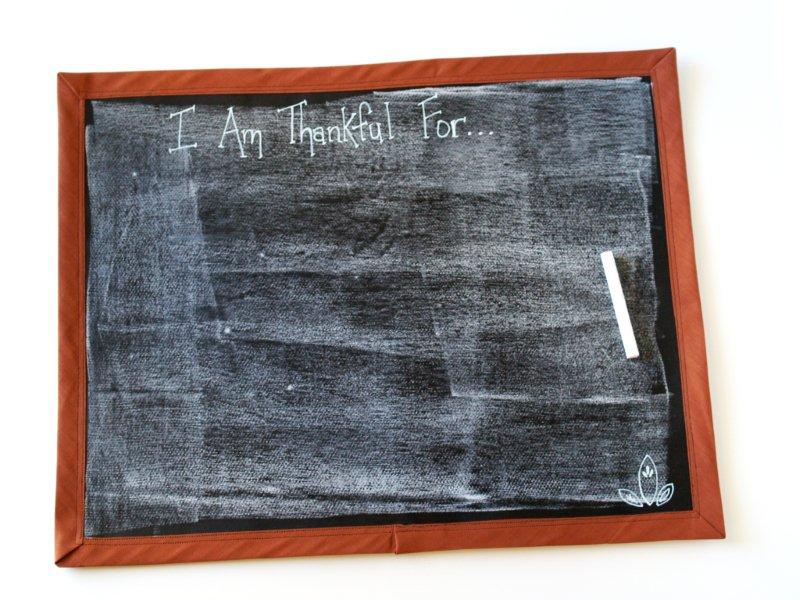
Wipe all the chalk off with a damp cloth and you’re ready to start coloring!
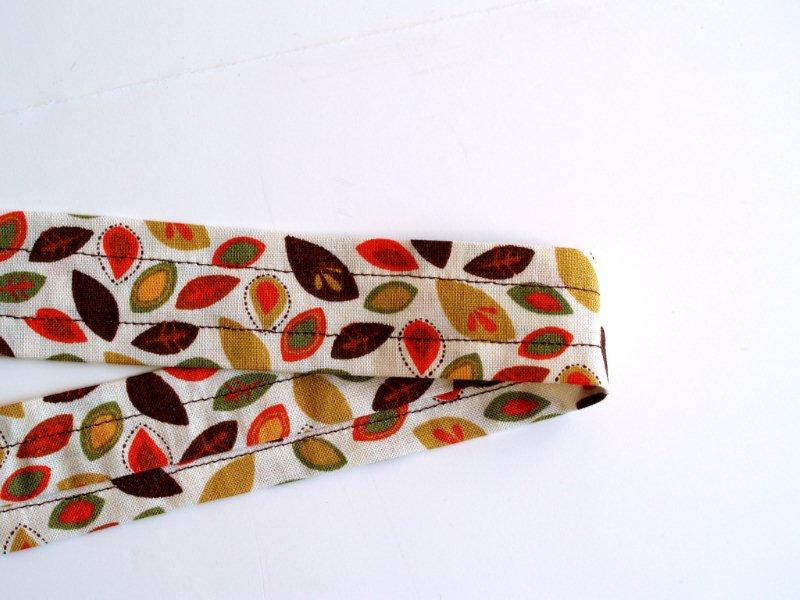
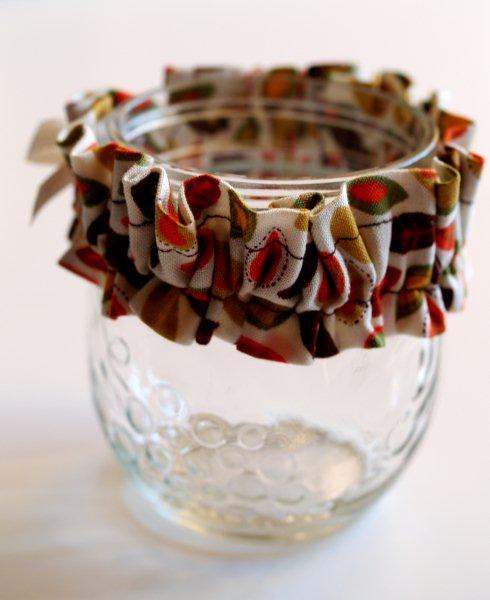
I also decorated a small jar to keep chalk in. I cut a strip of fabric, hemmed the ends, and sewed it in half.

Sew two stitching lines along the piece – so that the lines divide the rectangle into thirds.
Cut a small piece of ribbon that is long enough to tie around the rim of your chalk holder. Thread the ribbon through the center casing – between the two stitching lines.
Do not watch t.v. while threading the ribbon through the casing and pull it all the way completely through to the other side. Twice.
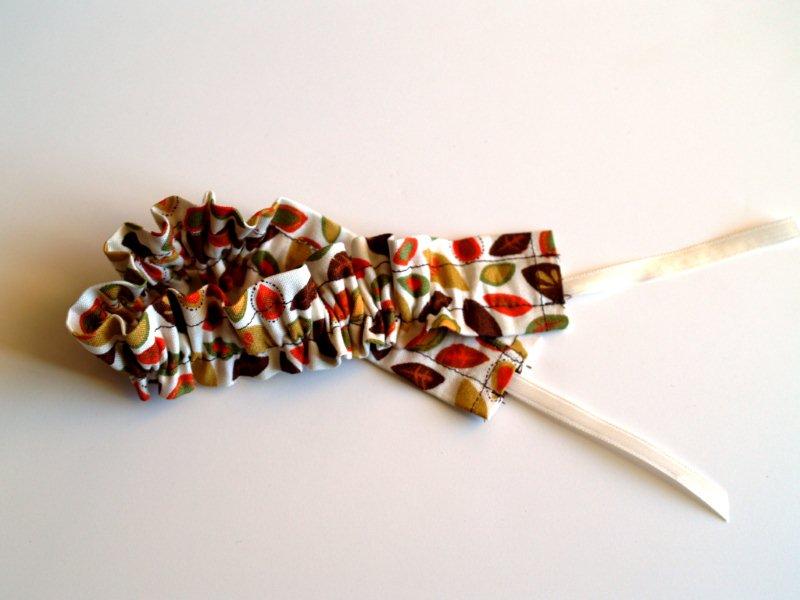
Tie the ruffle around your chalk holder – I used a little ball canning jar. So cute.
All done!! Time to start getting creative with your kids!!
I think these would be a really fun way to help your little ones focus on Thanksgiving – you could use it at home or it would be perfect to take out to a restaurant too! It would definitely help keep everyone entertained while you’re waiting for your food. You just erase the chalk with a damp paper towel.
It would be fun on Thanksgiving Day too – keeping the kids entertained while they’re waiting not so patiently for Thanksgiving dinner. Hmmmm.
I think I might make one for Mr. F.T.


Um this is just too adorable. Thanksgiving is going to be way fun at your house. And I was just tickled by your coordinating ruffly chalk holder. Love it all!
Too cute, Bev!! I think my son needs one of these, ASAP. He would love to be able to draw on his placemat! Love that its reversible to boot! You know how I feel about those types of projects. ;)
What a great idea!!! Thanks so much for sharing this. I will be doing this for the kids table this year!!! I can’t wait ;0)
How smart!! I can definitely see infinite uses for that chalkboard fabric. I must get some!!!
I had no idea there was such a thing as chalk board cloth. That is amazing!! I love this project. Maybe I should make two for me and the hubs. On his I will write with a permanent marker, “I’m thankful for my amazing wife” so he’ll never forget. ;)
Great idea and it would keep the kids busy! :)
I think that you will make Roo proud with your stick figures! ;) I love these placements- they are pretty, functional, AND meaningful… What threw me over the edge was your awesomely cute ruffle for the jar. LOVE that!
How DO you do it, Beverly? These are so cute! I didn’t know there was chalk cloth. “Kids” of all ages would have fun with these.
Very Kewl!
Your placemats are adorable! Great project–and the coordinating chalk jar is a wonderful finishing touch!
These are so great! And the ruffle on the chalkholder…super cute!
These are so fun! And I love the ruffle!!
Love this project! I wanted you to know that I mentioned it on my blog today & to invite you over to visit my blog. I love Thanksgiving, too. I’m celebrating the 30 Days of Thanksgiving & blogging what I’m thankful for everyday (or at least trying to).
Thanks & I love visiting your blog.
http://KeepinUpWithTheTatums.blogspot.com
adorable! I didn’t know about the chalk cloth.
Bev, this is seriously genius!! What a fun addition to the Thanksgiving table!
This is so cute Bev, you come up with the greatest ideas!
Thanks for visiting my blog! I thought it was funny you said here in CA you don’t have much color in the leaves. I’m in CA, too, although MUCH further north. We’re in the SF Bay area.
What a great idea! I love it. . I didn’t know they had chalk fabric. I must copy this one. My grandkids will love it. Thank for stopping by my blog and leaving such a sweet comment. I so appreciate it. And thanks again for sharing your great idea.
I think your stick figures look FANTABULOUS! Thanks for sharing!
I hadn’t heard of chalkboard cloth before, what a fun idea. My kids would really like this.
LOVE these!! How PERFECT to keep the kids entertained!! I wish I had some sewing skills!! GREAT job!!! (=
I Love this! Where did you find the chalkboard mats?!
What a great idea!!
Such a great idea! And it looks pretty simple to pull off.
Thanks for the great tutorial and for linking with What little boys are made of!
WOW! This is so awesome!! I will bookmark this one!
Super cute! I didn’t know that they made chalk cloth! Thank’s for sharing!
What an awesome idea, I will have to see if that cloth is at my Joann’s. I can’t believe you also made the cutest little chalk holder too! Thanks for coming to A Crafty Soiree and sharing:)
This is my favorite Thanksgiving craft and use for Chalkcloth EVER! No wonder my RLF, Holly @ 504 Main is always saying such wonderful things about you!
chalk cloth??? I didnt even know they had that?? AWESOME!!!
I love those placemats!! What an awesome idea!!
:)
Courtney
ThePaisleyAbbey.com
This is such a cute idea! I love it!
These are so adorable ! I had never heard of chalk cloth and I adore chalkboards ! ! ! I will have to make some :)
I am seriously in love with this idea. I let the kids decorate the Thanksgiving table and this would be so perfect for that look!
What a fabulous idea. I have never heard of chalk cloth before. I need to head on over to JoAnns and see if they have any in stock. Probably not now that you have this great project on line. You have great handwriting too. Mine would never look that good.
This is such a great idea! I will need to get one for my son.
LOVE! Featured this on Craft Gossip :) http://homeandgarden.craftgossip.com/thanksgiving-chalk-cloth-placemats/
Hey shoot me an email, I have a question for you :0)
LOVE LOVE this! Not only would it be good for the kiddos, but I’m thinking it’d be a cool idea for the adults too! Our family is fun enough that they would enjoy it too! Thanks so much for sharing!
VERY COOL! You did a great job on this tute. I love it. Thanks.
I’m trying to come up with a way these could be used for dinner/cocktail parties. lol Surely these could come in handy for some sort of drinking game. I don’t drink but have friends that have alot of parties.
What a neat idea. I may have to try to make some! My little girl would love these!
I love this idea, I’ve never heard of chalk cloth. Great way to get the kids involved.
Those are darling. What a wonderful idea. The chalk holders are adorable too. Have a great weekend!
in love!!! Such a great idea! Just found out about chalkboard fabric!!!
Congrats on your CSI feature!!
LOVE THIS! If you have a chance come link up to Handmade Tuesdays @ http://www.ladybug-blessings.com
Chalkboard placemats, really cute idea! I’ve never worked with that fabric before, it’s something new since I had a kid I guess. Congrats on being picked in the top 10!
Love them! Two of my favorite things, chalkboard paint and the kids table at Thanksgiving!!!
This is terrific timing. I just bought some of this cloth at the International Quilt Festival (because I knew I could do SOMETHING with it), but wasn’t quite sure how to proceed. Ta-daa! Your blog to the rescue. Thanks for the inspiration.
Saw this project featured over at One Pretty Thing and love it! Glad I stumbled on your site! What a great way to get my youngins to sit at the dinner table this Thanksgiving :)
Adorable! So much fun for the kiddos at the little kids table.
I only heard of chalkboard FABRIC a few days ago — now I see your post. This is a fantastic idea to use with the kids at Thanksgiving — or year-round! Thanks for stopping by to see me and leaving a comment. YES, you definitely want to stop by my Etsy shop and pick up some Restoration linen cleaner. It’s saved so many old linens and gotten them back into service!
These will be on my table as soon as I can get the fabric!! What a great idea! I linked to this on For The Luv Of Boys: http://fortheluvofboys.blogspot.com/2010/11/fun-fall-crafts.html Hope you don’t mind!
Great idea! Adorable to look at and interactive too!
I’d love to have you and your Thanksgiving placemats join my meme Seasonal Sundays. The link is open until late Monday night. Hope to see you!
– The Tablescaper
Absolutely darling and very creative!!
These are such a fun way to use chalkboard fabric. Thanks for sharing.
This is a wonderful idea! Thanks for sharing this project..it is very fun :)
How cute! I have had the idea to make something similar only instead of using chalk cloth, spray paint those plastic type placemats with chalkboard paint. I am hoping that works out just as well and then there is no sewing involved… I just need to find some of those cheapo plastic placemats!
Love these! I’m linking to them on my Friday Favorites.
Love this! I wonder if I will find time to try it . . .
Seriously! How do you do it? Is there a week I haven’t featured you! Simply amazing. Thanks for linking up again and I’m totally featuring you yet AGAIN!
So cute! these are great!
This is so cute and something I could actually make!!
I’m thinking about making a few as gifts for my daughter’s classroom teachers for indoor recess/centers time!! : )
This is a wonderful idea! I saw it on Oopsey Daisy and had to head right over to see it all. I am definitely add it to my list of things to do for next year! I even have that same leaf fabric–can’t wait to use it!!
I am totally in love with these! must have!
Too cute! Its just what I need to keep my nine grandkos busy.
What a cute idea!!Love it.
Cute and what a wonderful idea!
T’onna @ Submarine Sunday
http://navywifeypeters.blogspot.com/2013/01/submarine-sunday-15.html
I make something similar – http://roseleej.blogspot.com/2011/09/monkey-applique-shirt-some-news-and.html
Thanks for sharing your version!
This is such a neat idea! We use to make place mats every year in grade school. We had a Thanksgiving meal where we would always sit as the whole entire school. This is a great idea! It would be a lot better than the construction paper style that we did back then.
Bev I have a question. When I went to several sites to look into purchasing it had low ratings. Most were that it had a very strong odor that would not go away no matter how hard they tried, the reason for the concern is that my preschoolers are between 3-4 years old and I don’t want to get them sick. It is a little pricey and I don’t want to spend money on something that they won’t use. Also a few said that it did not write and the kids got frustrated but as I can see on your site it looks amazing. Is it washable and will it be same after? Can you please help and calm some of my concerns. Thank you and God Bless. Mrs. Valerie
Hi Valerie!
I did not notice a strong odor with my chalk cloth. It smells a little like vinyl, but not bad at all. I gave my nieces the mats and we have had a blast with them, reusing them often. I do use regular chalk with them, not the markers so I’m not sure if that was the problem or not. I have had mine for a while now, so I can’t vouch for the lots they are selling now, but I didn’t have any problem with odor or permanent marks.
I have seen it in my local Jo-Ann’s – you might try heading in there to see if they carry it and if you notice an odor there? Then you’d be able to check it out in person instead of just ordering it online. Hope that helps!
Bev
I LOVE this. Thanks for helping me figure out what everyone is getting for Christmas this year! I love that I can do one family gift that is great for kids and adults.
That is so great Sara! I’m so glad you like them – thanks!!
you just amaze me with all the crafting that is going on at your place! thanks so much for sharing on craft schooling Sunday!
I love this idea and will attempt to make these for next Thanksgiving. This one if I can find the time to get the materials. Thanks for sharing on Sunday’s Best Linkup. Looking forward to seeing more from you.
This is so cool. I didn’t know they made this stuff in fabric form. This opens up a world of possibilities. Now we can make clothing and write on ourselves. Your mats are adorable.
This is so adorable!
These are the cutest placemats I have ever seen! Thanks for sharing. Pinned. Coming over from home matters Linky party.
I’d favor to use some with the content material on my blog whether or not you don’t mind. Natually I’ll give you a link on your web blog. Thanks for sharing. Host Regions LTD