I have a sweet treat for you today!
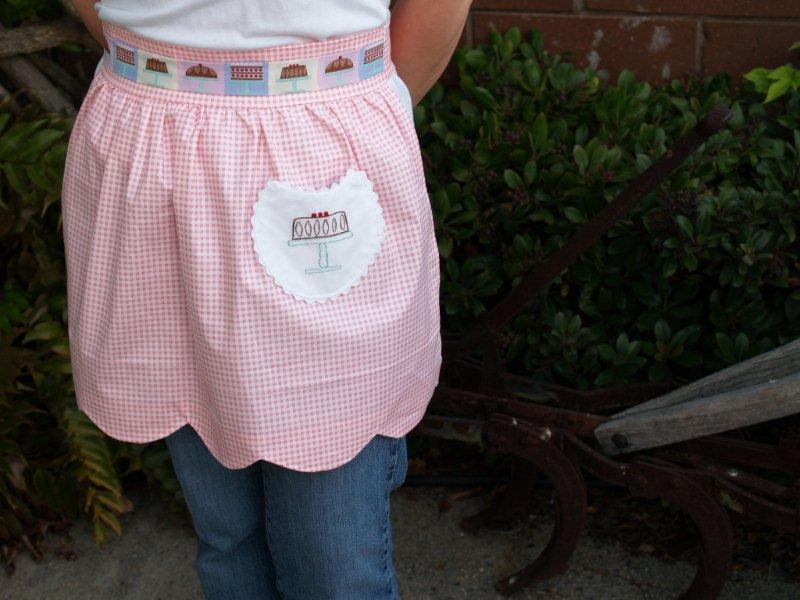
I call it the “Let’s Eat Cake” Apron.
Because it’s always time for cake.
I don’t think you can have enough aprons.
And if by some unlikely chance you think you do have enough – this one would make a great gift too!
(Did you know Christmas is 3 months away? Ack!)
This super cute gingham apron is decked out with cake ribbon and embroidery and is finished at the hem with a retro-y (yes. That’s a word.) scalloped border.
If you can’t find cake ribbon, you could take the methods used in this tutorial and adapt them to any ribbon, to coordinate with your decor and style!
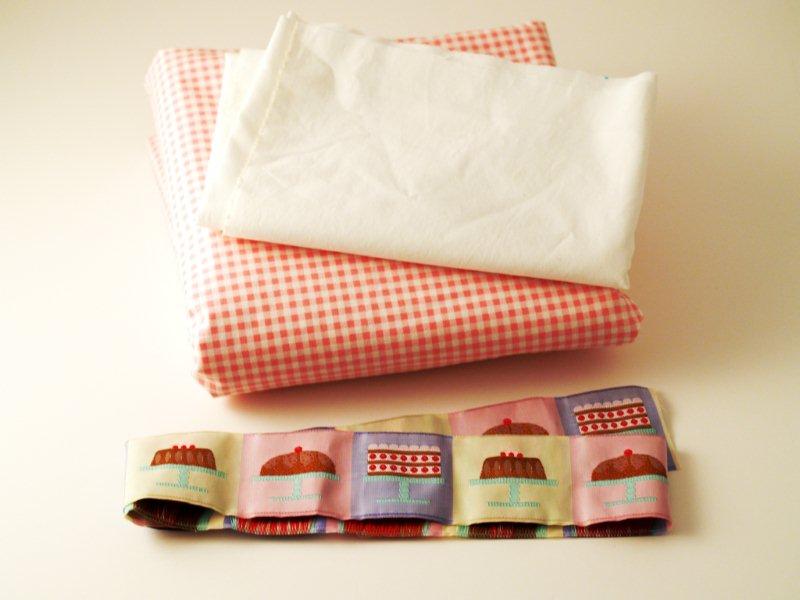
Ready to get started? Here’s what you’ll need:
• Fabric for Apron – about 1 yard
• Small piece of contrasting fabric for pocket – about 10″ x 20″
• Decorative Ribbon – about 16″
(I got this ribbon in a little fabric shop in North Carolina.
I am sorry but I don’t know the name of the shop or the brand.
But I’ve seen some really cute cupcake ribbon lately and I think that would make a darling apron too!! )
•Ric Rac
• Embroidery Floss – colors to coordinate with your ribbon
• Thread
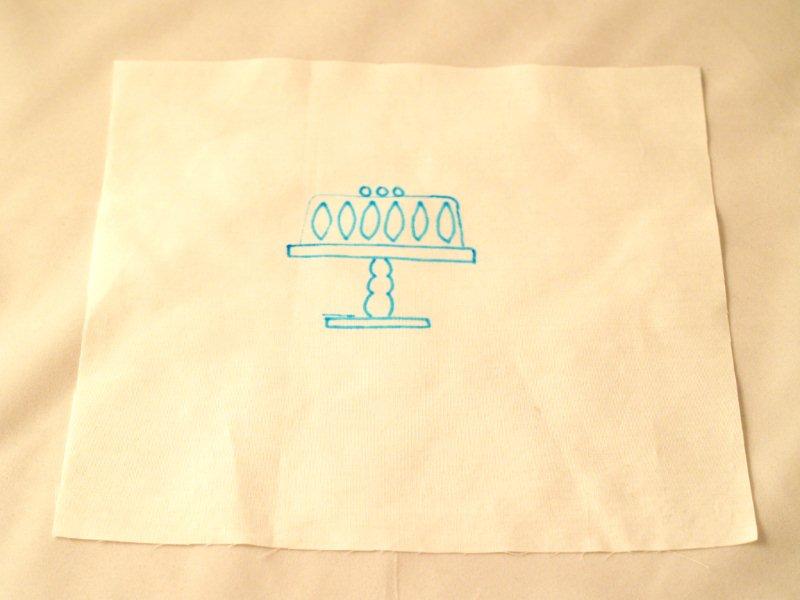
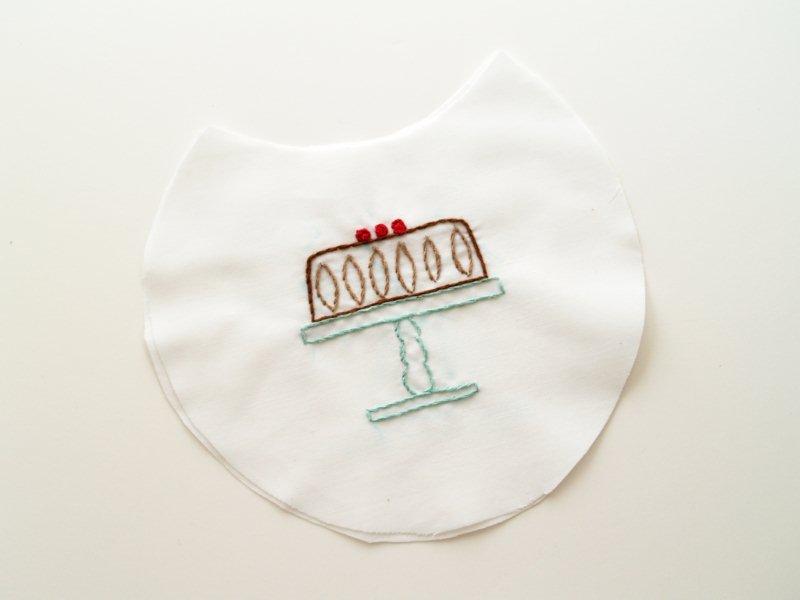
Start by making your pocket.
Redraw a design from your ribbon onto a 10″ x 10″ piece of contrasting fabric with a disappearing fabric pen.
I chose one of the cake styles. The overall size of the design was 2 1/2″ x 2 1/2″.
Put your fabric in an embroidery hoop. Outline your drawn lines with a stem embroidery stitch, in the colors that match your ribbon.
To do this, separate your embroidery floss, threading your needle with 3 strands.
Knot the thread and bring it up at one corner of your design.
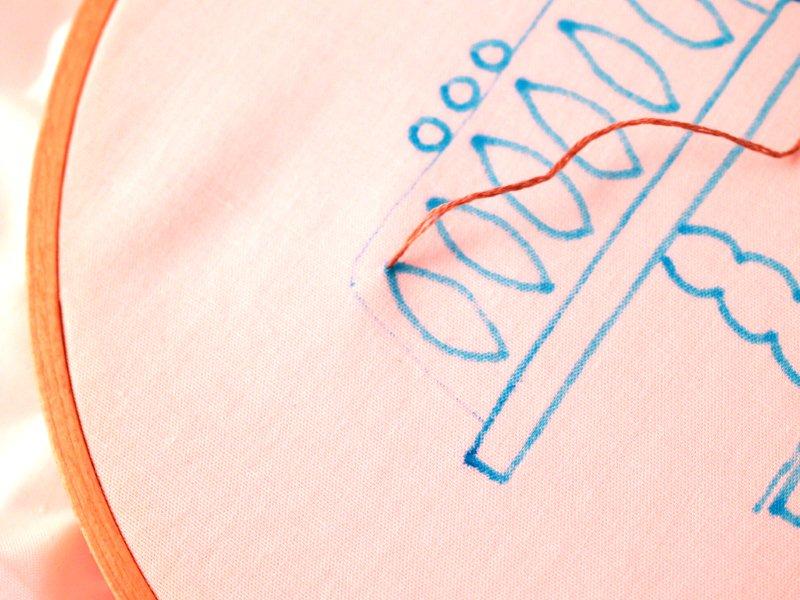
Bring your needle from front to back to front again, facing the place where your thread came up. The distance between the thread and the stitch should be about the same.
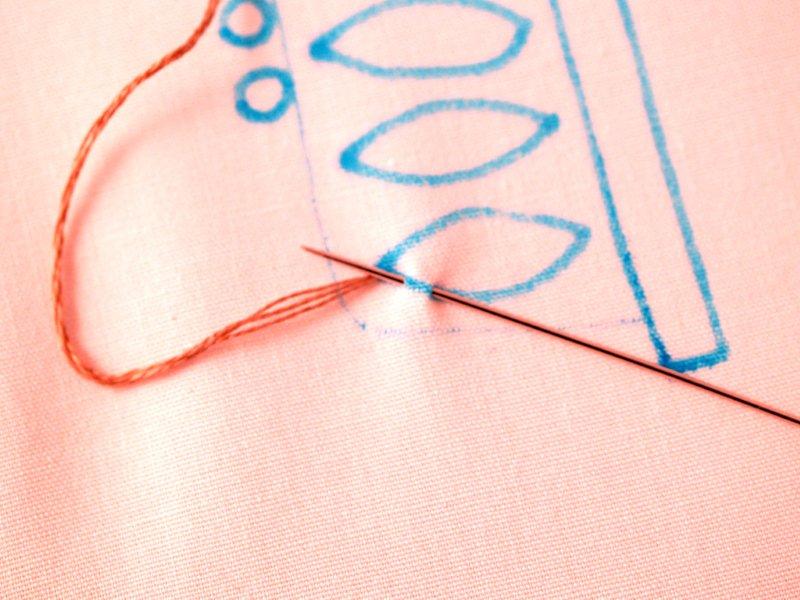
Pull the thread through the fabric.
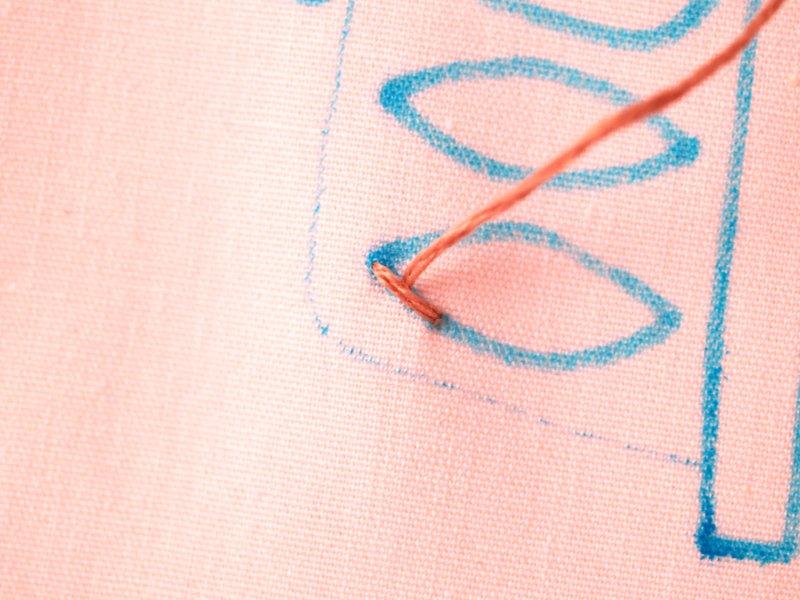
Hold the loose part of the thread downward, and then make another stitch just like the first, with the needle coming up where the first stitch ends.
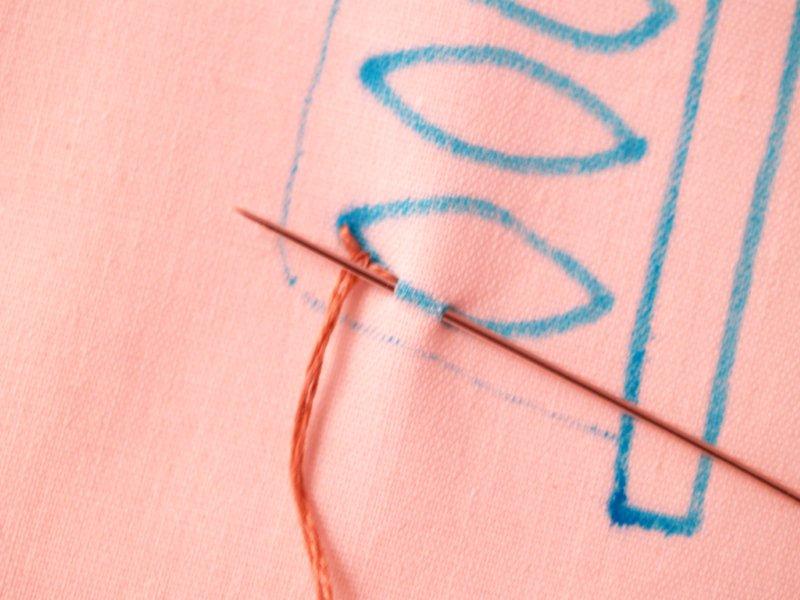
Continue making stitches around all the lines, making sure to hold the thread end the same direction before each stitch.
(If you need help with these stitches, send me an email! I’d love to help!)
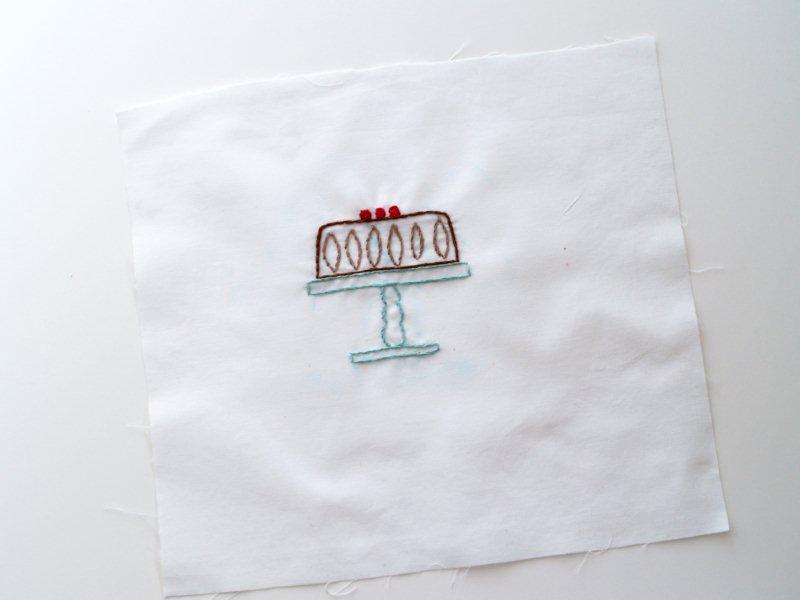
What a cute little cake.
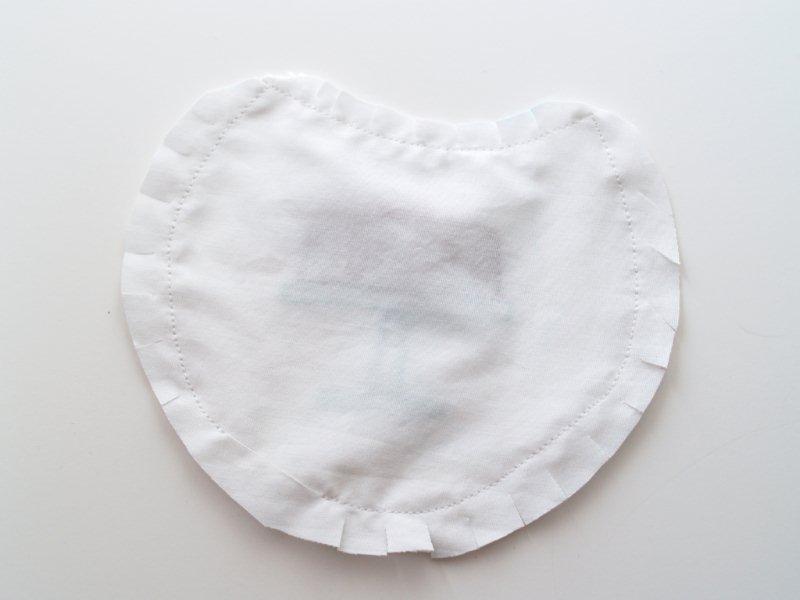
Using a bowl or other rounded item, trace 3/4 of a circle around the design. Move the bowl up and trace the bottom again so the top of the circle is scooped too. Cut out your pocket and cut this shape out of your remaining contrasting fabric as well.
Place your two pocket pieces right sides together. Lay the ric rac between the pieces.
Sew around the sides of the pocket, catching half the ric rac. Leave a small section open at the bottom for turning.
Clip around the pocket up to the seam and trim off the corners so it will turn well.
Turn the pocket right sides out and press.

Cut our a large rectangle for your apron skirt – 27″ x 16″.
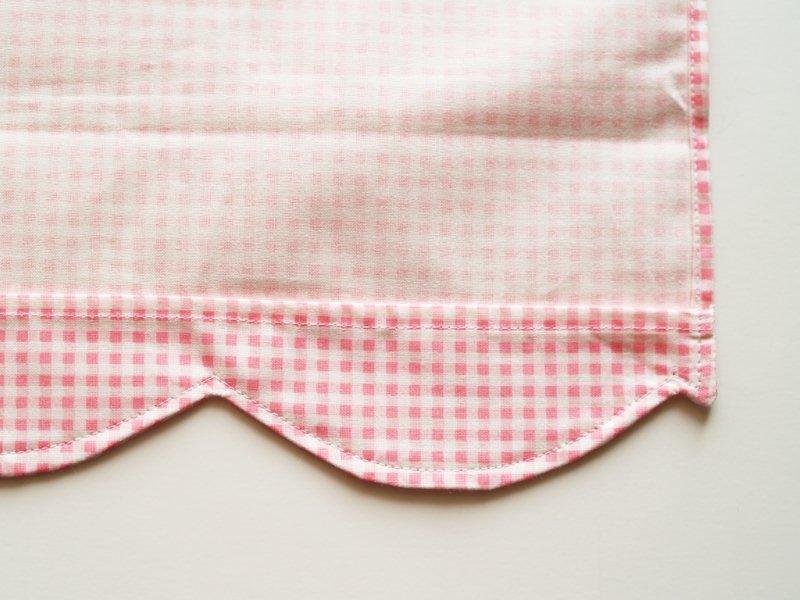
Mark the center bottom point on the long side of the rectangle. Use the same bowl to trace scallops onto the bottom of the apron, centering the first scallop over the halfway point.

Cut your scallops out.
Cut out a 3″ x 27″ rectangle. Lay your apron skirt over this piece and cut out the bottom edge so it is scalloped also.
This is your hem facing.

Hem the top, straight edge of the facing. Turn the edge over twice and sew.

With right sides together and the scalloped ends together, sew the bottom pieces of the apron and hem facing. Sew along the sides as well.
Clip the curves up to the seam and clip little “v’s” out of the top corners of the scallops.
Don’t clip through the seam. It makes you say fake swear words. Trust me.

Turn the scallops right sides out, with the hem facing to the back. Press the scallops down.
Hem the sides of your apron skirt and sew along the edges of your scallops, 1/4″ from the edge.
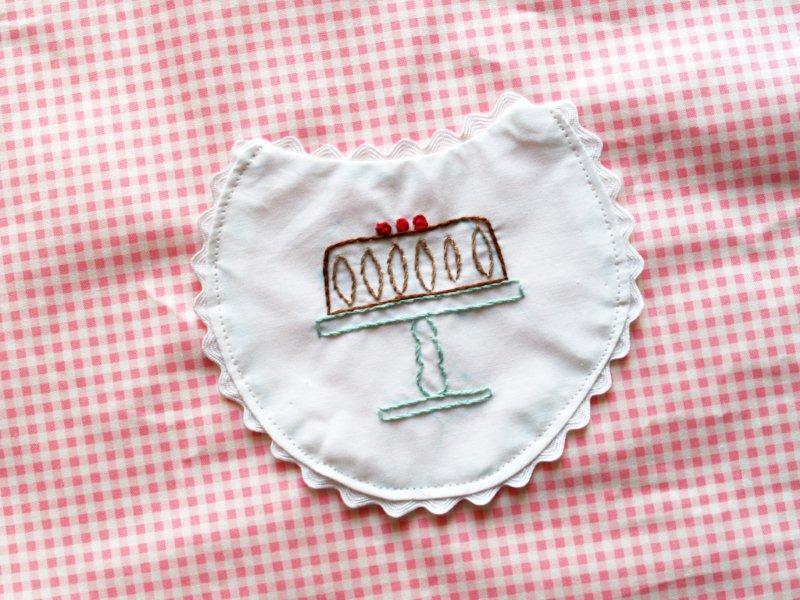
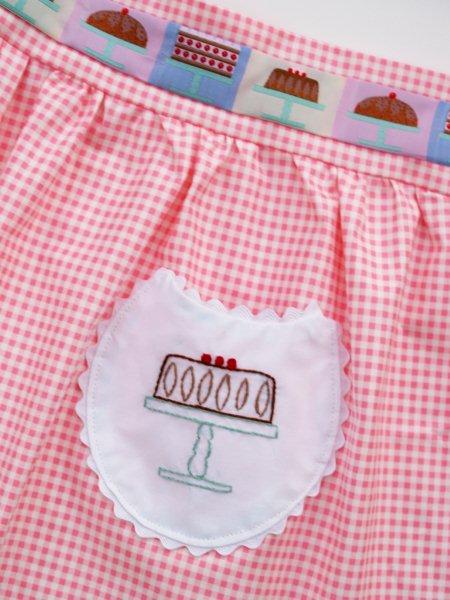
Determine where you’d like your pocket and pin it on. Mine is 3″ from the top of the apron skirt and 4 1/2″ from the left edge.
Sew around the pocket, except for the top. Make sure you catch the section you left open for turning.
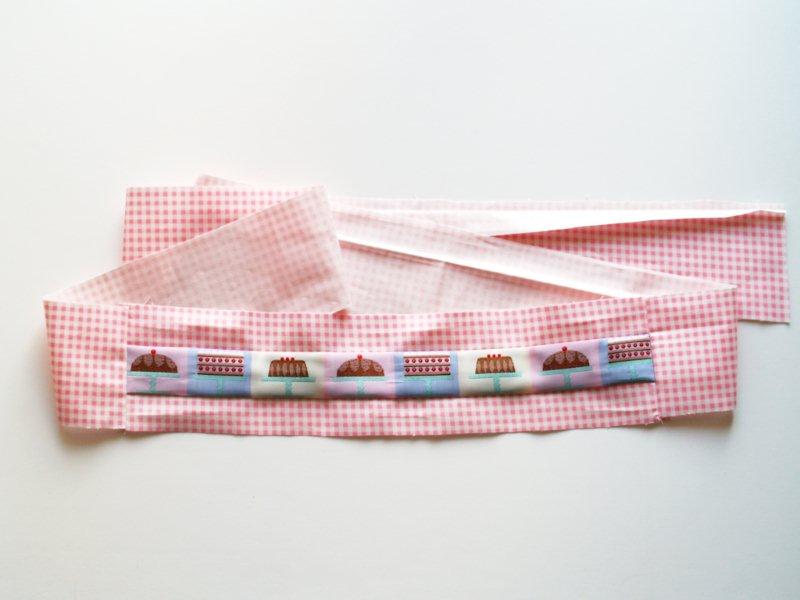
Cut two rectangles of apron material to sew to the top and bottom of your ribbon, 1 1/4″ x 16″.
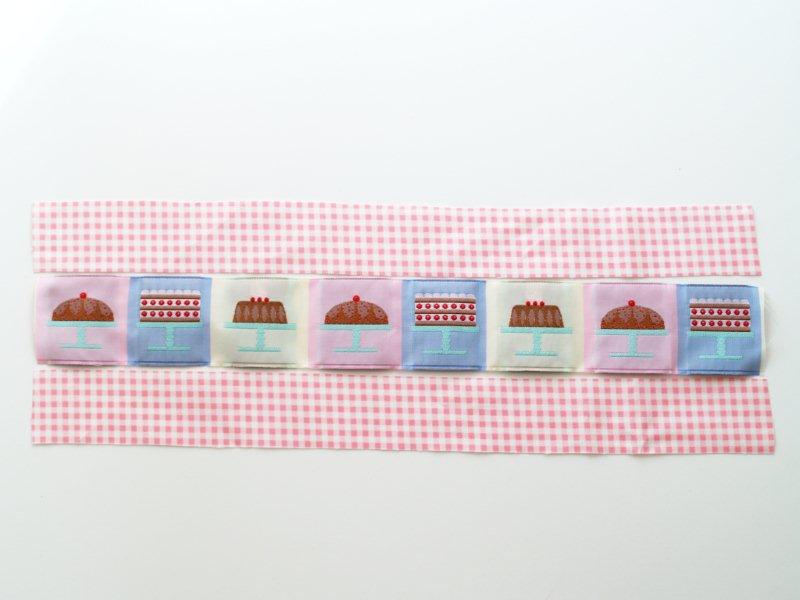
Sew these to the top and bottom of your ribbon with a 1/8″ seam. Press the seams towards the center.
Cut out 4 rectangles for your ties, 3″ x 36″
Cut out a back waistband piece also, 3″ x 16″.
Sew a tie piece to each side of your center waistband piece.
Sew the remaining two tie pieces to either side of your waistband back piece.
Gather the top of your apron skirt so that it measures 16″.
Pin and sew the apron skirt to the center waistband front, right sides together.

Fold the waistband piece back up and lay the other waistband piece and ties over it, right sides together. Sew around the ties on all three sides and sew along the top of the waistband pieces. If you want, angle the ends of the ties. Leave the bottom section of the waistband open.
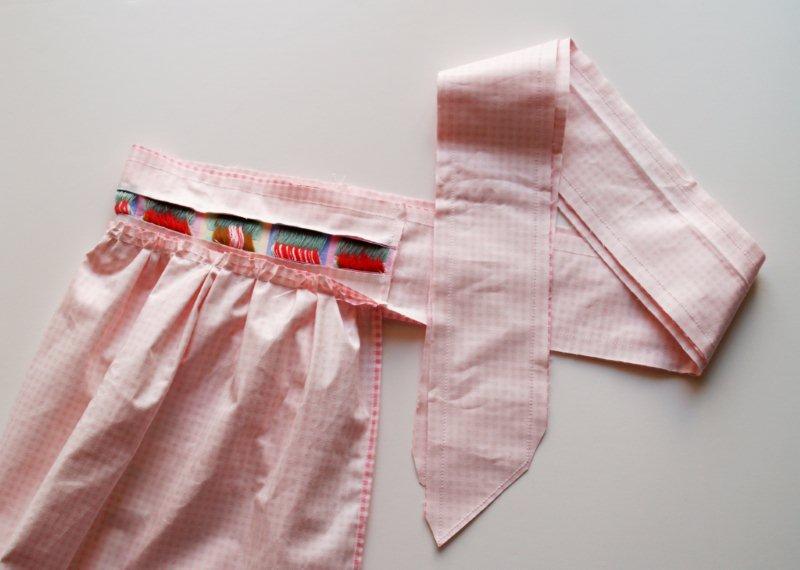
Turn the ties and waistband right sides out. Press well.
Turn the bottom of the waistband back piece under 1/2″ and hand sew down.
You’re all done!! What a cute apron you’ve made!!

You could shrink your measurements down and make this for any little helpers you might have around the kitchen too!
Doesn’t it make you want to bake a cake?
Or maybe put it on and eat a cake?
Either way, you will look so cute.


“Because it’s always time for cake.” This is why you and I are such good blog friends.
I need to order that for my B
D. So cute.
This is too cute!! From the scallops, to the ribbon, to the handmade pocket. Love it, Bev!
LOVE LOVE LOVE!!! Great tute and super cute apron. My sis-in-law would LOVE this for a Christmas gift (but then again, what girl wouldnt?!). THanks for the inspiration!!
Kara @ Mine for the Making
So cute! I don’t think I am talented enough for this…yet…
no it just makes me want the apron!!! how cute i need to find a sewing machine!
It’s so cute Bev! Your tutorials are always so precise and detailed…they are wonderful…Thanks!
That is soooooo cute! Thanks for the great instructions. I love it! :)
~Liz
So cute! Thanks for sharing!
How sweet. It’s perfect! I think I need to make this one, it’s my birthday this week and sadly the only reason I am excited is because it gives me a valid excuse to eat cake!
Turned out great, it’s really cute!
Hi there…
Ohhh…your “lets eat cake” apron is just sooo darling!!! It’s one of the cutest aprons that I’ve ever seen! All the extra little details really do make is so pretty…like the cake trim around the waist…and the little scallped lace around that pretty embroidered pocket…and the scalloped hem! Gorgeous, my friend! Ohhh…and I love the pink gingham fabric!!!
You did a marvelous job with the tutorial! I know that must have taken alot of time and work putting that together for us! Thank you so much…and I love, love, LOVE your apron!!!
Warmest autumn wishes,
Chari @Happy To Design
What an adorable apron! and so much work gone into a fabulous tutorial too!
I’d love if you’d link this post up to my weeky “Round Tuit’ party at:
http://jembellish.blogspot.com/2010/09/round-tuit-16.html
Hope you have a lovely week
Jill @ Creating my way to Success
I LOVE this and love aprons! We have purchased many…my girls have one for each holiday, but how special would it be, if I could make one for them! I am a beginner sewer, so this might be too much, but I will save for later! LOVE it!
Very Cute! The little cake on the pocket is just the right touch to make it feel more ‘personal’. I would make it for a gift, but I don’t know anyone that like aprons….more then I do. So guess who will just keep it! lol
Oh, that is so cute!
This is so adorable! And so detailed! Just too cute. Bravo!
The apron turned out really cute. The ribbon is definitely icing on the cake.
Let them eat cake! And wear a fabulously cute apron in the process! Darling, darling.
This is just too cute for words! I love it! And now I’ll have a look at your other posts.
Such a cute apron! A lot of work in all those little details, I love the embroidered pocket. Great tutorial too :)
Adorable & I’m in love with that ribbon! Thanks for linking to Craftastic Monday:)
This seriously couln’t have been any cuter!! I just LOVE LOVE LOVE it!! Way to go girly!! Hope you’re having a delightful day!
Hugs from your friend Terrell @ FrouFrou Decor
Such a darling little apron I love the the cake embroidery! Great job thanks for linking up this week!
I have some of that same ribbon! I had to have it and now I know the perfect use for it.
I can’t believe how cute this is! I love it!
I LOVE good tutorials for cute stuff. I’m following now!
This is absolutely adorable! I love it- and the embroidery adds so much. And it seems like you and I are always on the same brainwave- I’m in the process of trying to figure out how to write up a tutorial for an embroidery project that I made a week ago. :]
Love it!! Such a great little project and great instructions!
What a pretty apron. I would want to wear it while shopping or something. It is to bad that we mostly only get to wear our pretty aprons at home. Love the cupcakes too.
So cute, Bev!
That apron is adorable. I love the way you show the process.
By the way…do you like the blue disappearing ink pen? I used it once to draw scallops on a quilt…then sprayed it with water…but I ended up with blue water marks all over the edge of the quilt. Just wondering if it works better for embroidery.
Thanks for sharing.
This is so cute – so much attention to detail. I really like the embroidered cake and scallops.
How precious! I love aprons, preferring them over cake even!
Sherry @ A Happy Valentine
So cute! I haven’t done that kind of needlework in YEARS!
So cute!!!
this is just precious! I LOVE it! You are are inspiring me to get back into embroidery! Thanks for linking up to Topsy Turvy Tuesday’s!
still in love! I’m going to be featuring this on Monday! Thanks AGAIN for being AMAZING and creating such fun stuff with great tutorials!
Very cute!
This is just adorable!
lovely apron.
I have the same ribbon, I purchased it from the designer but I cannot remember her name!
It was a great idea to copy one of the design, embroidery makes everything better, or is it cake?!
Very sweet!
I’ve always loved embroidery designs but then I’d think what on earth would you do with the finished piece. What a fun, cute, and non old lady way to incorporate it! Thanks for choosing to share with us at A Crafty Soiree! I hope to see you next week too!
Darling indeed!!! Thanks for linking this one up to Thrilling Thursdays too!
Thanks for the tutorial!! And you can never have enough aprons (or cake) so true :) Thanks for linking up this week, see you next time :)
Very cute! I want to make one!
So cute! You did such a nice job!
So fabulous!! I LOVE both aprons and hand embroidery!! I am needing to make an apron for a swap and I think I have been inspired!
Blessings!
Gail
Very cute!
Melissa
http://www.burstsofcreativity.blogspot.com/
Just wanted to let you know we’ll be featuring this as one of our favorite things tomorrow!
I just found this tutorial for the apron..I know it was done a while ago..but hey…I LOVE IT and instead of making one, I found one at a thrift shop…gingham and all…and I’m just adding the embroidered pocket! Yah, I cheated. But it turns out that it was meant to be..since my sewing machine is on the fritz.:) THANKS FOR YOUR PRECIOUS IDEAS AND SMILES your site gives me!<3
jo
http://www.OttLite.com/blog
I find it so incredible that aprons are coming back with such interest. Love both your aprons but gingham one is my favorite. Love the details of the cake. Great winter tv watching project.
I have a couple of my Mother’s gingham aprons and a couple gotten at yard sales. I really do wear them as I’m a pretty messy cook and baker. I wear what I make. Thx so much for tutorials. Been in sewin mood lately so will give it a go.
I displayed my aprons one time on an outdoor rack in my dining room on side of my hutch. Love your blog.