Anthro Necklace Week Day 4!
In case you have not visited this week – it is officially Anthropologie Necklace Week! 5 Days of Tutorials ending in 5 Lovely Giveaways!!
If you need to catch up, here are Days 1, 2 a & 3. If you’re not a follower – maybe you should do that so you don’t forget to check in for Day 5. :)
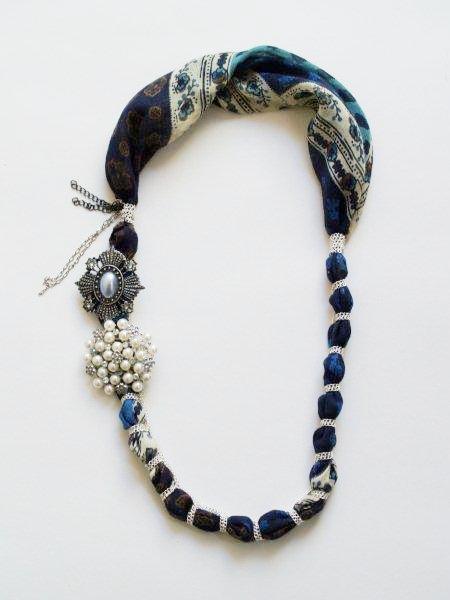
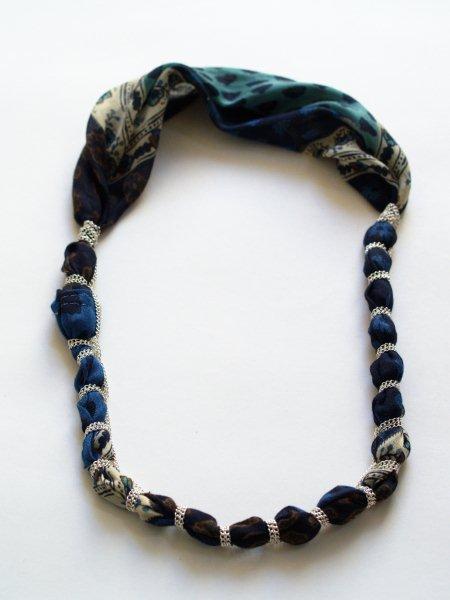
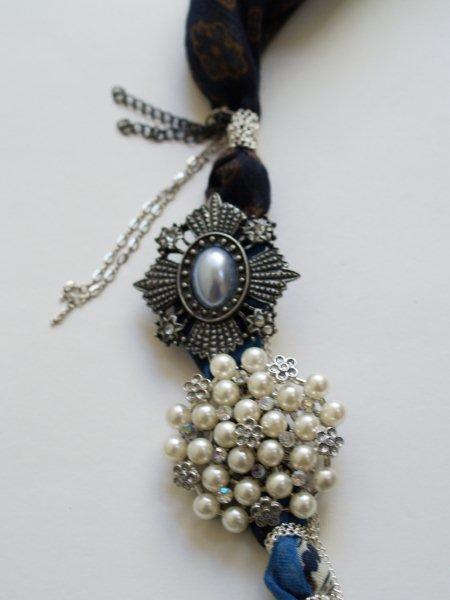
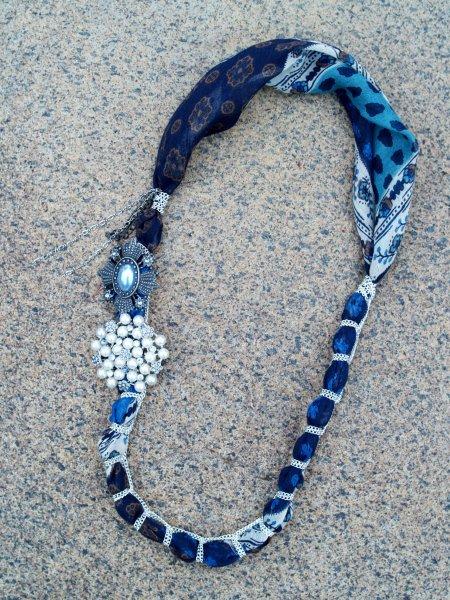
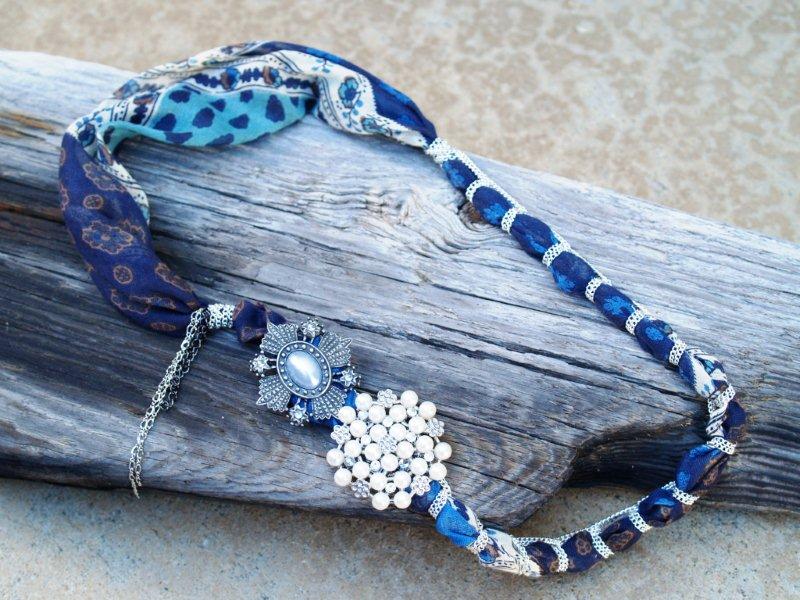
Today we are creating the Adorable Paisley Rebirth Necklace.
Where on earth do they come up with the names for these?? It is mystifying.
Here is mine:
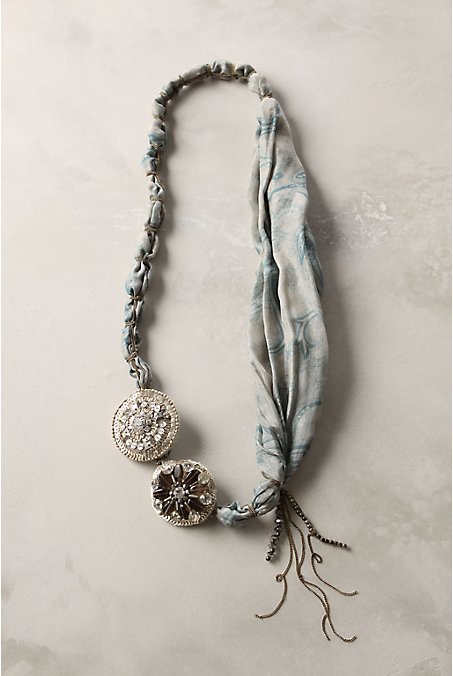
And here is theirs:
This one is a blast to do.
I went with a little darker colors than they did because I just fell in love with the fabric in the scarf I found.
Here’s your handy dandy tutorial!!
Materials:
-
Sewing Machine (you can hand sew it, it will just take longer)
Supplies:
-
Scarf or lightweight fabric (you need enough for a 33″ x 12″ piece)
-
Silver chain – 4 yards
-
Small pieces of different chains
-
2 Large beaded pieces or pins (I bought these at Michaels)
-
Needle and matching thread

Cut out your fabric – you need a 33″ x 12″ piece. I recommend you cut it out on the bias if you have enough fabric. It helps it lay nicer.
(The bias is a 45 degree angle from the selvage. It’s basically a diagonal cut.)
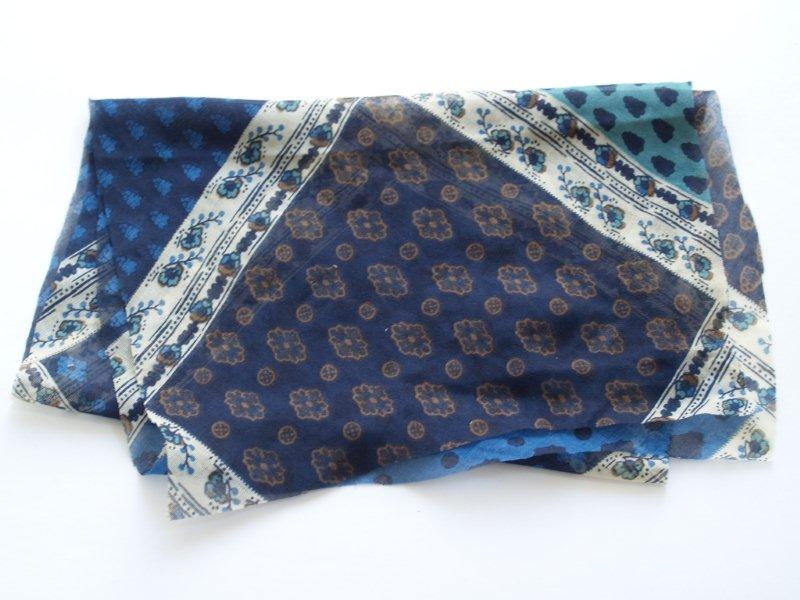
You can see that my fabric was pretty sheer. If yours is a thicker fabric you might want to cut down on the width of your rectangle. Try bunching it up. If it is pretty thick, I’d recommend a narrower rectangle.
With right sides together, sew the rectangle into a long tube. Turn right side out.

Turn the raw edges under and overlap them, making a circle. Sew. I did two rows of stitching to make sure it would hold.

It helps to lay out your circle in a necklace shape. Put the seam on the left, towards the top. Place a pin on the right side of the circle, about 1″ above the point across from the seam. That is where we will start wrapping.
Double up your chain so it is 2 yards long. You will work with the chain doubled as you go – treating it as one chain.
Begin with the halfway point.
Leaving that halfway point with a little space, wrap the chain around the fabric tube twice. Feed the other ends of the doubled chain through the halfway point loop and pull. Don’t pull super tight – you don’t want to stress the chain – but so that it is snug against the fabric.
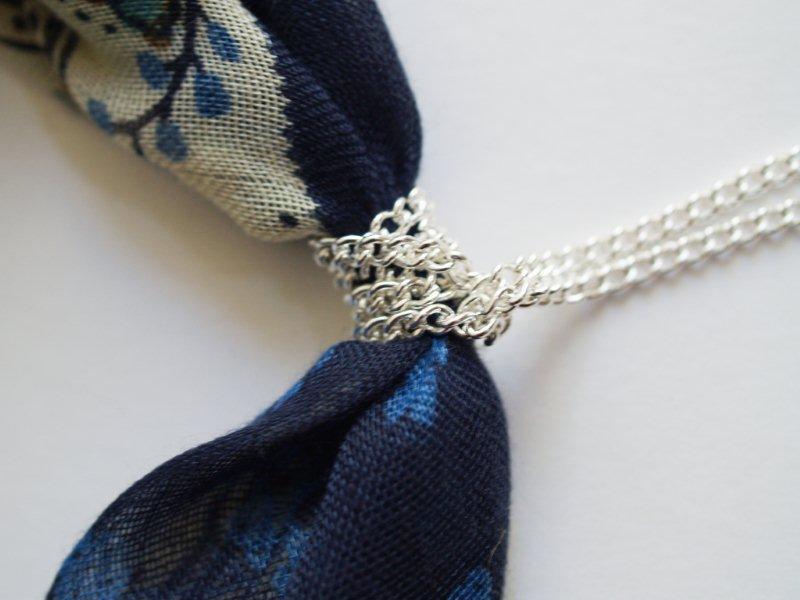
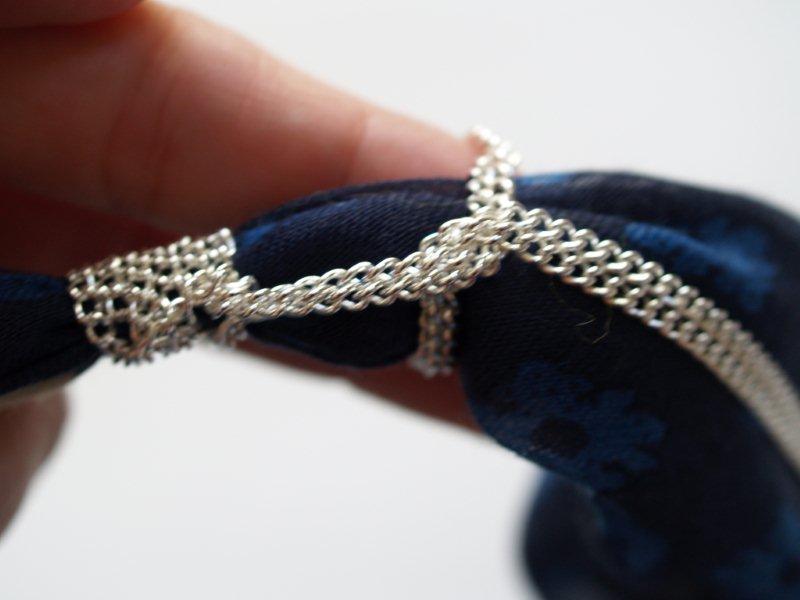
Lay the chain along the fabric for about an inch. Hold the chain at that point. Wrap the chain around the fabric tube. Bring the ends up and run them under the wrapped part and pull snug.
Here is a handy arrow drawing to illustrate. Don’t laugh.
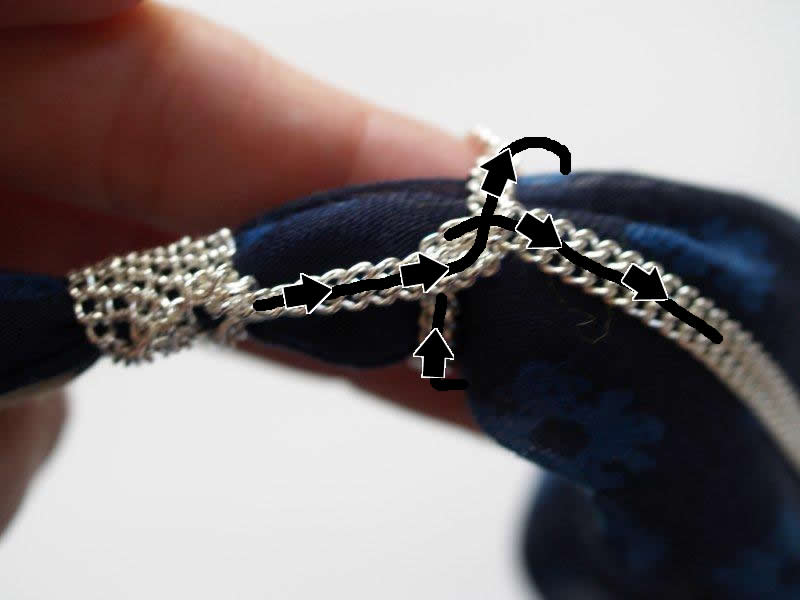
Continue wrapping and looping around the bottom of the fabric tube. Keep the distance between loops the same, except for over the stitching line. That can be a bit longer.
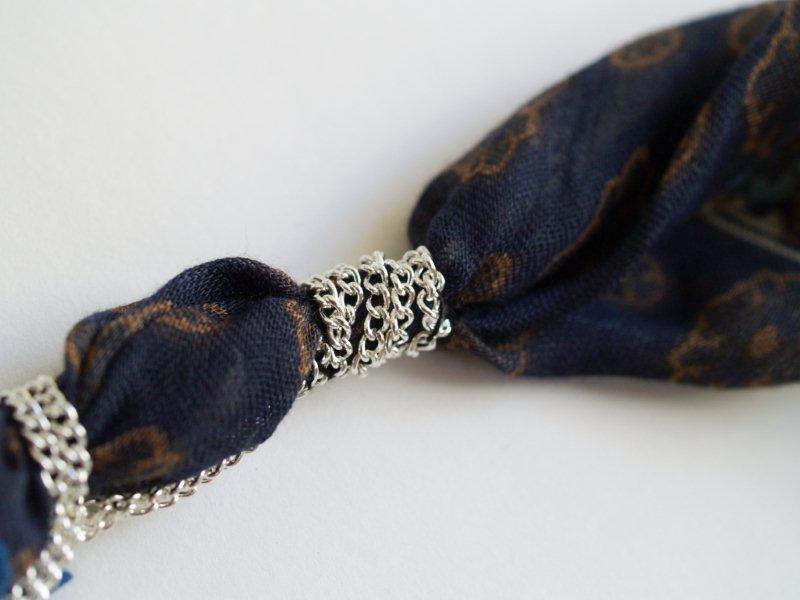
When you get just above the stitching, wrap the chain around the tube four times.
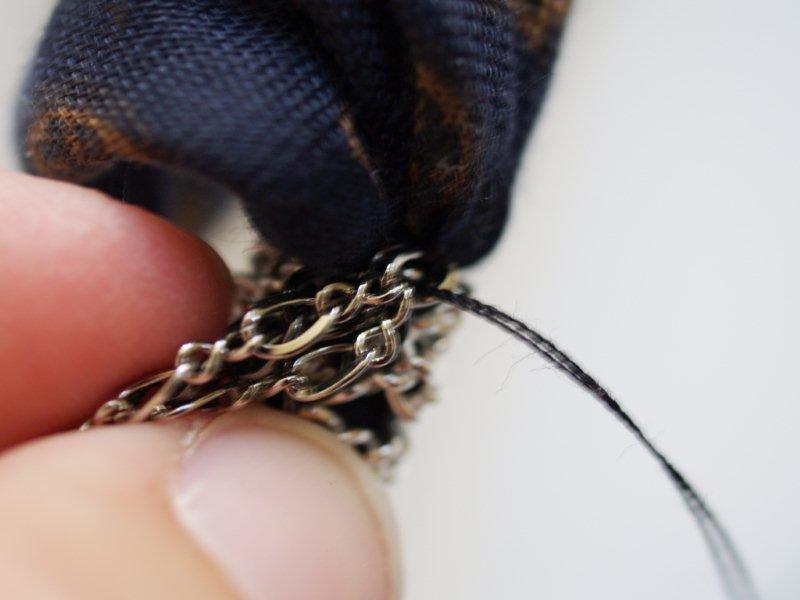
Sew down the end of your chains.
If you have chain leftover, trim it off.
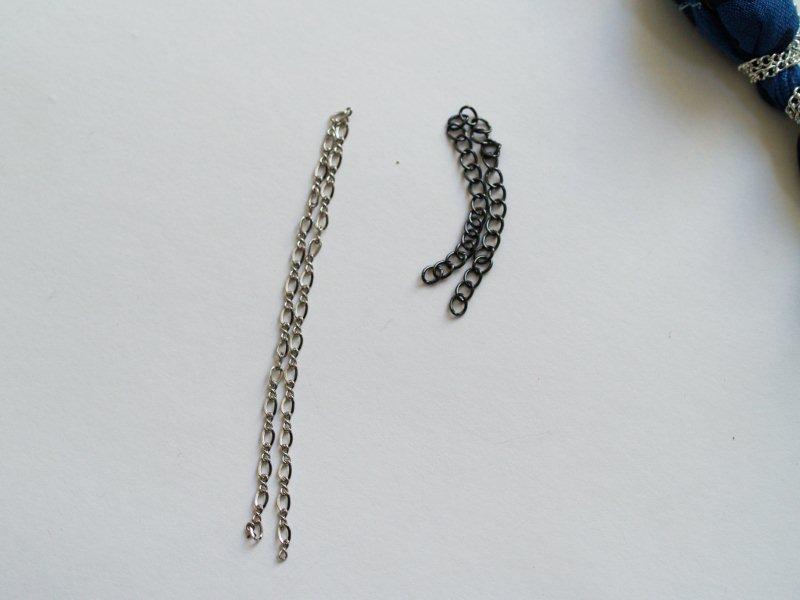
Fold in half your two small contrasting chain pieces.
Sew the folded ends to the fabric tube at the top of your wrapped chain on the left side.
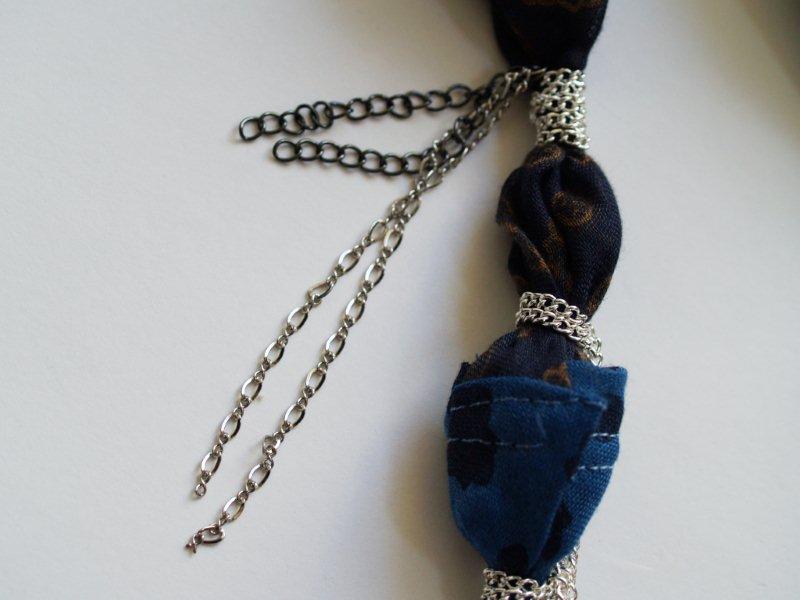
Sew on your large beaded pieces on the left side, making sure you cover up the seam. If you are using pins, you can just pin them on, but I’d recommend sewing these on as well, for stability.
You have just created you own Paisley Rebirth Necklace!
Don’t you love it??
One more tutorial!! I’ll post the final tutorial Thursday Night. The Giveaway Posts will go up Friday morning – 6 am pacific time.
I’m doing 5 different giveaway posts – because the necklaces are so different. That way you can comment on the ones you like.
I can’t wait to hear what you think of this one. I want to keep it!
But I won’t. ;)


This last one is my favorite, it’s so unique! Thank you for the very descriptive tutorial too. When you get a moment, come by my blog, I tagged you!
SOOO CUTE!!! I really like this necklace! I would like to try this. I guess I start the hunt for some gorgeous pins like yours!
I think this is my favorite so far! And that’s saying something since they’ve all been so great!
I love it! Make sure you put these in your tutorial page so that when I have time to make them – I can find them! LOL
This is definitely my favorite by far!! I love the darker color too!
This one is definitely cute, it looks like something my sis in law would wear. I think this is her Christmas gift.
My favorite as well. I really think your remakes are better than the ones from the store. (((((HUGS))))
This one might be my fav. Close call between this one and the bib.
Oh my goodness, I love, love, LOVE this one!! Its just stunning. I want to win this one! Where are you finding these amazing brooches that you are using? They are so unique!
Love your interpretation. The fabric is wonderful.
ok, i lied. this is the one i need! i want it!
I LOVE this one! Definitely my favorite so far. Thanks for posting it. Can’t wait to make my own.
Love it! I posted my attempts today:
http://ginghamworld.blogspot.com/2010/09/new-necklaces.html
Wouldn’t it be fun to do a swap of all our attempts to use your tutorials?
Another great necklace that looks so much like the original! You are on a roll, Bev! Keep it up :)
So sorry about the lack of a fun description for the last one…
I’m thinking biker chic because all the chains remind me of that ;)
This one…I love! I’m thinking it is an eagle scout at the ready.
need a scarf? got it.
some chain? check.
want some bling with that? got you covered!
Sorry, the best I could do today…my students first day and I’ve been looking at my math homework for the last 6 hours :D
This one is my favorite! By far the most amazing one yet! Awesome!! Thanks for sharing :)
These are beautiful!!
My girls would love to make them (or have me make them so they can wear them : )
You are TOO inspiring:) I now want to make jewelry!!! Cuz, ya know I have so much time on my hands..LOL Seriously though, you truly do inspire me. Thanks!!
Happy Wednesday
Again so cute! I like the colors of yours better!! Looks like I’ll be loading up on jewelry supplies soon!
4 for 4! Gurl you are on a FABOOSH roll :) I think for my personaly style this one is a close second to the Pretty-in-Pinking! I thought it was fabric wrapped costume jewelry at first! So sneaky :)
Wow! I think yours looks better than the original! Great job :)
Great job! I have this in my “to do” file and now you’ve made it easy for me!
i would just like to thank you for providing me with christmas gift ideas for all of the women in my life. seriously – these are beautiful! i can hardly wait to go to michaels and buy all my materials!
Thanks for this tutorial! I saw this necklace and thought it would be fairly easy to recreate but couldn’t quite figure out what they did with the chain. You rock!
I love this one …Its definetly better than anthro’s…their color looks washed out…I love the color you picked and the embelishments too…the pearls look so great with the blue!
i love this necklace, i actually started making one of these myself, but your directions will make finishing it so much easier. thx
Oh gosh, super cute necklace again. I sure hope you aren’t going to make ME choose which one I like most.
I love it! You did such a great job…The colors in the scarf are fabulous. Wow! This week has gone by too fast. I am sad for it to end!!
I love this one! I love all of them but this one is so different I love it! You are doing such a great job on all of these! Thanks for the tutorials!
Okay. Seriously, do you know how talented you are?! I could never dream these up!! I am amazed!! This one has got to be my fav!
Wow Beverly, what an amazing job you did! I like the darker colors you picked for your remake a lot and thanks for letting us know you can get fun baubbles like that at Michaels! Thanks for linking up to A Crafty Soiree!
this is just gorgeous! I like your version much better than the Anthro version! I love your ability to recreate for so much cheaper! Way to go!
Man, you are on a ROLL this week! All of your necklaces are gorgeous, Bev! Seriously!
Loving this one too!! :D You’re so talented!
This is gorgeous!! I like yours better than theirs! :)
Beautiful necklace and great tutorial! Found you on Tatertots and Jello!
Lovin all of your necklaces, but this is my favourite :)
Love it! Yours is better than the original!
how cute is this? Great tutorial! Now I have yet another reason to head to the thrift store! My girls would love to this one with mom! Thanks for the idea!
Wow, what an incredible knock-off!
Absolutely gorgeous! Love it, thanks for the tutorial, I’ve been on a jewelery making kick lately :)
What a great necklace and a terrific tutorial! Thanks for joining us this week!
these look like fun to make! thanks!
I love it! Your’s is way cuter than the Anthro one too I think. Now I just need to find myself a scarf!
I’m thinking I like your version WAY better than the the anthro one. Well done! I may be heading to michaels this weekend with this tutorial in hand. Beautiful!
Ok your necklace is EVEN cuter! I love it.
You are too talented.
Thanks for linking up to A Crafty Soiree last week and I can’t wait to see what else you’ve come up with tomorrow. xoxo Malia
That is so awesome! thanks for linking up. Yours really is cuter than the anthro one!
another pretty necklace! Way to go! This one looks SO much like the original. Thanks for linking up to Topsy Turvy Tuesday’s!
YOU HAVE BEEN featured at CraftOManiac.blogspot.com WAY TO GO! Jen
This is lovely!!! Thanks for sharing the tutorial, I’ll share it on fb and on my blog, linking to all of your Anthro necklaces tutorials!! You rock :))
Alessia
Your necklace is way nicer then theirs!
That’s a wonderful necklace! If you don’t mind I’ll post a link to this tutorial on my Friday Tutorial section, this is too interesting!
Sofia
GREAT JOB! This looks spot on!
This is gorgeous! I love yours even more!!
Your necklace is way cooler than theirs! I have a big scarf collection that I would like to reuse. I think I may have found a great way to do it!
This is just beautiful and I will give it a try, will let you know if it turns out as nice as yours. I love to wear cool stuff like this.
Thanks!
God Bless
Ahhhh yessss….here it is! Holly was mentioning this project to me the other night, saying that it was her favorite, so I had to come by and check it out. I absolutely loved scrolling through all of your incredible jewelery projects. I love ’em all, but have to agree with Holly. This one is my absolute fav! She and I will have to add making this necklace to our list of crafty New Year’s resolutions!
This is beautiful! My mother passed away last January and I have her old jewelry, maybe some scarves too. Making this necklace from her things would be a wonderful keepsake…thank you.
This is beautiful! I love how it’s a little bit eclectic yet very glamorous. You version is just as nice as Anthros. :)
I like the colors of yours better than the original. It seems to make a better impression on the viewer.
That looks so professional. I’m sending this link to my wife to check out; I know she’ll love it. Also, she has scarves she doesn’t use as much as she used to.
Yours is way nicer! Love it!
Love the necklace, any way to get the back part thinner, im afraid it would bother me on my neck, im just strange that way, I have some of my grandmothers old pins and this would be a great way to use them. Thanks so much.
My god that is stunning!
Oi Amei seu blog e a idéia deste colar feito com lenço e peças de bijuteria!!!Parabéns!!!Bom fim de semana!!!Já estou te seguindo!!!!
Rommy
accept my words . very nice and creative .
Those are beautiful. <3
Oh my gosh!!! I’ve been searching for a way to use this beautiful scarf I have but don’t wear. This is perfect!!
I have to save this page on my computer so that I can make such a WONDERFUL necklace myself. It’s a very creative way to create stunning Mother’s Day or birthday gifts at home! Thank you so much for sharing!
Wow! I love these! I wonder if it would work with tulle for a wedding flair… :)
This is amazing !!! so pretty..absolutely love it.
This is so gorgeous! I love anthro stuff but it’s always soooo overpriced and not that well made. This looks like so much fun!
Thanks, this is great! Where did you get your metal chain? I’m having a hard time finding some that is reasonably priced (given how much is needed for this project).
This is an awesome tutorial, and beautiful pics to go along! thanks for sharing the great Idea. In response to Reagan above; micheals, joann fabrics and maybe even walmart carry that tiny metal chain. Again, thanks for sharing!!!
Now that’s creative! I love how you make it look so easy.
OMG! this is so good…and obviously it isn’t as easy as it looks but I will definitely give it a try… I would love to tell my readers about it.
I kinda liked the first 3 necklaces that you recreated, but when I saw the one today, THEN, I got real interested!!!
Just like you.. I want that one. If I don’t win it, then I will be forced to try and make it. Hope I am lucky..
I have to say I like yours better!!!!
This is great! I will be making one too. :)
I am blown away by your genius.I look forward to your posts and your crafts. The humor you inject isn’t bad either. I find myself smiling as I read and view as if I’m talking to a friend over coffee.
This is such a unique necklace. I absolutely love how you used the scarf and the color choice is lovely as well. If I don’t win this I’ll have to make one for myself. Thanks for a great project!
OMG…I have a scarf so much like this that I have been wondering what to do with…I was JUST going to donate it this week. So glad I didn’t! If I don’t win, I will be recreating this one. Thanks for the easy to follow tutorial!!
just realized this post is waaaaaay old! LOL…guess no winning here!! But glad I have the scarf anyway, can recreate this :)
I love these! So unique! Absolutely Beautiful!
Thank You!
…http://handmadera.blogspot.de/2012/04/wonderful-necklace-diy.html (sorry to see that, Handemadera is known for copying)
Love this! You have a new follower. :)
beautiful! and nicer than the original. thanks for the tutorial
That’s so sweet – thank you Klara, I’m so glad you like it!
I saw this on Pinterest and loved it immediately. I actually thought it was a lot prettier than the actual Antro one when I found out that this was the handmade one! You did a wonderful job on this,and as I said, I like this one better!Pretty and great choice of “hardware”!!!!I would be proud to wear it,plus it is my favorite color
I found this DIY necklace very easy to follow , materials almost available. I’m sure will one or two for my personal accessory.
Great inspiration for scarfs I have but are too short. These three are wonderful and just what I would love to wear if I win.