I have a deep and abiding love for Ric Rac.
If you were to peek into my stash, which I do not recommend, you would think I was saving up for a global Ric Rac shortage. Other people, they buy a pack of gum or TicTac’s every time they go to the store. Nope, not me. I’m Ric Rac all the way.
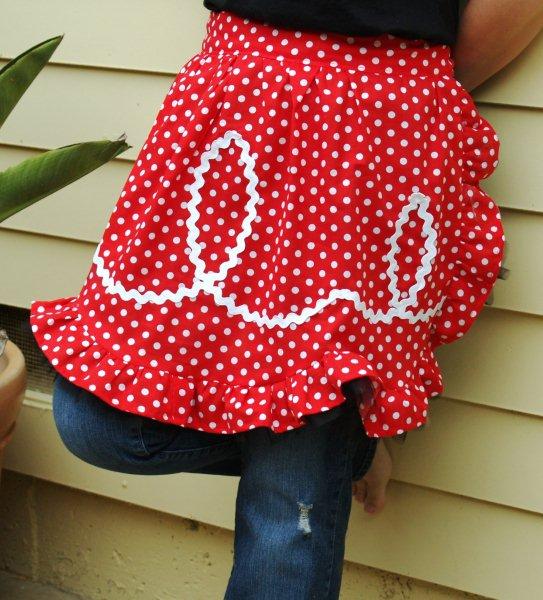
So when it came time to make a new apron, because it’s always time for a new apron, I just had to make one with Ric Rac. Want to see?
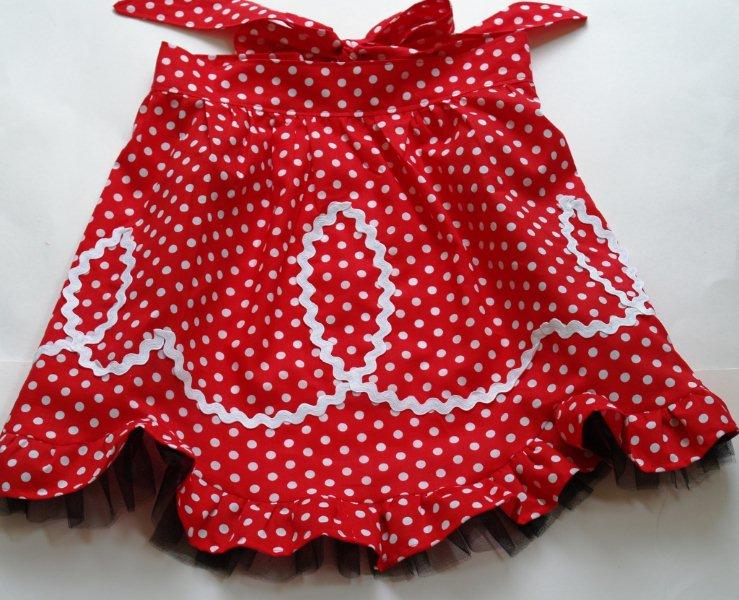
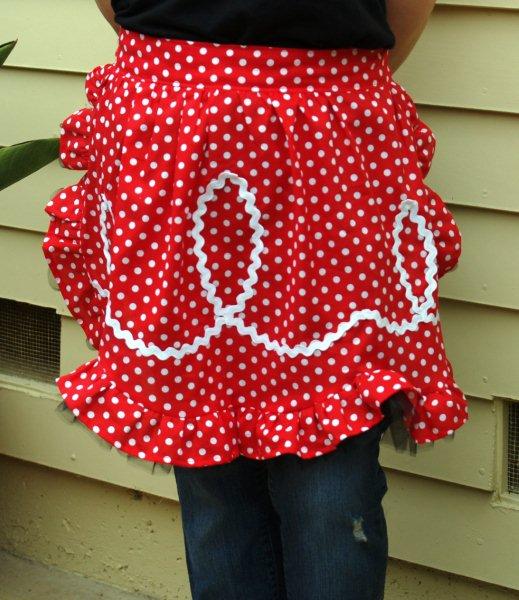
Sigh. Lots of Ric Rac and Ruffles. I love it! Do you??? Sweet! Here’s how to make your own.
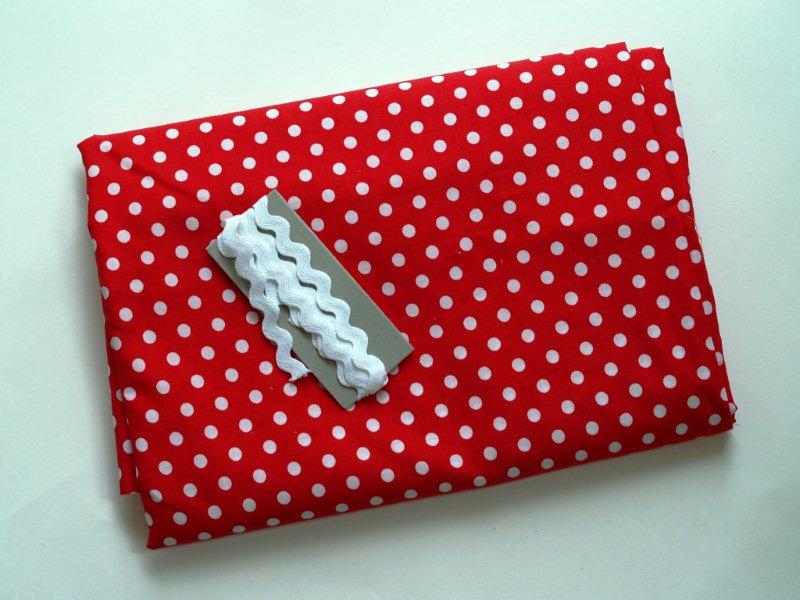
You’ll need –
- Fabric for apron (Polka dots and Ric Rac are best friends. :) – 1 yard of 44/45″ fabric
- Ric Rac, of course
- Netting (not pictured) You can buy it by the yard or in those small rolls which is what I had.
Here’s what you cut out of your fabric:
- 2 pieces 18″ x 3″ for waistband
- 4 pieces 29″ x 3″ for ties
- 1 piece 16″ x 29″ for skirt
- 1 piece 60″ x 3″ (1 piece or a few cut to make 60″ – whatever works for you)
Out of netting cut a piece 120″ x 6″. If you are using netting by the yard you’ll probably need to piece it to get this length. I love those little roles of netting they sell at Michael’s and Walmart – they’re 6″ wide so you can just cut your length. Easy peasy.
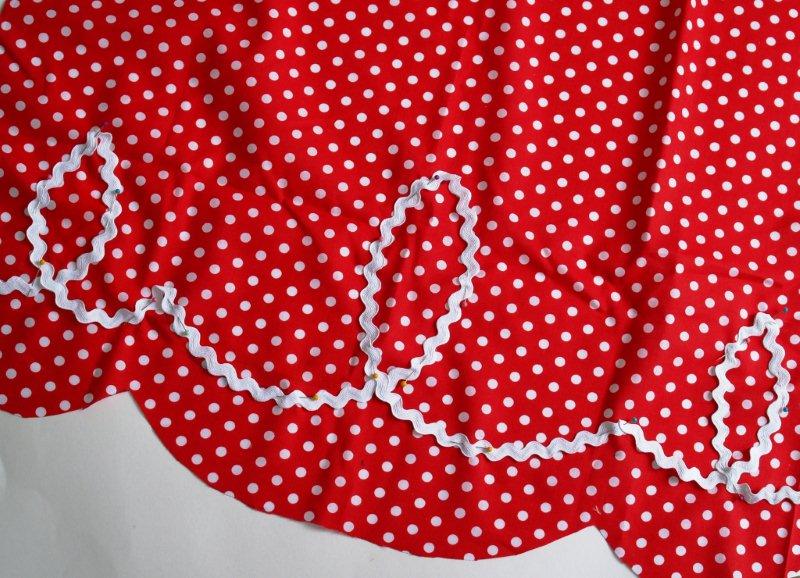
Now you’re going to trim the skirt into the scallops. Fold the apron in half. Measure the halfway point at the bottom and then measure up 2 inches. Make a mark with your fabric pen. Measure up 4″ at the side edge and mark also. Find a large bowl and lay on the skirt at the point so the curve goes from the point to the edge. Trace. Cut out the curved edges.

Mark with your pen where you’d like the Ric Rac loops to go. I measured up from the bottom of the two side scallops 4″, then 5″ above that – that is for the bottom and top of the side loops. For the center loop I measured up 4″ and then 7″ above that. I also did points in the Ric Rac at the points of the scallops, 3″ up. Mark all those and then draw out the loops. Pin on your Ric Rac, then sew down.
Whew. No more marking. ;)
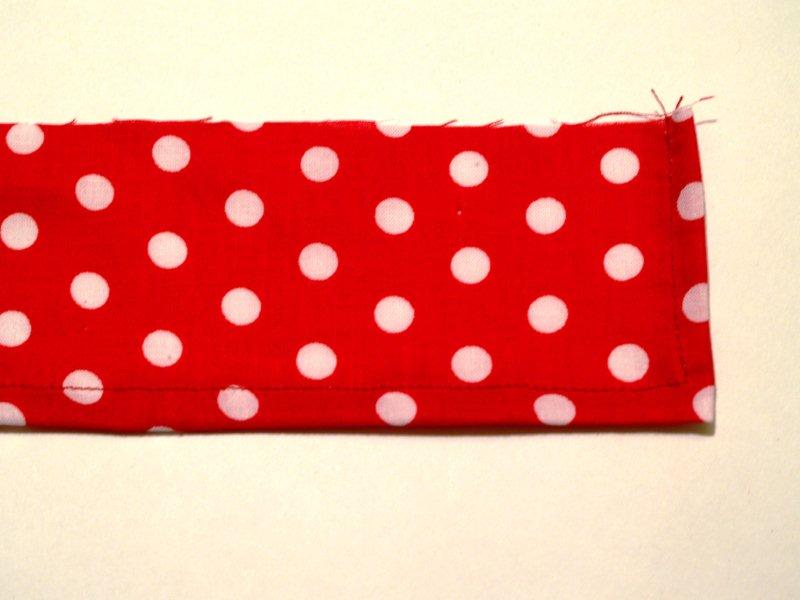
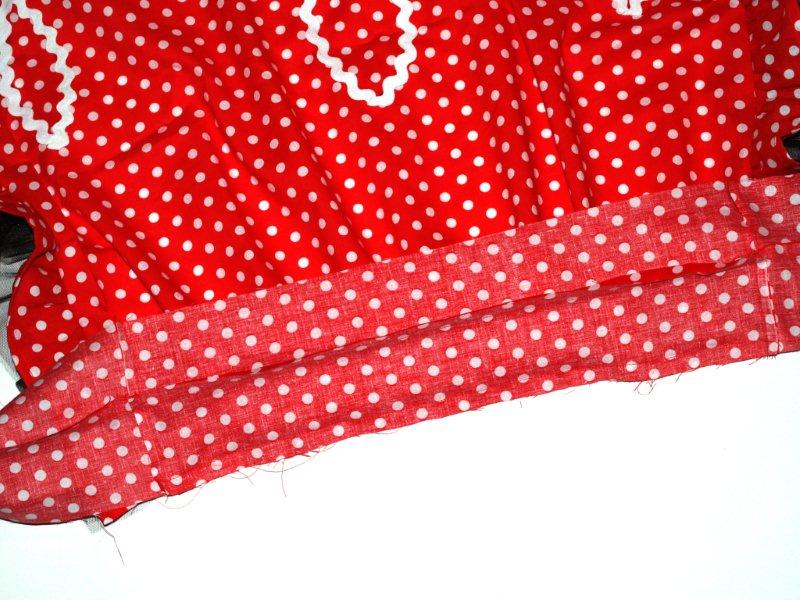
Sew together any piecing you need to do and hem the two sides and bottom of your ruffle piece.
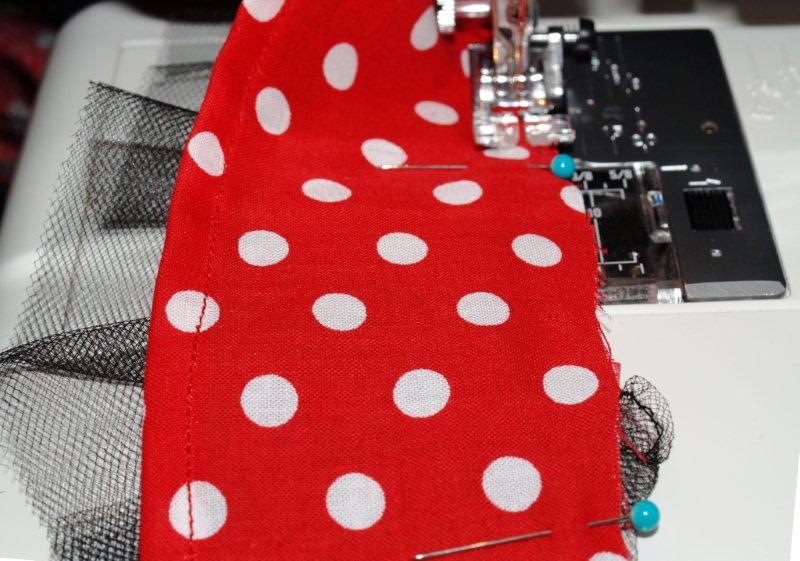
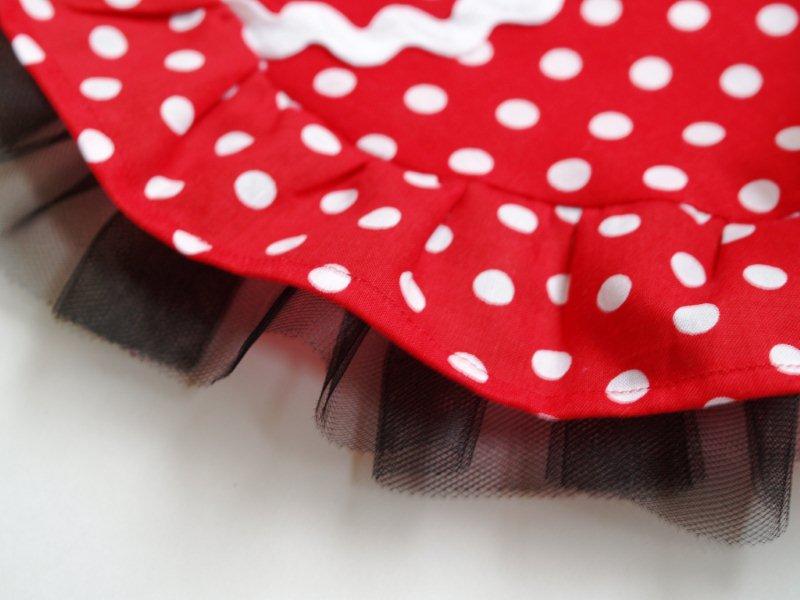
Set this piece aside for now. Fold your netting in half length-wise, so it is three inches wide x 120″. Sew a gathering stitch along the folded edge of the netting. (Put your machine on the longest stitch length and hold your thread as you sew. The tighter you hold it, the more gathered the fabric will be.)

Pin your netting to your ruffle piece. Sew another gathering stitch along the top edges, making sure you’re catching both the fabric and the netting.
Pin your ruffle along the sides and bottom of your apron skirt, following the edges of your scallops. Sew the ruffle to the skirt.
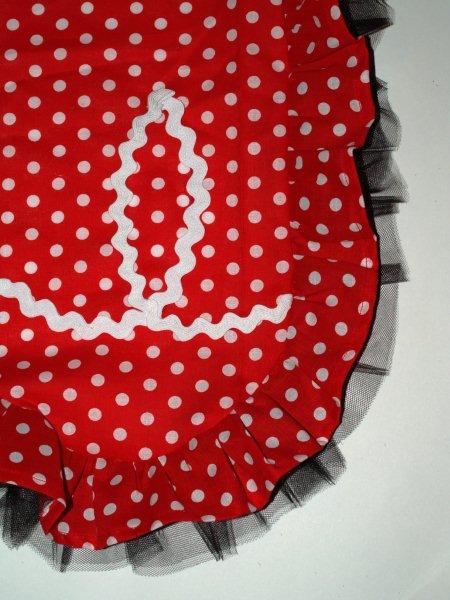
Oooh we’re looking flirty. ;)
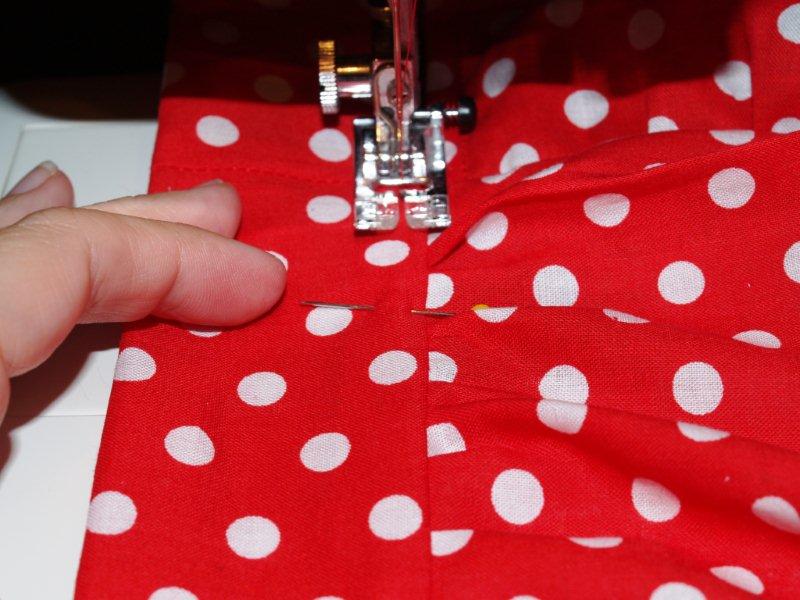
Sew a gathering stitch to the top of your apron skirt, so that it measures 18″.
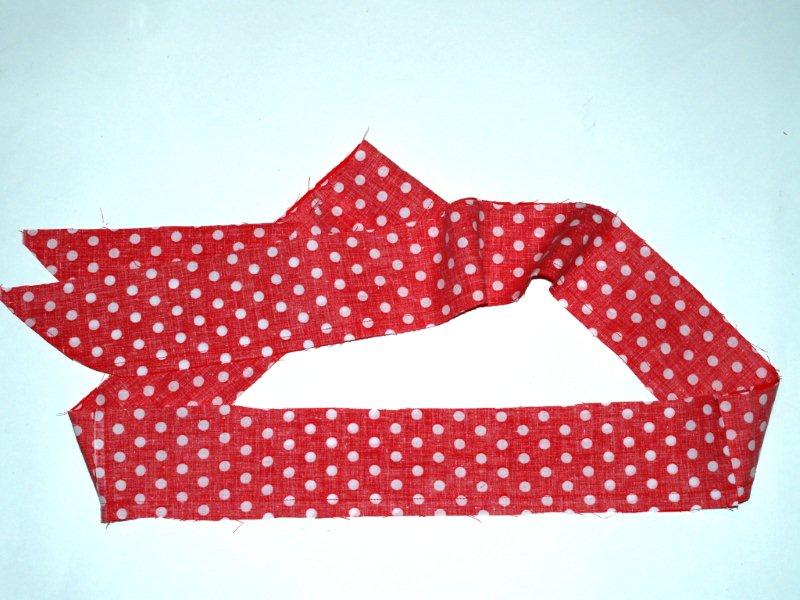
Sew an apron tie piece to each side of a waistband piece. Repeat for the other three pieces. Pin the two pieces together and sew the sides (at an angle) and the top long edge of the strip.
Open up your waistband and ties and pin the waistband to the apron skirt, right sides together, so that the edges of the skirt fit between the two waistband edge seams. Pinch up your ruffle edges so the ruffle is tucked under the edge of the skirt. Sew the skirt to the waistband.
While waistband and tie pieces are folded right sides together, sew the bottom edge of each tie piece, from the end up until you reach the apron skirt. Turn right side out and press. Press under the waistband back piece 1/2″ and pin down, so it covers the waistband/skirt seam. Top stitch 1/4″ from the edge all the way around the waistband and ties, sewing down the waistband back piece as you go.
And we’re done! As always, if you have any questions, please feel free to email me. Here’s some more pictures for you. . .
I think I need some more White Ric Rac.


i just recently started fowllowing you and i seen your rooster apron my gosh that is adorable
I love that apron the ruffles and the ric rac it is so adorable you make such cute things!!!
This is SO cute! I totally have to make one. I wasn’t a ric-rack girl until a few months ago. I bought a huge bag of sewing notions/fabric at the DI (thrift store) for $6. There were about 100 packages of ric-rack. Tons of vintage stuff. Loving it, using it. Tempted to take some some the vintage (it says $.15 on the package) and decorating my craft room with it.
This is TOO adorable!! I love everything about it. The fabric, the tulle, the ruffles, and, of course, the ric rac! Ric rac is so fabulous. Its just do strong and versatile! Great project, Bev!!
this is so adorably cute!
Adorable! I love the fabric, the ric rac and of coarse the ruffles!
Bev, your posts always make me laugh! Don’t let anyone stop you from buying more ric rac. You create some cute stuff with it!
Again…..so cute. You creative ric rack lover.
Love Love Love….I must have one of these! Super cute – fantastic job Beverly. ~ Stephanie Lynn
Super sweet! Thanks for the tutorial and for linking up with Sugar & Spice.
Oh my goodness! This needs to be your next giveaway!!! I want it! :o) so so so cute!!!!
Seriously adorable- it reminds me of I Love Lucy! My mom just made a red polka dot tablecloth with a huge ruffle around the bottom, some ric rac would be the perfect addition.
I’m not kidding when I say, CUTEST APRON EVER! Adorable. So fun and flirty. Love, love, love, love it!
Two of my favorites together – aprons and ric rac. A-dorable! I want to make one now, too. Thanks for sharing!
Beverly, this is so incredible!! I love that it is retro. I love the ric rac. I love that it kind of reminds of Minnie Mouse. I so want to make this!! Truly inspiring, my friend!
The apron is so cute and the ric rac simply divine!! Hey, everyone needs something to focus their efforts on and Ric Rac is a GOOD thing!
This is just darling – I especially like the scallops. :)
Oh, that is such a sweet apron! I love the design you made with the ric rac and how it looks with the polka dots! :) I wear aprons all the time, and love when I have time to sew them. And it has been way to long since I’ve taken time to do one! I am going to bookmark this tutorial so that I don’t lose it! I’m following your blog now!
Can we ever have enough aprons, LOL? I love this one you made! The ric-rac is adorable, but the netting just gives it that extra ‘flirty fifties’ look!
I’m also a lover of ric rac. I have quite a bite of vintage trim as my hub’s grandmother evidently loved it too. Your apron is adorable. I love the red and white combination.
Wow! What a FABULOUS apron!! I linked to your tutorial over at Craft Gossip Sewing:
http://sewing.craftgossip.com/tutorial-retro-ric-rac-apron/2010/07/31/
–Anne
Hi there! This apron is adorable. I too love ric rac :) I’m planning to make some aprons for Christmas gifts; this one would be just perfect for a few gals on my list! Thanks so much for the tutorial.
I’m visiting from The Saturday Standstill. Have a great weekend!
I LOVE that apron! It is red (my favorite color) and has ric rac on it. I have been a ric rac person all my life. I lucked out and got a huge lot of it in all colors and sizes on eBay for a few bucks. I use it in all my crafting.
I found your blog through Craft Gossip. I will bookmark you. :)
OMG I am in love with this apron.. I love polka dots and rick rack… right up my alley..
How cute! I love how you used the ric-rac. Thank you for visiting my party!
That looks great! I also think RR is divine! It’s cheap too, I stock up on it as well! Love this apron!
This is so cute, rick-rack and polka dots, just doesn’t get much better than that!
What’s not to love ~ polka dots, ric rac, ruffles? I share your love for ric rac; it goes all the way back to childhood. It never fails to charm! Your tutorial is fantastic. Sewing isn’t one of my strongest skills, but you really made this project very approachable, and I look forward to trying it. You have great style, and I’m glad that my friend Holly from 504 Main mentioned your name and sent me your way. Best, Jenn
oh this is so so cute!! i’d love for you to link it up!
-Jamielyn
http://iheartnaptime.blogspot.com/
Saw you at Anything Related, and this is adorable! Thanks for sharing :]
i love the retro flirty look of this apron. i wish i knew how to sew. i love ric rac and pom poms with a fierce passion. i wonder if i could glue them on. hmmm…
This is a stinkin’ cute apron! Thanks for sharing how you did it :)
SOOOO cute! I love it! I hate that I keep finding all these great sewing project just when my sewing machine breaks down! SAD! I’d love it if you’d come join my Topsy Turvy Tuesdays!
Hi Beverly, I simply adore your apron – I am so making one! It looks fabulous – Fantastic job. I have featured this today – stop by and grab a featured button if you like. Thanks so much for joining The Sunday Showcase Party. I greatly appreciate it. Hope you have a wonderful week! ~ Stephanie Lynn
This is the cutest apron EVER! I love it! Thanks for the how-to, I’ll be linking.
Ric Rac, polka dots, and red – a few of my favorite things in one beautiful package!
so sweet and simple! come on over and link up to MMM!
This apron is so pretty and colorful. I’m going to make one!
Thanks for posting it.
Just found your Retro Ric Rac Apron! Love it love it love it! Hope there is time for me to make this for my girls for Christmas! Thanks!! UpNorthGrammie
I’m set to make some aprons for my g’friends bdays this year. How much ric rac do u think u used (so i can have enough on hand) and what’s the width? I love red and I love ric rac. What could be cuter?
Thanks for such a great apron pattern! I made it for my 50’s inspired hens party yesterday and it turned out just as cute as promised.
Only trouble was, after I’d already sewn the netting to the ruffle I discovered the ruffle wasn’t long enough to go around the edge even without gathering. I had to add a third piece to bring it up to 90″ which gave a lovely ruffle. Hopefully this helps someone else!
Love this apron!!! Red is my favorite color and have always loved it with white polka dots. The ric rac really adds to it. Was looking for a retro apron to sew for my son’s girlfriend (she loves to cook) and fell in love with this one. Now I am wondering what it would look like with a ruffled bib top added to it. Have you ever made one along these lines using this pattern? Would be interested to see a finished product/picture if anyone has tried this.
This is darling,love the addition of the netting.