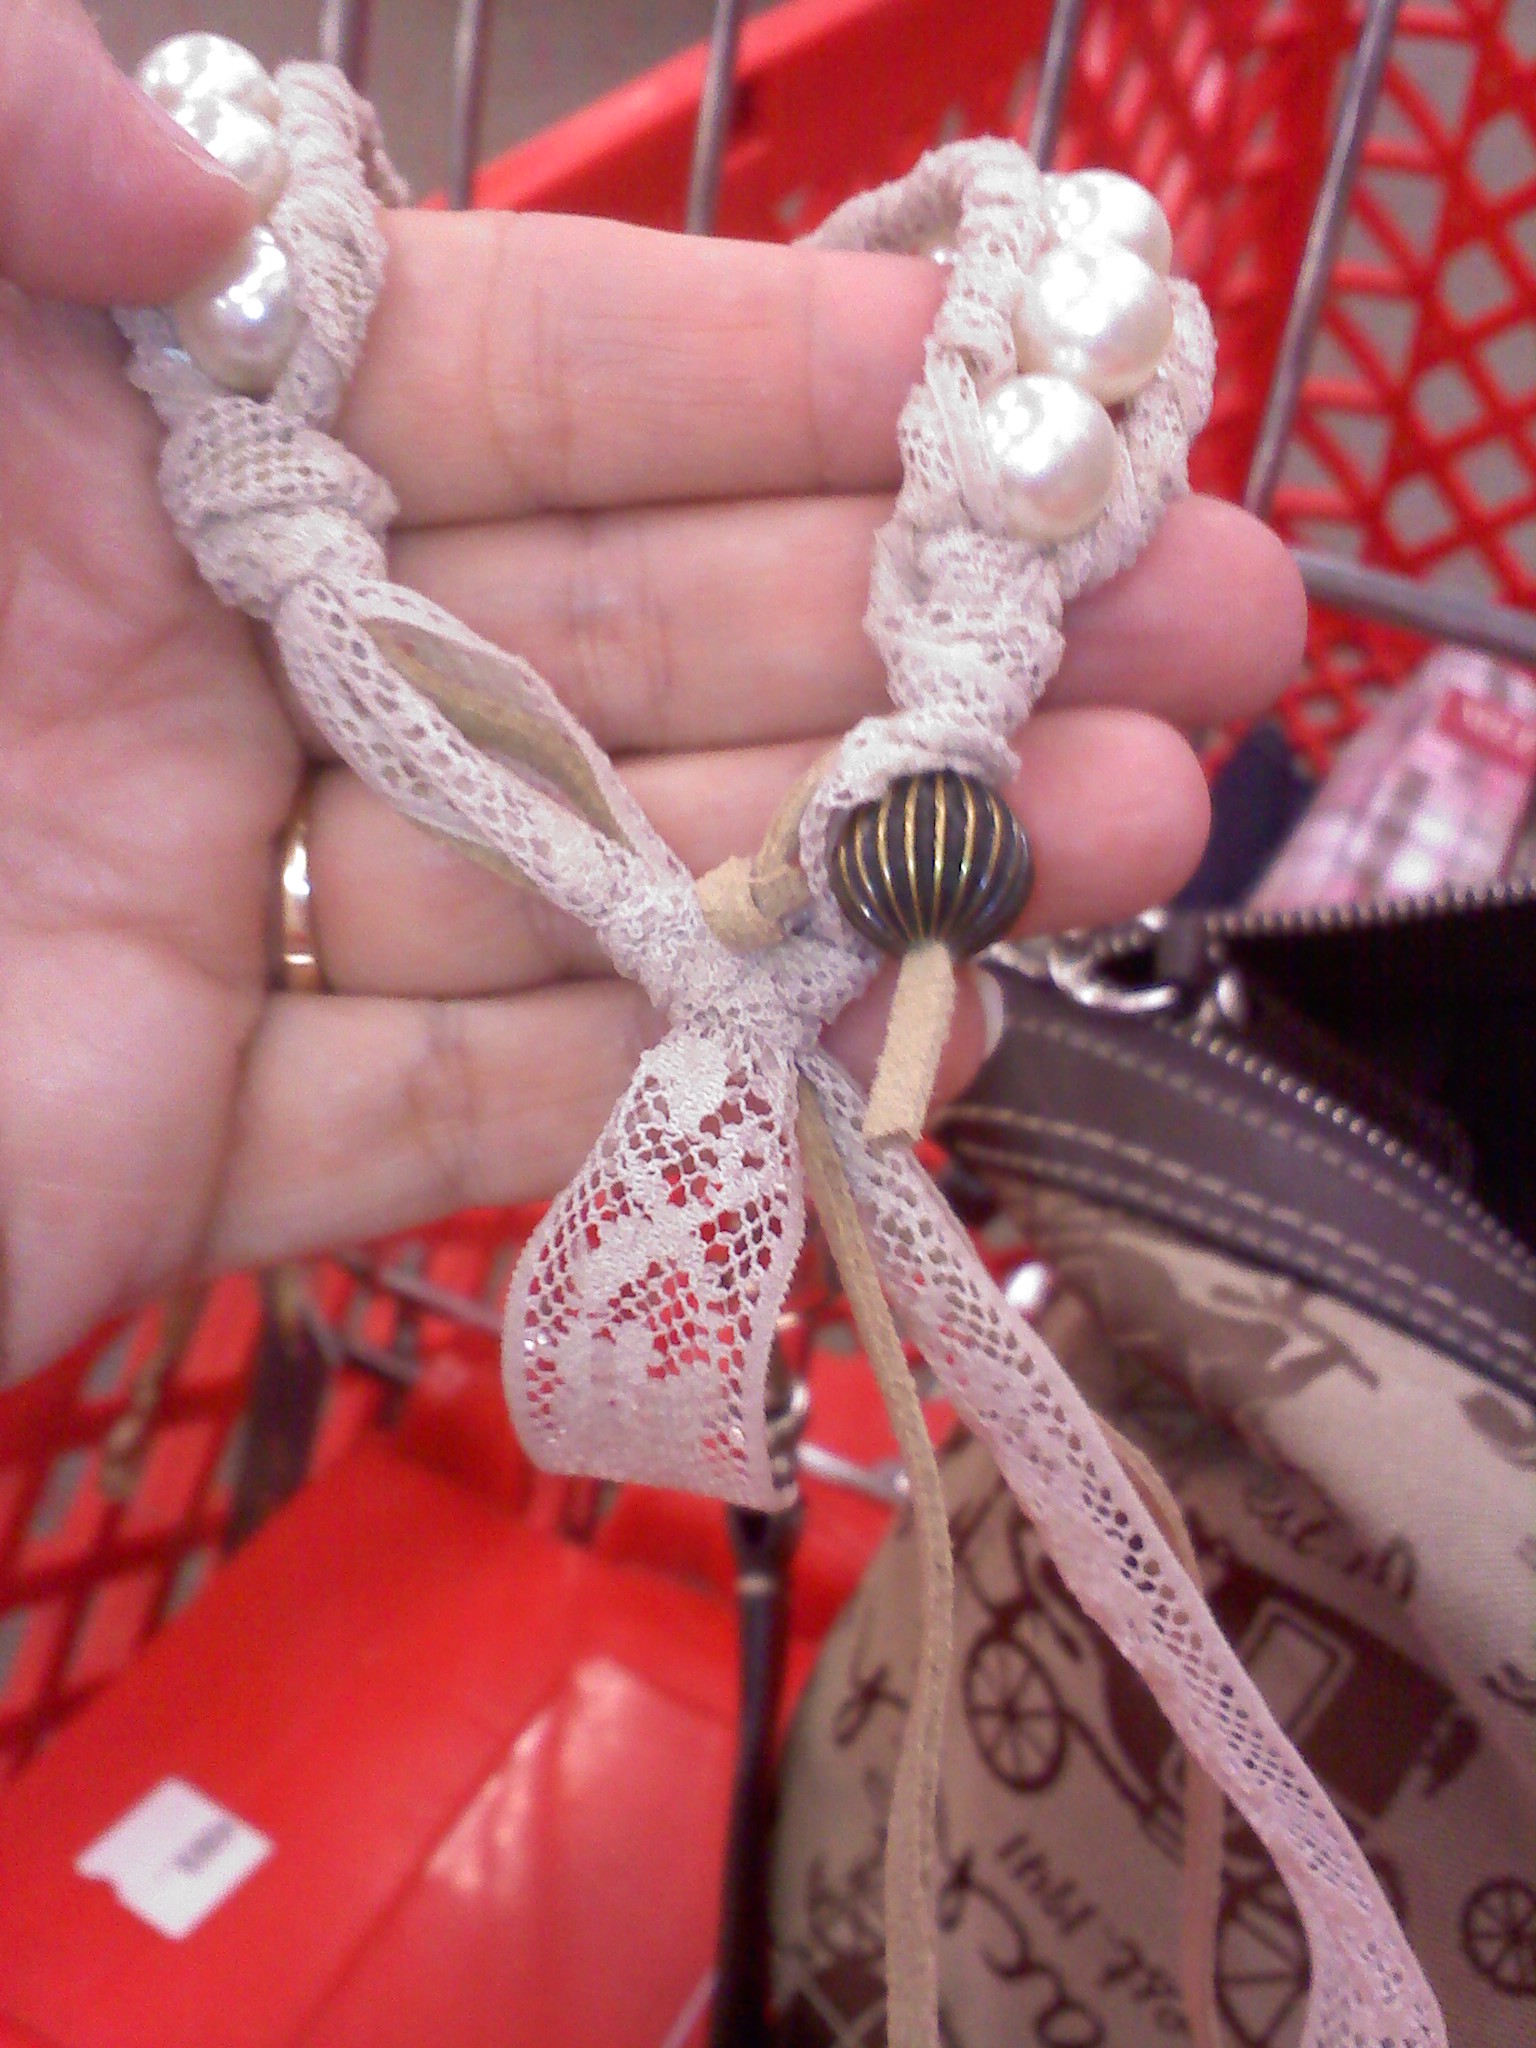
I have another fun Target knockoff to share with you. Last time I was there I stumbled upon a great little bracelet.
Here is my handy camera picture. :)
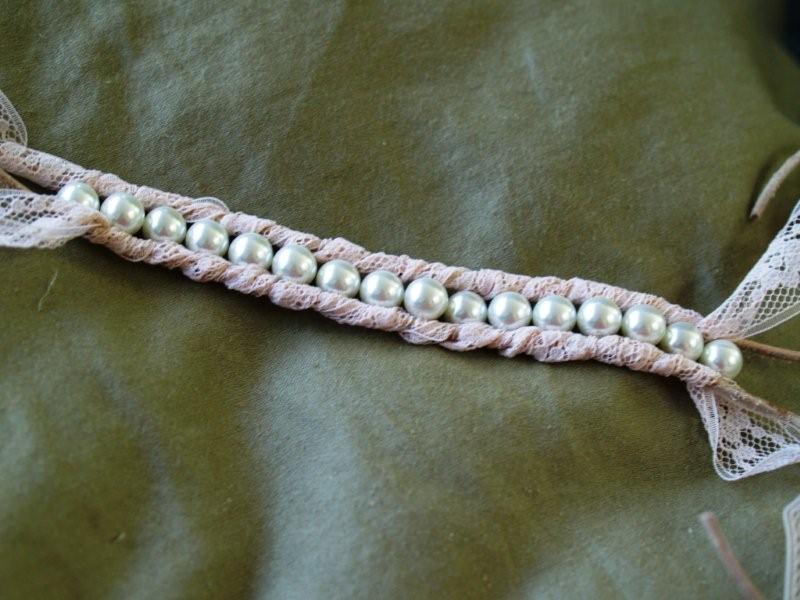
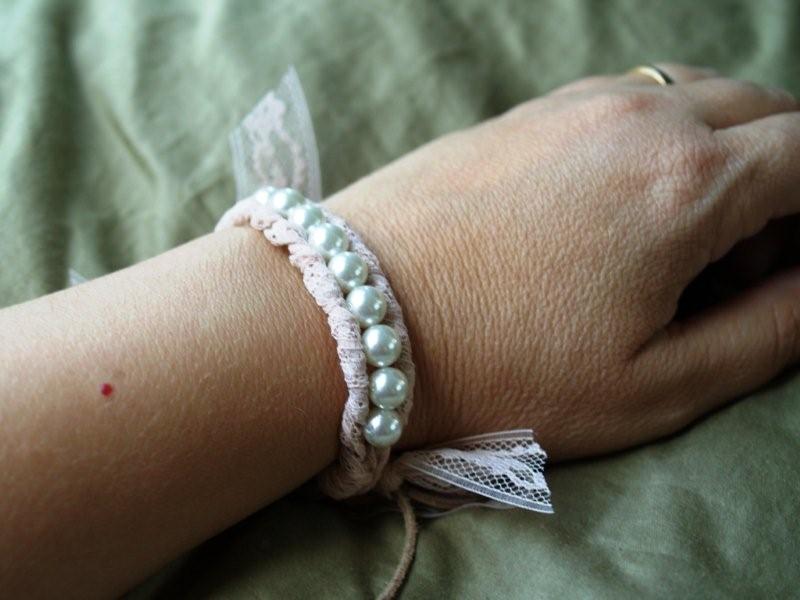
I love the lace and pearls combined with the leather. So I set out to recreate it. Here’s my version . . .
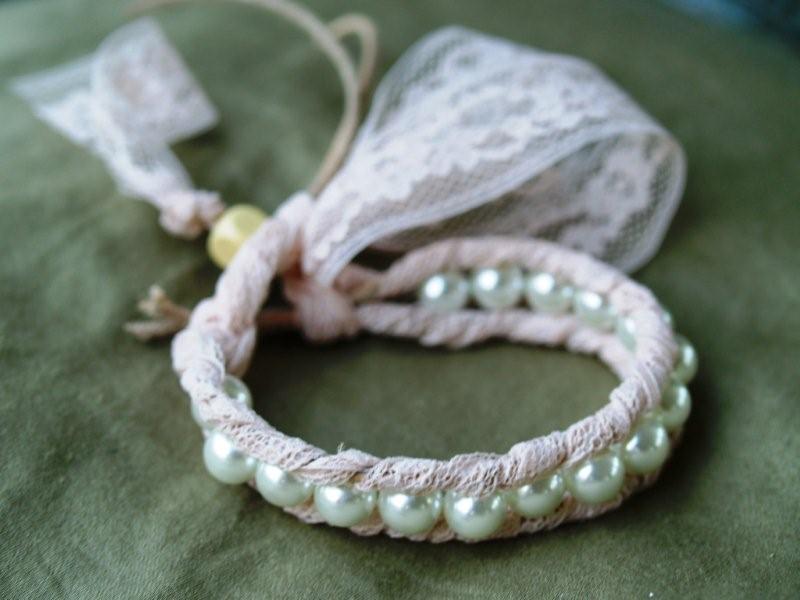
I have a quick tutorial for you if you’d like to make your own.
You’ll need:
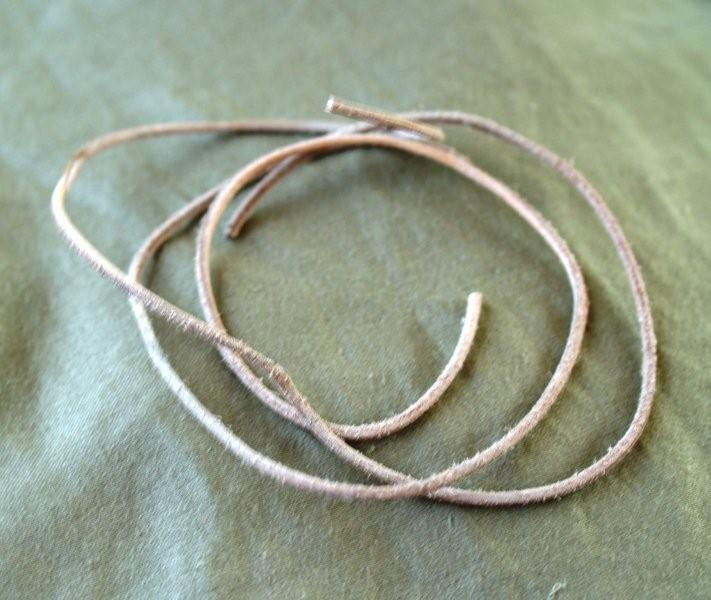
- leather cording – I used about 28″
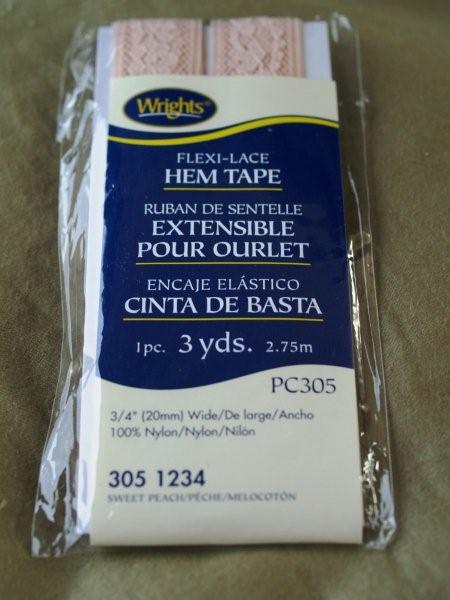
- hem tape lace
- pearls – I used 16
- thread
- a bead with a larger hole in the center
- optional – a thimble
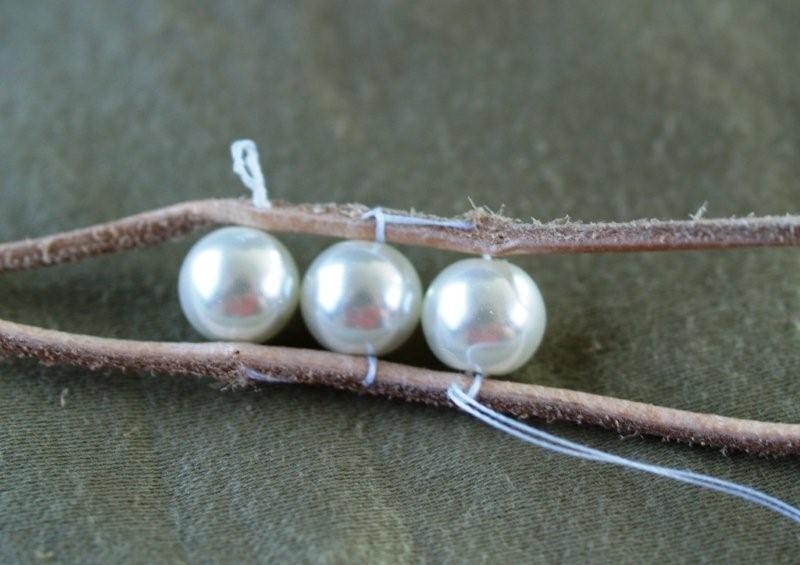
Start by cutting your cording into 14″ pieces. You’ll trim some of this off later but it’s better to have extra.
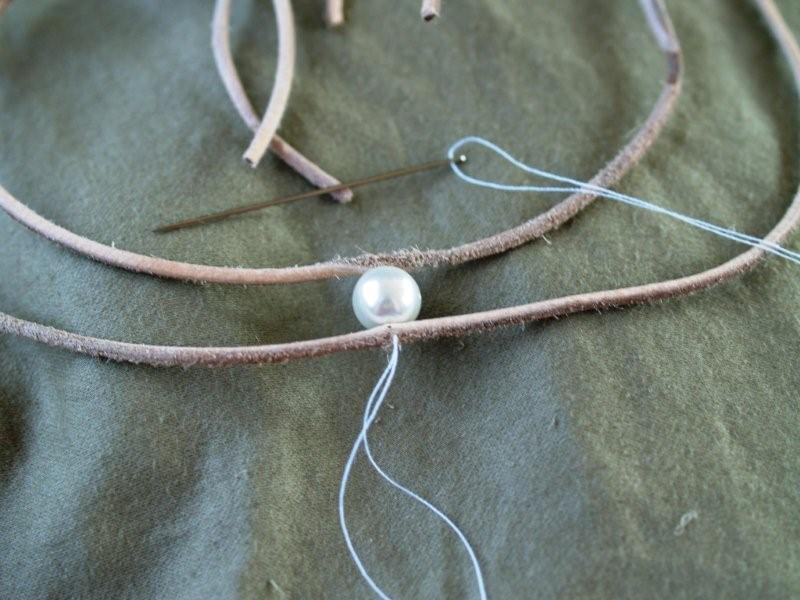
Start in the center and work your way down one end – sewing the pearls to the cording. Put your needle through one piece of cording (a thimble helps with this), then through your pearl, then through the other piece of cording. Make a small knot in the thread and then move on to the next pearl. You don’t need to cut your thread, it won’t show once you cover it with the lace.
Continue adding pearls down one side – 8 in all. Wrap your bracelet around your wrist as you go – you might need to do less or more pearls depending on the size of your wrist.
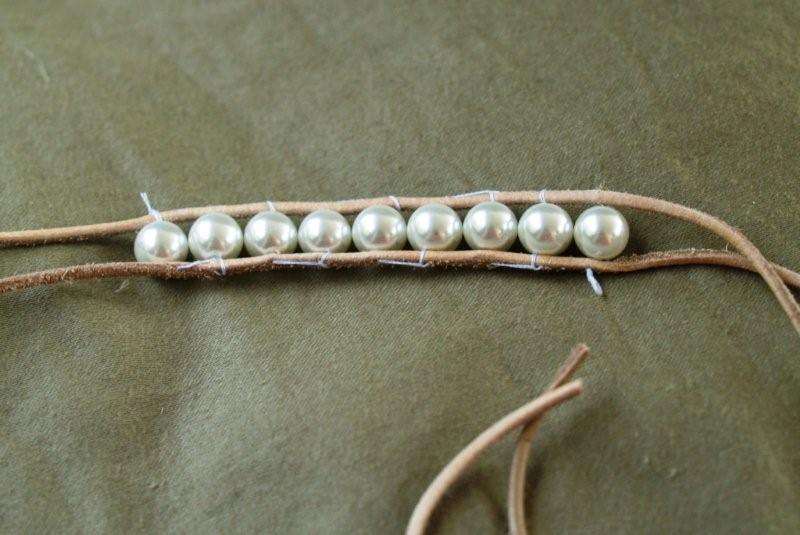
Move to the other side of the cording and add 8 more pearls on that side.

Once your pearls are all sewn on, you can start wrapping your lace. I used hem lace.
Cut a long piece – and start wrapping it around the cording between the pearls. I put the lace through a large yarn needle – this helped thread it between the pearls more easily.
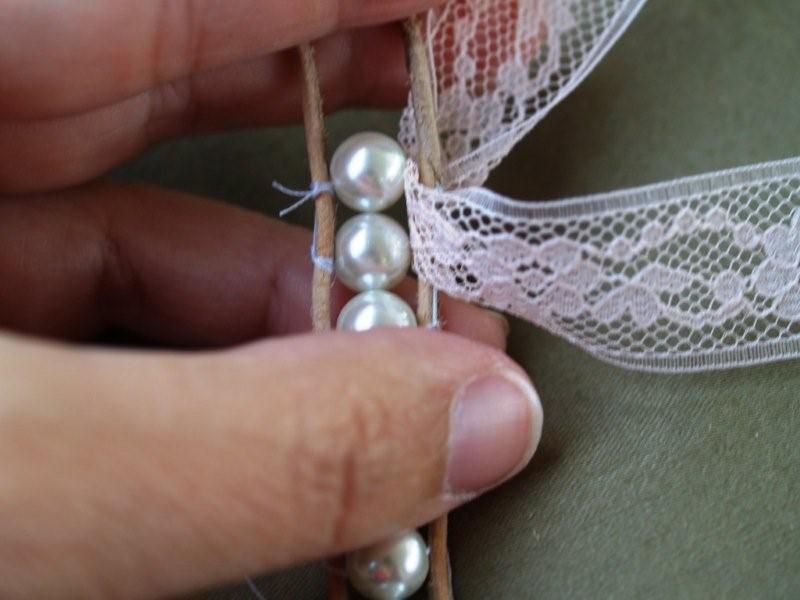
Keep wrapping all the way down one side of the cording.

Repeat with the other side.
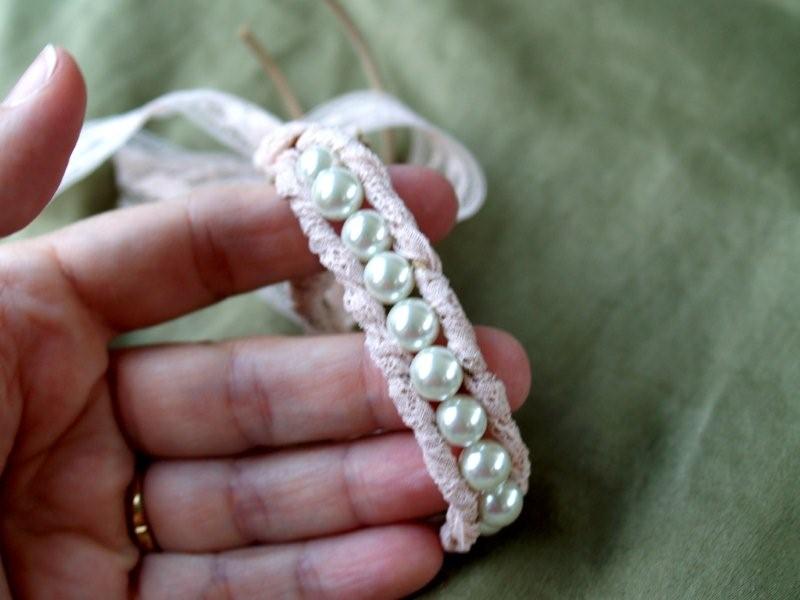
Wrap your lace around the cording on one end and knot it. Do this twice in the same place so you have a kind of chunky knot.
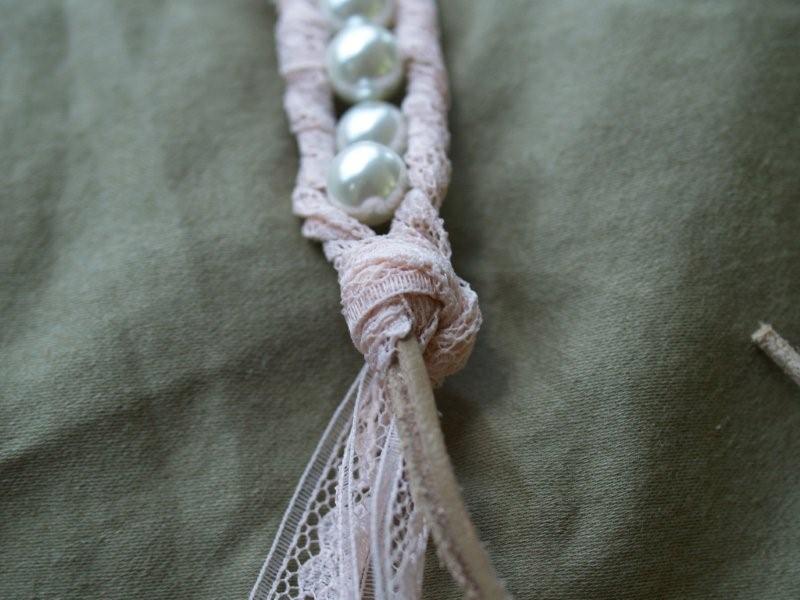
Make a second knot about 1/2″ down from the first one around the cording again. Trim your cording and lace so there is about 3 or 4″ hanging after the knot.

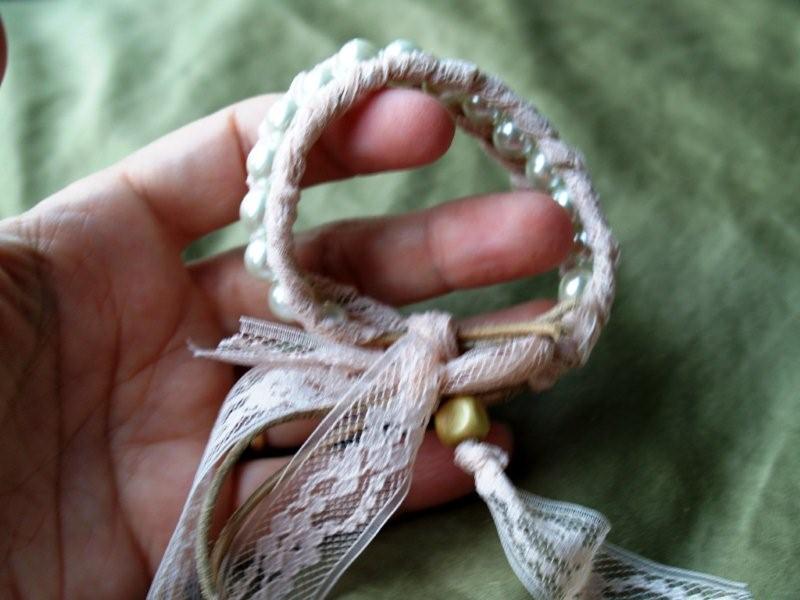
On the other side of the bracelet make a chunky knot similar to the first one you did. Trim the cording about 1″ below this. One one piece of the lace thread your bead and knot the lace after it. Trim your lace pieces about 1 – 2″ below this. This is what you will thread through the two knots you make on the other side to hold the bracelet on.
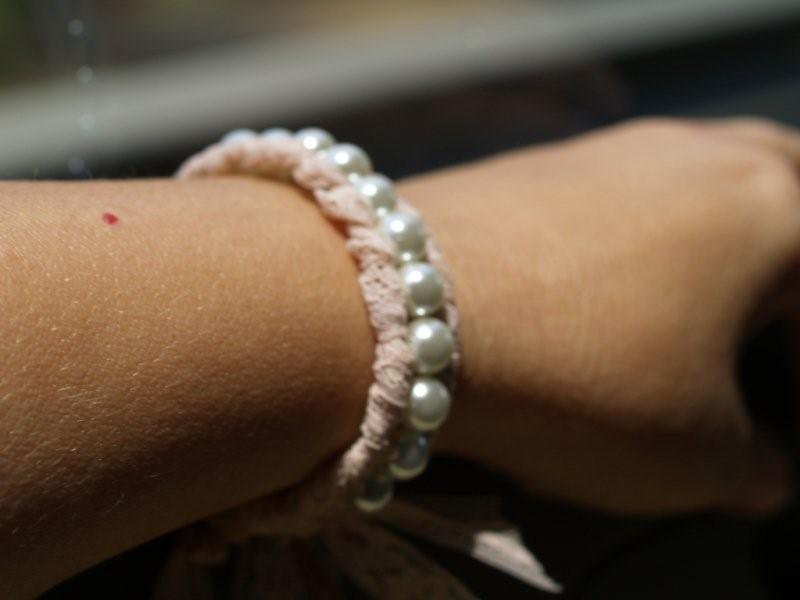
Try it on and admire your new handy-dandy bracelet!!


Very pretty! You did a fantastic job. Great tute!
I absolutely LOVE it!
That came out cute. I wasn’t able to post yesterday….but that bug was gross. Everyone was smiling in the brunch picture so you must be having fun. ((((HUGS))))
This is wonderful and yours is definitely better than Targets…
I really like this! It’s very pretty. I love knock-offs, especially Target ones. Thanks for the tutorial!
Very pretty! And great tutorial! Thanks for posting on Favorite Things Friday!
Love those bracelets!! My girls would love them too – I see Christmas presents :-)
I love this!!! Definitely going on my to-do list! :)
I love it! Beautiful! Thanks for the tutorial.
Superb! And nice photos!
Beautiful! I like yours so much more than the Target one! Thanks for the tutorial.
I love it!! You are such a clever girl!! I am going to try this one! ~Shelley
Fabulous – you did a great job!
Very pretty!
I am in love with this bracelet. What a great tutorial. I want to run out right now and buy everything to make one of my own. I am inspired by your craftiness and brilliance. Thanks for sharing. So so cute!!!
This is just perfect! You are so crafty!!! Looks like you guys are having a great trip. Hope you have a fun weekend!
OOHHH I love this! C
I’d also LOVE if you could stop by and link this project up to Socialize with me Monday til Sunday! going on now :)
http://simpsonizedcraftsandthensome.blogspot.com/
Love it! I need to try this one!
Good job :)) I love it!!! Very pretty!!
~ Michella ~
Its excellent…easy and wonderful.thank you for sharing this tutorial
I love your bracelet knock-off! In fact, yours is prettier. Thanks so much for sharing the tute. I’m a new follower. Come see me sometime at:
http://sceneofthegrime.blogspot.com
OMGosh, I like your version better. Great job.
That is beautiful looking. It’s on my ever-growing to do list now. Thanks for sharing.
I love the bracelet. Love knockoffs too. I followed a link over from Out of the Notebook and Into The Blog from Apache Princess. I will be trying this. So clever thanks for sharing. I love to share tutorials too and its nice when others do too. Have a great Sunday.
Çok güzel bir çalışma.Ben de incileri severim.
Tebrik ederim.
Amazing! This is maybe not a craft I’m capable of, but how neat that you thought of this and can do it! Props to you!
So pretty! I love the combination of the two! Love all these creations – you are on a roll! Thanks so much for joining the Sunday Showcase. I greatly apprecite it! Hope you have a wonderful week! ~ Stephanie Lynn
This is a incredible! Thanks so much for adding it to the stocking stuffer share-along. I think I should definitely make one for myself first … just to make sure I can do it right before making one for someone else. ;)
Another great project! I love the style of this bracelet. You did it again!
Ooh that is so, so pretty! I love how feminine this is. Thanks so much for the how-to, I’ll be linking.
Wow, this is prrrretty!!! I’ll definitely give it a try, it’s the perfect combination of classy and shabby :D
Oh my goodness I am in love with this! I am off to make it right this moment!! I have been having a lot of fun playing with lace lately too!
Love this bracelet! Great job!
Wow! I am really impressed! That was so clever! I am book marking this for future reference!
This is one of the best leather style bracelet adaptations I have ever seen! It looks so feminine. Thanks for sharing. I will link in a future blog post. Pearl
I like your version better. So pretty, delicate, and romantic. It would be so beautiful with some edgy outfit. I’m already dreaming of it…
love it thanks for sharing:)
Thanks for the great Tutorial!
I linked it to my page!
Your knock off is even cuter than the original! I love it!
I linked you in my blog :)
http://ohthatscrafty.blogspot.com/2010/10/lace-pearl-bracelet.html
Love your stuff!!
Bev I really love this bracelet I really need to make a few of these for Christmas gifts! Thank you so much for this tutorial!
This is so cute! I am imagining all the colors they could be in! Definitely a keeper.
A really cute bracelet and a great tutorial ! Thanks for sharing.
Tried this and it turned out great! now making them for my friends too! :)
I love this!!!! Lace is my thing! lol.
This is so pretty I am imagining all the insignia they could be in definitely a keeper.
Kelly!
I’m a little late :) but i am in love with this!! such great work, I pinned it!
We’re fans of Running With Glitter :)
♥jaime…sevensisters
Thanks for sharing jewellery design ideas, very nice.
Cloe :)
I love your knockoffs so much, I fantasize about starting an at home jewelry business- and I’m not even such a jewelry person (I own like 2 bracelets). I like this one a lot, but the closure seems a bit skewed and bulky. Any ideas on how to trim it down a bit? Thank you!
I absolutely LOVE this bracelet! You did such a wonderful job, it looks exactly like the Target one! Keep up the great work. Can’t wait to see what you come up with next. Thank you so much for sharing!!!
Tired of knockoffs? I think not! So pretty, and so easy. TFS
Thank you so much for this tutorial, the finished product is so cute!
I shared your tutorial on my blog here:
http://shelovestocraft.blogspot.com/2011/09/chair-redo.html
Ooops! Wrong post, hahaha! It’s actually located here:
http://shelovestocraft.blogspot.com/2011/09/jewelry-tutorial-roundup.html
I came to your blog from Prinerst today, I love this bracelet and tutorial, and the others I have seen on your blog. I sure hope you meant for others to re create from your awesome inspiration. Keep creating!!
Karren
the end result fabulous, very delicate! tks
Dolly
this is beautiful…will have to try this:)
This is gorgeous! Thanks for the tutorial, must make this for my daughters!
I think yours is prettier than the original :O)
Very nice tutorial
Thank you,
Teddie
No I am certainly not tired of knockoffs. This sure is a cute bracelet. Something I think my teen gdaughters would like. It’s hard to buy them things anymore but love to make jewelry for them.
Awesome tutorial. Gonna go get some of that hem tape or maybe I already have some in my sewing stash. Just need to buy some pearls. Have to use one of those good old Michaels, or JoAnn’s or Hobby Lobby coupons. We have all 3 in Grand Junction so will see who gets my crafting money.
What a cute bracelet! Thanks for sharing the tutorial. I think I have all the supplies to make one….
Looking so beautiful bracelet with Lace & Pearl! It’s so easy to make at home and I also like homemade things than store-bought.
Thanks for sharing such a creative tutorial.
This is so cute. I’ve never made my own jewelry, but I think I’m getting ready to give it a try because I like this one so much. And I’m a 58 year old grandma.
very good
wow! It looks amazing! Great job!
so sweet!!
I actually just started to create jewelry again. There are so many pieces out there that can be made at home. I honestly just wanna make all my jewelry now! haha…it’ll save me oooober amounts of money too! something, I know my hubby will enjoy! Great tutorial…easy & fun!! XO
your designs are beautiful!!!!… congratulations!!!!
Lovelovelove this!
First time to visit your Blog thanks to the real GEM “Pearl” The Beading Gem newsletter. Thank you for this Tutorial its so different hope to make it soon. Looking forward to looking through your Blog and so joining it for sure.
Have a great day, Doris
SUPER TUTO
MERCIIIIIIIIIIIIIIIIIIII
Great job! I’ll try this… thanks for sharing!
I have seen this sort of bracelet pattern with leather and metal beads; but this is the one of it’s own kind and exactly what I was looking for. Simply best for my vintage clothing collection.
Awesome bracelet . I’d love to make one myself but I have to go and find some pearls first
Nice bracelets! Really like your post! Thanks for sharing!
Tired of knock-offs? No way! Keep them coming!
These are very cute!
“I Adore Your Site, You come Up With The Best Of The Best Knock-Offs. And Show Us How To Make Them, You Do A Great Job On Your Tutorials, That I can Understand Them!! And That Means Alot To Me. Thank You For Everything. Please Keep Your Knock-Offs Coming.
If All Your Followers Come Up With An Idea, Should We E-Mail You First?
Huge Fan,
Kat
Beautiful necklace :)
Thank you for this darling idea.
Çok işime yaradı bende bunu nasıl yapacağımı araştırıyorum. Paylaşım için teşekkür ederim.